Belkin F8E825-USB F8E825veaUSB Manual
Belkin F8E825-USB Manual
 |
View all Belkin F8E825-USB manuals
Add to My Manuals
Save this manual to your list of manuals |
Belkin F8E825-USB manual content summary:
- Belkin F8E825-USB | F8E825veaUSB Manual - Page 1
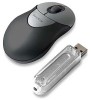
MiniWireless Optical Mouse Navigate your notebook with optical precision and wireless freedom EN User Manual FR Manuel de l'utilisateur : DE Benutzerhandbuch NL Handleiding ES Manual de usuario IT Manuale utente www.belkin.co.uk/support 10ea_F8E825veaUSB_man.indd 1 F8E825veaUSB 15/2/05 4:35:06 - Belkin F8E825-USB | F8E825veaUSB Manual - Page 2
Table of Contents English Battery Installation 4 Hardware Installation 5 Driver Installation 6 ID Setup 7 Button Function Setup 8 Troubleshooting 9 Français Installation des piles 10 Installation de matériel 11 Installation du pilote 12 Réglage de l'identit 13 Réglage de la fonction des - Belkin F8E825-USB | F8E825veaUSB Manual - Page 3
ón de las funciones de los botones 32 Resolución de problemas 33 Italiano Inserimente delle pile 34 Installazione Hardware 35 Installazione dei driver 36 Impostazione ID 37 Impostazione delle funzioni pulsanti 38 Risoluzione anomalie 39 10ea_F8E825veaUSB_man.indd 3 15/2/05 4:35:06 - Belkin F8E825-USB | F8E825veaUSB Manual - Page 4
section Battery Installation 1 1. Press the button to open the top cap. (fig. 1) (fig. 1-1) 2 3 2. Insert 2 AAA alkaline (1.5V). • Remove the batteries if mouse will not be in use for a long time. • Each time you replace the batteries, repeat the mouse setup by following the "setup for linkage" - Belkin F8E825-USB | F8E825veaUSB Manual - Page 5
Installation 1. Shut down the computer. 1 2. Connect the receiver either directly or with the USB extension cable to the USB port on the PC. (fig. 2) 2 3 3. Place the receiver beside the notebook or desktop PC. (fig. 3) 4 5 6 4. Turn on the PC. 5. Switch on the power of the wireless mouse - Belkin F8E825-USB | F8E825veaUSB Manual - Page 6
follow through the on- 3 screen instructions to complete the installation. 3. When the setup is complete, the system will restart 4 automatically. It will show a mouse icon in the bottom right-hand corner of the screen. CAUTION: 5 Some computers running Windows® 98 will require insertion of - Belkin F8E825-USB | F8E825veaUSB Manual - Page 7
ID Setup 1. Aim the front point of the mouse at the receiver. 1 2. IMPORTANT: FIRST, PRESS THE CONNECT BUTTON OF THE MOUSE; THEN PRESS THE CONNECT BUTTON 2 OF THE RECEIVER (fig. 5). NEVER REVERSE THIS PROCEDURE. 3 4 5 3. When the connect button of the receiver is pressed, the 6 LED inside - Belkin F8E825-USB | F8E825veaUSB Manual - Page 8
up, press "Yes" to store the new setup. 5 SETUP FOR MULTI-USERS When using more than one MiniWireless Optical Mouse in the same location, set up one mouse at a time. You must 6 complete the setup for each mouse before beginning the next. ENVIRONMENT To avoid environmental interference, which will - Belkin F8E825-USB | F8E825veaUSB Manual - Page 9
, 2000, Me, or XP. 6 When using Windows 98 and setting up the mouse using a USB port, you may need your Windows 98 installation CD. UNINSTALL INSTRUCTIONS 1. Go to "Start" then "Programs" and select "Belkin F8E825veaUSB mini wireless optical mouse". 2. You should then see the "uninstall" option - Belkin F8E825-USB | F8E825veaUSB Manual - Page 10
section Installation des piles 1 1. Appuyez sur le bouton pour faire glisser le couvercle supérieur (fig. 1-1). 2 3 2. Insérez 2 piles AAA (fig. 1-2). 4 5 6 3. Remettez le couvercle en place et - Belkin F8E825-USB | F8E825veaUSB Manual - Page 11
section Installation de matériel 1. Éteignez l'ordinateur. 1 2. Connectez le récepteur, soit directement, soit avec un câble d'extension USB, au port USB du PC (fig. 2). 2 3 3. Placez le récepteur à côté de l'ordinateur portable ou de l'ordinateur de bureau (fig. 3). 4 5 6 4. Allumez l' - Belkin F8E825-USB | F8E825veaUSB Manual - Page 12
D). Suivez ensuite les instructions qui apparaissent à l'écran pour installer le 4 matériel. 3. Lorsque l'installation est effectuée, le syst Certains ordinateurs équipés de Windows® 98 exigeront que vous insériez le CD de Windows 98 pour finir l'installation du pilote. 12 10ea_F8E825veaUSB_man - Belkin F8E825-USB | F8E825veaUSB Manual - Page 13
de l'identité 1. Dirigez l'avant de la souris vers le récepteur. 1 2. IMPORTANT : AVANT TOUTE CHOSE, APPUYEZ SUR LE BOUTON « CONNECT » DE LA SOURIS, PUIS APPUYEZ 2 SUR LE BOUTON « CONNECT » DU RÉCEPTEUR (fig. 5). N'INVERSEZ JAMAIS CES DEUX ÉTAPES. 3 4 5 3. Après avoir appuyé sur le bouton - Belkin F8E825-USB | F8E825veaUSB Manual - Page 14
Après avoir réglé les fonctions, appuyez sur « Yes » (Oui) pour stocker le nouveau réglage en mémoire. 5 RÉGLAGE POUR PLUSIEURS UTILISATEURS Lorsque plusieurs mini-souris optiques sans fil sont utilisées 6 au même endroit, réglez une seule souris à la fois. Vous devez avoir terminé le réglage d'une - Belkin F8E825-USB | F8E825veaUSB Manual - Page 15
de réglage de 5 l'identité. Instructions pour désinstaller la souris 6 1. Cliquez sur« Start » (Démarrer), puis sur « Programs » (Programmes), et sélectionnez « Belkin F8E825eaUSB mini wireless optical mouse » (Mini-souris optique USB sans fil F8E825eaUSB de Belkin). 2. L'option « Unistall - Belkin F8E825-USB | F8E825veaUSB Manual - Page 16
section Einlegen der Batterie 1 1. Drücken Sie die Taste zum Öffnen der oberen Abdeckung. (Abb. 1-1) 2 3 2. Legen Sie 2 Microzellen (AAA) ein. (Abb. 1-2) 4 5 6 3. Setzen Sie die Abdeckung wieder auf, und schließen Sie sie. ACHTUNG! • Achten Sie beim Einlegen der Batterien auf die korrekte Polung (+ - Belkin F8E825-USB | F8E825veaUSB Manual - Page 17
Hardwareinstallation 1. Schalten Sie den Computer ab. 1 2. Schließen Sie den Empfänger entweder direkt oder über die USBKabelverlängerung an die USB-Schnittstelle des 2 PCs an. (Abb. 2) 3 3. Stellen Sie den Empfänger neben dem Notebook bzw. 4 dem Desktop-PC auf. (Abb. 3) 5 6 4. Schalten - Belkin F8E825-USB | F8E825veaUSB Manual - Page 18
abzuschließen. 4 3. Nach der Installation wird das System automatisch neu gestartet. 5 Danach erscheint unten rechts auf dem Bildschirm ein Maussymbol. 6 ACHTUNG! Bei bestimmten Computersystemen mit Windows® 98 wird für die Treiberinstallation die Windows 98 CD verlangt. 18 10ea_F8E825veaUSB_man - Belkin F8E825-USB | F8E825veaUSB Manual - Page 19
section Einstellen der Kennung 1. Richten Sie die Mausspitze auf den Empfänger aus. 1 2. WICHTIG: DRÜCKEN SIE ZUERST DIE VERBINDUNGSTASTE DER MAUS UND DANN DIE 2 VERBINDUNGSTASTE DES EMPFÄNGERS (ABB. 5). GEHEN SIE KEINESFALLS UMGEKEHRT VOR! 3 4 5 3. Beim Drücken der Verbindungstaste des - Belkin F8E825-USB | F8E825veaUSB Manual - Page 20
der Funktion die Schaltfläche "Ja", um die neuen Einstellungen zu speichern. 5 Einrichten für mehrere Benutzer Wenn am gleichen Standort mehrere optische MiniWireless Mäuse verwendet werden sollen, muss die Einrichtung der jeweiligen Maus 6 abgeschlossen werden, bevor Sie sich der nächsten zuwenden - Belkin F8E825-USB | F8E825veaUSB Manual - Page 21
Sie die Kennworteinrichtung. DEINSTALLATIONSANWEISUNGEN 1. Wählen Sie "Start" > "Programme" > "Belkin F8E825eaUSB mini 6 wireless optical mouse" (Kompakte optische USB-Funkmaus Belkin F8E825eaUSB). 2. Jetzt müsste eine Deinstallationsoption ("Uninstall" / "Deinstallieren") angezeigt werden - Belkin F8E825-USB | F8E825veaUSB Manual - Page 22
section Batterijen inzetten 1 1. Druk op de knop om het kapje aan de bovenkant te openen. (afb. 1-1) 2 3 2. Zet er twee AAA-batterijen in. (afb. 1-2) 4 5 6 3. Plaats het kapje terug en sluit het. LET OP! • Controleer de batterijpolen (+ of -) en plaats de batterijen in de juiste stand. • Gebruik - Belkin F8E825-USB | F8E825veaUSB Manual - Page 23
section Hardware installeren 1. Schakel uw computer uit. 1 2. Sluit de receiver rechtstreeks - of met de USB- verlengkabel - aan op de USB-poort van de pc. (afb. 2) 2 3 3. Plaats de receiver naast de notebook of desktop-pc. (afb. 3) 4 5 6 4. Schakel de pc in. 5. Schakel de voeding van de - Belkin F8E825-USB | F8E825veaUSB Manual - Page 24
computer vanzelf opnieuw. Rechts onder in uw beeldscherm verschijnt nu een muispictogram. 5 LET OP: Bij sommige computers die onder Windows® 98 draaien, moet u de Windows 98 installatie-cd in uw optische station 6 plaatsen om de installatie te voltooien. 24 10ea_F8E825veaUSB_man.indd 24 15/2/05 - Belkin F8E825-USB | F8E825veaUSB Manual - Page 25
section Identificatie-Setup 1. Richt de voorste punt van de muis op de receiver. 1 2. BELANGRIJK: DRUK EERST DE VERBINDINGSKNOP VAN 2 DE MUIS IN EN DAARNA DE VERBINDINGSKNOP VAN DE RECEIVER (afb. 5). DOE DIT NOOIT ANDERSOM. 3 4 5 3. Wanneer u de verbindingsknop van de receiver indrukt, - Belkin F8E825-USB | F8E825veaUSB Manual - Page 26
u op 'Yes' (Ja) om de nieuwe setup op te slaan. 5 Setup voor meerdere gebruikers Wordt er meer dan één MiniWireless optische muis in hetzelfde lokaal gebruikt, installeer dan niet meer dan één muis tegelijk. U moet de 6 installatie van elke muis voltooien voordat u met de volgende begint. OMGEVING - Belkin F8E825-USB | F8E825veaUSB Manual - Page 27
. Aanwijzingen voor deïnstalleren 1. Ga naar 'Start', dan naar 'Programs' (Programma's) en selecteer 6 'Belkin F8E825eaUSB mini wireless optical mouse' (Belkin F8E825eaUSB mini draadloze optische muis). 2. Nu moet de optie 'Uninstall' (Deïnstalleren ofwel Verwijderen) zichtbaar zijn. Klik - Belkin F8E825-USB | F8E825veaUSB Manual - Page 28
section Instalación de la batería 1 1. Pulse el botón para abrir la tapa superior. (fig. 1) (fig. 1-1) 2 3 2. Introduzca 2 baterías tipo AAA. (fig. 1-2) 4 5 6 3. Vuelva a colocar en su sitio la tapa superior y ciérrela. ADVERTENCIA! • Asegúrese de comprobar la polaridad (signo + o -) y de insertar - Belkin F8E825-USB | F8E825veaUSB Manual - Page 29
section Instalación del hardware 1. Apague el ordenador. 1 2. Conecte el receptor bien directamente o con el cable de extensión USB al puerto USB del PC. (fig. 2) 2 3 3. Coloque el receptor junto al ordenador portátil u ordenador de sobremesa. (fig. 3) 4 5 6 4. Encienda el PC. 5. - Belkin F8E825-USB | F8E825veaUSB Manual - Page 30
. Ahora mostrará un icono de ratón en la esquina inferior derecha de la pantalla. 5 ADVERTENCIA! Algunos ordenadores con el sistema operativo Windows® 98 solicitarán la inserción del CD de Windows 98 para 6 finalizar la instalación del controlador. 30 10ea_F8E825veaUSB_man.indd 30 15/2/05 4:35:11 - Belkin F8E825-USB | F8E825veaUSB Manual - Page 31
section Configuración de ID 1. Dirija la parte frontal del ratón hacia el receptor. 1 2. IMPORTANTE: PULSE EN PRIMER LUGAR EL BOTÓN DE CONEXIÓN DEL RATÓN Y DESPUÉS EL BOTÓN DE 2 CONEXIÓN DEL RECEPTOR (fig. 5). NUNCA LLEVE A CABO ESTE PROCEDIMIENTO A LA INVERSA. 3 4 5 3. Cuando el botón - Belkin F8E825-USB | F8E825veaUSB Manual - Page 32
Una vez que la función haya sido configurada, haga clic en "Yes" (Sí) para guardarla. 5 CONFIGURACIÓN PARA MÚLTIPLES USUARIOS Cuando utilice más de un Mini Ratón Óptico Inalámbrico en el 6 mismo lugar, configure cada uno por separado. Deberá concluir la configuración de cada ratón antes de comenzar - Belkin F8E825-USB | F8E825veaUSB Manual - Page 33
el proceso de configuración de ID. Instrucciones para la desinstalación 1. Vaya a "Start" (Inicio), "Programs" (Programas) y seleccione 6 "Belkin F8E825eaUSB mini wireless optical mouse". 2. Entonces podrá ver la opción "uninstall" (Desinstalar). Haga clic sobre la misma con el botón izquierdo - Belkin F8E825-USB | F8E825veaUSB Manual - Page 34
à (segno + o -) ed inserire le pile correttamente. • Accertarsi che le pile tipo AAA utilizzate siano alcaline (da 1,5 V). • Togliere le batterie se il mouse dovesse rimanere inutilizzato per un lungo periodo. • Ogni volta che si intende sostituire le batterie, ripetere le procedure di setup del - Belkin F8E825-USB | F8E825veaUSB Manual - Page 35
direttamente o con un cavo di prolunga USB alla porta USB del PC. (fig. 2) 2 3 3. Posizionare il ricevitore accanto al computer portatile o desktop. (fig. 3) 4 5 6 4. Accendere il PC. 5. Attivare l'alimentazione del mouse wireless dal retro del mouse. (fig. 4) CAUTELA! Se ci si trova - Belkin F8E825-USB | F8E825veaUSB Manual - Page 36
riavviato automaticamente. Nell'angolo in basso a destra 5 dello schermo compare un'icona del mouse. CAUTELA: Alcuni computer con installato Window® 98 richiedono 6 l'inserimento del CD di Windows 98 per completare l'installazione del driver. 36 10ea_F8E825veaUSB_man.indd 36 15/2/05 4:35:12 - Belkin F8E825-USB | F8E825veaUSB Manual - Page 37
verso il ricevitore. 2. IMPORTANTE: INNANZITUTTO PREMERE IL PULSANTE DI CONNESSIONE DEL MOUSE, QUINDI PREMERE IL 2 PULSANTE DI CONNESSIONE DEL RICEVITORE (fig. 5). NON INVERTIRE MAI LE FASI DELLA PROCEDURA. 3 4 5 3. Premendo il pulsante di connessione del ricevitore, il LED - Belkin F8E825-USB | F8E825veaUSB Manual - Page 38
funzione, premere "Yes" (Sì) per salvare. 5 IMPOSTAZIONI PER DIVERSI UTENTI Se si dovessero utilizzare diversi mouse ottici MiniWireless nella 6 stessa postazione, impostare un mouse alla volta. Prima di iniziare una nuova impostazione, completare quella precedente. AMBIENTE Per evitare possibili - Belkin F8E825-USB | F8E825veaUSB Manual - Page 39
. Ripetere il processo di impostazione ID. Istruzioni per la disinstallazione 6 1. Andare in "Start", "Programs" (Programmi) e selezionare "Belkin F8E825eaUSB mini wireless optical mouse". 2. Dovrebbe comparire l'opzione "uninstall" (disinstalla). Fare clic con il pulsante sinistro del - Belkin F8E825-USB | F8E825veaUSB Manual - Page 40
Belkin Corporation, of 501 West Walnut Street, Compton, CA 90220, declare under our sole responsibility that the product, F8E825-USB normal operation is minimized. When connecting an external antenna to the device harmful interference in a residential installation. This equipment generates, uses, - Belkin F8E825-USB | F8E825veaUSB Manual - Page 41
notified that any changes or modifications to this device that are not expressly approved by Belkin Components may void the user's authority to operate the equipment. Canada-Industry Canada (IC) The wireless radio of this device complies with RSS 139 & RSS 210 Industry Canada. This Class B digital - Belkin F8E825-USB | F8E825veaUSB Manual - Page 42
for radio equipment. • ETS 300 826 General EMC requirements for radio equipment. To determine the type of transmitter, check the identification label on your Belkin product. Products with the CE marking comply with the EMC Directive (89/336/EEC) and the Low Voltage Directive (72/23/EEC) issued by - Belkin F8E825-USB | F8E825veaUSB Manual - Page 43
if the product has been damaged by accident, abuse, misuse, or misapplication; if the product has been modified without the written permission of Belkin; or if any Belkin serial number has been removed or defaced. THE WARRANTY AND REMEDIES SET FORTH ABOVE ARE EXCLUSIVE IN LIEU OF ALL OTHERS, WHETHER - Belkin F8E825-USB | F8E825veaUSB Manual - Page 44
MiniWireless Optical Mouse Belkin Ltd. Express Business Park • Shipton Way Rushden • NN10 6GL • United Kingdom Tel: +44 (0) 1933 35 2000 Fax: +44 (0) 1933 31 2000 Fax: +31 (0) 20 654 7349 Belkin GmbH Hanebergstrasse 2 80637 Munich • Germany Tel: +49 (0) 89 143405 0 Fax: +49 (0) 89 143405 100
-
 1
1 -
 2
2 -
 3
3 -
 4
4 -
 5
5 -
 6
6 -
 7
7 -
8
-
9
-
10
-
11
-
12
-
13
-
14
-
15
-
16
-
17
-
18
-
19
-
20
-
21
-
22
-
23
-
24
-
25
-
26
-
27
-
28
-
29
-
30
-
31
-
32
-
33
-
34
-
35
-
36
-
37
-
38
-
39
-
40
-
41
-
42
-
43
-
44
 |
 |

F8E825veaUSB
EN
User Manual
FR
Manuel de l’utilisateur :
DE
Benutzerhandbuch
NL
Handleiding
ES
Manual de usuario
IT
Manuale utente
www.belkin.co.uk/support
Navigate your notebook with optical
precision and wireless freedom
MiniWireless
Optical Mouse
10ea_F8E825veaUSB_man.indd
1
15/2/05
4:35:06