BenQ 7763PA Operating Guide
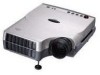
BenQ 7763PA - PalmPro SVGA DLP Projector Manual
 |
View all BenQ 7763PA manuals
Add to My Manuals
Save this manual to your list of manuals |
BenQ 7763PA manual content summary:
- BenQ 7763PA | Operating Guide - Page 1
Multimedia Projector PalmPro 7763PA/65PA OPERATING GUIDE Thank you very much for purchasing this Acer DLP™ Technology Projector. Please read this operating guide to ensure correct use of the device. After reading this manual, keep it for future reference. Outline This DLP™ Technology Projector can - BenQ 7763PA | Operating Guide - Page 2
, manual or specifically SERVICE PERSONNEL. AND PLEASE READ ALL OF THESE INSTRUCTIONS BEFORE YOU OPERATE YOUR PROJECTOR. SAVE THESE INSTRUCTIONS FOR FUTURE REFERENCE . Safety Instructions 1. Read all of these instructions before you operate your projector and save for future reference. 2. The lamp - BenQ 7763PA | Operating Guide - Page 3
two sides are for ventilation. They must not be blocked or covered. 9. For ventilation reasons, the fan continues to operate for about 1 minute after the projector has been powered off. Please do not unplug the power cord until the fan stops. 10. Do not look straight at the - BenQ 7763PA | Operating Guide - Page 4
Moving the Projector 5 Accessories 6 Connection 7 A Connecting the Projector to Computer/Notebook ....... 7 B Connecting the Projector to Macintosh/ 25 Maintenance and Troubleshooting 27 A Lamp Replacement 27 B Cleaning the Lens 27 C Troubleshooting 27 Specifications 29 A - BenQ 7763PA | Operating Guide - Page 5
1 Introduction Projector Features A Image Resolution Fully compatible with true SVGA(63PA)/XGA(65PA), and supports SXGA using advanced intelligent compression technology. The advanced intelligent compression technology enables it to present clear compression SVGA/XGA images without line omission. B - BenQ 7763PA | Operating Guide - Page 6
as well as for rear projection applications. H AV box An AV box is optional, and users can attach one or two to the projector. Additionally, our AV box video standard is compatible with: NTSC U.S. and Canada standard PAL Western Europe standard SECAM France and Eastern Europe standard - BenQ 7763PA | Operating Guide - Page 7
Figure 2 Rear view English 3 - BenQ 7763PA | Operating Guide - Page 8
C BOTTOM (figure) Figure 3 Bottom view Installation A. Positioning • This projector is basically designed to project on a flat projection surface. It can focus from 1.5m-14m and adjust the screen size like figure below. Figure 4 Positioning B. - BenQ 7763PA | Operating Guide - Page 9
(supplied) is intended to protect the projector from dust and scratches on the surface of the cabinet. It is not designed to protect the projector from external shock. Do not transport the projector in an unsuitable transport case by using a courier or transport service. This may cause damage to the - BenQ 7763PA | Operating Guide - Page 10
contact your dealer. Please save the original box and packing materials in case you ever need to ship the unit. Projection Lens Manual User's manual AAA Batteries Figure 7 Accessories Remote Control Mac Adapter 15pin D-sub connector ADB Mouse adapter PS/2 Mouse adapter Serial Mouse adapter General - BenQ 7763PA | Operating Guide - Page 11
Connection A Connecting the Projector to Computer/Notebook 2 Figure 8 Connection to PC Figure 9 Connection to notebook English 7 - BenQ 7763PA | Operating Guide - Page 12
B Connecting the Projector to Macintosh/Power Book Figure 10 Connection to Macintosh Figure 11 Connection to Power Book English 8 - BenQ 7763PA | Operating Guide - Page 13
the screen if the horizontal frequency of the input signal exceeds the range of the projector. B Standby Press the Standby/On key for 2 seconds to turn off the lamp. The LED will then blink orange and the lamp will shut down, but the fan will continue to run for about 1 minute to cool - BenQ 7763PA | Operating Guide - Page 14
does not light. External Control A Control Pad Hotkey - Keystone + Keystone Remote Menu Receiver Auto Stanby/On Stanby/On Indicator Lamp Status Indicator Figure 12 Hotkey control pad Menu operating When you press MENU button into OSD menu, all hotkeys become menu operating buttons. English - BenQ 7763PA | Operating Guide - Page 15
Figure 13 Menu control pad MAIN UNIT Menu 4 ( KEYSTONE+ ) 3 ( KEYSTONE- ) Exit (AUTO) FUNCTION To call the OSD menu. To enter sub pages. To select items. To navigate through sub pages or to increase the scale bar number. To navigate through sub pages or to decrease the scale bar number. To exit - BenQ 7763PA | Operating Guide - Page 16
B Remote Control STMANDBY/ON Menu Freeze (LED) Source Laser Exit Blank L-Click Ma g ni fy Return Channel down Drag Reverse 1 2 3 4 5 6 7 8 9 Add/Erase 0 scan R-Click Volume Mute Channel up Figure 14 Remote control English 12 - BenQ 7763PA | Operating Guide - Page 17
Main Unit Function Standby/On To turn the projection lamp on and off. Freeze Pressing this button displays a on the projector and to emulate mouse function when the projector is connected to a computer. Inserting Batteries in the Remote Control Be sure to follow instructions in placing - BenQ 7763PA | Operating Guide - Page 18
control and remote sensor must be shorter than four meters (13 feet). Figure 16 Range Usage and Replacement of Lamp The light source lamp has a limited service life. The picture will become dark or the color will fade after the lamp has been used for a long time. In such cases, continued use of the - BenQ 7763PA | Operating Guide - Page 19
a continuous red, it means the lamp has exceeded (*1500) service hours. After this light appears, it is advisable to replace the projection lamp as soon as possible. i. "PLEASE CHANGE A NEW LAMP. AND RESET THE LAMP TIMER" will be displayed on the screen if the lamp has been operated for 1400 hours - BenQ 7763PA | Operating Guide - Page 20
automatically. 4. Normal status If the LED light is off, it means the lamp and temperature inside the projector are normal. Caution: The lamp indicator will light when the lamp becomes too hot. Turn off the power and let the projector cool for 45 minutes, then turn it on again. If the indicator is - BenQ 7763PA | Operating Guide - Page 21
), disconnect the power cord from the outlet and ask your dealer to replace the lamp. The lamp is covered by a front glass panel and an air-tight structure, but, in rare cases, the reflector and the inside of the projector may be damaged by scattered, broken pieces of glass, which could cause injury - BenQ 7763PA | Operating Guide - Page 22
• Do not reset the timer without changing the lamp, as this can cause the lamp to break. English 18 - BenQ 7763PA | Operating Guide - Page 23
Lamp Replacement Procedure Step 1 Step 2 Figure 20 Lamp replacement: Step 1, Step 2, Step 3 Step 3 English 19 - BenQ 7763PA | Operating Guide - Page 24
menu, and use "4" (KEYSTONE+) or "3" (KEYSTONE-) to select the Control page. Then press the Menu button again to highlight the Lamp item. Press "4" (KEYSTONE+) or "3" (KEYSTONE-) buttons, the lamp usage time will display on the bottom of the screen and can be adjusted. • Use the "4" (KEYSTONE+) or - BenQ 7763PA | Operating Guide - Page 25
Press the "Exit" (AUTO) button to leave the current sub-page, and press "Exit" (AUTO) the button again to leave the main OSD menu (at the same time the settings are saved). Input status Subpag e PC input without AV box Display Image Control PC input with AV box Video input with AV box Display - BenQ 7763PA | Operating Guide - Page 26
Resize H. Phase H. Size Setting effects When Auto Resize is on, the projector determines the best fit of the image to the screen. If flicker occurs on a projected the screen, users may turn Auto Image off and adjust the H. Size manually to fit the screen size. H.Posit ion (move the (move the image - BenQ 7763PA | Operating Guide - Page 27
video systems. When selecting system, the projector will detect the selected system simultaneously, Control sub-page Auto Language Mirror Auto Off Lamp Setting effects To reset display, image and control settings OSD menu language. Seven languages are supported: English, French, German, Italian, - BenQ 7763PA | Operating Guide - Page 28
: (a.) PC (b.) S-Video (c.) Video *When selecting input sources, the projector will detect the selected input simultaneously, and the OSD menu will still exist sources are available in the items when AV box is connected to the projector: PC, Video, S-video To set the volume level of speaker built - BenQ 7763PA | Operating Guide - Page 29
, press the "Return" button. Laser Disk Pad Press this button to generate the laser beam. If users connect the PS2 (ADB) mouse cable on the projector with the PC/Notebook (Macintosh/ Powerbook) mouse port, the disk pad will be able to function as a PC/Notebook (Macintosh/ Powerbook) mouse. When an - BenQ 7763PA | Operating Guide - Page 30
Drag Blank display area (the mouse function is not available when magnify function is on). This button is a toggle switch to turn on/off the drag function of the remote mouse. Press this button to activate or release the blank function. English 26 - BenQ 7763PA | Operating Guide - Page 31
4 Maintenance and Troubleshooting A Lamp Replacement Refer to Page 17 B Cleaning the Lens Follow these the clean cloth over the lens. 4. Affix the lens cover whenever the projector is not in use. C Troubleshooting PROBLEMS NO POWER NO PICTURE IMAGE ISN'T SQUARE ON THE SCREEN POOR COLOR IMAGE - BenQ 7763PA | Operating Guide - Page 32
NO SOUND Make sure nothing is blocking the receiver on the control pad. Check audio cable connection from audio input source. Adjust audio source. Press "Volume" (+) button. Press "Mute" button. English 28 - BenQ 7763PA | Operating Guide - Page 33
Specifications 5 A Optical DMD TM Lens Lamp Image size Projection Distance Contrast Ratio B Electrical Inputs Video Color Reproduction Power Requirement C Mechanical 1-chip 0.7" DMDTM (Digital Micromirror Device) Manual zoom ,manual focus (F=2.8 to 3.1 f=31 to 40) Mercury lamp 150W 25" to 300" - BenQ 7763PA | Operating Guide - Page 34
1024x768 1024x768 1024x768 1280x1024 56.5 60.0 68.7 64.0 70.1 75.0 85.0 60.0 Appendix VESA VESA VESA VESA Guideline to AV box Features and Connection AV Connection Port This box is compatible with RCA input, S-Video input, audio output . Figure 28 Connection of AV box Speaker RCA Jack S Video - BenQ 7763PA | Operating Guide - Page 35
Connecting the Box Please follow the instruction here to place the AV box: Figure 30 two chocks at the lower surface of the AV box into the lower slots in the correspondent position in the projector. 2. Slowly push the box to fit the unit and, meanwhile, insert the box plug into the A/V connector
-
 1
1 -
 2
2 -
 3
3 -
 4
4 -
 5
5 -
 6
6 -
 7
7 -
8
-
9
-
10
-
11
-
12
-
13
-
14
-
15
-
16
-
17
-
18
-
19
-
20
-
21
-
22
-
23
-
24
-
25
-
26
-
27
-
28
-
29
-
30
-
31
-
32
-
33
-
34
-
35
 |
 |

Digital Multimedia Projector
PalmPro 7763PA/65PA
OPERATING GUIDE
Thank you very much for purchasing this Acer DLP™ Technology
Projector.
Please read this operating guide to ensure correct use of the device.
After reading this
manual, keep it for future reference.
Outline
This DLP™ Technology
Projector can display
various computer signals and NTSC/PAL/SECAM
video signals.
Features
(1)
High brightness
(2)
High resolution
(3)
Compact size, light weight for portability
(4)
RGB input terminal
(5)
RS232 Communication
(6)
Mouse emulation
(7)
Complies with VESA DDC1/2B specifications
English I