BenQ Ceiling Mount-CM00G2 Universal Ceiling Mount Manual
BenQ Ceiling Mount-CM00G2 Manual
 |
View all BenQ Ceiling Mount-CM00G2 manuals
Add to My Manuals
Save this manual to your list of manuals |
BenQ Ceiling Mount-CM00G2 manual content summary:
- BenQ Ceiling Mount-CM00G2 | Universal Ceiling Mount Manual - Page 1
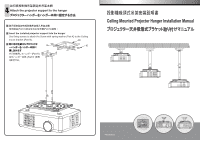
K Part N)ᖇႧĄ I Insert the installed projector support into the hanger Use fixing screws to attach the Screw with spring washer (Part K) to the Ceiling mount bracket (Part N). N I K Part K) Part N )䉕࿕ Ceiling Mounted Projector Hanger Installation Manual 78P30250201A - BenQ Ceiling Mount-CM00G2 | Universal Ceiling Mount Manual - Page 2
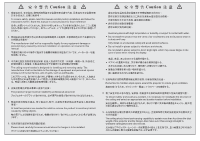
instructions herein. Store this manual in a secure place for future reference 2 The manufacturer shall not be responsible legally for any equipment damage or personal injury caused by incorrect installation or operation not covered in this manual 3 The ceiling mount bracket projector to ensure good - BenQ Ceiling Mount-CM00G2 | Universal Ceiling Mount Manual - Page 3
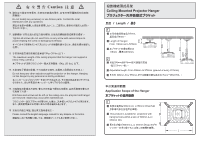
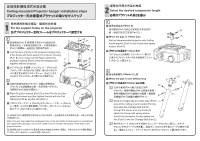
lbs.)̾ʮĄ The maximum weight of the ceiling projector that the hanger can support is below 15Kg. (33 lbs 15Kg. (33 lbs 13 15 Please consult the English language manual for any dispute on the terms 116 W 398 578 22.5 Ceiling Mounted Projector Hanger Length 1 I 116mm 578mm - BenQ Ceiling Mount-CM00G2 | Universal Ceiling Mount Manual - Page 4
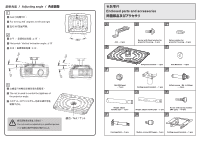
A B C Arm --- 4 pcs D Screw with fixed washer for projector housing --- 6 pcs Nylon washer for projector housing --- 8 pcs e Projector bracket --- 1 pcs Flat Washers --- 4 pcs f g H Nut (M6 type) --- 7 pcs I Ceiling mount bracket --- 1 pcs Inflate screw M6 L=50mm --- 4 pcs J K Height - BenQ Ceiling Mount-CM00G2 | Universal Ceiling Mount Manual - Page 5
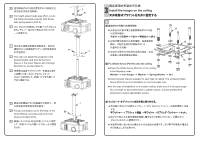
on the arm holder to be in line with the position of the hole on the projector bracke. 2 Select the desired suspension length 1 I 116mm ਢ պᒳ൛(Part K G Part G) Ą I When the pipe is 116mm long K Fix the frame-mounted projector onto Ceiling mount bracket (Part G) with Screw - BenQ Ceiling Mount-CM00G2 | Universal Ceiling Mount Manual - Page 6
-mounted projector with Screw with spring washer (Part K). 2-2 䊈䉳㩷(Part K Part J 2-3 Part L)Ⴤᒳ౾(Part F 2-3 The user can adjust the projector to type of ceiling. The enclosed Inflate Screw (Part H) are for installation on concrete walls only. œ In the case of installation on a wooden ceiling,
-
 1
1 -
 2
2 -
 3
3 -
 4
4 -
 5
5 -
 6
6
 |
 |
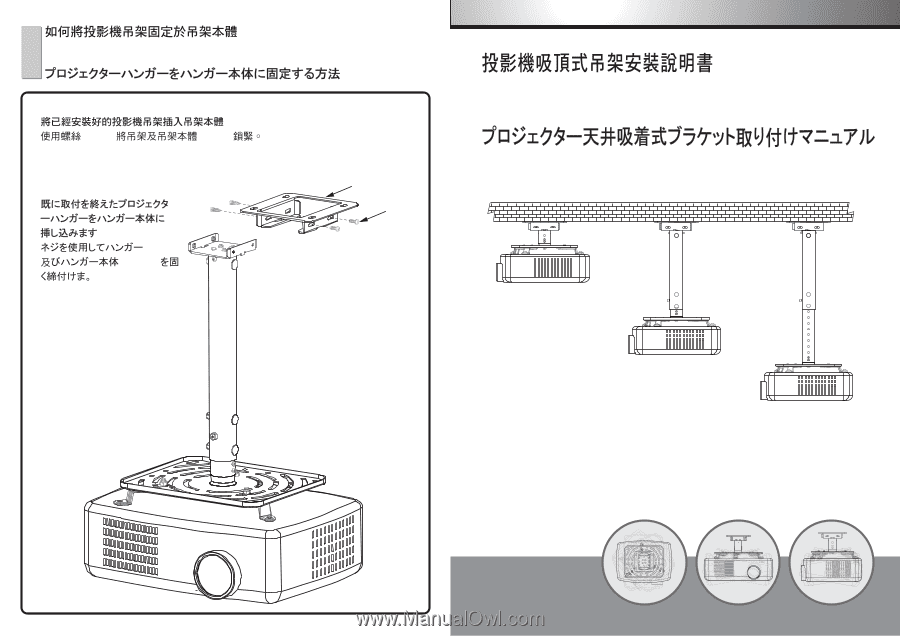
Ceiling Mounted Projector Hanger Installation Manual
78P30250201A
N
K
Attach the projector support to the hanger
■
(Part K)
(Part N)
■
Insert the installed projector support into the hanger
Use fixing screws to attach the Screw with spring washer (Part K) to the Ceiling
mount bracket (Part N).
■
(Part K)
(Part N )
4