BenQ DC1300 User Manual
BenQ DC1300 Manual
 |
View all BenQ DC1300 manuals
Add to My Manuals
Save this manual to your list of manuals |
BenQ DC1300 manual content summary:
- BenQ DC1300 | User Manual - Page 1
BENQ Digital Camera 1300 Electronic User's Manual Introduction to Benq Digital Camera 1300 1 Touring Your Camera 2 Preparing the Camera for Using 5 Installing batteries and strap 5 Installing Digital Camera Software 6 Using Your Camera 8 The digital camera mode 8 Taking pictures 8 Managing photos - BenQ DC1300 | User Manual - Page 2
mechanical, magnetic, optical, chemical, manual or otherwise, without prior written permission from Benq. Brands and product names are use your camera in the water. • If the foreign substance or water gets in your camera, please tum the power off immediately and disconnect the batteries and the - BenQ DC1300 | User Manual - Page 3
to Benq Digital Camera 1300 1 2. Touring Your Camera 2 3. Preparing the Camera for Using 5 3.1. Installing batteries and strap 5 3.2. Installing Digital Camera Software 6 4. Using Your Camera 8 4.1. The digital camera mode 8 4.1.1. Taking pictures ...8 4.1.3. Managing photos in camera 11 - BenQ DC1300 | User Manual - Page 4
5. Troubleshooting Tips 25 6. Service Information 26 ii - BenQ DC1300 | User Manual - Page 5
1. Introduction to Benq Digital Camera 1300 1. Introduction to Benq Digital Camera 1300 Benq Digital Camera 1300 is equipped with the following features: • Small size for easy carriage and convenience of use • High resolution: 1280 x 1024 pixels in digital camera mode • Onboard 16 MB memory • Mode - BenQ DC1300 | User Manual - Page 6
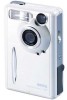
Front View Shutter Flash light Lens Rear View Viewfinder Busy indicator Status display Flash/ Enter button 2. Touring Your Camera Viewfinder Macro switch Self-timer activation indicator USB connection port Strap Eyelet Power/ Mode button White Balance Mode/ + button Pixel Selection/ _ button - BenQ DC1300 | User Manual - Page 7
) Compression Selection Mode (Fine/ Normal) Resolution Selection Mode (1280 X 1024) (1024 X 768) (640 X 480) Digital Camera Mode Overcast Mode Fluorescent Mode Self-timer Mode Battery status Erase Mode Image counter PC Camera Mode Sound Recording Mode Video Camera Mode Continuous Shooting Mode 3 - BenQ DC1300 | User Manual - Page 8
for Using 3. Preparing the Camera for Using 3.1. Installing batteries and strap Open the battery compartment cover and insert two AAA alkaline batteries into the compartment. Note the polarity of the batteries when you install. Refer to the illustration below to install the strap. Now you are ready - BenQ DC1300 | User Manual - Page 9
the digital camera driver bundled with valuable image-editing software. To install digital camera software: Insert the utility CD into the CD-ROM drive. The software installation menu will appear automatically. 1. If the software installation menu does not automatically display, open Windows Explore - BenQ DC1300 | User Manual - Page 10
Camera for Using Click "Camera Driver" on the menu. Follow the on-line instructions to complete the driver intallation. Click to install digital camera driver Click to install Video Impression Click to browse User's Manual Click to install DirectX 8.1 Click to install NetMeeting Click to install - BenQ DC1300 | User Manual - Page 11
use this application program to easily manage your pictures. This software program allows you to use your digital camera as a video camera for video conferencing. A desktop shortcut of the program is automatically created after successful installation. Restart your computer when you have finished - BenQ DC1300 | User Manual - Page 12
these modes, you can not only use Digital Camera 1300 to take photos, but capture and show images in various ways by connecting to your PC. 4.1. The digital camera mode In digital camera mode, you can take photos, view and download them from your camera and save them as files. 4.1.1. Taking pictures - BenQ DC1300 | User Manual - Page 13
. You can choose to let the counter display in another way. : Indicates the battery status. If the battery power becomes low, the battery icon will become empty. : This icon indicates the DC 1300 is in digital camera mode. You can change the mode setting by pressing the Power/ Mode button. : This - BenQ DC1300 | User Manual - Page 14
: Do not press the POWER button when the BUSY indicator flashes. After the shutter is pressed, hold the camera still until the BUSY indicator becomes OFF to prevent blurred images. To save battery power, if the camera power is turned on and not used for 1 minutes, it will be turned off automatically - BenQ DC1300 | User Manual - Page 15
taken Press the "Power/ Mode" button 4 times. The icon mode. will appear on the status display. It indicates the camera is in Erase Press the "Flash/ Enter" button, the camera will beep once and the BUSY indicator will flash, then the last photo taken will be deleted. 4.1.3.2. Deleting all photos - BenQ DC1300 | User Manual - Page 16
the Busy indicator will flash, then all photos saved in camera memory will be deleted. 4.1.3.3. Downloading photos from camera Turn on the power of the camera by pressing the "Power/Mode" button. Refer to the illustration below to connect the camera to PC using the USB cable. When connected, the PC - BenQ DC1300 | User Manual - Page 17
a time by simply pressing the shutter button once. Taking pictures Press the POWER button for 3 seconds to turn on the power of the camera. The camera beeps once and enters camera mode. Then press the "Power/ Mode" button 1 times. The icon will appear on the status display. It indicates the - BenQ DC1300 | User Manual - Page 18
mode, you can shoot video by pressing the shutter button. Shoot videos Press the POWER button for 3 seconds to turn on the power of the camera. The camera beeps once and enters camera mode. Then press the "Power/ Mode" button 2 times. The icon will appear on the status display. It indicates the - BenQ DC1300 | User Manual - Page 19
, you can record sounds by pressing the shutter button. Record sounds Press the POWER button for 3 seconds to turn on the power of the camera. The camera beeps once and enters camera mode. Then press the "Power/ Mode" button 3 times. The icon will appear on the status display. It indicates the - BenQ DC1300 | User Manual - Page 20
When connected, the PC mode icon and the number of images in camera memory will appear on the status display. Right-click on the icon on Windows Taskbar and select "QuickSnap" in the submenu which appears, then you will see a DC 1300 frame appear on the screen. Wait several seconds and the frame - BenQ DC1300 | User Manual - Page 21
image display of the DC 1300 monitor frame. This means you are using your DC 1300 as a PC camera. It is shown as follows: Motion Image Display Motion Images Captured 4.5.2. The function of the DC 1300 monitor frame There are 5 buttons on the buttom of the DC 1300 monitor frame. The fuctions - BenQ DC1300 | User Manual - Page 22
4.6. Options 4.6.1. Using the flash light Your camera is equipped with a flash light. It is recommended that you use the flash within the best working range as illustrated below. 4.6.1.1. Turning on/off the flash light Turn on the camera power and the default flash icon appears on the status display - BenQ DC1300 | User Manual - Page 23
the Flash/ Enter button, the camera will beep as the flash icon changes in the sequence as follow illustrated: Flash light OFF Forced flash light ON Auto flash light Now you - BenQ DC1300 | User Manual - Page 24
4. Using Your Camera 4.6.2. Using the macro function If you need to shoot objects at a very close distance (from 8 inches to 2 feet), turn on the macro function before shooting. - BenQ DC1300 | User Manual - Page 25
, you can adjust white balance settings to get the best color registration image effect. The DC 1300 provides 5 white balance settings to modify white balance under different situations. Turn on the camera power and the default flash icon appears on the status display. Press the WB/ + button - BenQ DC1300 | User Manual - Page 26
. To enable self-timer: Press the Power/ Mode button 5 times. The self-timer icon will appear on the status display. Press the shutter and the camera will start generating beep sound. The self-timer activation indicator on the front panel and the busy indicator on the rear panel will both blinks - BenQ DC1300 | User Manual - Page 27
: Turn on the power. The default pixel setting icon will appear on the status display as illustrated below. Press the Pix/ _ button, the camera will beep as the pixel icon changes in the sequence as follow illustrates: Pixel Settings: 1. Compression: Fine: Image with low compression. Normal: Image - BenQ DC1300 | User Manual - Page 28
2. Resolution: 1280 X 1024 Resolution: Image with 1280 X 1024 resolution. 1024 X 768 Resolution: Image with 1024 X 768 resolution. 640 X 480 Resolution: Image with 640 X 480 resolution. Now you are ready to take photos in different compression and resolution. 4. Using Your Camera 24 - BenQ DC1300 | User Manual - Page 29
the camera to the computer, but the Digital Camera 1300 driver says "Device not ready!". Make sure that the batteries are installed correctly and there is enough power in them. Check if the camera power is turned on. If not, turn it on and then connect the camera to the computer again. 5. In Windows - BenQ DC1300 | User Manual - Page 30
Digital Camera 1300 and the camera driver program, please send an E-mail (containing detailed descriptions of the problem you came upon, the hardware and software environment of your system) to the following addresses: USA: [email protected] Europe: [email protected] Taiwan: service-tw@benq
-
 1
1 -
 2
2 -
 3
3 -
 4
4 -
 5
5 -
 6
6 -
 7
7 -
8
-
9
-
10
-
11
-
12
-
13
-
14
-
15
-
16
-
17
-
18
-
19
-
20
-
21
-
22
-
23
-
24
-
25
-
26
-
27
-
28
-
29
-
30
 |
 |

BENQ Digital Camera 1300
Electronic User’s Manual
Introduction to Benq Digital Camera 1300 1
Touring Your Camera 2
Preparing the Camera for Using 5
Installing batteries and strap 5
Installing Digital Camera Software 6
Using Your Camera 8
The digital camera mode 8
Taking pictures 8
Managing photos in camera 11
The continuous shooting mode 13
The video camera mode 14
The sound recording mode 15
The PC camera mode 16
Options 18
Troubleshooting Tips 25
Service Information 26