BenQ GL2055 GL Series User Manual - Page 9
How to assemble your monitor hardware, Attach the monitor base.
 |
View all BenQ GL2055 manuals
Add to My Manuals
Save this manual to your list of manuals |
Page 9 highlights
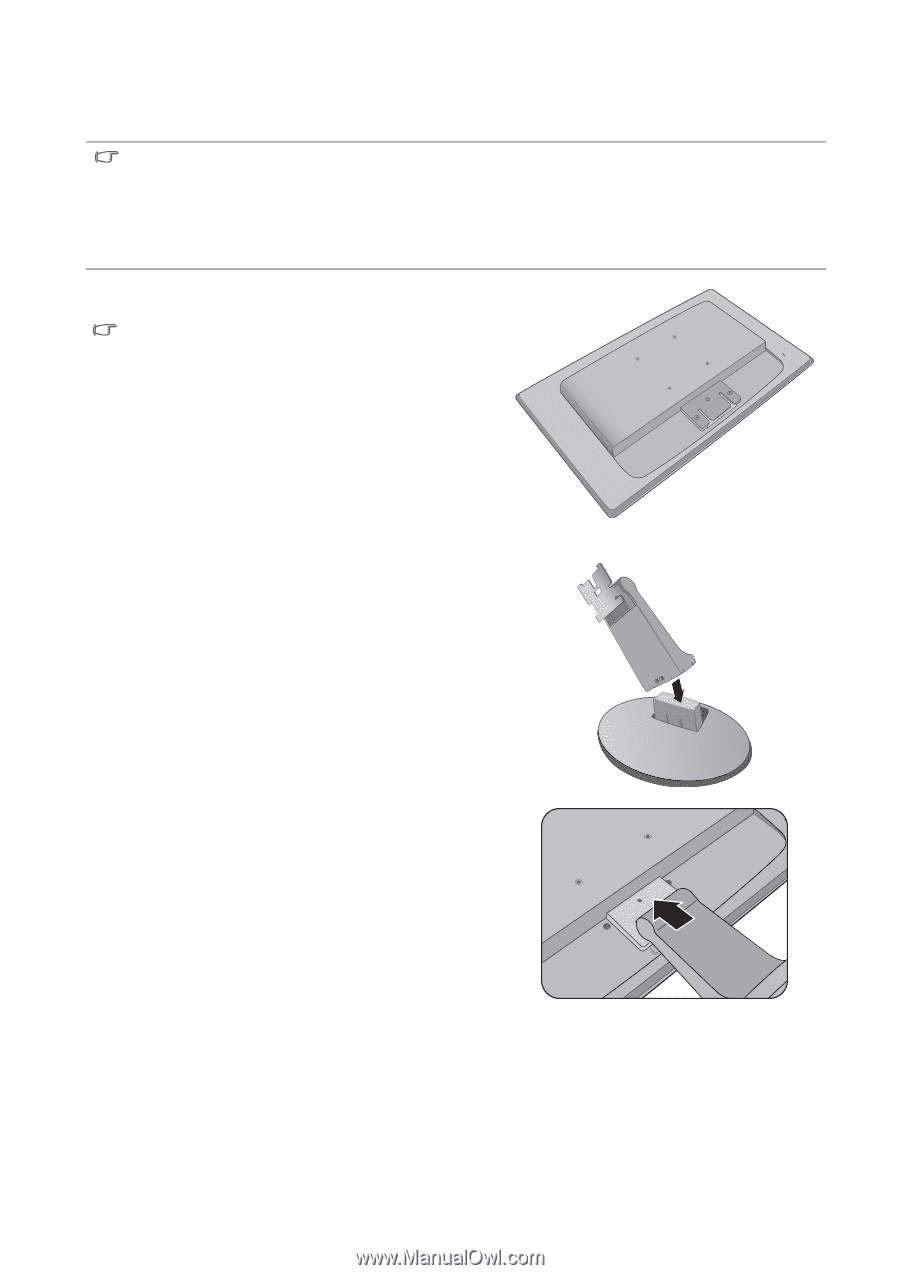
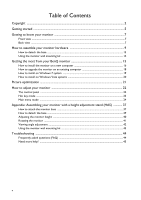
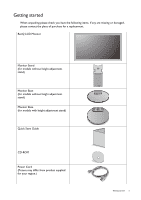
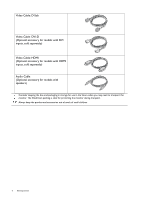
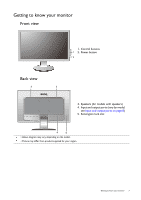
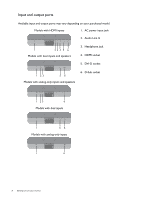
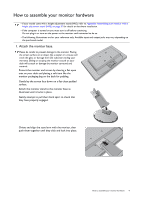
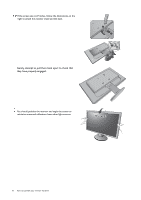
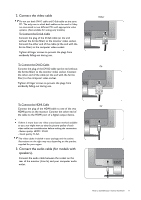
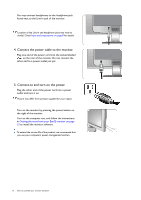
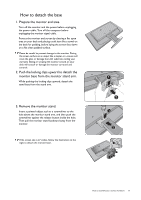
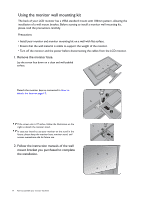
How to assemble your monitor hardware • If your model came with a height adjustment stand (HAS), refer to Appendix: Assembling your monitor with a height adjustment stand (HAS) on page 37 for details on hardware installation. • If the computer is turned on you must turn it off before continuing. Do not plug-in or turn-on the power to the monitor until instructed to do so. • The following illustrations are for your reference only. Available input and output jacks may vary depending on the purchased model. 1. Attach the monitor base. Please be careful to prevent damage to the monitor. Placing the screen surface on an object like a stapler or a mouse will crack the glass or damage the LCD substrate voiding your warranty. Sliding or scraping the monitor around on your desk will scratch or damage the monitor surround and controls. Protect the monitor and screen by clearing a flat open area on your desk and placing a soft item like the monitor packaging bag on the desk for padding. Gently lay the screen face down on a flat clean padded surface. Attach the monitor stand to the monitor base as illustrated until it locks in place. Gently attempt to pull them back apart to check that they have properly engaged. Orient and align the stand arm with the monitor, then push them together until they click and lock into place. How to assemble your monitor hardware 9
-
 1
1 -
2
-
3
-
 4
4 -
 5
5 -
 6
6 -
 7
7 -
 8
8 -
 9
9 -
 10
10 -
 11
11 -
 12
12 -
 13
13 -
 14
14 -
15
-
16
-
17
-
18
-
19
-
20
-
21
-
22
-
23
-
24
-
25
-
26
-
27
-
28
-
29
-
30
-
31
-
32
-
33
-
34
-
35
-
36
-
37
-
38
-
39
-
40
-
41
-
42
-
43
-
44
-
45
 |
 |