BenQ GL2055A GL Series User Manual - Page 11
Connect the video cable, Connect the audio cable for models with, speakers.
 |
View all BenQ GL2055A manuals
Add to My Manuals
Save this manual to your list of manuals |
Page 11 highlights
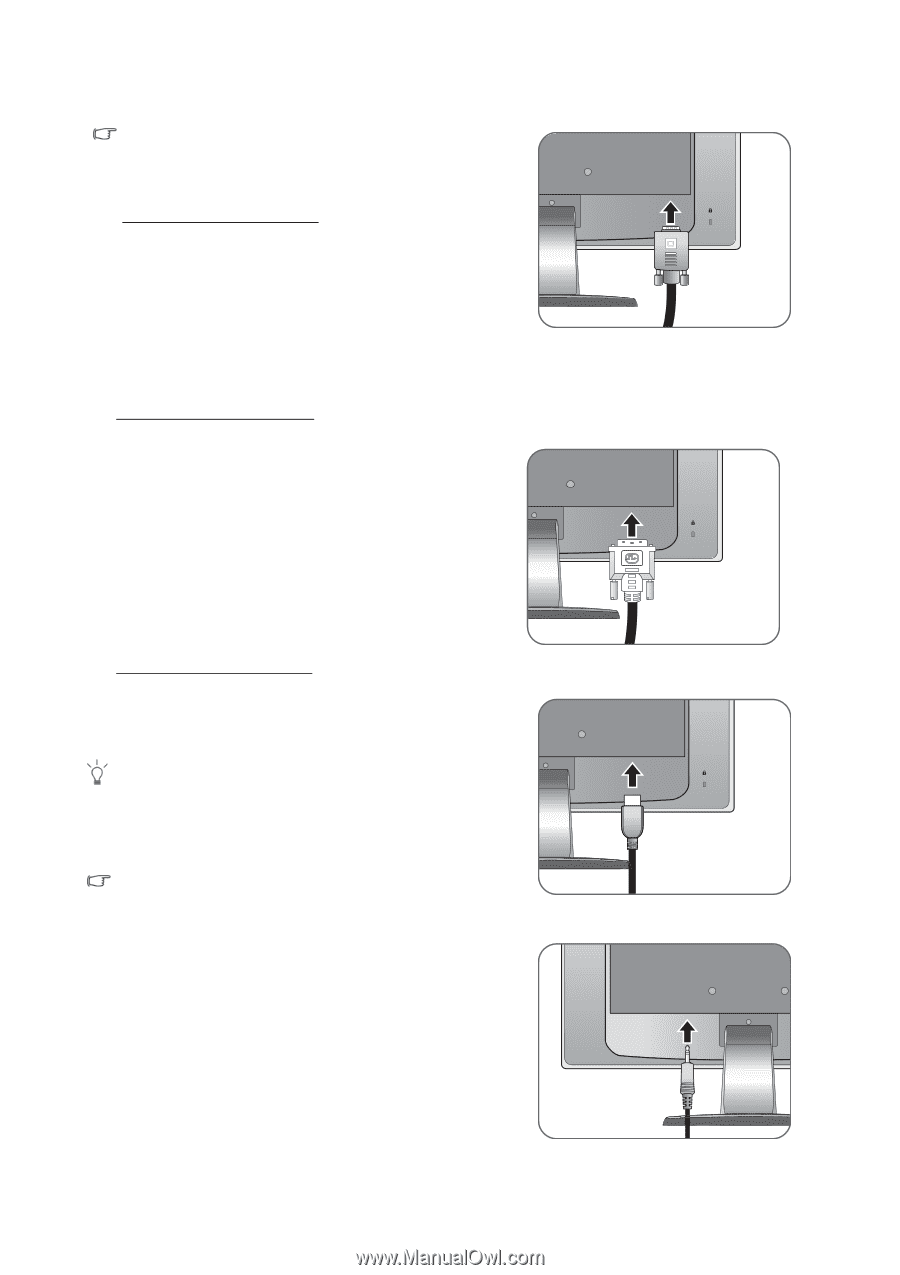
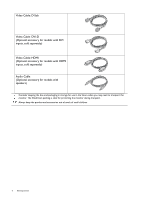
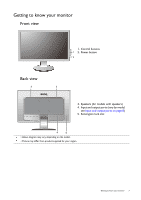
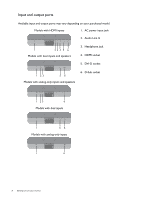
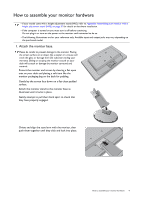
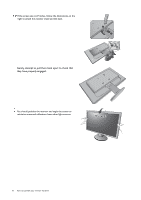
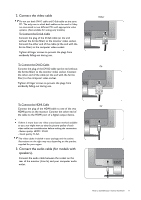
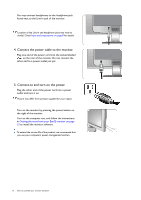
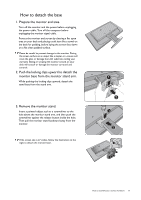
2. Connect the video cable Do not use both DVI-D cable and D-Sub cable on the same PC. The only case in which both cables can be used is if they are connected to two different PCs with appropriate video systems. (Not available for analog-only models). To Connect the D-Sub Cable Connect the plug of the D-Sub cable (at the end without the ferrite filter) to the monitor video socket. Connect the other end of the cable (at the end with the ferrite filter) to the computer video socket. Tighten all finger screws to prevent the plugs from accidently falling out during use. To Connect the DVI-D Cable Connect the plug of the DVI-D cable (at the end without the ferrite filter) to the monitor video socket. Connect the other end of the cable (at the end with the ferrite filter) to the computer video socket. Tighten all finger screws to prevent the plugs from accidently falling out during use. To Connect the HDMI Cable Connect the plug of the HDMI cable to one of the two HDMI ports on the monitor. Connect the other end of the cable to the HDMI port of a digital output device. If there is more than one video transmission method available to you, you might want to take the picture quality of each video cable into consideration before making the connection. - Better quality: HDMI / DVI-D - Good quality: D-Sub The video cables included in your package and the socket illustrations on the right may vary depending on the product supplied for your region. 3. Connect the audio cable (for models with speakers). Connect the audio cable between the socket on the rear of the monitor (Line In) and your computer audio outlet. Either Or Or How to assemble your monitor hardware 11
-
 1
1 -
2
-
3
-
4
-
5
-
 6
6 -
 7
7 -
 8
8 -
 9
9 -
 10
10 -
 11
11 -
 12
12 -
 13
13 -
 14
14 -
 15
15 -
 16
16 -
17
-
18
-
19
-
20
-
21
-
22
-
23
-
24
-
25
-
26
-
27
-
28
-
29
-
30
-
31
-
32
-
33
-
34
-
35
-
36
-
37
-
38
-
39
-
40
-
41
-
42
-
43
-
44
-
45
 |
 |