BenQ PL460 User Manual - PH460 & PL460
BenQ PL460 Manual
 |
View all BenQ PL460 manuals
Add to My Manuals
Save this manual to your list of manuals |
BenQ PL460 manual content summary:
- BenQ PL460 | User Manual - PH460 & PL460 - Page 1
PH460 / PL460 Digital Signage User Manual - BenQ PL460 | User Manual - PH460 & PL460 - Page 2
obligation to notify any person of such revision or changes. Copyright Copyright 2013 BenQ Corporation. All rights reserved. No part of this publication may be reproduced, any means, electronic, mechanical, magnetic, optical, chemical, manual or otherwise, without the prior written permission of - BenQ PL460 | User Manual - PH460 & PL460 - Page 3
Disclaimer 2 Copyright 2 Safety warnings and precautions 5 Important safety instructions 6 Notes on the LCD panel of this display 6 Safety notice for remote control 7 Battery safety notice 7 Notes on moving the display 7 BenQ ecoFACTS 8 Package contents 10 Optional accessories 10 Setting - BenQ PL460 | User Manual - PH460 & PL460 - Page 4
4 Sound menu 31 Screen menu 32 Setting menu 35 Product information 38 Specifications 38 Dimensions 40 Supported input signal resolution 41 Supported PAP input signal combination 43 Troubleshooting 44 - BenQ PL460 | User Manual - PH460 & PL460 - Page 5
. The exclamation point within an equilateral triangle is intended to alert the user to the presence of important operating and maintenance (servicing) instructions in the literature accompanying the appliance. THIS EQUIPMENT MUST BE GROUNDED To ensure safe operation, the three-pin plug must be - BenQ PL460 | User Manual - PH460 & PL460 - Page 6
block any ventilation openings. Install in accordance with the manufacturer's instructions. 8. Do not install near any heat sources such as unused for long periods of time. 14. Refer all servicing to qualified service personnel. Servicing is required when the apparatus has been damaged in any - BenQ PL460 | User Manual - PH460 & PL460 - Page 7
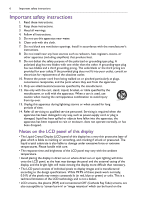
Important safety instructions 7 screen as visible fixed lines and shades. To avoid such damage to the screen, avoid displaying still images (like On-Screen Display menus, TV station - BenQ PL460 | User Manual - PH460 & PL460 - Page 8
safety instructions - Lay weight spread evenly on the surface. (Fig. 4) (Fig. 1) (Fig. 2) Support surface (Fig. 3) (Fig. 4) • Check the shock label on the outside of turn red if the display/package is improperly handled. BenQ ecoFACTS • BenQ has been dedicated to the design and development of - BenQ PL460 | User Manual - PH460 & PL460 - Page 9
Important safety instructions 9 CSR Website at http://csr.BenQ.com/ for more details on BenQ's environmental commitments and achievements. - BenQ PL460 | User Manual - PH460 & PL460 - Page 10
is missing or damaged, please contact your dealer immediately. LCD display Power cord D-Sub (15-pin) cable Remote control AAA batteries Quick start guide IR cables • The type of power cord supplied may differ from that illustrated depending on your region of purchase. • Before discarding the - BenQ PL460 | User Manual - PH460 & PL460 - Page 11
type: M6 400mm (15.75") 5. Install the wall mounting bracket on the display and attach the display to the wall according to the mounting bracket's instructions. The length of the LCD display screw should exceed the thickness of the wall mounting bracket by at least 10 mm. Make sure that all - BenQ PL460 | User Manual - PH460 & PL460 - Page 12
12 Setting up the display • To maintain proper ventilation, keep at least 10 mm of 10mm clear space from the back cover of the display to the (0.39") wall. • Please consult a professional technician for wall mount installations. The manufacturer accepts no liability for installations not - BenQ PL460 | User Manual - PH460 & PL460 - Page 13
Parts of the display and their functions 13 Parts of the display and their functions Rear panel 1 23 4 56 No. Name Description 1 • Receives command signals from the remote control. Remote control sensor / Ambient light sensor / Power indicator • Detects ambient lighting conditions - BenQ PL460 | User Manual - PH460 & PL460 - Page 14
14 Parts of the display and their functions 6 Power indicator Indicates the power status of the display: - Lights up green when the power is turned on. - Lights up red when the display is turned off. - Lights up red when the display is in Power Save High mode. - Flashes red when the display is in - BenQ PL460 | User Manual - PH460 & PL460 - Page 15
Input/output terminals Parts of the display and their functions 15 RS-232C-OUT RS-232C-IN 1 2 3 45 6 7 8 9 10 11 12 13 14 15 16 17 18 19 20 No. Name 1 RJ-45 2 RS232C IN/OUT 3 DISPLAY PORT 4 DVI-OUT 5 DVI-IN 6 HDMI-1/HDMI-2 7 VIDEO IN (YPbPr) 8 VIDEO IN (SVIDEO) 9 AV OUT 10 AV IN 11 VGA - BenQ PL460 | User Manual - PH460 & PL460 - Page 16
16 Parts of the display and their functions 14 AUDIO IN (AUDIO2) 15 AUDIO OUT (R/L) 16 IR-IN/IR-OUT 17 SPEAKERS (R/L) 18 AC SWITCH ON/ OFF 19 AC IN 20 AC OUT Receives audio signals from an external device (such as a VCR or DVD player). Outputs audio signals to an external device. • IR-IN: For use - BenQ PL460 | User Manual - PH460 & PL460 - Page 17
Remote control 1 2 3 4 5 Parts of the display and their functions 17 6 INFO Shows the current input source and resolution. 7 Numeric buttons (1-9) /Input source buttons 6 • Performs as numeric buttons when the OSD menu is on. • Performs as input source buttons when the OSD 7 menu is off. SDI and - BenQ PL460 | User Manual - PH460 & PL460 - Page 18
18 Parts of the display and their functions Using the remote control Installing remote control batteries 1. Open the remote control battery compartment cover. 2. Insert the supplied batteries ensuring that the positive and negative marked battery terminals match the (+) and (-) marks in the - BenQ PL460 | User Manual - PH460 & PL460 - Page 19
Connection 19 Connection Connecting audio/video signals Pay attention to the following notes when you connect cables: • Please turn off all devices. • Familiarize yourself with the audio/video ports on the display and the devices you want to use. Be aware that incorrect connections may adversely - BenQ PL460 | User Manual - PH460 & PL460 - Page 20
20 Connection Connecting the digital input 1. Connect the DVI-IN jack on the display to the DVI-D output jack on a computer using a DVI-D cable. If the computer has a DisplayPort/HDMI output jack, connect the computer's DisplayPort/HDMI output jack to the DISPLAY PORT/HDMI-1/ HDMI-2 input jack on - BenQ PL460 | User Manual - PH460 & PL460 - Page 21
Connection 21 Connecting the YPbPr component video input 1. Connect the VIDEO IN (YPbPr) jacks on the display to the component output jacks on an A/V device (such as a VCR or DVD player) using a component video cable. 2. Connect the DVD player's audio output jacks to the AUDIO IN (AUDIO2) jacks on - BenQ PL460 | User Manual - PH460 & PL460 - Page 22
22 Connection Connecting the AV and S-Video inputs 1. Connect the VIDEO IN (S-VIDEO) or AV IN jack on the display to the output jack on an A/V device (such as a VCR) using an appropriate video cable. 2. Connect the VCR's audio output jacks to the AUDIO IN jacks on the display using a suitable - BenQ PL460 | User Manual - PH460 & PL460 - Page 23
Connection 23 Connecting external speakers The built-in amplifier on the display allows you to output audio signals through external speakers. Connect external speakers to the SPEAKERS (R/L) jacks on the display. RS-232C-OUT RS-232C-IN External speakers You can use the remote control or the - BenQ PL460 | User Manual - PH460 & PL460 - Page 24
24 Connection Connecting multiple displays You can connect multiple displays serially (daisy chain) to a computer for management. The number of displays you can connect serially depends on the resolution of the input signal you use. Additional display RS-232C-OUT RS-232C-IN RS-232C DVI cable - BenQ PL460 | User Manual - PH460 & PL460 - Page 25
type on the power cord. • Be aware of the power loading when you use extension cords or multiple outlet power boards. • There are no user serviceable parts in this display. Never unscrew or remove any covers. There are dangerous voltages inside the display. Turn off the power and unplug the power - BenQ PL460 | User Manual - PH460 & PL460 - Page 26
26 Basic operations Basic operations Turning the display on or off To turn on or off the display, press the power button on the display's control panel or on the remote control. • The display's standby mode still consumes power. To completely cut off power supply, set the power switch to the off - BenQ PL460 | User Manual - PH460 & PL460 - Page 27
• Mail Report: Provides options for setting up email accounts to receive status or error reports sent from the display. • Network: Provides options for manually setting the display's IP address or obtaining an IP address from a DHCP server. Provides options for setting or changing the user name and - BenQ PL460 | User Manual - PH460 & PL460 - Page 28
28 The OSD (On-Screen Display) menu The OSD (On-Screen Display) menu OSD menu overview Menu name Picture Sound Screen Setting Options/functions • Picture Mode • Backlight • Contrast • Brightness • Chroma • Phase • Sharpness • Color Temp. • Noise Reduction • Film Mode • Reset • Sound Mode • - BenQ PL460 | User Manual - PH460 & PL460 - Page 29
The OSD (On-Screen Display) menu 29 Operations in the OSD menu Using the control panel buttons Using the remote control 1. Press MENU to open the OSD menu. 1. Press MENU to open the OSD menu. ENTER VIDEO SOURCE 2. In the OSD menu, press or to select an item. 2. Press or to select an - BenQ PL460 | User Manual - PH460 & PL460 - Page 30
30 The OSD (On-Screen Display) menu Picture menu Picture Picture Mode Backlight Contrast Brightness Chroma Phase Sharpness Color Temp. Noise Reduction Film Mode Reset Standard 100 50 50 25 25 10 Cool Mid Auto :Move ENTER :Enter EXIT :Exit Name Picture Mode Backlight Description Sets the - BenQ PL460 | User Manual - PH460 & PL460 - Page 31
Sound menu Sound Sound Mode Treble Bass Balance Surround Speaker Audio Source Reset The OSD (On-Screen Display) menu 31 Standard 0 0 Center Off Internal Audio1 :Move ENTER :Enter EXIT :Exit Name Description Sound Mode Adjusts the sound output from the speakers. Dynamic: Enhances treble and - BenQ PL460 | User Manual - PH460 & PL460 - Page 32
the sub picture. Display Wall Aspect • PAP is not available for all signal source combinations. See Supported PAP input signal combination on page 43 for more information on supported combinations. • In PAP mode, only sound from the active picture will be available. • H. Monitors/V. Monitors: Sets - BenQ PL460 | User Manual - PH460 & PL460 - Page 33
Aspect (continued) The OSD (On-Screen Display) menu 33 • Full: Enlarges the picture horizontally to fill the screen when the picture source is 4:3 (Standard definition). When the picture source is 16:9 (High definition), it displays in the same 16:9 aspect ratio. • 4:3: Displays all picture - BenQ PL460 | User Manual - PH460 & PL460 - Page 34
34 The OSD (On-Screen Display) menu Adjust Screen Freeze • Auto Adjustment: Sets whether to optimize image display for each VGA input. • Phase: Adjusts the phase of the VGA input image. • Clock Frequency: Adjusts the clock frequency of the VGA input image. • H. Position: Adjusts the horizontal - BenQ PL460 | User Manual - PH460 & PL460 - Page 35
Setting menu Setting The OSD (On-Screen Display) menu 35 Language Schedule Power Save Control Setting Network Settings Set Monitor ID HDMI Control Advanced Information All Reset English High RS-232C 01 Off :Move ENTER :Enter EXIT :Exit Name Language Schedule Description Sets your preferred - BenQ PL460 | User Manual - PH460 & PL460 - Page 36
36 The OSD (On-Screen Display) menu Control Setting Network Settings Set Monitor ID • RS-232C/LAN: Sets a terminal to control the display. • IR Passthrough: Select it when multiple displays are connected via RS-232C cables. - Primary: Designate the display as the primary unit for remote control - BenQ PL460 | User Manual - PH460 & PL460 - Page 37
The OSD (On-Screen Display) menu 37 Advanced • Auto Search: Automatically detects available input sources. • Auto Adjustment: Automatically optimizes image display for the VGA input. • Overscan: Turns the overscan function on or off. • RGB Signal: Sets the type of signal for a piece of video - BenQ PL460 | User Manual - PH460 & PL460 - Page 38
standby Operating temperature Operating humidity Storage temperature Storage humidity Display orientation Weight (kg) Dimensions (W x H x D) (mm) Bezel dimension T/B/L/ R (mm) PH460 D-LED 46" 0.53025 1920 x 1080 PL460 700 450 4000:1 30,000 4000:1 48,000 6.5 1.07 billion VGA (D-Sub 15-pin - BenQ PL460 | User Manual - PH460 & PL460 - Page 39
control (Adaptive Contrast) Picture in Picture (PIP) Picture by Picture (PBP) 10 Bit color processing Build-in video wall support Scheduling Total turn-on time Diagnostic DC voltage (12v/5v) Internal temperature Sensor CEC control O O O O O O O O O O O (10 x 10) O O O O O Specifications and - BenQ PL460 | User Manual - PH460 & PL460 - Page 40
40 Product information Dimensions 2134/79 689/38 552/3 511 511 644 217/8 Unit: mm - BenQ PL460 | User Manual - PH460 & PL460 - Page 41
Product information 41 Supported input signal resolution Resolution AV 640 x 480 @ 60Hz 640 x 480 @ 72Hz 640 x 480 @ 75Hz 720 x 400 @ 70Hz 800 x 600 @ 60Hz 800 x 600 @ 75Hz 1024 x 768 @ - BenQ PL460 | User Manual - PH460 & PL460 - Page 42
42 Product information 1080i (50Hz) 1080i (60Hz) 1080p (50Hz) 1080p (60Hz) • : supported • Blank: not supported - BenQ PL460 | User Manual - PH460 & PL460 - Page 43
Product information 43 Supported PAP input signal combination Main/Left picture signal source AV S-Video YPbPr VGA DVI HDMI Display Port AV S-Video Sub/ Right picture signal source YPbPr VGA DVI HDMI Display Port - BenQ PL460 | User Manual - PH460 & PL460 - Page 44
Troubleshooting Troubleshooting Problem ray disc player? Refer to Supported input signal resolution on page 41 to select a supported resolution and try again. Check Frequency, Phase, H. Position and V. Position functions to manually adjust the image. Have you locked the control panel buttons? - BenQ PL460 | User Manual - PH460 & PL460 - Page 45
Troubleshooting 45 The remote control does not work • Have you locked the remote control function? Unlock the function and try again. • Check for incorrect battery orientation. •
-
 1
1 -
 2
2 -
 3
3 -
 4
4 -
 5
5 -
 6
6 -
 7
7 -
8
-
9
-
10
-
11
-
12
-
13
-
14
-
15
-
16
-
17
-
18
-
19
-
20
-
21
-
22
-
23
-
24
-
25
-
26
-
27
-
28
-
29
-
30
-
31
-
32
-
33
-
34
-
35
-
36
-
37
-
38
-
39
-
40
-
41
-
42
-
43
-
44
-
45
 |
 |

PH460 / PL460
Digital Signage
User Manual