Bernina 810 Manual - Page 10
thread, machine
 |
View all Bernina 810 manuals
Add to My Manuals
Save this manual to your list of manuals |
Page 10 highlights
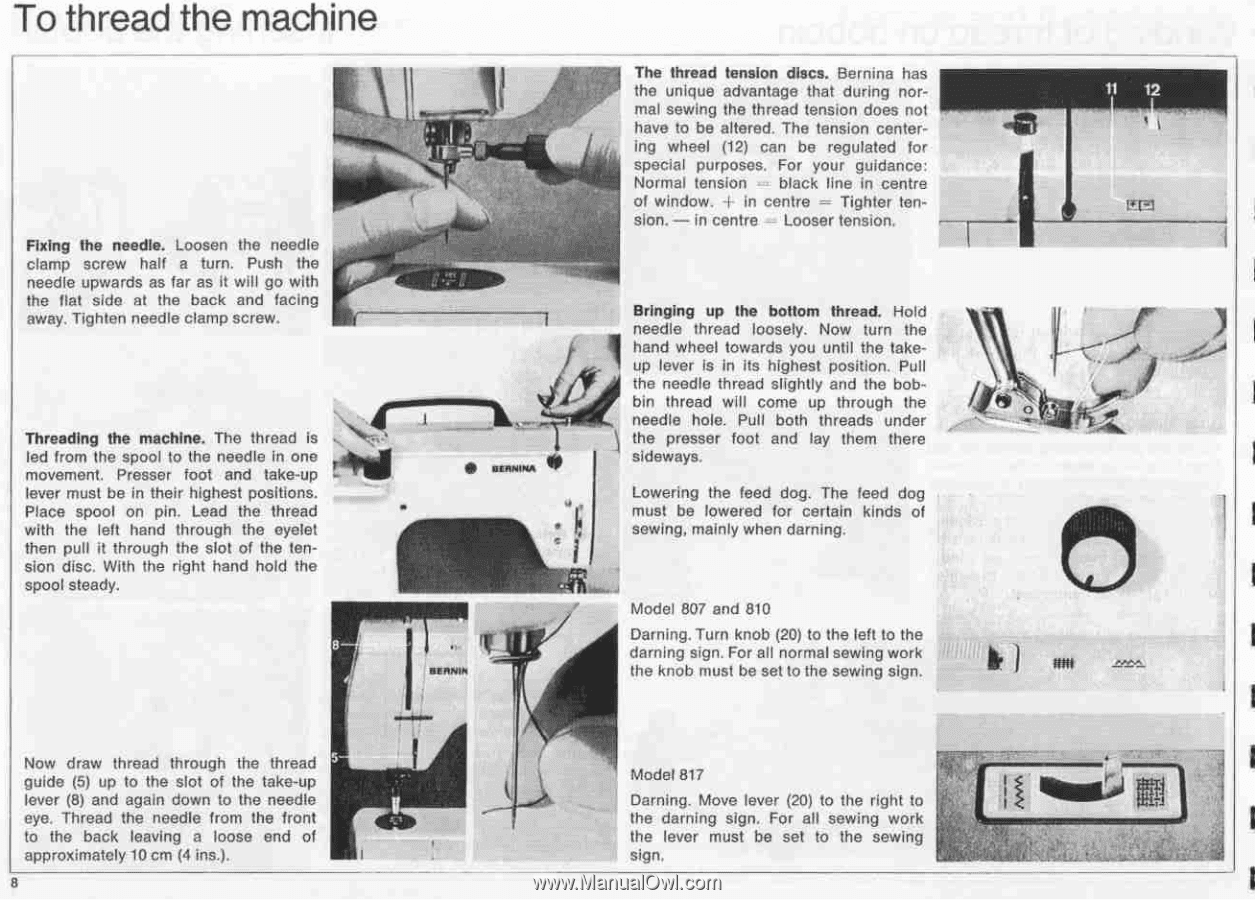
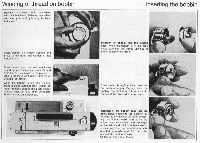
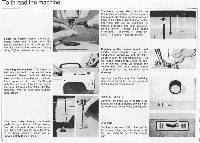
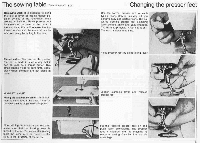
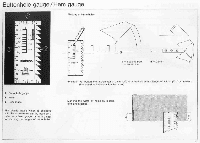
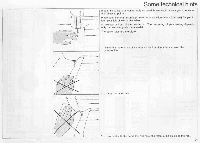
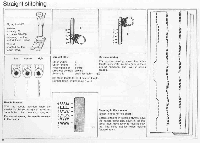
To thread the machine oar lw 4 Fixing the needle. Loosen the needle clamp screw half a turn. Push the needle upwards as far as it will go with the flat side at the back and facing away. Tighten needle clamp screw. Threading the machine. The thread is led from the spool to the needle in one movement. Presser foot and take-up • lever must be in their highest positions. Place spool on pin. Lead the thread with the left hand through the eyelet then pull it through the slot of the ten- sion disc. With the right hand hold the spool steady. 8 Now draw thread through the thread 5guide (5) up to the slot of the take-up lever (8) and again down to the needle eye. Thread the needle from the front to the back leaving a loose end of approximately 10 cm (4 ins.). 8 The thread tension discs. Bernina has the unique advantage that during normal sewing the thread tension does not have to be altered. The tension centering wheel (12) can be regulated for special purposes. For your guidance Normal tension black line in centre of window. in centre = Tighter tension. - in centre - Looser tension, Bringing up the bottom thread. Hold needle thread loosely. Now turn the hand wheel towards you until the takeup lever is in its highest position. Pull the needle thread slightly and the bobbin thread will come up through the 1needle hole. Pull both threads under the presser foot and lay them there sideways. Lowering the feed dog. The feed dog must be lowered for certain kinds of sewing, mainly when darning. Model 807 and 810 Darning. Turn knob (20) to the left to the darning sign. For all normal sewing work the knob must be set to the sewing sign. Model 817 Darning. Move lever (20) to the right to the darning sign. For all sewing work the lever must be set to the sewing sign. '.1-i •
-
 1
1 -
2
-
3
-
4
-
 5
5 -
 6
6 -
 7
7 -
 8
8 -
 9
9 -
 10
10 -
 11
11 -
 12
12 -
 13
13 -
 14
14 -
 15
15 -
16
-
17
-
18
-
19
-
20
-
21
-
22
-
23
-
24
-
25
-
26
-
27
-
28
-
29
-
30
-
31
-
32
-
33
-
34
-
35
-
36
-
37
-
38
-
39
-
40
-
41
-
42
-
43
-
44
-
45
-
46
-
47
-
48
-
49
-
50
-
51
-
52
-
53
-
54
-
55
-
56
-
57
 |
 |