Bernina 810 Manual - Page 34
Darning, Woollens, Terry, Cloth, towels
 |
View all Bernina 810 manuals
Add to My Manuals
Save this manual to your list of manuals |
Page 34 highlights
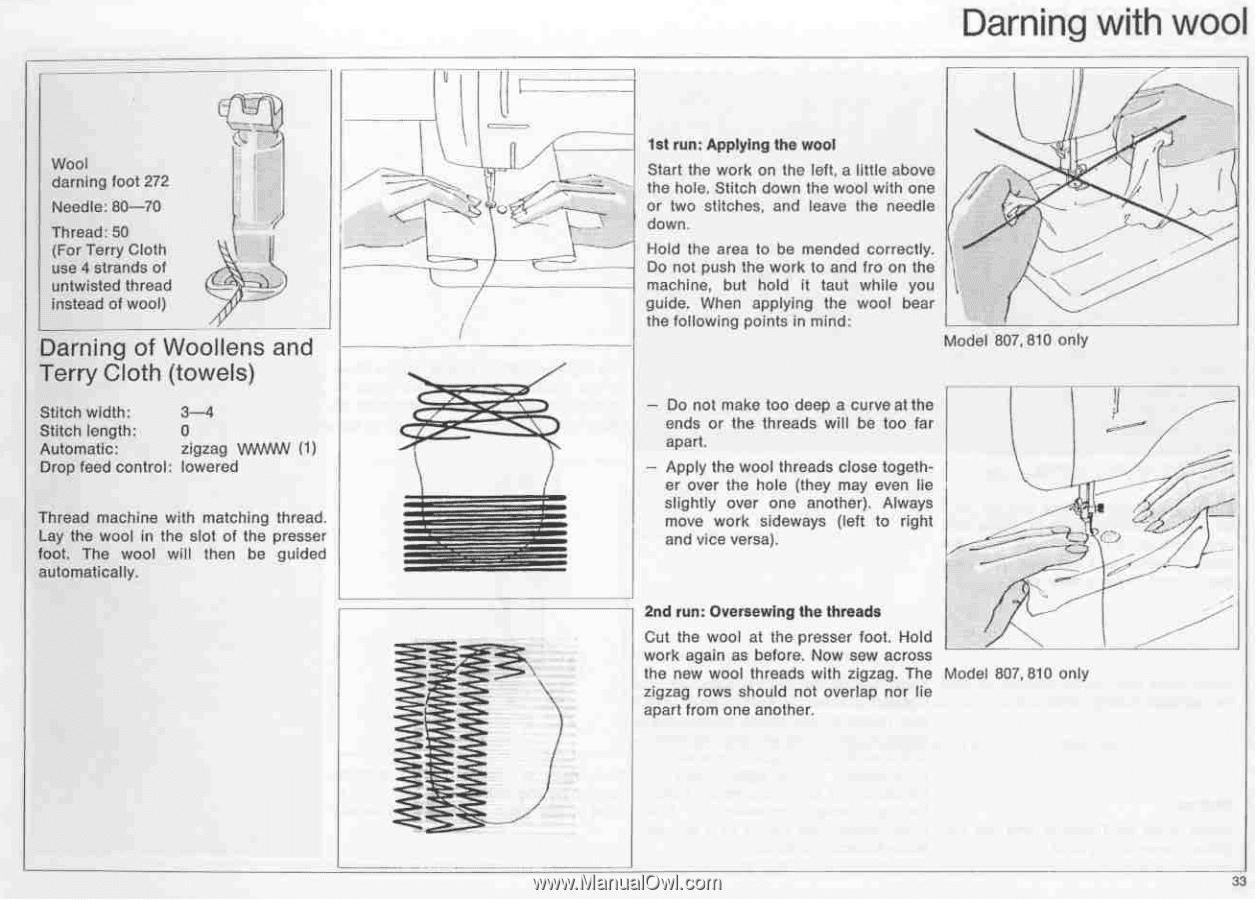
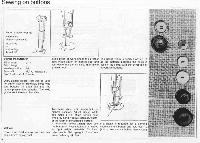
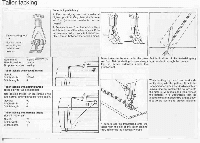
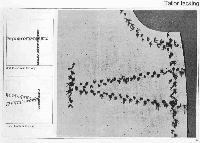
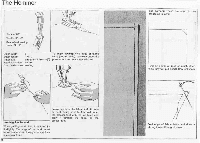
121V-I1 Wool darning foot 272 Needle: 80-70 Thread: 50 (For Terry Cloth use 4 strands of untwisted thread instead of wool) Darning of Woollens and Terry Cloth (towels) Stitch width: 3-4 Stitch length: 0 Automatic: zigzag WMWV (1) Drop feed control: lowered Thread machine with matching thread. Lay the wool in the slot of the presser foot. The wool will then be guided automatically. Darning with wool 1st run: Applying the wool Start the work on the left, a little above the hole. Stitch down the wool with one or two stitches, and leave the needle down. It Hold the area to be mended correctly. Do not push the work to and fro on the machine, but hold it taut while you guide. When applying the wool bear the following points in mind: Model 807, 810 only - Do not make too deep a curve at the ends or the threads will be too far apart. - Apply the wool threads close together over the hole (they may even lie slightly over one another). Always move work sideways (left to right and vice versa). 2nd run: Oversewing the threads Cut the wool at the presser foot. Hold work again as before. Now sew across the new wool threads with zigzag. The Model 807, 810 only zigzag rows should not overlap nor lie apart from one another. 33
-
 1
1 -
2
-
3
-
4
-
5
-
6
-
7
-
8
-
9
-
10
-
11
-
12
-
13
-
14
-
15
-
16
-
17
-
18
-
19
-
20
-
21
-
22
-
23
-
24
-
25
-
26
-
27
-
28
-
 29
29 -
 30
30 -
 31
31 -
 32
32 -
 33
33 -
 34
34 -
 35
35 -
 36
36 -
 37
37 -
 38
38 -
 39
39 -
40
-
41
-
42
-
43
-
44
-
45
-
46
-
47
-
48
-
49
-
50
-
51
-
52
-
53
-
54
-
55
-
56
-
57
 |
 |