Bernina 810 Manual - Page 35
tro414, T1tElr.t.
 |
View all Bernina 810 manuals
Add to My Manuals
Save this manual to your list of manuals |
Page 35 highlights
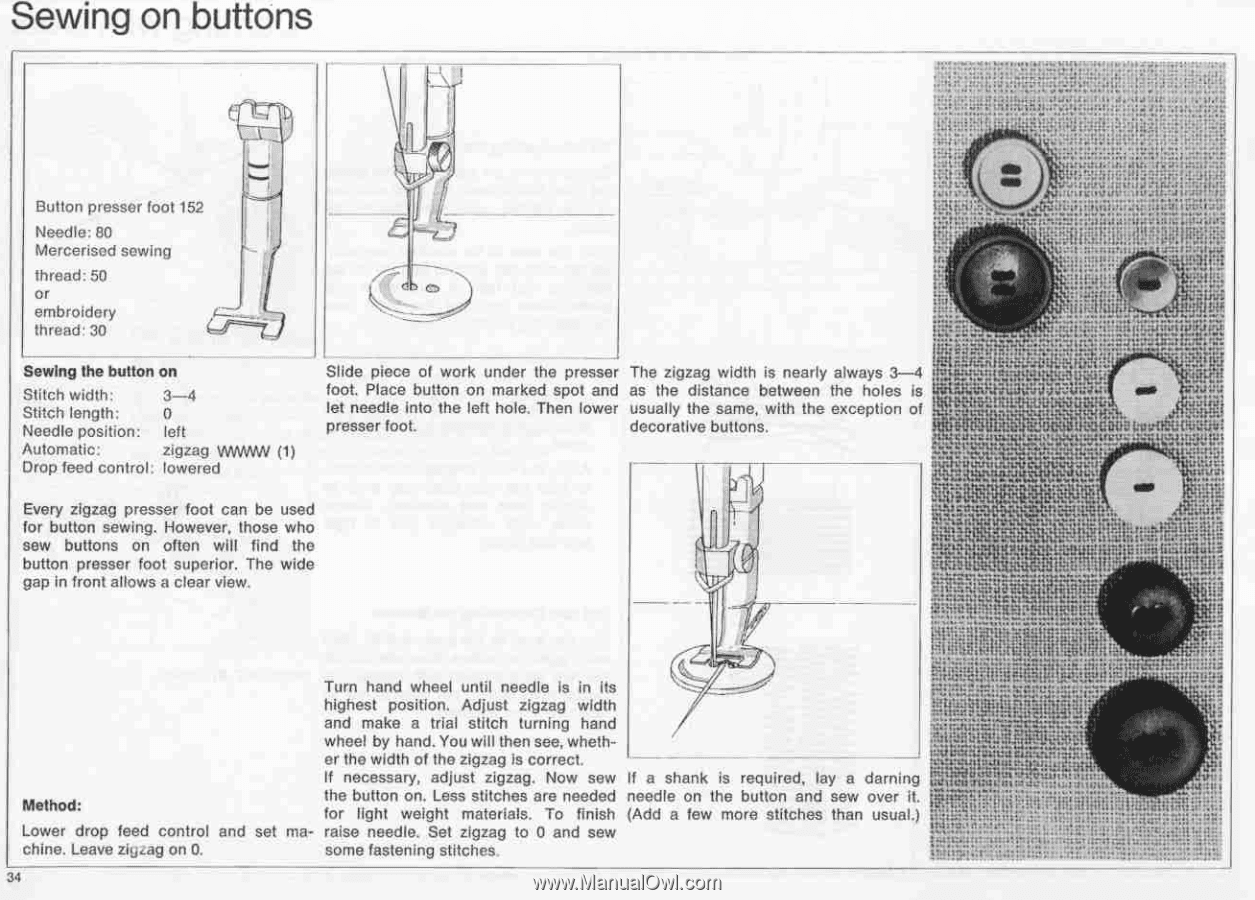
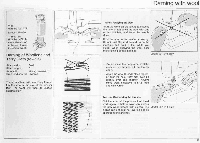
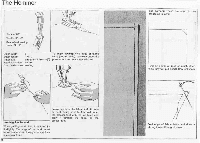
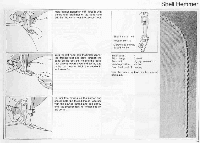
Sewing on buttons ... Dutton presser foot 152 Needle: 80 Mercerised sewing thread: 50 Or embroidery thread• 30 Sewing the button on Stitch width: 3-4 Stitch length: 0 Needle position: left Automatic: zigzag VvVONIN (1) Drop feed control. lowered SO re.i.ikiFf ). • a. • • • ., I h ; • 3 ler it! irgrir. 1`.)A•li fr.. 41 ..." :.'W. :El .... iiiiirk- .vIttr:::!E'lliIiiiiiII:vuMt g Slide piece of work under the presser The zigzag width is nearly always 3-4 u4idzi,.,.._knt.a-.1Itnkg.irff;loittiliiii« foot. Place button on marked spot and as the distance between the holes is - r -ii}iiiiiailiWnr:iiii4r4: vu, let needle into the left hole. Then lower usually the same, with the exception of 1.14W 1 143 .1:41LtNs. , presser foot. decorative buttons. , dig! taliAltiMigliii "! 18! atui lumtinv .....- Every zigzag presser foot can be used for button sewing. However• those who sew buttons on often will find the button presser foot superior. The wide gap in front allows a clear view. Zia a'"t"" " ..4. -`it. ta.Vrth... ti t EV. .UnZin -"•intt.\•1. tutu:: 7 Etititi taw • tfL LOA Turn hand wheel until needle is in its highest position. Adjust zigzag width and make a trial stitch turning hand wheel by hand. You will then see, wheth- er the width of the zigzag is correct. Method: If necessary, adjust zigzag. Now sew If a shank is required, lay a darning the button on. Less stitches are needed needle on the button and sew over it. for light weight materials. To finish (Add a few more stitches than usual.) anitli,11 01 e`i;, ; ; Lower drop feed control and set ma- raise needle. Set zigzag to 0 and sew chine. Leave zii,,ag on 0. some fastening stitches tro414-T-1tElr.t. 34 $ 3:14:4 • amr.g
-
 1
1 -
2
-
3
-
4
-
5
-
6
-
7
-
8
-
9
-
10
-
11
-
12
-
13
-
14
-
15
-
16
-
17
-
18
-
19
-
20
-
21
-
22
-
23
-
24
-
25
-
26
-
27
-
28
-
29
-
 30
30 -
 31
31 -
 32
32 -
 33
33 -
 34
34 -
 35
35 -
 36
36 -
 37
37 -
 38
38 -
 39
39 -
 40
40 -
41
-
42
-
43
-
44
-
45
-
46
-
47
-
48
-
49
-
50
-
51
-
52
-
53
-
54
-
55
-
56
-
57
 |
 |