Bernina 810 Manual - Page 48
Pintucking
 |
View all Bernina 810 manuals
Add to My Manuals
Save this manual to your list of manuals |
Page 48 highlights
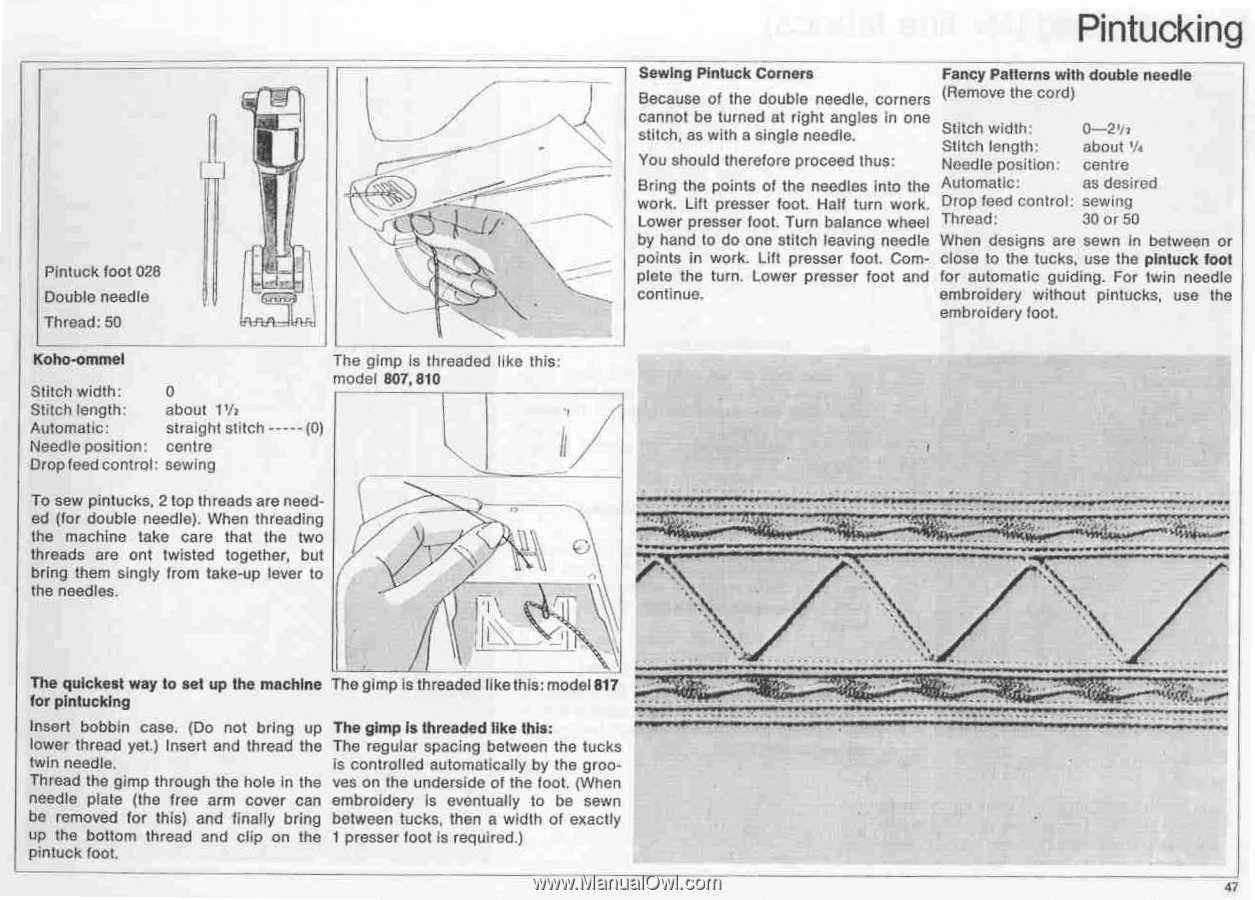
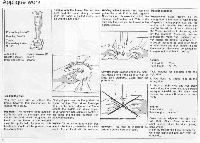
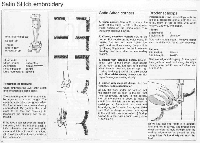
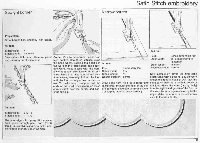
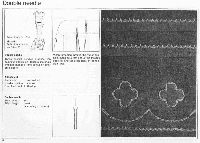
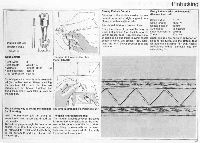
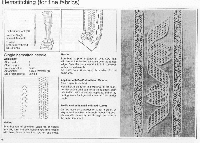
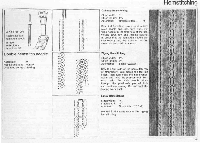
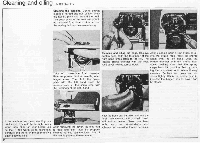
N N Pintuck loot 028 Double needle Thread: 50 Koho-ommel Stitch width: 0 Stitch length: about 112/ Automatic: straight stitch Needle position: centre Drop feed control: sewing The gimp Is threaded like this: model 807, 810 (0) To sew pintucks, 2 top threads are needed (for double needle). When threading the machine take care that the two threads are ont twisted together, but bring them singly from take-up lever to the needles. Pintucking Sewing Pintuck Corners Fancy Patterns with double needle Because of the double needle, corners (Remove the cord) cannot be turned at right angles in one stitch, as with a single needle. Stitch width: Stitch length: You should therefore proceed thus: Needle position: 0-212/ about 1/4 centre Bring the points of the needles Into the Automatic: as desired work. Lift presser foot. Half turn work. Drop feed control: sewing Lower presser foot. Turn balance wheel Thread: 30 or 50 by hand to do one stitch leaving needle When designs are sewn in between or points in work. Lift presser foot. Com- close to the tucks, use the pintuck foot plete the turn. Lower presser foot and for automatic guiding. For twin needle continue. embroidery without pintucks, use the embroidery toot. Jj rw . . • 07, 1•WW9 rril1r•l The quickest way to set up the machine The gimp is threaded like this: model 817 for pintucking 1 Inrarm nr.n; Insert bobbin case. (Do not bring up The gimp is threaded like this: lower thread yet.) Insert and thread the The regular spacing between the tucks twin needle. is controlled automatically by the groo- Thread the gimp through the hole in the ves on the underside of the foot. (When needle plate (the free arm cover can embroidery Is eventually to be sewn be removed for this) and finally bring between tucks, then a width of exactly up the bottom thread and clip on the 1 presser foot is required.) pintuck foot. •M47
-
 1
1 -
2
-
3
-
4
-
5
-
6
-
7
-
8
-
9
-
10
-
11
-
12
-
13
-
14
-
15
-
16
-
17
-
18
-
19
-
20
-
21
-
22
-
23
-
24
-
25
-
26
-
27
-
28
-
29
-
30
-
31
-
32
-
33
-
34
-
35
-
36
-
37
-
38
-
39
-
40
-
41
-
42
-
 43
43 -
 44
44 -
 45
45 -
 46
46 -
 47
47 -
 48
48 -
 49
49 -
 50
50 -
 51
51 -
 52
52 -
 53
53 -
54
-
55
-
56
-
57
 |
 |