Bernina Activa 210 User Guide
Bernina Activa 210 Manual
 |
View all Bernina Activa 210 manuals
Add to My Manuals
Save this manual to your list of manuals |
Bernina Activa 210 manual content summary:
- Bernina Activa 210 | User Guide - Page 1
after sales service second to none. The new BERNINA activa 210 are characterized by a youthful appeal which is combined with a range of added value features to give you, dear Customer, more sewing pleasure than ever before. Enjoy modern, creative sewing with BERNINA: our wide range of accessories as - Bernina Activa 210 | User Guide - Page 2
openings blocked. Keep ventilation openings of the sewing computer and foot control free from accumulation of lint, dust and loose cloth. 5. Keep fingers away from all moving parts. Special care is required around the sewing needle. 6. Always use the BERNINA original needle plate. The wrong plate - Bernina Activa 210 | User Guide - Page 3
or changing the needle, threading the bobbin or changing the presser foot. 10. Always unplug the sewing computer from the electrical outlet when removing covers, lubricating or when making any other user servicing adjustments mentioned in this instruction manual. 11. Never drop or insert any - Bernina Activa 210 | User Guide - Page 4
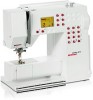
4 Details of the sewing computer Details of the sewing computer 12 11 13 10 14 8 7 5 2 15 16 9 6 3 1 17 18 19 20 27 23 22 29 21 4 12 13 30 23 24 28 27 29 25 26 Front view Right end 032622.50.04_0701_a210_EN - Bernina Activa 210 | User Guide - Page 5
31 Horizontal spool pin 12 Bobbin pre-tension 32 Rear thread guide 13 Thread tension adjustment 33 Accessory box connection 14 LCD display 34 Presser foot lifter (manual) 15 Needle stop up/down 35 Thread cutter 16 1/2 motor speed 17 Bobbin winder 18 Stitch width button 19 Needle position - Bernina Activa 210 | User Guide - Page 6
• Oiler • Instruction manual • Foot control • Power cable • Warranty card The foot control regulates the sewing speed Sewing speed is adjusted by applying more or less pressure to the foot control. Important! (USA/Canada only) Use only foot controller type SR-1 with sewing computer activa 210. Self - Bernina Activa 210 | User Guide - Page 7
sole for manual buttonholes Feet selection 7 Optional presser feet selection 1 Reverse pattern sole for practical and decorative stitches 9 Darning foot 10 Edgestitch foot 4 Zipper sole for sewing in zippers 20 Open embroidery foot 37 Patchwork foot 1/4'' / 6mm 5 Blind stitch sole Blind - Bernina Activa 210 | User Guide - Page 8
box is equipped with one small and one large drawer as well as compartments for bobbin holders and presser feet. (Additional compartments and drawers are available). Attaching the accessory box to the sewing computer • close the doors • push feet back into position A • attach the box to the - Bernina Activa 210 | User Guide - Page 9
Lens Set We recommend the use of the BERNINA Lens Set for more comfort when sewing. Foot Control Optional accessories 9 Sewing speed • control the sewing speed by depressing the foot control • raise or lower the needle by tapping on the foot control with your heel Start-stop-unit B A Note: If - Bernina Activa 210 | User Guide - Page 10
Setting up the sewing computer Winding the bobbin Winding the bobbin • turn power switch on • place empty bobbin on spindle • following the direction of the arrow take thread through the rear guide and round the pre-tension stud • wind the thread two to three times around the empty bobbin and cut - Bernina Activa 210 | User Guide - Page 11
into place Bobbin thread cutter • insert the bobbin case • take the thread over cutter A • thread is cut • close the bobbin cover Note: The bobbin thread does not have to be brought up as the loose end is just the right length to start sewing. Please refer to the safety instruction! 032622.50 - Bernina Activa 210 | User Guide - Page 12
up the sewing computer Inserting the bobbin Insert the bobbin Insert the bobbin so that the thread runs clockwise. Pull the thread counter clockwise into the slot. Pull the thread to the left under the spring until ... Changing the needle Removing the needle • raise the needle • turn power - Bernina Activa 210 | User Guide - Page 13
peg sits under the opening of the shaft • lower the presser foot lifter and the foot sole will click into position Please refer to the safety instruction! Supplementary spool pin Collapsible vertical spool pin • found on the back of the sewing computer behind the handwheel • essential aid for - Bernina Activa 210 | User Guide - Page 14
14 Setting up the sewing computer Threading the upper thread A Attaching the thread spool • raise the needle and the presser foot • switch the power off • attach the foam • take thread down and through guides D and E 032622.50.04_0701_a210_EN C D B E Please refer to the safety instruction! - Bernina Activa 210 | User Guide - Page 15
Needle Threader Setting up the sewing computer 15 A B Thread in hook • raise the needle • lower the presser foot • lay the thread behind hook B and hold lightly Lever down • press lever A down and simultaneously guide the thread around hook B to the right to the needle Thread in front of - Bernina Activa 210 | User Guide - Page 16
by one step. The length of this step is determined by the stitch length selected. With an extremely short stitch length, the steps are also short. The fabric moves under the foot quite slowly, even at full sewing speed. Buttonholes are sewn with a very short stitch length. 032622.50.04_0701_a210_EN - Bernina Activa 210 | User Guide - Page 17
other sewing or embroidery threads are used, the tension may need adjusting to suit the fabric and chosen stitch. Perfect stitch formation • the stitch formation is of the fabric • to increase the upper thread tension turn ten- sion adjustment wheel to 5-10 For example: Tension Metallic thread - Bernina Activa 210 | User Guide - Page 18
18 Operating instructions Balance Your sewing computer has been tested and factory set using a double layer of cretonne fabric and Metrosene 100/2 threads (Arova Mettler, Switzerland). Different fabrics, threads and stabilizers can naturally affect the stitch balance so that they are sewn too - Bernina Activa 210 | User Guide - Page 19
the LCD display 032622.50.04_0701_a210_EN Operating instructions 19 Altered Stitch Memory • any stitch length or width alterations will be saved automatically For example: • sew altered stitch, e.g. zig-zag • select another stitch, e.g. straight stitch • return to zig-zag, your alterations are - Bernina Activa 210 | User Guide - Page 20
symbol no longer appears on the LCD display. Reverse sewing quick reverse: • press button • Sewing computer sews reverse until button is released (max. stitch length 3 mm) Applications: • programming buttonholes • programming darning program • manual securing (seam begin and end) continous reverse - Bernina Activa 210 | User Guide - Page 21
overlock stitch All types of knit; Overlock = sew and neaten in one operation 7 Stretch overlock stitch Mediumweight stitch Most types of interlock and smooth fabrics; visible seams and hems 10 Darning program Automatic darning for fine and medium weight fabrics 11 Buttonhole Fine to medium weight - Bernina Activa 210 | User Guide - Page 22
Use reverse pattern sole No. 1 Zig-zag stitch • for all fabrics • for neatening edges • for decorative work Satin stitch • dense (shorter) zig-zag stitch = filled in zig-zag • adjust stitch width as you sew for new effects Oversewing edges • guide edge of fabric under the center of the presser foot - Bernina Activa 210 | User Guide - Page 23
edge and elastic into 4 equal sections and mark • pin elastic to raw edge, matching up marks Sewing • stretch the elastic to fit the raw edge while sewing • trim excess fabric close to the stitching Use reverse pattern sole No. 1 Open Seam • durable seam for firm and densely woven fabrics such as - Bernina Activa 210 | User Guide - Page 24
again if necessary Use reverse pattern sole No. 1 or overlock sole No. 2 (optional accessory) Closed seam Overlock seam in loose knits and cross seams in knits and jerseys. Sewing 2 • guide the raw edge along the pin on the overlock sole or the reverse pattern sole • the stitch will form - Bernina Activa 210 | User Guide - Page 25
pattern sole No. 1 Closed Seam • overlock seam in coarse or loose knits Sewing • sew stretch overlock along the fabric edge • the stitch should sew over the edge of the fabric on the right sewing of the needle Use reverse pattern sole No. 1 Open Seam • very elastic seam for knit fabrics • ideal - Bernina Activa 210 | User Guide - Page 26
(3/8") to wrong side Sewing • sew from the right at a foot's width from the edge • trim surplus fabric (wrong side) • adjust balance if necessary Balance/corrections bring stitch together open out stitch Note: After sewing return balance to the normal setting! Use zipper sole No. 4 Preparation - Bernina Activa 210 | User Guide - Page 27
foot sole No. 3 and the buttonhole symbol (the first step blinks on the display) • insert the lower thread in the finger of the bobbin case = thread tension is a little higher • mark the buttonhole length in the appropriate position Test sewing • test on the fabric and stabilizer you intend to use - Bernina Activa 210 | User Guide - Page 28
practical stitches Sewing a manual standard buttonhole Both beads are sewn in the same direction. The individual steps blink on the LCD display. 1 3 2 4 1 sew the first bead forward, stop the sewing computer • press the reverse button 2 sew reverse straight stitch, stop the sewing computer - Bernina Activa 210 | User Guide - Page 29
Important facts about sewing needles Your BERNINA uses needle system 130/705H. stitching or thread breakage can occur. Needle and fabric Condition of needle The needle must be in perfect condition. Problems can occur with damaged needles. Thick threads, synthetic mercerised thread Buttonhole - Bernina Activa 210 | User Guide - Page 30
needles Special materials are easier to sew if the appropriate needle is used. Special needles are available at your BERNINA dealer. Type of needle Model Suitable for Universal 130/705 H Normal point, slightly rounded For nearly all natural and synthetic fabrics (woven and knitted) Jersey - Bernina Activa 210 | User Guide - Page 31
be brought to a warm room about one hour before use. Clean the sewing computer after every use • turn power switch to «0» (off) and pull out plug from electric outlet • remove presser foot and needle • open the free-arm cover • press the stitch plate down at the back right corner, lift and remove - Bernina Activa 210 | User Guide - Page 32
bulb • insert the new bulb • replace cover and tighten screw CAUTION Disconnect plug from the socket before cleaning and servicing Note: Use bulb type 12 V 5 W. W 2.1 x 9.5 d. Light bulbs get hot. Allow to cool down before removal. Please refer to the safety instruction! 032622.50.04_0701_a210_EN - Bernina Activa 210 | User Guide - Page 33
leather. Faulty stitching • Remnants of thread between the tension discs. • Remnants of thread under the bobbin case spring. • Lower thread still threaded in the bobbin case finger. • Sewing computer threaded with foot down. • Incorrect threading. Check upper and lower threads. • Use the correct - Bernina Activa 210 | User Guide - Page 34
34 Index Index A Accessories 6-9 Accessory bag 6 Accessory box 8 Altered stitch memory 19 B Balance Blind stitch Bobbin Bobbin case Bobbin thread cutter Buttonhole 18, 26, 28 21, 24 10-12 11 10, 11 27, 28 C Changing the presser foot sole 13 Changing the needle 12 Cleaning 31 - Bernina Activa 210 | User Guide - Page 35
Important safety Instructions Details of the sewing computer Standard Accessories Feet selection Optional Accessories Setting up the sewing computer Operating instructions Stitch overview Selected practical stitches Sewing Needles Maintenance Troubleshooting Index Contents 35 2 4 6 7 8 10 17 21 - Bernina Activa 210 | User Guide - Page 36
032622.50.04_0701_a210_EN
-
 1
1 -
 2
2 -
 3
3 -
 4
4 -
 5
5 -
 6
6 -
 7
7 -
8
-
9
-
10
-
11
-
12
-
13
-
14
-
15
-
16
-
17
-
18
-
19
-
20
-
21
-
22
-
23
-
24
-
25
-
26
-
27
-
28
-
29
-
30
-
31
-
32
-
33
-
34
-
35
-
36
 |
 |

In choosing
BERNINA
, you are assured of years of rewarding sewing. For over 100 years my family
has concentrated on providing complete satisfaction to our customers. And it is my personal wish to
continue this tradition of offering you Swiss precision engineering combined with state of the art
technology and an after sales service second to none.
The new
BERNINA activa 210
are characterized by a youthful appeal which is combined with a range
of added value features to give you, dear Customer, more sewing pleasure than ever before. Enjoy
modern, creative sewing with
BERNINA
: our wide range of accessories as well as our sewing publica-
tions brimming with imaginative ideas and practical tips all add to the joy of sewing
BERNINA
style.
Any questions you have will be dealt with courteously and efficiently by our highly trained
BERNINA
dealers, who will also be glad to service your sewing computer for you.
www.bernina.com
BERNINA
International AG
•
CH-8266 Steckborn/Switzerland
”Welcome to
the BERNINA
family”
H.P. Ueltschi
Owner
032622.50.04_0701_a210_EN