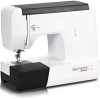
Bernina Bernette 12 Instruction Manual
Bernina Bernette 12 Manual
 |
View all Bernina Bernette 12 manuals
Add to My Manuals
Save this manual to your list of manuals |
Bernina Bernette 12 manual content summary:
- Bernina Bernette 12 | Instruction Manual - Page 1
my my world bernette 502020.75.24_021V4D0101_1010_IM_bernette 10 12 15_EN_DE_NL_FR - Bernina Bernette 12 | Instruction Manual - Page 2
manual describes three different bernette models. On the top left of each page you will find the models for which the current page is valid. Attention: This sewing machine the local authorised servicing staff. DDEE Hinweis: Diese Anleitung beschreibt drei verschiedene bernette Modelle. Oben links - Bernina Bernette 12 | Instruction Manual - Page 3
BERNINA dealer. DFER Remarque: Ces directives englobent un descriptif des trois modèles "bernette". Le modèle évoqué ressort en haut à gauche. Attention: Cette machine Cette décision sera prise par le service sur site après observation. 502020.75.24_021V4D0101_1010_IM_bernette 10 12 15_EN_DE_NL_FR - Bernina Bernette 12 | Instruction Manual - Page 4
502020.75.24_021V4D0101_1010_IM_bernette 10 12 15_EN_DE_NL_FR - Bernina Bernette 12 | Instruction Manual - Page 5
as threading needle, changing needle, threading bobbin, or changing presser foot, and the like. 12. Always unplug sewing machine from the electrical outlet when removing covers, lubricating, or when making any other user servicing adjustments mentioned in the instruction manual (pull power plug). 13 - Bernina Bernette 12 | Instruction Manual - Page 6
a hazard. 19. Never place anything on the foot control. 20. This sewing machine is provided with double insulation (except U.S.A / Canada). Use only identical replacement parts. See instructions for Servicing of double-insulated products. SERVICING OF DOUBLE-INSULATED PRODUCTS In a double-insulated - Bernina Bernette 12 | Instruction Manual - Page 7
WICHTIGE SICHERHEITSHINWEISE DDEE Beim Gebrauch eines elektrischen Geräts sind folgende grundsätzliche Sicherheitsmassnahmen unbedingt zu beachten: Lesen Sie vor dem Gebrauch dieser Nähmaschine alle Sicherheitshinweise durch. Bewahren Sie die Gebrauchsanweisung an einem geeigneten Ort in der Nähe - Bernina Bernette 12 | Instruction Manual - Page 8
14. Die Nähmaschine auf keinen Fall im Freien benutzen. 15. Die Nähmaschine nicht an Orten benutzen, wo Treibgasprodukte ( werden. Verwenden Sie für Service und Reparatur nur OriginalErsatzteile nur für den Haushaltsgebrauch bestimmt. Umweltschutz BERNINA fühlt sich dem Umweltschutz verpflichtet. Wir - Bernina Bernette 12 | Instruction Manual - Page 9
BELANGRIJKE VEILIGHEIDSVOORSCHRIFTEN DNEL Bij het gebruik van een elektrisch apparaat dienen de gebruike lijkeen navolgende veiligheidsvoorschriften altijd in acht te worden genomen. Lees voor het gebruik van deze naaimachine alle veiligheidsvoorschriften zorgvuldig door. Bewaar de handleiding op - Bernina Bernette 12 | Instruction Manual - Page 10
vallen. 14. Gebruik de naaimachine nooit buiten. 15. Gebruik de naaimachine niet in ruimtes waar aë 18. Als de kabel is beschadigd, moet deze door uw BERNINA dealer worden vervangen om schade te vermijden. 19. Zet nooit personeel te worden uitgevoerd. Voor service en reparaties mogen alleen originele - Bernina Bernette 12 | Instruction Manual - Page 11
elle est tombée ou endommagée ou si elle est tombée dans l'eau. Apportez dans ce cas votre machine pour réparation, vérification ou réglage des composants électriques ou mécaniques auprès de l'agent BERNINA le plus proche ou du spécialiste agréé. 6. Veillez à ne pas boucher les fentes d'aération de - Bernina Bernette 12 | Instruction Manual - Page 12
machine en plein air. 15. Ne jamais employer la machine dans un local où l'on utilise des produits avec gaz propulseur (spray) ou de l'oxygène. 16. Débranchez la machine SECURITE Cette machine à coudre est destinée exclusivement à l'usage domestique. Protection de l'environnement BERNINA se sent - Bernina Bernette 12 | Instruction Manual - Page 13
DEEN All rights reserved For technical and product improvement reasons, the sewing computer's features, parts and accessory are subject to unannounced changes and alterations at any time. The accessory included can differ from country to country. DDEE Alle Rechte vorbehalten Aus technischen Grü - Bernina Bernette 12 | Instruction Manual - Page 14
10/12/15 14 Accessories bernette 10/12 16 Accessories bernette 15 18 Machine preparation 20-48 Needle, fabric, thread selection 50 Stitch selection 54 Standard sewing functions 72-74 Buttonholes 76-78 Enhanced sewing functions 80-118 Maintenance 120 -122 Troubleshooting 124 Index 128 - Bernina Bernette 12 | Instruction Manual - Page 15
130 FR Table des matières Prescriptions de sécurit 5-6 Table des matières 11 Aperçu bernette 10/12/15 15 Accessoires bernette 10/12 16 Accessoires bernette 15 19 Préparation de la machine 21-49 Tableau des aiguilles, tissus et fils 53 Sélection des points 55 Fonctions de couture - Bernina Bernette 12 | Instruction Manual - Page 16
sewing machine, we recommend that you read all the important safeguards and use and care instructions in this instruction book. May we suggest that before you start to use your sewing machine rir une machine à coudre de grande classe dans la fameuse qualité et précision de point de BERNINA! Des - Bernina Bernette 12 | Instruction Manual - Page 17
1 3 502020.75.24_021V4D0101_1010_IM_bernette 10 12 15_EN_DE_NL_FR - Bernina Bernette 12 | Instruction Manual - Page 18
guide 2. Presser foot pressure 3. Bobbin winder pre-tension 4. Thread take-up lever 5. Thread tension dial 6. Reverse sewing lever 7. Thread cutter 8. Presser foot 9. Needle plate 10. Sewing table and accessory box 11. Spool pin 12. Hole for second spool pin 13. Bobbin winder 14. Bobbin stopper 15 - Bernina Bernette 12 | Instruction Manual - Page 19
Steekbalans (model 15) 22. Hoofdschakelaar 23. Stopcontact voor netkabel 24. Handvat 25. Naaivoethendel FR Aperçu 1. Guide fil 2. Pression coffret d'accessoires 11. Tige support de bobine 12. Fente pour une deuxième tige support de bobine 13. Arrêt de la bobine 14. Dévidoir 15. Bouton de réglage de - Bernina Bernette 12 | Instruction Manual - Page 20
(J) 2. Zipper foot (I)** 3. Button sewing foot 4. Buttonhole foot (B) 5. Pack of needles (3x) 6. L-screwdriver 7. Oil bottle 8. Seam ripper/ brush 9. Bobbin (3x) 10. Seam guide 11. Second spool pin 12. Spool holder 13. Spool pin felt 14. Darning plate Optional accessories * 15. Satin stitch foot 16 - Bernina Bernette 12 | Instruction Manual - Page 21
. Guide 11. Deuxième tige support de bobine 12. Support de bobine 13. Deuxième tige support de bobine 14. Plaque de reprisage Accessoires spéciaux * 15. livrés avec la machine et doivent être achetés séparément. ** Accessories spécifiques pour la bernette 10 502020.75.24_021V4D0101_1010_IM_bernette - Bernina Bernette 12 | Instruction Manual - Page 22
15 EN Accessories Standard accessories 1. All purpose foot (J) 2. Zipper foot (I) 3. Button sewing foot 4. Buttonhole foot (B) 5. Satin stitch foot 6. Overcasting foot (G) 7. Pack of needles (3x) 8 L-screwdriver 9. Oil bottle 10 Seam ripper/ brush 11 Bobbin (3x) 12. Seam guide 13. Second spool pin - Bernina Bernette 12 | Instruction Manual - Page 23
pinceau 11. Canettes (3x) 12. Guide 13. Deuxième tige support de bobine 14. Support de bobine 15. Deuxième tige support de bobine Speciale accessoires * 16. Zoomvoet sont pas livrés avec la machine et doivent être achetés séparément. 19 502020.75.24_021V4D0101_1010_IM_bernette 10 12 15_EN_DE_NL_FR - Bernina Bernette 12 | Instruction Manual - Page 24
10 12 15 EN Sewing table Hold the snap-in sewing table horizontal, and push it in the direction of the arrow. (1) The inside of the snap-in sewing table can be utilized as an accessory box. 502020.75.24_021V4D0101_1010_IM_bernette 10 12 15_EN_DE_NL_FR 20 - Bernina Bernette 12 | Instruction Manual - Page 25
DE Nähtisch Den Nähtisch zum Einschnappen horizontal halten und in Pfeilrichtung drücken. (1) NL Aanschuifwerkblad Houd het aanschuifwerkblad voor het bevestigen horizontaal en druk het in de richting van de pijl vast (1). Het binnengedeelte van het aanschuifwerkblad kan als accessoirebox worden - Bernina Bernette 12 | Instruction Manual - Page 26
Attention: Unplug power cord when machine is not in use. Sewing light Press main switch for power and light on. (1) Position 0 - Machine is switched off. Position I - Machine and sewing light is switched on. Foot control Foot control regulates the sewing speed. (2) Attention: Consult a qualified - Bernina Bernette 12 | Instruction Manual - Page 27
. (2) Attention: Adressez-vous à un électricien qualifié si vous rencontrez un problème lors du raccordement de la machine au secteur. Débranchez la machine quand vous ne l'utilisez pas. Votre machine doit être accompagnée de la pédale KD-1902 (pour 100-120 volts) / KD-2902 (pour 220/240volts - Bernina Bernette 12 | Instruction Manual - Page 28
10 12 15 EN Two-step presser foot lever When sewing several layers or thick fabrics, the presser foot can be raised to a second stage for easy positioning of the work. EN Adjusting the presser foot pressure The presser foot pressure has been preset and requires no particular adjustment for - Bernina Bernette 12 | Instruction Manual - Page 29
DE Zweistufen-Nähfusshebe NL Tweetraps-naaivoethendel Beim Nähen von mehreren Lagen oder dicken Stoffen kann der Nähfuss um eine zweite Stufe angehoben werden, um die Näharbeit leichter zu platzieren. Voor het naaien over dikke of verschillende lagen stof kan de naaivoet nog een stap hoger worden - Bernina Bernette 12 | Instruction Manual - Page 30
(2) Lower the presser foot holder (b) and the presser foot (f) will engage automatically. Removing the presser foot: Raise the presser foot. Release the pressure foot by raising lever (e) located at the back of the foot holder. (3) Attaching the seam guide: Attach the seam guide (g) in the slot - Bernina Bernette 12 | Instruction Manual - Page 31
le pied-de-biche. Relever le levier (e) et retirer le pied en le faisant glisser vers l'arrière du support. (3) Fixer le guide: Glisser le guide (g) dans le fente comme illustré. Adapter (4) l'écart pour les ourlets, plis, etc. 27 502020.75.24_021V4D0101_1010_IM_bernette 10 12 15_EN_DE_NL_FR - Bernina Bernette 12 | Instruction Manual - Page 32
inside out and hold the thread. Push the bobbin to the right towards the bobbin winding position. Press the foot control gently. The bobbin will stop winding when it is full. Push the bobbin to the left to "sewing position" and remove it. Before threading the machine, cut the thread near the hole of - Bernina Bernette 12 | Instruction Manual - Page 33
. Coupez le fil restant au trou de la canette avant de la posicioner dans le crochet. Remarque: Quand l'axe se trouve en positiond'embobinage, la machine et le volant sontbloqués et ne peuvent pas être actionnés.Pour coudre, repousser l'axe vers la gauche(position de couture). 29 502020.75 - Bernina Bernette 12 | Instruction Manual - Page 34
10 12 15 EN Inserting bobbin When inserting or removing the bobbin, the needle must be fully raised. - Open the hinged cover (1). - Remove the bobbin case by pulling its latch towards you and pulling it out from the hook. - Hold the bobbin case with one hand. Insert the bobbin so that the thread - Bernina Bernette 12 | Instruction Manual - Page 35
DE Spule einlegen Beim Einsetzen und Herausnehmen der Spule muss die Nadel in der höchsten Position sein. - Klappdeckel öffnen (1). - Spulenkapsel entfernen, an geöffneter Klappe herausziehen und sie aus dem Greifer nehmen. - Spulenkapsel mit einer Hand halten. Spule so einlegen, dass der Faden im - Bernina Bernette 12 | Instruction Manual - Page 36
10 12 15 EN Inserting the needle Attention: Turn power switch to "O" before inserting or removing the needle. Change the needle regularly, especially if it is showing signs of wear and causing problems. Insert the needle as illustrated: A. Loosen the needle clamp screw and tighten again after - Bernina Bernette 12 | Instruction Manual - Page 37
DE Nadel einsetzen Achtung: Vor dem Einsetzen oder Entfernen der Nadel Hauptschalter auf "O" stellen. Nadel regelmässig ersetzen, vor allem bei Anzeichen von Abnützung und Nähschwierigkeiten. Die Nadel wie abgebildet einsetzen: A. Nadelbefestigungsschraube lösen und nach dem Einsetzen der neuen - Bernina Bernette 12 | Instruction Manual - Page 38
unthreading the machine. - To release the upper thread tension the presser foot lever has to be raised. - The thread take-up lever must be in the highest position when threading. 1. Place spool on pin using appropriate spool disc (spool turns clockwise). Take thread through rear guide (A) and then - Bernina Bernette 12 | Instruction Manual - Page 39
-de-biche pour dégager la tension du fil supérieur. - Relever complètement le levier de fil avant l'enfilage de la machine. 1. Enficher le fil accompagné du disque correspondant sur le support de bobine (le fil se déroule dans le sens des aiguilles d'une montre), tenir fermement le fil dans le coude - Bernina Bernette 12 | Instruction Manual - Page 40
10 12 15 EN Needle threader - Raise the needle to its highest position. - Press lever (A) right down . - The threader automatically swings to the threading position (B). - Take the thread - Bernina Bernette 12 | Instruction Manual - Page 41
DE Nadeleinfädler - Nadel in die höchste Position bringen. - Hebel (A) ganz nach unten drücken. - Einfädler schwenkt automatisch in die Einfädlerposition (B). - Faden um den Haken (C) legen. - Faden so vor die Nadel führen, dass er von unten nach oben in den Haken (D) zu liegen kommt. - Hebel (A) - Bernina Bernette 12 | Instruction Manual - Page 42
10 12 15 EN Upper thread tension Basic thread tension setting: "4". To increase thread tension is too tight, decrease setting. (B1) Note: The tension is factory set for best possible sewing results using a thread (Metrosene 100/2). The optimum tension may vary when using other or different types of - Bernina Bernette 12 | Instruction Manual - Page 43
DE Oberfadenspannung NL Bovendraadspanning FR Tension du fil supérieur Grundeinstellung der Fadenspannung: "4". Um die Fadenspannung zu verstärken, den Verstellknopf auf die nächst grössere Zahl drehen. Um die Fadenspannung zu lösen, den Verstellknopf auf die nächst kleinere Zahl drehen. A. - Bernina Bernette 12 | Instruction Manual - Page 44
the lower thread up through the stitch plate hole. Lay both threads to the back under the presser foot. (2) Note: When the excess thread was cut, the thread can be brought up, however does not have to. Caution: When starting to sew do not pull on the taut threads under the presser - Bernina Bernette 12 | Instruction Manual - Page 45
DE Unterfaden heraufholen NL Onderdraad omhooghalen FR Remonter le fil de canette Oberfaden mit der linken Hand halten. Handrad eine Umdrehung nach vorne drehen, bis die Nadel wieder hochgestellt ist. (1) Houd de bovendraad met de linkerhand vast. Draai het handwiel naar voren, tot de naald weer - Bernina Bernette 12 | Instruction Manual - Page 46
foot. Press the reverse sewing lever (A) while sewing backwards up to the fabric edge. Release reverse sewing lever and continue sewing. End of seam (1) At the end of seam, press down the reverse sewing lever (A). Sew a few reverse stitches. Release the lever and the machine will sew forwards - Bernina Bernette 12 | Instruction Manual - Page 47
de gewenste naad vooruit. Naadeinde (1) Druk de achteruitnaaitoets (A) bij naadeinde naar beneden. Naai enkele steken achteruit. Laat de toets los en de machine naait weer vooruit. Naaiwerk wegnemen (2) Draai het handwiel naar voren om de draadhevel in de hoogste stand te zetten. Zet de naaivoet - Bernina Bernette 12 | Instruction Manual - Page 48
10 12 EN Darning Plate For certain types of work, (e.g. darning or free-hand embroidery), the darning plate must be used. Install the darning plate as illustrated. For normal sewing, remove the darning plate. 44 502020.75.24_021V4D0101_1010_IM_bernette 10 12 15_EN_DE_NL_FR - Bernina Bernette 12 | Instruction Manual - Page 49
DE Stopfplatte Bei Freihandsticken oder Stopfen muss die Stopfplatte verwendet werden. Stopfplatte wie abgebildet einsetzen. Für normales Nähen Stopfplatte entfernen. NL Stopplaat Bij borduren uit de vrije hand of stoppen moet de stopplaat worden gebruikt. Bevestig de stopplaat zoals afgebeeld. - Bernina Bernette 12 | Instruction Manual - Page 50
15 EN How to drop feed dog For ordinary sewing, keep the feed dog up, for freehand embroidery, sewing on buttons and darning, drop the feed dog. To raise (a) and lower (b) feed dog. 46 502020.75.24_021V4D0101_1010_IM_bernette 10 12 15_EN_DE_NL_FR - Bernina Bernette 12 | Instruction Manual - Page 51
DE Transporteur versenken Für normales Nähen bleibt der Transporteur oben. Bei Freihandsticken, Knöpfe annähen und Stopfen den Transporteur versenken. Transporteur hochstellen (a) und versenken (b). NL Transporteur omlaagzetten Bij normaal naaiwerk staat de transporteur omhoog. Zet de transporteur - Bernina Bernette 12 | Instruction Manual - Page 52
15 EN Adjust pattern balance If the decorative stitch patterns or buttonhole are uneven when sewing with particular fabrics, turn the feed balancing dial* with a screwdriver for adjustment. * This dial should usually be in a neutral position. (1) Adjusting distorted stretch stitch patterns - Bernina Bernette 12 | Instruction Manual - Page 53
DE Einstellung der Stichmuster-Balance Wenn Dekorstichmuster und Knopflöcher beim Nähen von speziellen Stoffen ungleich sind, den Balance-Knopf* zum Einstellen mit einem Schraubenzieher drehen. * Dieser Knopf sollte in Normalstellung (waagerecht) sein. (1) Verzogene Stretch-Stichmuster anpassen - Bernina Bernette 12 | Instruction Manual - Page 54
and fabric. The fabric weight and type determine the thread weight, needle size and point form sewing with twin needles, the stitch width dial should be set less than "2.5". (Model 15) 3. European needles show sizes 65, 70, 80 etc. American and Japanese needles show size 9, 11, 12 etc. 4. Replace - Bernina Bernette 12 | Instruction Manual - Page 55
und Unterfaden immer den gleichen Faden verwenden. Dicker Faden, Teppichfaden. (Hohen Nähfussdruck benutzenhöhere Zahl.) NADEL- und STOFFWAHL NADELN HA×1 15×1 15×1/ 130/705H BESCHREIBUNGS Scharfe Standardnadel. Nadelstärken von dünn bis dick. 9 (65) bis 18 (110) Halbkugelspitznadel. 9 (65) to 18 - Bernina Bernette 12 | Instruction Manual - Page 56
zijn tweelingnaalden voor nuttige en decoratieve steken verkrijgbaar. 2. Bij het naaien met de tweelingnaald mag de steekbreedte niet groter dan "2,5". (Model 15) 3. Europese naalddiktes zijn 65, 70, 80, enz. Amerikaanse en Japanse naalddiktes zijn 9, 11, 12, enz. 4. Vervang de naald regelmatig (ong - Bernina Bernette 12 | Instruction Manual - Page 57
aiguille jumelée. 2. Lors de la couture avec une aiguille jumelée, régler le bouton de réglage de la largeur du point sur moins de "2.5". (modèle 15) 3. Numéros européens d'aiguilles 65, 70, 80 etc., numéros américains et japonais 9, 11, 12 etc. 4. Remplacer régulièrement l'aiguille (tous les deux - Bernina Bernette 12 | Instruction Manual - Page 58
same direction. Note: Between the positions "0" and "S", a bit of resistance is to be expected. Green numbered stitch patterns come with default stitch length. (model 12/15) 502020.75.24_021V4D0101_1010_IM_bernette 10 12 15_EN_DE_NL_FR 54 - Bernina Bernette 12 | Instruction Manual - Page 59
een kleine mechanische weerstand worden overwonnen. Bij de groene afgebeelde steken is de steeklengte vastgelegd. Deze kan niet worden veranderd. (Model 12/15) Sélectionner le point droit avec le bouton " " ou " ". Régler la longueur du point avec le bouton de réglage de la longueur. Sélectionner - Bernina Bernette 12 | Instruction Manual - Page 60
DEEN Stitches Overview Stitch Pattern Straight Stitch Zigzag 3 Step zigzag Stretch Blindhem Overlock Blindhem Scalop 4 Step BH Stitch Pattern Straight Stitch Zigzag 3 Step zigzag Stretch Blindhem Blindhem Overlock Universal Bridging Stitch Scalop 4 Step BH Tripple Straight Tripple Zigzag Honeycomb - Bernina Bernette 12 | Instruction Manual - Page 61
Stichmuster Geradstich Zickzack 3-Stufen-Zickzack Stretch Blindstich Overlock Blindstich Raupennaht 4-Stufen-Knopfloch Stichübersicht DE Stichmuster Geradstich Zickzack 3-Stufen-Zickzack Stretch Blindstich Blindstich Overlock Universal Bridging Stich Raupennaht 4-Stufen-Knopfloch - Bernina Bernette 12 | Instruction Manual - Page 62
DNEL Steekoverzicht Steek Rechte steek Zigzagsteek 3-fase-zigzag Stretch-blindzoom Overlock Blindzoom Schelpsteek 4-fase-knoopsgat Steek Rechte steek Zigzagsteek 3-fase-zigzag Stretch-blindzoom Blindzoom Overlock Universele steek Rimpelsteek Point coquillage 4-fase-knoopsga Drievoudige rechte - Bernina Bernette 12 | Instruction Manual - Page 63
Motifs de point Point droit Point zigzag Point zigzag à 3 niveaux Point invisible stretch Point de surjet Point invisible Point coquillage Boutonnière à 4 niveaux Aperçu sur les motifs de points FR Motifs de point Point droit Point zigzag 3-Stufen-Zickzack Point invisible stretch Point invisible - Bernina Bernette 12 | Instruction Manual - Page 64
10 12 EN Straight stitching and needle position Function of stitch length dial Straight Stitching Turn the pattern selector dial to " " or " ". The stitch length is controlled with the stitch length dial. While "2" - "3" on the dial gives a suitable stitch length for ordinary purposes. - Bernina Bernette 12 | Instruction Manual - Page 65
DE Geradstich und Nadelposition Stichlängenknopf-Funktion für Geradstich Stichwahlknopf auf " " oder " " stellen. Die Stichlänge wird mit dem Stichlängenknopf eingestellt. Die geeignete Stichlänge für normalen Gebrauch liegt bei "2" - "3" auf dem Knopf. Allgemein gilt: je leichter der Stoff, - Bernina Bernette 12 | Instruction Manual - Page 66
15 EN Straight stitching and needle position Function of stitch length dial Straight Stitching Turn the pattern selector dial to " " or " ". The stitch length is controlled - Bernina Bernette 12 | Instruction Manual - Page 67
DE Geradstich und Nadelposition Stichlängenknopf-Funktion für Geradstich Stichwahlknopf auf " " oder " " stellen. Die Stichlänge wird mit dem Stichlängenknopf eingestellt. Die geeignete Stichlänge für normalen Gebrauch liegt bei "2" - "3" auf dem Knopf. Allgemein gilt: je leichter der Stoff, - Bernina Bernette 12 | Instruction Manual - Page 68
When the stitch length is set between "0" - "1", the stitches are very close together producing the "satin stitch" which is used for making buttonholes and decorative stitches. Please note: No "S" marking is shown on the stitch length dial by model 10. 502020.75.24_021V4D0101_1010_IM_bernette 10 12 - Bernina Bernette 12 | Instruction Manual - Page 69
DE Zickzackstich NL Zigzagsteek FR Point zigzag Stichwahlknopf auf " " oder " " stellen. Stichlängenknopf-Funktion Die Dichte der Zickzackstiche erhöht sich, je näher die Einstellung des Stichlängenknopfes an "0" kommt. Saubere Zickzackstiche werden in der Regel bei "2.5" oder tiefer erreicht. - Bernina Bernette 12 | Instruction Manual - Page 70
15 EN Zigzag stitching Function of stitch width dial The maximum zigzag stitch width for zigzag stitching is "5"; however, the width can be reduced on any patterns. The width increases as you move zigzag dial from "0" - "5". For twin needle sewing, never set the width wider than "2.5". Function of - Bernina Bernette 12 | Instruction Manual - Page 71
DE Zickzackstich NL Zigzagsteek FR Point zigzag Stichbreitenknopf-Funktion Die max. Zickzack-Stichbreite beim Zickzack Nähen ist "5". Die Breite kann jedoch bei jedem Stichmuster verkleinert werden. Die Breite vergrössert sich beim Drehen des Zickzackknopfes von "0" "5". Beim Nähen mit - Bernina Bernette 12 | Instruction Manual - Page 72
12 15 EN Blind hem/lingerie stitch Presser foot available as optional accessory. For hems, curtains, trousers, skirts, etc. Blind hem/lingerie for firm fabrics. Blind hem for stretch fabrics. Set the machine as illustrated. Note: It takes practice to sew blind hems. Always make a sewing test first - Bernina Bernette 12 | Instruction Manual - Page 73
sur tissus rigides. Ourlet à jour sur tissus stretch. Régler la machine comme illustré. Remarque: La réalisation d'un joli ourlet à jour demande plié. Si nécessaire, régler et adapter la largeur de point. Régler le guide (2) en tournant le bouton (4) jusqu'à ce qu'il repose sur le rebord du - Bernina Bernette 12 | Instruction Manual - Page 74
EN Overlock stitches Presser foot available as optional accessory. Seams, neatening, visible hems. Turn the stitch length dial to "S". Set stitch width control between "3" - "5". (model 15) The stitch width can be adjusted to suit the fabric. Stretch overlock: " " For fine knits, jerseys, neck edges - Bernina Bernette 12 | Instruction Manual - Page 75
rebords, les ourlets visibles. Régler le bouton de réglage de la longueur de point sur "S". Régler la largeur de point entre "3" et "5" (modèle 15). La largeur de point peut être adaptée au tissu. Surjet stretch: Pour les lainages fins, jerseys, bordures d'encolure, etc. (1) Surjet double: Pour les - Bernina Bernette 12 | Instruction Manual - Page 76
Install the darning plate. (1) Change presser foot to button sewing foot. Turn the stitch length dial to "0". Position the work under the foot. Place the button on the marked position and lower the foot. Set the pattern selector knob on " " or " " and sew a few securing stitches. Select the zigzag - Bernina Bernette 12 | Instruction Manual - Page 77
DE Knöpfe annähen NL Knopen aanzetten FR Couture de boutons Stopfplatte einsetzen. (1) Nähfuss mit Knopfannähfuss austauschen. Stichlängenknopf auf "0" stellen. Näharbeit unter den Fuss legen. Knopf an die gewünschte Stelle legen und Nähfuss senken. Stichwahlknopf auf " " oder auf " " stellen und - Bernina Bernette 12 | Instruction Manual - Page 78
15 EN Sewing on buttons Move the drop feed control to right side to lower the feed dogs. (1) Change presser foot to button sewing foot. Turn the stitch length dial to "0". Position the work under the foot. Place the button in the desired position, lower the foot. Set the pattern selector knob on - Bernina Bernette 12 | Instruction Manual - Page 79
DE Knöpfe annähen NL Knopen aanzetten FR Couture de boutons Hebel für Transporteur nach rechts schieben, um Transporteur zu versenken. (1) Nähfuss mit Knopfannähfuss austauschen. Stichlängenknopf auf "0" stellen. Näharbeit unter den Fuss legen. Knopf an die gewünschte Stelle legen und Nähfuss - Bernina Bernette 12 | Instruction Manual - Page 80
so that the center line of the fabric buttonhole comes to the center of the foot hole. Adjust the stitch length dial between "0.5-1" for stitch density. Note: Density varies according to the fabric. Always test sew a buttonhole. Follow the 4-step sequence changing from one step to another with - Bernina Bernette 12 | Instruction Manual - Page 81
DE Knopflöcher nähen NL Knoopsgaten naaien FR Couture de boutonnières Vorbereitung Stichwahlknopf auf " " stellen. 1. Allzweckfuss entfernen und Knopflochfuss einsetzen. 2. Durchmesser und Dicke des Knopfs messen plus 0,3 cm für Riegel und Knopflochgrösse auf Stoff markieren. 3. Stoff so - Bernina Bernette 12 | Instruction Manual - Page 82
the order shown in fig. (D). 8. Stop the machine when the buttonhole is sewn. Making a Buttonhole on Stretch Fabrics (fig. E) When sewing buttonholes on stretch fabric, place a gimp thread under the buttonhole foot. 1. Mark the position of the buttonhole on the fabric with the tailor`s chalk, attach - Bernina Bernette 12 | Instruction Manual - Page 83
l'arrière comme illustré (C). 6. Commencer la couture en tenant légèrement le fil supérieur. 7. Coudre la boutonnière dans l'ordre illustré (D). 8. Arrêter la machine quand la boutonnière est cousue. Couture d'une boutonnière sur un tissu stretch (E) Glisser une ganse sous le pied pour la couture de - Bernina Bernette 12 | Instruction Manual - Page 84
the machine as illustrated. Pattern selector on " " or " ". Set stitch length control between "2.5" - "4" (according to thickness of fabric). Turn the stitch width dial to "0". (model 15) The zip foot can be inserted right or left, depending on which side of the foot you are going to sew. (1) To sew - Bernina Bernette 12 | Instruction Manual - Page 85
(2). FR Couture de fermetures à glissière et de nervures Régler la machine comme illustré. Régler le bouton sélecteur de point sur " " ou "4" (selon l'épaisseur du tissu). Régler la largeur de point sur "0". (modèle 15) La fermeture à glissière peut être placée à droite ou à gauche selon la - Bernina Bernette 12 | Instruction Manual - Page 86
10 12 15 EN Hemmer foot Presser foot available as optional accessory. For hems in fine or sheer fabrics. Set the machine as illustrated. Pattern selector on " " or " ". Set stitch length control between "2.5" - "4". Turn the stitch width dial to "0". (model 15) Neaten the edge of the fabric. At the - Bernina Bernette 12 | Instruction Manual - Page 87
de-biche en option. Pour ourler des tissus fins ou des voilages. Régler la machine comme illustré. Régler le bouton sélecteur de point sur " " ou " et "4". Régler le bouton de réglage de la largeur depoint sur "0". (modèle 15) Surfiler le rebord du tissu. Replier le rebord(deux fois 3 mm) et arrêter - Bernina Bernette 12 | Instruction Manual - Page 88
EN 3-step zig-zag Sewing on lace and elastic, darning, mending, reinforcing edges. Set the machine as illustrated. Pattern selector on " ". Set stitch length control between "1" - "2". Set stitch width control between "3" - "5". (model 15) Place patch in position. The stitch length can be shortened - Bernina Bernette 12 | Instruction Manual - Page 89
le reprisage, le raccommodage, pour renforcer des rebords. Régler la machine comme illustré. Régler lebouton sélecteur de point sur " ". Régler entre "1" et "2". Régler la largeur de point entre "3" - "5" (modèle 15). Placer une pièce. La longueur de point peut être réduite pour former des points - Bernina Bernette 12 | Instruction Manual - Page 90
12 15 EN Stitch selection Triple straight stitch: (1) Pattern selector on " " or " ". For hardwearing seams. Turn the stitch length dial to "S". Turn the stitch width dial to "0". The machine sews two stitches forwards and one stitch backwards. This gives triple reinforcement. Triple zigzag: (2) - Bernina Bernette 12 | Instruction Manual - Page 91
sur "S". Régler le bouton de réglage de la la rgeurde point sur "0". La machine coud deux points en avant et un en arrière. Ce point est ainsi renforcé point sur "S". Régler la largeur de point entre "3" et "5" (modèle 15). Le zigzag triple est recommandé pour les tissus épais tels que les jeans, - Bernina Bernette 12 | Instruction Manual - Page 92
, T-shirts, underwear, etc. Set the machine as illustrated. Pattern selector on " ". Turn the stitch length dial to "S". Set stitch width control between "4" - "5". (model 15) This stitch can be used for all types of jersey as well as for woven fabrics. (1) Sew at 1 cm (1/4") from the fabric edge - Bernina Bernette 12 | Instruction Manual - Page 93
af (2). Coutures, ourlets, t-shirts, lingerie, etc. Régler la machine comme illustré. Régler le bouton sélecteur de point sur " ". longueurde point sur "S". Régler la largeur de point entre "4" et "5" (modèle 15). Ce point sera utilisé sur les tissus en jersey ainsi que ceux tissés. (1) Coudre - Bernina Bernette 12 | Instruction Manual - Page 94
10 12 15 EN Cording foot Presser foot available as optional accessory. Decorative effects, cushions, tablecloths, etc. Set the machine as illustrated. Various stitches are suitable for sewing on cord, e.g. Zigzag, decorative stitches. Pattern selector on " ". Set stitch length control between "1" - - Bernina Bernette 12 | Instruction Manual - Page 95
en option. Effets décoratifs, coussins, nappes, etc. Régler la machine comme illustré. Certains points comme le zigzag, zigzag triple, les points point entre "1" et "4". Régler la largeur de point entre "3" et "5" (modèle 15). Guider le fil sous la tige du pied pour cordon. Le fil doit être glissé - Bernina Bernette 12 | Instruction Manual - Page 96
motion darning Presser foot available as optional accessory. Set the machine as illustrated. Install the darning plate. (1) Remove the presser foot holder. (2) (see page 26) Pattern selector on " " or " ". Turn the stitch length dial to "0". Attach the darning foot to the presser foot bar. The lever - Bernina Bernette 12 | Instruction Manual - Page 97
bij normale naaiwerk zaamheden. Pied-de-biche en option. Régler la machine comme illustré. Placer la plaque de reprisage. (1) Retirer le pied (2). sur la tige. Le levier (A) doit se trouver derrière la vis du support d'aiguille (B). Pousser depuis l'arrière le pied avec l'index et visser (C). - Bernina Bernette 12 | Instruction Manual - Page 98
15 EN Free motion darning Presser foot available as optional accessory. Set the machine as illustrated. Move the drop feed control to right side to lower the feed dogs. (1) Remove the presser foot holder. (2) (see page 26) Pattern selector on " ". Turn the stitch length dial to "0". Turn the - Bernina Bernette 12 | Instruction Manual - Page 99
normaal naaiwerk naar links. Pied-de-biche en option. Régler la machine comme illustré. Déplacer vers la droite le levier de la griffe reprisage sur la tige. Le levier (A) doit se trouver derrière la vis du support d'aiguille (B). Pousser depuis l'arrière le pied avec l'index et visser (C). (3) - Bernina Bernette 12 | Instruction Manual - Page 100
EN Practical stitches Set the machine as illustrated. Turn the stitch width dial and stitch length dial to suit the fabric. Set stitch length control between "1" - "2". Set stitch width control between "3" - "5". (model 15) Shell hem (1) Pattern selector on " ". For decorative edges. Suitable for - Bernina Bernette 12 | Instruction Manual - Page 101
Bij het model 10 staat op de steeklengteknop geen positie "S". Régler la machine comme illustré. Régler le bouton de réglage de la largeur et de la entre "1" et "2". Régler la largeur de point entre "3" et "5" (modèle 15). Ourlet coquille (1) Régler le bouton sélecteur de point sur " ". Rebords dé - Bernina Bernette 12 | Instruction Manual - Page 102
15 EN Decorative stitches Set the machine as illustrated. Turn the stitch width dial and stitch length dial to suit the fabric. Set stitch length control "0.5" - "1". Set stitch width control "3" - "5". For edges, - Bernina Bernette 12 | Instruction Manual - Page 103
Zet de steekkeuzeknop op " ". Voor alle stoffen en werkzaamheden. Decoratieve steken (2) Zet de steekkeuzeknop op " ". Voor alle stoffen en werkzaamheden. Régler la machine comme illustré. Régler le bouton de réglage de la largeur et de la longueur de point selon le genre du tissu. Régler le bouton - Bernina Bernette 12 | Instruction Manual - Page 104
under laying fabric to be used. - Lower the presser foot and alternately sew forward or reverse using the reverse sewing lever. - Repeat this motion until the area to be darned is filled with rows of stitching. For reverse sewing instructions, see figure A, page 42. Please note: No "S" marking is - Bernina Bernette 12 | Instruction Manual - Page 105
DE Stopfen NL Stoppen FR Reprisage - Stichlängenknopf auf gewünschte Länge einstellen. - Stichwahlknopf auf " " oder " " stellen. - Mittlere Nadelposition. - Den zu stopfenden Stoff zusammen mit dem Unterlagenstoff unter den Nähfuss legen. - Nähfuss senken und abwechslungsweise vor- oder rückwä - Bernina Bernette 12 | Instruction Manual - Page 106
10 12 15 EN Attaching lac - Turn stitch length dial to the desired length. - Pattern selector on " " slightly as required by the pattern of the lace. - Sew on the edge of the fabric fold. - You can add a decorative touch by using the satin stitch to sew on the lace. Please note: No "S" marking is - Bernina Bernette 12 | Instruction Manual - Page 107
DE Spitze einnähen NL Kant aanzetten - Stichlängenknopf auf gewünschte Länge einstellen. - Stichwahlknopf auf " " oder " " stellen. - Mittlere Nadelposition. - Stoffkante falten (ca. 6 mm). - Spitze so unter die gefaltete Stoffkantelegen, dass sie ein wenig unter den Stoff zu liegen kommt, je nach - Bernina Bernette 12 | Instruction Manual - Page 108
10 12 15 EN Applique - Turn stitch length dial to the desired length. - Pattern selector dial on " " or " " . - Cut out the applique design and baste it to the fabric. - Sew slowly around the edge of the design. - Trim excess material outside the stitching. Make sure not to cut any stitches. - - Bernina Bernette 12 | Instruction Manual - Page 109
DE Applikation NL Appliqueren FR Appliqué - Stichlängenknopf auf gewünschte Länge einstellen. - Stichwahlknopf auf " " oder " " stellen. - Applikationsmotiv ausschneiden und auf den Stoff heften. - Langsam die Kanten des Motivs übernähen. - Überschüssigen Stoff ausserhalb der Stiche abschneiden. - Bernina Bernette 12 | Instruction Manual - Page 110
makesure the stitch width dial is set between "0" and "2.5". Do not use twin needle atsetting above "2.5". (model 15 ) Use only twin needle assemblies with max. 2 mm needle distance. (i.e.bernette part number 502020.62.91) Please note: No "S" marking is shown on the stitch length dial by model 10 - Bernina Bernette 12 | Instruction Manual - Page 111
"0" en "2,5" is ingesteld. Gebruik de tweelingnaald niet als de instelling groter dan "2,5" is. (Model 15) Gebruik alleen tweelingnaalden met een maximale afstand van 2 mm tussen de naalden (d.w.z. bernette - artikelnummer 502020.62.91). - Régler le bouton de réglage de la longueur de point à la - Bernina Bernette 12 | Instruction Manual - Page 112
optional accessory. - Set the machine as illustrated. - Pattern selector on " " or " " . - Remove the presser foot and the presser foot holder. - Install the darning plate. (1) (model 10/12) - Move the drop feed control to right side to lower the feed dogs. (2) (model 15) - Lower presser foot lever - Bernina Bernette 12 | Instruction Manual - Page 113
bouton sélecteur de point sur " " ou " ". - Régler la machine comme illustré. - Retirer le pied et le support du pied-de- biche. - Fixer la plaque de reprisage. (1) ( Déplacer vers la gauche le levier de la griffe d'entraînement. (modèle 15). Attention: Dans le modèle 10 il n'y a pas de "S" marquée - Bernina Bernette 12 | Instruction Manual - Page 114
15 EN Quilt stitch Set the machine as illustrated. Turn the stitch width dial and stitch length dial to work. Quilt (2) Pattern selector on " ". For all fabrics and all types of work. The bobbin thread must come through the right side. Depending on the fabric used increase the upper tension. Use - Bernina Bernette 12 | Instruction Manual - Page 115
de bovendraadspanning afhankelijk van de stof. Gebruik monofilgaren = "handgemaakt" effect (bovendraad). Pas de balans, indien nodig, aan. FR Point quilt Régler la machine comme illustré. Régler le bouton de réglage de la largeur et de la longueur de point selon le genre dutissu. Régler le bouton - Bernina Bernette 12 | Instruction Manual - Page 116
as optional accessory. - Set stitch length control between "2" - "4". - Pattern selector on " " or " ". - Center needle position. Procedure: Seam allowance 1/4 inch (6 mm) Place the fabric under the presser foot so that the raw edges are aligned with the seam guide sew seam by guiding the fabric - Bernina Bernette 12 | Instruction Manual - Page 117
DE Quilten NL Quilten FR Quilt 1/4" Quiltfuss erhältlich als Spezialzubehör. - Stichlängenknopf zwischen "2" - "4" einstellen. - Stichwahlknopf auf " " oder " " stellen. - Mittlere Nadelposition. Arbeitsweise: Nähtiefe 1/4 inch (6 mm) Nähgut so unter den Nähfuss legen, dass die Stoffkanten an den - Bernina Bernette 12 | Instruction Manual - Page 118
15 EN Invisible zipper foot This foot is available as special accessory. This foot is used to insert invisible zippers so that they are covered by the seam, and thus hidden. Attach the invisible zipper foot to the machine fixing the fabric. Change to regular sewing foot and saw as close as possible - Bernina Bernette 12 | Instruction Manual - Page 119
fermeture à glissière jusqu'à la butée du coulisseau. Retirer l'ouvrage de la machine. Coudre la deuxième moitié de la fermeture à glissière en plaçant coudre la fermeture jusqu'à la butée du coulisseau. Retirer l'ouvrage de la machine. Fermer la fermeture à glissière. Plier le tissu, l'extrémité de - Bernina Bernette 12 | Instruction Manual - Page 120
10 12 15 EN Gathering Presser foot available as optional accessory. - Attach the gathering foot. - Pattern selector on " " or " ". - Center needle position - Set stitch length control between "2.5" "4". - Sew a single row or multiple rows of straight stitches. - If more gathering is required, - Bernina Bernette 12 | Instruction Manual - Page 121
DE Kräuseln NL Rimpelen FR Fronces Nähfuss erhältlich als Spezialzubehör. - Kräuselfuss montieren. - Stichwahlknopf auf " " oder " " stellen. - Mittlere Nadelposition. - Stichlängenknopf zwischen "2.5" - "4" einstellen. - Eine oder mehrere Steppnähte nähen. - Für ein stärkeres Kräuseln den - Bernina Bernette 12 | Instruction Manual - Page 122
10 12 15 EN Walking foot Presser foot available as optional accessory. Always try to sew first without the walking foot accessory which should be used only when necessary. The "Walking foot" accessory equalizes the feeding of the upper and lower layers of fabric and improves the matching of plaids, - Bernina Bernette 12 | Instruction Manual - Page 123
le rapport de plaids, rayures et motifs. Ce pied favorise l'avancement régulier sur des tissus difficiles. 1. Relever la barre du pied. 2. Retirer le support du pied en dévissant la vis (3) (consulter la page 27). 3. Fixer le pied de transport supérieur comme illustré: i) La vis de fixation doit - Bernina Bernette 12 | Instruction Manual - Page 124
at the point (d) (1 to 2 drops) with sewing machine oil. Turn the handwheel until the driver (e) is in the left position. Replace the hook (c) then the hook race cover (b), snap back the two retaining arms (a). Insert bobbin and bobbin case and replace the stitch plate. Note: When the needle is - Bernina Bernette 12 | Instruction Manual - Page 125
regelmatigworden verwijderd. Uw naaimachine moetregelmatig door uw BERNINA dealerworden gecontroleerd. Attention: Mettre toujours le avec de l'huile spéciale pour machine (1 à 2 gouttes). Tourner le volant jusqu'à ce que l'entraînement (e) se trouve à gauche. Replacer la coursière (c) et l'anneau - Bernina Bernette 12 | Instruction Manual - Page 126
10 12 15 Light bulb replacement Attention: Turn the power switch off and wait until the lamp has cooled down before touching it. Loosen the screw (a) on the left side of the sewing head and remove the face plate (b). (1) Pull light bulb downward to remove. Replace the bulb with same type rated 5w/ - Bernina Bernette 12 | Instruction Manual - Page 127
DE Unterhalt NL Onderhoud Maintenance Glühlampe wechseln Gloeilamp verwisselen Achtung: Hauptschalter auf "O" stellen. Maschine durch herausziehen des Netzstecker elektrisch vom Stromnetz trennen. Zuerst Glühlampe herunterkühlen lassen. Die Abdeckung entfernen, Schraube (a) lösen, Kopfdeckel - Bernina Bernette 12 | Instruction Manual - Page 128
DEEN Troubleshooting guide Problem Upper thread breaks Skipped stitches Needle breaks Loose stitches Seams gather or pucker Uneven stitches, uneven feed The machine is noisy The machine jams Machine sews in reverse Cause 1. The machine is not threaded correctly 2. The thread tension is too tight - Bernina Bernette 12 | Instruction Manual - Page 129
Behebung von Störungen DE Störung Oberfaden reisst Fehlstiche Nadelbruch Lose Stiche Nähte ziehensich zusammen oder Stoff kräuselt Stiche und Transport sind ungleichmässig Maschine ist zu laut Maschine klemmt Maschine näht rückwärts Ursache 1. Die Maschine ist nicht richtig eingefädelt 2. Die - Bernina Bernette 12 | Instruction Manual - Page 130
DNEL Storingen opheffen Storing Bovendraad breekt Oorzaak 1. De naaimachine is niet correct ingeregen 2. De draadspanning is te hoog 3. Het garen is te dik voor de naald 4. De naald is niet correct ingezet 5. Het garen is om de garenklospen gewikkeld 6. De naald is beschadigd Steekfouten 1. De - Bernina Bernette 12 | Instruction Manual - Page 131
fil s'est enroulé autour de la tige du support de bobine 6. L'aiguille est abîmée Maîtrise des problèmes 1. Réenfiler la machine 2. Réduire la tension du fil (chiffre inférieur) 3. Choisir un numéro supérieur d'aiguille 4. Retirer l'aiguille et replacer dans la bonne position (le côté plat doit se - Bernina Bernette 12 | Instruction Manual - Page 132
92, 94 G Gathering 116 H Hemmer foot How to drop feed dog How to sew buttonholes 82 46 76, 78 I Importent savety Instructions 1, 2 Inserting bobbin 30 Inserting the needle 32 Invisible zipper foot 114 L Light bulb replacement 122 M Maintenance 120 Monogramming and embroidering - Bernina Bernette 12 | Instruction Manual - Page 133
57 55, 87 101 45 Transporteur versenken 45, 47 U Unterfaden heraufholen 41 Unterfaden spulen 29 Unterhalt 121, 123 Ü Übersicht 15 W Wabenstich 89 Wichtige Sicherheits- hinweise 3, 4 Z Zickzackstich 65, 67 Zubehör 11, 19 Zweistufen-Nähfuss-hebel 25 Zwillingsnadel 107 502020 - Bernina Bernette 12 | Instruction Manual - Page 134
43 Nuttige steken 97 O Onderdraad inrijgen 39 Onderdraad omhooghalen 41 Onderdraad opspoelen 29 Onderhoud 121, 123 Overlocksteek 71 Overzicht 15 Q Quilten 113 Quiltsteek 111 R Rechte steek en naaldpositie 61, 63 Rimpelen 117 Rits inzetten en biezen naaien 81 Ritsvoet - Bernina Bernette 12 | Instruction Manual - Page 135
47 Accessoires 17, 19 Aperçu 15 Appliqué 105 Aiguille jumelée 107 et broderie avec un cadre de broderie 109 Montage du support du pied-de-biche 27 O Ourlet à jour/ point curité 5, 6 Q Quilt 113 R Raccordement de la machine 23 Réglage de la pression du pied-de-biche 25 - Bernina Bernette 12 | Instruction Manual - Page 136
For more information visit www.mybernette.com 502020.75.24_021V4D0101_1010_IM_bernette 10 12 15_EN_DE_NL_FR
-
 1
1 -
 2
2 -
 3
3 -
 4
4 -
 5
5 -
 6
6 -
 7
7 -
8
-
9
-
10
-
11
-
12
-
13
-
14
-
15
-
16
-
17
-
18
-
19
-
20
-
21
-
22
-
23
-
24
-
25
-
26
-
27
-
28
-
29
-
30
-
31
-
32
-
33
-
34
-
35
-
36
-
37
-
38
-
39
-
40
-
41
-
42
-
43
-
44
-
45
-
46
-
47
-
48
-
49
-
50
-
51
-
52
-
53
-
54
-
55
-
56
-
57
-
58
-
59
-
60
-
61
-
62
-
63
-
64
-
65
-
66
-
67
-
68
-
69
-
70
-
71
-
72
-
73
-
74
-
75
-
76
-
77
-
78
-
79
-
80
-
81
-
82
-
83
-
84
-
85
-
86
-
87
-
88
-
89
-
90
-
91
-
92
-
93
-
94
-
95
-
96
-
97
-
98
-
99
-
100
-
101
-
102
-
103
-
104
-
105
-
106
-
107
-
108
-
109
-
110
-
111
-
112
-
113
-
114
-
115
-
116
-
117
-
118
-
119
-
120
-
121
-
122
-
123
-
124
-
125
-
126
-
127
-
128
-
129
-
130
-
131
-
132
-
133
-
134
-
135
-
136
 |
 |
my
world
my
bernette
502020.75.24_021V4D0101_1010_IM_bernette 10 12 15_EN_DE_NL_FR