Bernina Bernette 340 deco User Guide - Page 19
Hooping, Step 1, Step 2, Important
 |
View all Bernina Bernette 340 deco manuals
Add to My Manuals
Save this manual to your list of manuals |
Page 19 highlights
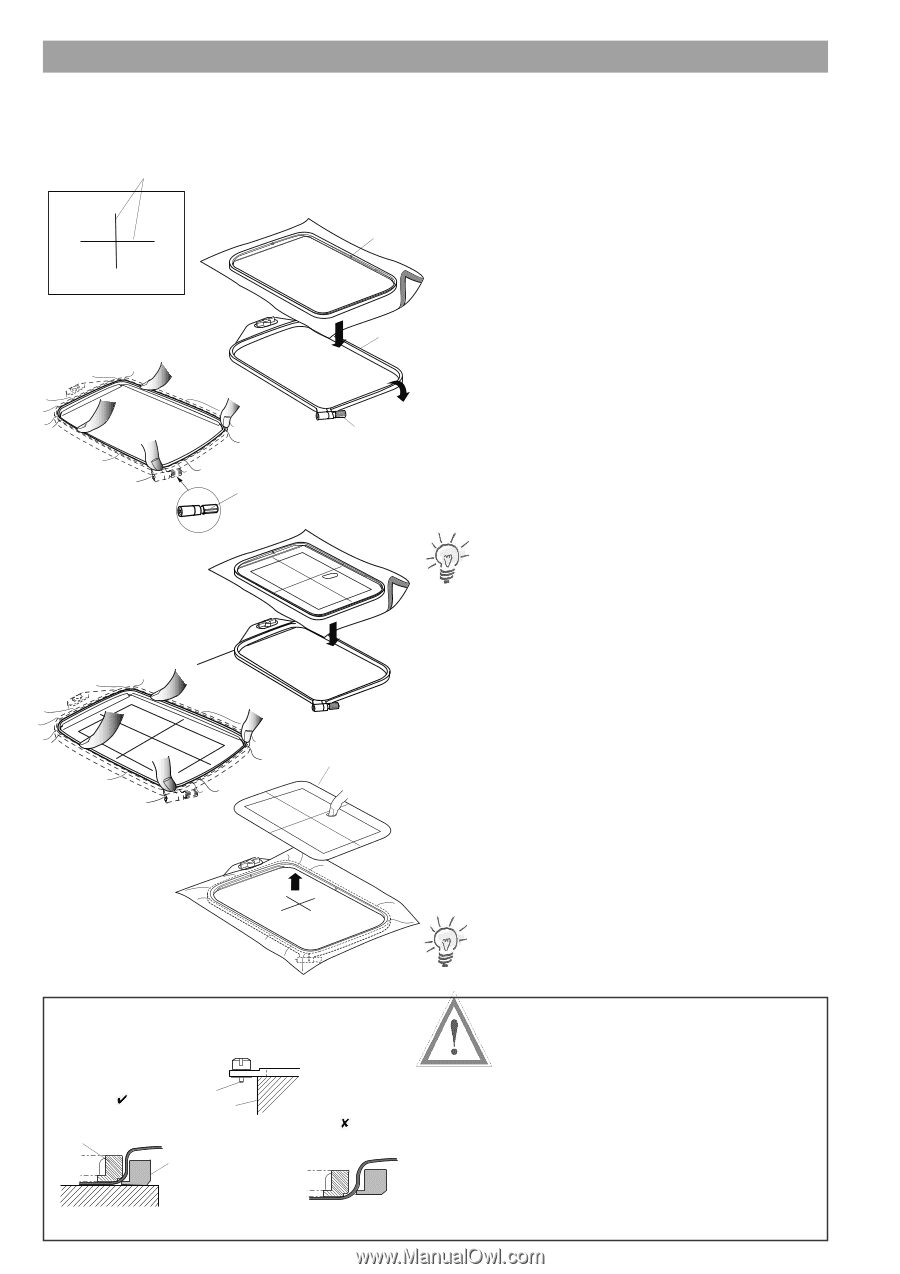
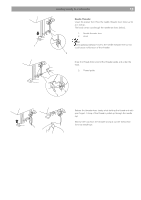
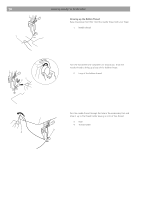
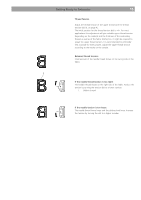
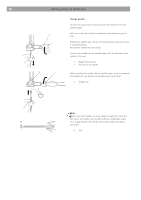
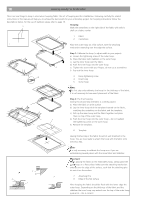
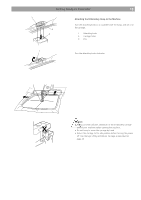
18 Getting Ready to Embroider There are two things to keep in mind when hooping fabric: the act of hooping and the stabilization. Following carefully the related instructions in this manual will help you to achieve the best results for your embroidery project. For hooping instructions follow the descriptions below, for the use of stabilizer please refer to page 19. Hooping 2 Mark the centerlines on the right side of the fabric with tailor's chalk or a fabric marker. 4 1 Fabric 2 Centerlines 1 Place the outer hoop on a flat surface, with the attaching mechanism extending over the edge the surface. 5 3 Step 1: Calibrate the hoop (= adjust width to your project) a) Loosen the tightening screw of the outer hoop. b) Place the fabric with stabilizer on the outer hoop. c) Lay the inner hoop over the fabric. d) Push the inner hoop into the outer hoop e) Tighten the screw with your fingers, do not use a screwdriver. f) Pop out the inner hoop 3 3 Hoop tightening screw 4 Inner hoop 5 Outer hoop Note: This first step only calibrates the hoop for the thickness of the fabric. It is not necessary to have exact placement of the fabric. Step 2: The final hooping. During this second step the fabric is correctly placed. a) Place the fabric on a flat surface b) Lay the inner hoop with the template inserted on the fabric, matching the centerlines on the fabric and the template. c) Pick up the inner hoop and the fabric together and place them on top of the outer hoop. 6 d) Push the inner hoop into the outer hoop - do not readjust the tightening screw on the outer hoop. e) Remove the template. 6 Template Having finished step 2 the fabric should sit well stretched in the hoop. You are now ready to attach the hoop with the fabric onto the Deco 340. Note: It is only necessary to calibrate the hoop once if you are embroidering several pieces with the same fabric and stabilizer. 7 8 4 5 Important: When placing the fabric on the embroidery hoop, always place the outer hoop on a flat surface. Make sure the attaching mechanism extends over the edge of the surface, such that the attaching pins do not sit on the surface. 7 Attaching Pins 8 Edge of the flat surface After hooping the fabric should be flush with the lower edge the outer hoop. Depending on the thickness of the fabric and the stabilizer the inner hoop may extend over the top of the outer hoop quite a bit - this is correct!
-
 1
1 -
2
-
3
-
4
-
5
-
6
-
7
-
8
-
9
-
10
-
11
-
12
-
13
-
 14
14 -
 15
15 -
 16
16 -
 17
17 -
 18
18 -
 19
19 -
 20
20 -
 21
21 -
 22
22 -
 23
23 -
 24
24 -
25
-
26
-
27
-
28
-
29
-
30
-
31
-
32
-
33
-
34
-
35
-
36
-
37
-
38
-
39
-
40
-
41
-
42
-
43
-
44
-
45
-
46
-
47
-
48
-
49
-
50
-
51
-
52
-
53
-
54
-
55
-
56
-
57
-
58
-
59
-
60
-
61
-
62
-
63
-
64
-
65
-
66
-
67
-
68
-
69
-
70
-
71
-
72
-
73
-
74
-
75
 |
 |