Bernina Bernette 340 deco User Guide - Page 41
The last screen reminds you to move back several stitches
 |
View all Bernina Bernette 340 deco manuals
Add to My Manuals
Save this manual to your list of manuals |
Page 41 highlights
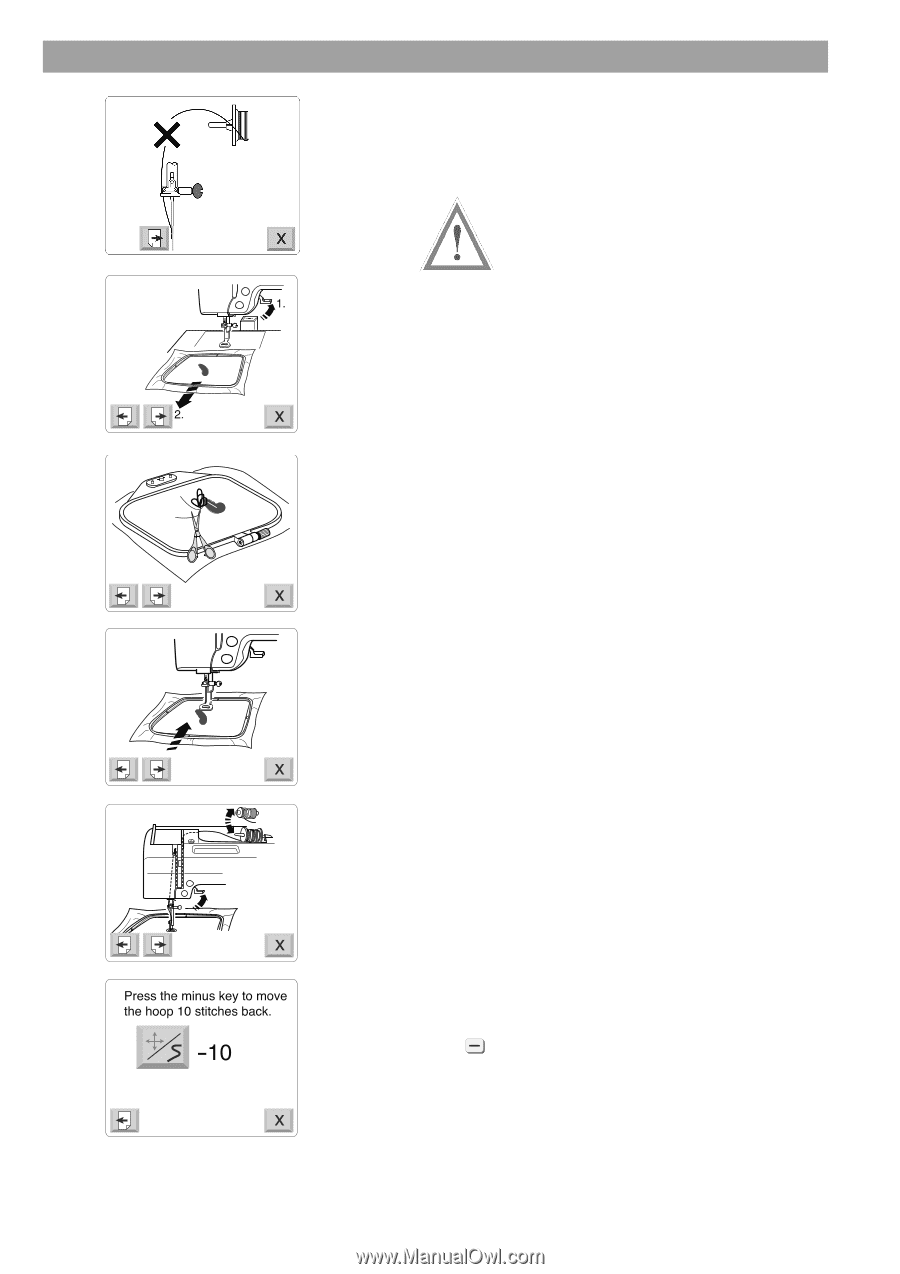
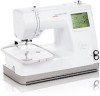
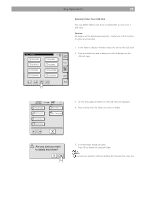
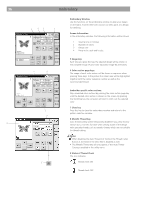
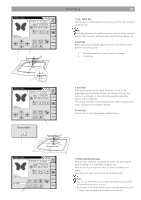
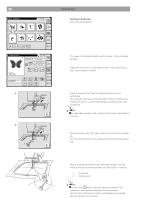
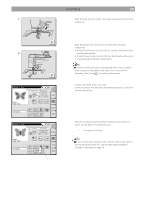
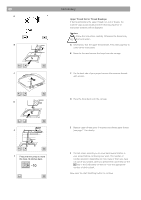
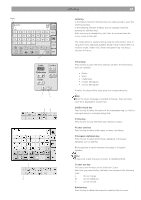
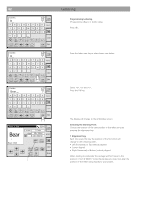
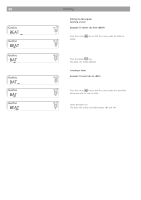
40 A B C D E F Embroidery Upper Thread End or Thread Breakage If during embroidery the upper thread runs out or breaks, the machine stops automatically and the following sequence of instruction windows will be displayed. Caution: Please follow the instructions carefully. Otherwise the thread may jam in the hook system. A Information, that the upper thread broke. Press next page key to continue the instructions. B Raise the foot and remove the hoop from the carriage C On the back side of your project remove the excessive threads with scissors. D Place the hoop back onto the carriage E Replace upper thread spool if required and thread upper thread (see page 11 for details) F The last screen reminds you to move back several stitches in your project before continuing your work. The number of stitches required is depending on how many of them you have cut out of your project. After you pressed the Cancel key use the key in the Embroidery window to move the appropriate number of stitches back. Now press the start Start/Stop button to continue.
-
 1
1 -
2
-
3
-
4
-
5
-
6
-
7
-
8
-
9
-
10
-
11
-
12
-
13
-
14
-
15
-
16
-
17
-
18
-
19
-
20
-
21
-
22
-
23
-
24
-
25
-
26
-
27
-
28
-
29
-
30
-
31
-
32
-
33
-
34
-
35
-
 36
36 -
 37
37 -
 38
38 -
 39
39 -
 40
40 -
 41
41 -
 42
42 -
 43
43 -
 44
44 -
 45
45 -
 46
46 -
47
-
48
-
49
-
50
-
51
-
52
-
53
-
54
-
55
-
56
-
57
-
58
-
59
-
60
-
61
-
62
-
63
-
64
-
65
-
66
-
67
-
68
-
69
-
70
-
71
-
72
-
73
-
74
-
75
 |
 |