Binatone LS1000W User Guide
Binatone LS1000W Manual
 |
View all Binatone LS1000W manuals
Add to My Manuals
Save this manual to your list of manuals |
Binatone LS1000W manual content summary:
- Binatone LS1000W | User Guide - Page 1
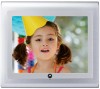
User's Guide For LS1000W 10.4" (26.4 cm) Digital Photo Frame Wi-Fi® Enabled Warning Use only the power adapter supplied with your product. - Binatone LS1000W | User Guide - Page 2
938802 in Europe On the Web: www.motorola.com This User's Guide provides you with all the information you need to get the most from your digital photo frame. Before you start using, you will need to set up your digital photo frame. Follow the simple instructions in "Getting started", on the next - Binatone LS1000W | User Guide - Page 3
Getting started Frame Overview 1. Navigation and buttons 2. EXIT button 3. ON/OFF button 4. Hanging slot (Portrait position) play the audio. 9. USB port for inserting a USB flash drive that contains the photos or music you want to play. 10. Memory card slot for inserting an SD, SDHC, MMC memory - Binatone LS1000W | User Guide - Page 4
the remote control battery 9 2. Using the photo frame 10 2.1 Using the control buttons 10 2.2 services 33 3.5.3.1 Using Picasa 33 3.5.3.2 Using Flickr 34 3.5.3.3 Using Framechannel 35 3.5.3.3.1 Framechannel custom settings 35 3.5.3.4 Using RSS 36 3.5.3.5 Using WEB Radio - Binatone LS1000W | User Guide - Page 5
digital photo frame; there are no user-serviceable parts inside. z If the LCD screen breaks, do not touch the glass or liquid. Contact Motorola customer support for assistance. z Use only the power adapter supplied with your digital photo frame. Compatible photo format Your digital photo frame can - Binatone LS1000W | User Guide - Page 6
the stand locking slot as illustrated, until the stand is secured to the photo frame. 1.1.1 Landscape position To place the photo frame in landscape position, follow the steps below to install the stand. 1. Hold the photo frame in landscape position. 2. Attach the stand to the stand locking slot on - Binatone LS1000W | User Guide - Page 7
portrait position. 2. Attach the stand to the stand locking slot on the back of the photo frame. 3. Insert the stand into the stand locking slot as illustrated, until the stand is secured to the photo frame. Getting started WARNING z Do not rotate the stand during the installation. Otherwise, the - Binatone LS1000W | User Guide - Page 8
-loaded memory card or USB flash drive and connect the photo frame to power, the photo frame will automatically start to display photos in slideshow mode. z The memory card slot and USB port both support hot-swap function. z The memory card slot accepts these types of memory cards: SD, SDHC, MMC - Binatone LS1000W | User Guide - Page 9
1.4 Replacing the remote control battery The supplied remote control comes installed with a CR2025 lithium battery. When you need to replace the battery, follow the steps below. 1. Slide the locking tab to the right. 3. Insert the new battery into the battery holder. The battery must be placed with - Binatone LS1000W | User Guide - Page 10
you can: z Use the control buttons on the back of the photo frame Or z Use the supplied remote control 2.1 Using the control buttons 10 No. Description 1 Navigation and buttons a. button z Turns on the screen backlight. z Turns off the screen backlight to enter Standby mode. Using the photo frame - Binatone LS1000W | User Guide - Page 11
Moves up. Moves down. Moves left. RIGHT EXIT Moves right. Displays the currently selected photo in Single Photo view. Goes back to the previous page. When playing a slideshow Button Function Starts/pauses Selects the previous track. RIGHT Selects the next track. Using the photo frame 11 - Binatone LS1000W | User Guide - Page 12
menu Button Function LEFT Selects Photo, Music, Calendar, Wi-Fi or Settings menu. RIGHT EXIT Selects Photo, Music, Calendar, Wi-Fi Moves down to the next sub-menu in Settings. Selects Photo, Music, Calendar, Wi-Fi or Settings menu. Selects Photo, Music, Calendar, Wi-Fi or Settings menu. z - Binatone LS1000W | User Guide - Page 13
One or Delete All options in Photo Viewer and Music Player. z Displays the Add to favorites option when using the WEB Radio menu in Wi-Fi List. z selected photo counterclockwise each time by 90 degrees. 6 DOWN/VOL- Moves down or decreases the volume. (Continued on next page) Using the photo frame - Binatone LS1000W | User Guide - Page 14
access Picasa™ web album service, when a Wi-Fi connection has been set up and your account has been configured. 17 FRAME CHANNEL You can press this shortcut key to access Framechannel™ service, when a Wi-Fi connection has been set up and your account has been configured. 14 Using the photo frame - Binatone LS1000W | User Guide - Page 15
the Main Menu, press the EXIT button on the back of the photo frame. 3.1 Using the Main Menu After turning on the power of the photo frame, photos will play in slideshow mode automatically. z If a memory card has been inserted, photos in the card will play in slideshow mode automatically. z If no - Binatone LS1000W | User Guide - Page 16
menu NOTE The photo frame only supports JPEG (*.jpg) image file format. 1. In the Main Menu, press the LEFT or RIGHT button to select the Photo menu. 2. Press the UP/VOL+ or DOWN/VOL- button to select a device. 3. Press the button to enter Photo Viewer, which displays your photos in thumbnail view - Binatone LS1000W | User Guide - Page 17
the copy process starts, do not remove your USB or memory card from the photo frame before the "Complete" message appears. 3.2.2 Deleting one or all photos NOTE Use the supplied remote control for this operation. 1. In Photo Viewer, press the MENU button on the remote control. Copy One, Copy All - Binatone LS1000W | User Guide - Page 18
rotation of photos. Follow the instructions below to enable auto rotation. • When the photo frame is placed in landscape position, rotate the photo frame 90 degrees counterclockwise to enable auto rotation. • When the photo frame is placed in portrait position, rotate the photo frame 90 degrees - Binatone LS1000W | User Guide - Page 19
3.3 Using the Music menu NOTE The photo frame only supports MP3 (*.mp3) audio file format. 1. In the Main Menu, press the LEFT or RIGHT button to select the Music menu. 2. Press the UP/VOL+ or - Binatone LS1000W | User Guide - Page 20
or Internal Memory), and then press the button to confirm. Once the copy process starts, do not remove your USB or memory card from the photo frame before the "Complete" message appears. 20 Using the menus - Binatone LS1000W | User Guide - Page 21
to select the Calendar menu. 3. In full screen calendar mode, you can press the button to display one specific still photo or enter slideshow mode. To switch to next or previous photo, press the RIGHT or LEFT button. NOTE If you have set the alarm, an alarm icon will show on the - Binatone LS1000W | User Guide - Page 22
3.5 Using the Wi-Fi menu To enjoy the provided web services, such as Picasa™, Flickr® and Framechannel™ from the photo frame, you need to sign up for a new account for the web service you want to use on the Internet. Then, follow the steps below to set up Wi-Fi® connection and make required account - Binatone LS1000W | User Guide - Page 23
b. The Select Access Point screen appears and shows access points that are available nearby. d. To connect to a security-enabled access point, you will be prompted to enter the password in the Keyboard screen that appears. (To connect to a security-disabled network, Step d and e are not required.) - Binatone LS1000W | User Guide - Page 24
to the Wi-Fi menu. NOTE z When you have set up Wi-Fi® connection using DHCP, the photo frame will connect to the Wi-Fi network automatically every time it is powered on. z To manually disconnect from the currently active Wi-Fi network, go to the Settings menu, select Default settings and press - Binatone LS1000W | User Guide - Page 25
If you are using static IP connection: a. Select Static IP Address in the Wi-Fi Setup menu. b. The Choose AP screen appears. Use the keyboard to enter your IP address, subnet mask, gateway and DNS server settings. Using the menus For details about how to use the keyboard, see the tips below. TIPS - Binatone LS1000W | User Guide - Page 26
the settings you have entered in the Choose AP page. However, every time the photo frame is powered on, you need to select Done in the Choose AP page and press the button repeatedly to manually connect to the Wi-Fi network. 26 3.5.2 Step 2: Configuring your accounts 3.5.2.1 Configuring your - Binatone LS1000W | User Guide - Page 27
3. In the Keyboard screen that appears, enter your account in the Account field. 4. Use the control buttons to select Done, and then press the button to move to the next field. 5. Continue to enter your password in the Password field. 6. Use the control buttons to select Done, and then press the - Binatone LS1000W | User Guide - Page 28
Flickr in the Wi-Fi List. TIPS The photo frame is limited to access public photos from Flickr account owners over the age of 18. For details, review the terms and conditions of use on Flickr's web site. 3.5.2.3 Configuring your Framechannel™ account NOTE Before making the following configurations - Binatone LS1000W | User Guide - Page 29
Framechannel™ account in the PIN field. NOTE A 4-digit PIN code is different from a Framechannel password. The PIN code is a unique identifier that Framechannel uses to create your Framechannel slideshow and send it to your photo frame feed, you will receive an update once the publisher releases new - Binatone LS1000W | User Guide - Page 30
3. The Keyboard screen appears and shows the web address of the default RSS channel. You can clear the web address by using the Backspace key, and then enter the web address of another RSS channel you want to subscribe to. 3.5.2.5 Configuring your email account 1. Sign up for a new Gmail™ (referred - Binatone LS1000W | User Guide - Page 31
Account and Password fields. The Gmail server settings have been preset on the photo frame. z For additional information about email server settings or mail server accessibility, contact your network administrator or network service provider. To avoid the risk of losing important email data in your - Binatone LS1000W | User Guide - Page 32
3.5.2.6 More information about on-screen keyboard use Note that when entering information using the LS1000W on-screen keyboard there are two pages of keys available, and there may be times when you will need to use characters from both keyboard - Binatone LS1000W | User Guide - Page 33
3.5.3 Step 3: Using web services 3.5.3.1 Using Picasa™ NOTE Use the supplied remote control if you have multiple ones. 3. Press the button to enter the selected album. z To play photos in full screen single photo mode, press the button. z To start running slideshow, press the button again. 4. To - Binatone LS1000W | User Guide - Page 34
3.5.3.2 Using Flickr® NOTE z The photo frame is limited to access public photos from Flickr account owners over the age of 18. For details, review the terms and conditions of use on Flickr's web site. z Use the supplied remote control for this operation. 1. Press the LEFT or RIGHT button to - Binatone LS1000W | User Guide - Page 35
account name/PIN code and try again. 3.5.3.3.1 Framechannel custom settings By default, Framechannel only displays 5 photos from each channel. To increase the number of photos to be displayed on this photo frame, follow the steps below: 1. Log into www.framechannel.com 2. Go to My Account. 3. Click - Binatone LS1000W | User Guide - Page 36
operation. 1. Press the button to go to RSS. The screen will display the most recently updated RSS feeds from the subscribed channel set in Account Cfg. 2. Press the UP/VOL+ . 3. Press the UP/VOL+ or DOWN/VOL- button to select a radio program you want to listen to, and then press the button. 4. In - Binatone LS1000W | User Guide - Page 37
program entry has been added to the Favorites list. 6. If you have added radio program entries to the Favorites list, the WEB Radio screen will show Favorites, Search and Delete One options when you access WEB Radio next time. 5. To quit, press the EXIT button. Using the menus z Favorites: In - Binatone LS1000W | User Guide - Page 38
the button to start streaming and playback. z Search: In this option, you can press the UP/VOL+ or DOWN/VOL- button to search for all radio programs that are available for playback. z Delete One: In this option, you can press the UP/VOL+ or DOWN/VOL- button to select the - Binatone LS1000W | User Guide - Page 39
the button to go to Email. To receive photo emails, you must add your contacts to the Welcome list first. Follow the instructions in "3.5.3.6.1 Adding your contacts to the Welcome list". 3.5.3.6.1 Adding your contacts to the Welcome list The photo frame is designed to avoid junk mails, which only - Binatone LS1000W | User Guide - Page 40
. 5. Once you have added your contacts to the Welcome list, you will be able to receive photo emails from these contacts. WARNING When receiving a photo email from a contact that is not in the Welcome list, the photo frame only shows the mail receiving progress, but will not download and save the - Binatone LS1000W | User Guide - Page 41
email(s) may not be saved. z When the "Downloading E-mail images..." message appears, all the current activities on the photo frame, such as copying music and photos, will be interrupted and stopped. Manually resume the unfinished activities after email downloading is complete. Using the menus 41 - Binatone LS1000W | User Guide - Page 42
from different contacts, and then press the button to view photo emails received from the selected contact. 3. To quit, press the EXIT button. NOTE The photo frame only receives the emails that contain photos in JPEG (*.jpg) file format. Other file formats are not supported. 42 Using the menus - Binatone LS1000W | User Guide - Page 43
select Send Mail, and then press the button. 2. Select the source of the photo you want to send (Internal Memory, USB or Memory Card), and then press 3. Press the UP/VOL+, DOWN/VOL-, LEFT and RIGHT buttons to select a photo you want to send. 4. Press the MENU or the control. button on the - Binatone LS1000W | User Guide - Page 44
has been sent successfully, the "Send success" message appears. NOTE If the photo is not sent successfully, the "Send fail" message appears on the screen. Please verify the email address you entered. 3.5.3.6.5 Editing or deleting the contacts in - Binatone LS1000W | User Guide - Page 45
the access point you are connecting to is active and working properly. • The photo frame only supports 802.11b/g wireless network. • For technical support, contact your network administrator or network service provider. Account configurations I have configured my Picasa™ account in Account Cfg in - Binatone LS1000W | User Guide - Page 46
you have entered the 4-digit PIN code (not the Framechannel password) in the "PIN" field. I have configured Mail Config settings in Account Cfg in the Wi-Fi menu, but the photo frame still cannot receive photo emails. • The photo frame only fully supports Gmail™ (referred to as Google Mail in some - Binatone LS1000W | User Guide - Page 47
Picasa™, Flickr®, Framechannel™, RSS, WEB Radio and Email web services (Continued) I cannot access the Flickr account that has been configured in Account Cfg. Make sure the Flickr account you are accessing meets the age requirements. The photo frame is limited to access public photos from Flickr - Binatone LS1000W | User Guide - Page 48
selected, press the button. z To go back to the previous page, press the EXIT button. You can control all function settings of the photo frame from the Settings menu. Refer to the table below for more information. Sub-menu Option Slideshow frequency 5 seconds 10 seconds 30 seconds 1 minute - Binatone LS1000W | User Guide - Page 49
Sub-menu Date & Time setting Alarm setting Option Year Month Day Hour Minute Time Format Alarm on/off Alarm hour Alarm minute Volume Tone Day Description/Function Allows you to set up the date and time. Activates/deactivates the alarm clock function. Sets the alarm hour. Sets the alarm minute. - Binatone LS1000W | User Guide - Page 50
to screen On Off Description/Function Enables/disables the Auto power on/power off options. Powers on the photo frame automatically according to the time length you set. Powers off the photo frame automatically according to the time length you set. Sets the level of brightness. Sets the level of - Binatone LS1000W | User Guide - Page 51
Sub-menu Startup mode Option Slideshow Calendar Frame Channel Description/Function Enters Slideshow mode upon system startup, when photos in Internal Memory, USB or Memory Card are available. Enters Calendar mode upon system startup. Runs a Framechannel photo slideshow, when Wi-Fi® connection has - Binatone LS1000W | User Guide - Page 52
3.6.2 Enabling auto on/off The photo frame comes with the Programmable On/Off Time feature time, press the LEFT or RIGHT button. 6. Press the EXIT button when finished. NOTE When the photo frame has been powered off automatically, you can press any control buttons or any buttons on the remote control - Binatone LS1000W | User Guide - Page 53
working properly... 1. Read this User's Guide or the Quick Start Guide. 2. Visit our website: www.motorola.com 3. Contact Customer Service: • 1-888-331-3383 in US applies as follows to new Motorola branded Products and Accessories manufactured by Binatone Electronics International LTD., and purchased - Binatone LS1000W | User Guide - Page 54
OF THE CONSUMER, AND IS PROVIDED IN LIEU OF ALL WARRANTIES AND MOTOROLA AND BINATONE ELECTRONICS INTERNATIONAL LTD. MAKES NO OTHER WARRANTIES OR CONDITIONS, EXPRESS OF IMPLIED. IN NO EVENT SHALL MOTOROLA OR BINATONE ELECTRONICS 54 INTERNATIONAL LTD. BE LIABLE, WHETHER UNDER THIS LIMITED WARRANTY OR - Binatone LS1000W | User Guide - Page 55
outside the usage parameters stated in the user instructions that came with the Products or Accessories; service, testing, adjustment, installation, maintenance, alteration, or modification in any way by someone other than Motorola, Binatone Electronics International LTD. or its authorized service - Binatone LS1000W | User Guide - Page 56
49 1805 938802 in Europe You will receive instructions on how to ship the Products or Accessories, the shipment of which shall be at your own risk and expense, to a BINATONE ELECTRONICS INTERNATIONAL LTD. Authorized Repair Center. To obtain service, you must include: (a) a copy of your receipt, bill - Binatone LS1000W | User Guide - Page 57
Compliance Information Declaration of Conformity General information 57 - Binatone LS1000W | User Guide - Page 58
that may cause undesired operation. This equipment has been tested and found to comply with the limits for a connected. z Consult the dealer or an experienced radio/TV technician for help. 58 WARNING You are , please follow operation instruction as documented in this manual. This equipment complies - Binatone LS1000W | User Guide - Page 59
Canadian DOC statement z This Class B digital apparatus complies with Canadian ICES-003. z Cet appareil numérique de la classe B est conforme à la norme NMB-003 du Canada. WEEE Directive Produced after 13 August 2005. Waste electrical should not be disposed of with household waste. Please recycle - Binatone LS1000W | User Guide - Page 60
/60 Hz; 0.6A z DC output: 9.0V, 2A JPEG (*.jpg) 60 Supported audio file format Auto rotation Wi-Fi® module Supported web services MP3 (*.mp3) Built-in tilt sensor 802.11b/g 2.4GHz WLAN Picasa™, Flickr®, Framechannel™, RSS, WEB Radio, Email NOTE Specifications are subject to change without prior - Binatone LS1000W | User Guide - Page 61
the wall exactly as illustrated. 2. Insert 8mm and 9.5mm head screws (to be purchased separately) into the holes and tighten the screws. Then, align your photo frame with the screws. 3. Mount your photo frame in landscape position on the wall. Wall mounting instructions 61 - Binatone LS1000W | User Guide - Page 62
62 Wall mounting instructions - Binatone LS1000W | User Guide - Page 63
Portrait wall mounting 1. Drill a hole in the wall and insert an 8mm head screw (to be purchased separately) into the hole. 2. Align your photo frame with the screw. 3. Mount your photo frame in portrait position on the wall. Wall mounting instructions 63 - Binatone LS1000W | User Guide - Page 64
64 Wall mounting instructions - Binatone LS1000W | User Guide - Page 65
other countries. Framechannel is a trademark of Frame Media, Inc., registered in the U.S. and other countries. SHOUTcast is a trademark of Nullsoft, INC. registered in the U.S. and other countries. All other product or service names are the property of their respective owners. © Motorola, Inc. 2009
-
 1
1 -
 2
2 -
 3
3 -
 4
4 -
 5
5 -
 6
6 -
 7
7 -
8
-
9
-
10
-
11
-
12
-
13
-
14
-
15
-
16
-
17
-
18
-
19
-
20
-
21
-
22
-
23
-
24
-
25
-
26
-
27
-
28
-
29
-
30
-
31
-
32
-
33
-
34
-
35
-
36
-
37
-
38
-
39
-
40
-
41
-
42
-
43
-
44
-
45
-
46
-
47
-
48
-
49
-
50
-
51
-
52
-
53
-
54
-
55
-
56
-
57
-
58
-
59
-
60
-
61
-
62
-
63
-
64
-
65
 |
 |

User’s Guide
For LS1000W
10.4” (26.4 cm) Digital Photo Frame
Wi-Fi
®
Enabled
Warning
Use only the power adapter supplied with your product.