Biostar IDEQ 200P iDEQ 200P BIOS setup guide.
Biostar IDEQ 200P Manual
 |
View all Biostar IDEQ 200P manuals
Add to My Manuals
Save this manual to your list of manuals |
Biostar IDEQ 200P manual content summary:
- Biostar IDEQ 200P | iDEQ 200P BIOS setup guide. - Page 1
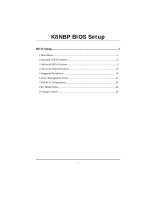
K8NBP BIOS Setup BIOS Setup 1 1 Main Menu...3 2 Standard CMOS Features 6 3 Advanced BIOS Features 9 4 Advanced Chipset Features 12 5 Integrated Peripherals 16 6 Power Management Setup 21 7 PnP/PCI Configurations 24 8 PC Health Status 26 9 Voltage Control 28 i - Biostar IDEQ 200P | iDEQ 200P BIOS setup guide. - Page 2
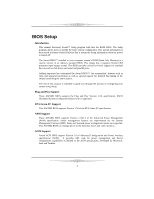
is then stored in battery-backed RAM so that it retains the Setup information when the power is turned off. The Award BIOS™ installed in your computer system's ROM (Read Only Memory) is a custom version of an industry standard BIOS. This means that it supports Nvidia CK8 processor input/output - Biostar IDEQ 200P | iDEQ 200P BIOS setup guide. - Page 3
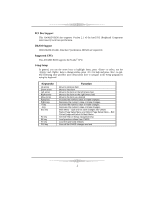
Version 2.1 of the Intel PCI (Peripheral Component Interconnect) local bus specification. DRAM Support DDR DRAM (Double Data Rate Synchronous DRAM) are supported. Supported CPUs This AWARD BIOS supports the Nvidia® CPU. Using Setup In general, you use the arrow keys to highlight items, press - Biostar IDEQ 200P | iDEQ 200P BIOS setup guide. - Page 4
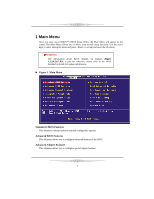
the items and press to accept and enter the sub-menu. WARNING The information about BIOS defaults on manual (Figure 1,2,3,4,5,6,7,8,9) is just for reference, please refer to the BIOS installed on board, for update information. Figure 1. Main Menu Standard CMOS Features This submenu contains - Biostar IDEQ 200P | iDEQ 200P BIOS setup guide. - Page 5
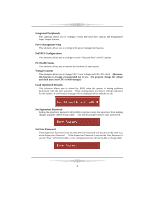
and Programmed Input/ Output features. Power Management Setup This submenu allows you to configure the power management features. PnP/PCI Configurations may cause CPU or M/B damage!) Load Optimized Defaults This selection allows you to reload the BIOS when the system is having problems particularly - Biostar IDEQ 200P | iDEQ 200P BIOS setup guide. - Page 6
all configuration changes to CMOS(memory) and exit setup. Confirmation message will be displayed before proceeding. Exit Without Saving Abandon all changes made during the current session and exit setup. Confirmation message will be displayed before proceeding. Upgrade BIOS This submenu allows you - Biostar IDEQ 200P | iDEQ 200P BIOS setup guide. - Page 7
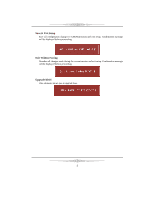
2 Standard CMOS Features The items in Standard CMOS Setup Menu are divided into 10 categories. Each category includes no, one or more than one setup items. Use the arrow keys to highlight the item and then use the or keys to select the value you want in each item. Figure 2. Standard - Biostar IDEQ 200P | iDEQ 200P BIOS setup guide. - Page 8
Main Menu Selections This table shows the selections that you can make on the Main Menu. Item Options Description Date mm : dd : yy Set the system date. Note that the 'Day' automatically changes when you set the date. Time hh : mm : ss Set the system internal clock. IDE Primary Master - Biostar IDEQ 200P | iDEQ 200P BIOS setup guide. - Page 9
, but Diskette All, but Disk/ Key N/A N/A N/A Description Select the situation in which you want the BIOS to stop the POST process and notify you. Displays the amount of conventional memory detected during boot up. Displays the amount of extended memory detected during boot up. Displays the total - Biostar IDEQ 200P | iDEQ 200P BIOS setup guide. - Page 10
function is enabled and an attempt is made to write to the boot sector, BIOS will display a warning message on the screen and sound an alarm beep. Disabled Quick Power On Self Test Enabling this option will cause an abridged version of the Power On Self-Test (POST) to execute after you power up - Biostar IDEQ 200P | iDEQ 200P BIOS setup guide. - Page 11
The BIOS supports version 1.1 and 1.4 of the Intel multiprocessor specification. Select version supported by the operation system running on this computer. The Choices: 1.4 (default), 1.1. OS Select For DRAM > 64MB A choice other than Non-OS2 is only used for OS2 systems with memory - Biostar IDEQ 200P | iDEQ 200P BIOS setup guide. - Page 12
option you to enable or disable "Level 2" secondary cache on the CPU, which may improve performance. The Choices: Enabled (default) Enable cache. Seq & Floppy Setup First/ Second/ Third/ Boot Other Device These BIOS attempt to load the operating system from the device in the sequence selected - Biostar IDEQ 200P | iDEQ 200P BIOS setup guide. - Page 13
4. Advanced Chipset Setup DRAM Configuration DDR Timing Setting by DDR Timing Setting by SPD or ITEM. The Choices: Auto (Default), Manual. Max Memclock (MHz) Places an artifical memory clock limit on the system. from running faster than this frequency. The Choices: 200 (Default), 166, 133, 100 - Biostar IDEQ 200P | iDEQ 200P BIOS setup guide. - Page 14
Row cycle time (tRC) This field specifies the ROW Cycle Time. RAS# active to RAS# active or auto refresh of the same bank. Typically -70 Nsec. The Choices: 9 BUS CLOCKS (Default), 7 BUS CLOCKS, 8 BUS CLOCKS, 10 BUS CLOCKS, 11 BUS CLOCKS, 12 BUS CLOCKS, 13 BUS CLOCKS, 14 BUS CLOCKS, 15 BUS CLOCKS, 16 - Biostar IDEQ 200P | iDEQ 200P BIOS setup guide. - Page 15
masked data strobe to the rising edge of the next Read Command (Jedec specs this as exactly one clock) The Choices: 1 BUS CLOCKS (Default), Choices: 1x 2064 Cycles (Default). CPU OverClock in MHz The Choices: 200 (default), 201, 202, 203, 204, 205, 206, 207. AGP OverClock in MHz The Choices: 66 ( - Biostar IDEQ 200P | iDEQ 200P BIOS setup guide. - Page 16
(default), I/O Length The Choices: 1 byte (default), System BIOS Cacheable Selecting the "Enabled" option allows caching of the system BIOS ROM at F0000h-FFFFFh which can improve system performance. However, any programs writing to this area of memory will cause conflicts and result in system errors - Biostar IDEQ 200P | iDEQ 200P BIOS setup guide. - Page 17
following options: OnChip IDE Channel 0/1 The motherboard chipset contains a PCI IDE interface with support for two IDE channels. Select "Enabled" implemented if it is supported by the IDE hard drives in your system. As well, your operating environment requires a DMA driver (Windows 95 OSR2 or a - Biostar IDEQ 200P | iDEQ 200P BIOS setup guide. - Page 18
USB legacy. The Choices: Enabled (Default), Disabled. USB Mouse Support Enables support for USB attached mouse. The Choices: Disabled (default), Enabled. Serial-ATA Enables support for Serial-ATA. The Choices: Enabled (default), Disabled. AC97 Audio This option allows you to control the onboard AC97 - Biostar IDEQ 200P | iDEQ 200P BIOS setup guide. - Page 19
RAID ROM This item allows you to enable or disable Onboard RAID ROM. The Choices: Disabled (default), Enabled. Onboard SATA ROM This item allows you to enable or disable Onboard SATA ROM. The Choices: Disabled (default), Enabled. Reltek Giga LAN Boot ROM This item allows you to enable or disable - Biostar IDEQ 200P | iDEQ 200P BIOS setup guide. - Page 20
Select an address and corresponding interrupt for the first and second serial ports The Choices: 2F8/IRQ3 (default), Disabled, Auto, 3F8/IRQ4 , 3E8/IRQ4, 2E8/IRQ3. UART Mode Select This item allows you to determine which Infrared (IR) function of onboard I/O chip. The Choices: Normal(default), - Biostar IDEQ 200P | iDEQ 200P BIOS setup guide. - Page 21
subsequent manual intervention. There are 3 sources that provide current to the CMOS area that retains these Power-On instructions; the motherboard battery (3V), the Power Supply (5VSB), and the Power Supply (3.3V). While AC is not supplying power, the motherboard uses the motherboard battery - Biostar IDEQ 200P | iDEQ 200P BIOS setup guide. - Page 22
to select the suspend type under the ACPI operating system. The Choices: S1 (POS) (default) Power on Suspend S3 (STR) Suspend to RAM S1 + S3 POS+STR Power Management This category allows you to select the type (or degree) of power saving and is directly related to the following modes: 1.HDD - Biostar IDEQ 200P | iDEQ 200P BIOS setup guide. - Page 23
management. Doze Mode = 1 hr. Standby Mode = 1 hr Suspend Mode = 1 hr. HDD Power Down = 15 min Max Saving Maximum power management only available for sl CPU's. Doze Mode = 1 min Standby Mode = 1 min. Suspend Mode = 1 min. HDD Power Down = 1 min. User Defined (default) Allows you to set each mode - Biostar IDEQ 200P | iDEQ 200P BIOS setup guide. - Page 24
WOL (PME#) From Soft-Off The Choices: Disabled (default), Enabled. WOR (RI#) From Soft-Off The Choices: Disabled (default), Enabled. Power-On by Alarm When you select Enabled, an alarm returns the system to Full ON state. The Choices: Disabled (default), Enabled. 23 - Biostar IDEQ 200P | iDEQ 200P BIOS setup guide. - Page 25
speeds nearing the speed of the CPU itself uses when communicating with its Data The system BIOS supports the PnP to the memory locations. These locations (4K) are reserved in the system BIOS. If the will be shown on the screen only if "Manual" is chosen for the resources controlled by function - Biostar IDEQ 200P | iDEQ 200P BIOS setup guide. - Page 26
(default), the system BIOS will detect the system resources and automatically assign the relative IRQ and DMA channel for each peripheral.By Choosing "Manual", the user will bus if the PCI VGA controller responds to the Write. In this case, the PCI VGA controller should not respond to the Write, it - Biostar IDEQ 200P | iDEQ 200P BIOS setup guide. - Page 27
This item allows you to set up the CPU shutdown Temperature. This item only effective under Windows 98 ACPI mode. The Choices: Enabled (default) , 60℃/ 140℉, 65℃/ 149℉, 70℃/ 158℉. CPU FAN Control by The Choice "smart" can make your CPU FAN to reduce noise. The Choices: SMART (default), Always - Biostar IDEQ 200P | iDEQ 200P BIOS setup guide. - Page 28
Temperature Show you the current CPU temperature. Current CPU FAN Speed This field displays the current CPU FAN speed. Current SYS FAN Speed This field displays the current speed of the SYSTEM fan. Show H/W Monitor in POST If you computer contain a monitoring system, it will show PC health status - Biostar IDEQ 200P | iDEQ 200P BIOS setup guide. - Page 29
Voltage This item allows you to select CPU Voltage Control. The Choices: Default (default), +1.7%, +3.4%, +5.1%. DDR setting. Method 2: Press the key and Power button simultaneously, after that keep-on pressing the key until the power-on screen showed. This action will boot-up the
-
 1
1 -
 2
2 -
 3
3 -
 4
4 -
 5
5 -
 6
6 -
 7
7 -
8
-
9
-
10
-
11
-
12
-
13
-
14
-
15
-
16
-
17
-
18
-
19
-
20
-
21
-
22
-
23
-
24
-
25
-
26
-
27
-
28
-
29
 |
 |

K8NBP BIOS Setup
i
BIOS Setup
.......................................................................................
1
1 Main Menu
....................................................................................................
3
2 Standard CMOS Features
..............................................................................
6
3 Advanced BIOS Features
..............................................................................
9
4 Advanced Chipset Features
.........................................................................
12
5 Integrated Peripherals
.................................................................................
16
6 Power Management Setup
...........................................................................
21
7 PnP/PCI Configurations
..............................................................................
24
8 PC Health Status
.........................................................................................
26
9 Voltage Control
...........................................................................................
28