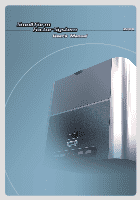
Biostar IDEQ 200SB iDEQ 200S user's manual
Biostar IDEQ 200SB Manual
 |
View all Biostar IDEQ 200SB manuals
Add to My Manuals
Save this manual to your list of manuals |
Biostar IDEQ 200SB manual content summary:
- Biostar IDEQ 200SB | iDEQ 200S user's manual - Page 1
- Biostar IDEQ 200SB | iDEQ 200S user's manual - Page 2
50-iDE0.200S-M-E1 - Biostar IDEQ 200SB | iDEQ 200S user's manual - Page 3
Fpm Factor-41g1 1 CZta35373 ZW1.5=3 _or - Biostar IDEQ 200SB | iDEQ 200S user's manual - Page 4
this equipment. This equipment generates, uses, and radiates radio frequency energy and, if not installed and used in accordance with the instructions, may cause harmful interference to radio communications. However, there is no guarantee that interference will not occur in a particular installation - Biostar IDEQ 200SB | iDEQ 200S user's manual - Page 5
software or equipment that is not supplied by the manufacturer or its affiliated companies. Copyright Notice No part of this manual may be reproduced or transmitted and company names mentioned herein may be trademarks and/or service marks of their respective owners. Intel and Pentium are registered - Biostar IDEQ 200SB | iDEQ 200S user's manual - Page 6
Information 1.Please read these safety instructions carefully. 2.Please keep this User's Manual for later reference. 3.Please disconnect THE OPENINGS. 9.Make sure the voltage of the power source when connect the equipment to the power outlet. 10.Place the power cord such a way that people can not - Biostar IDEQ 200SB | iDEQ 200S user's manual - Page 7
following situations arises, get the equipment checked by service personnel: a. The Power cord or plug is damaged. b. Liquid has user's manual. e. The equipment has dropped and damaged. f. If the equipment has obvious sign of breakage. 15.CAUTION: THE COMPUTER IS PROVIDED WITH A BATTERY-POWERED REAL - Biostar IDEQ 200SB | iDEQ 200S user's manual - Page 8
Devices 17 Section 4 Software and Utilities 4.1 Installing Drivers and Utilities 24 Section 5 Trouble Shooting 5.1 System Does Not Start 28 5.2 Keyboard and Mouse Problems 29 5.3 USB Devices Problems 30 5.4 Software Problems 31 Section 6 Taking Care of Your Computer 6.1 General - Biostar IDEQ 200SB | iDEQ 200S user's manual - Page 9
Section 1 Introductio n - Biostar IDEQ 200SB | iDEQ 200S user's manual - Page 10
-step installation guide of the manual, you will find that it is a simple process to set up CPU, memory and hard disk drive that takes only few minutes. And when you open its cover panels, you will admire the innovation of the components like side-blown CPU cooler and special-made power supply that - Biostar IDEQ 200SB | iDEQ 200S user's manual - Page 11
and check the following items. If there are any of the equipments are missing or damaged, contact your dealer immediately. 5 Small Form Factor System A power cord 0.4 Screws Pack C!) Driver CD MANUAL User's manual c) Studio Fun CD .-woo Guide ..-------- Installation Guide Thermal Grease 3 - Biostar IDEQ 200SB | iDEQ 200S user's manual - Page 12
- Biostar IDEQ 200SB | iDEQ 200S user's manual - Page 13
Section 2 Mainboard Set Up - Biostar IDEQ 200SB | iDEQ 200S user's manual - Page 14
, Mainboard Features Model • P4SBA Chipset • North Bridge: SiS®651 • South Bridge: SiS®962 CPU • Supports Socket 478 • Supports Intel Celeron7 Pentiurd4 processor up to 3.06 GHz • Supports FSB 400/533 MHz Main Memory • Supports up to 2 DDR SDRAM devices • Supports DDR SDRAM 200/266/333 MHz (without - Biostar IDEQ 200SB | iDEQ 200S user's manual - Page 15
management Interface(ACPI) and PCI power management system for modern operating systems • Supports remote wake-up in both ACPI and APM environments • Keeps network maintenance costs low and eliminates usage barriers • Uses one RF card for Wireless LAN LAN • Chip: RTL8201BL • Dual Speed - 10/100 - Biostar IDEQ 200SB | iDEQ 200S user's manual - Page 16
• 6 x USB2.0 Ports • 1 x game port. • 1 x IrDA connector • 2 x IEEE1394A connector • 1 x Parallel port • 2 x Serial port (COM1/COM2) • 1 x VGA port • 1 x floppy port 8 - Biostar IDEQ 200SB | iDEQ 200S user's manual - Page 17
2.2(layout And Components Index 2 Chapter 2 CODE . 1.119739Ir J1394B1 JUSBLAN2 JUSBV3 JVGAI JCDIN UN 011621001 JCOM1 CPU' JSPDIFO JKBMSI JAUDIO JATXPW2 JSFANI Socket I PCIl AGP1 SIS651 JCFANI 0 00 NUN Chip RUBIN!. (opfioneD WIAN (oPflond) SATA Chip (optional) 81642 (optionD cP-Ooco - Biostar IDEQ 200SB | iDEQ 200S user's manual - Page 18
Components Index • Socket: Installing CPU • JCFAN1: Connecting to cable of CPU cooler • DDR1 and DDR2: Installing DIMM Modules • IDE1 and IDE2: Connecting to hard disk drive • FDD: Connecting to the floppy disk drive • JUSB2: Connecting to - Biostar IDEQ 200SB | iDEQ 200S user's manual - Page 19
". The illustration shows a 3-pin jumper whose pinl and 2 are "close" when jumper cap is placed on these 2 pins. ■ Jumper close Jumper & Headers CPU Fan Headers: JCFAN1 • 00 JCFAN1 System Fan Headers: JSFAN1 • O O JCFAN1 Jumper open Pin 2 3 Pin 1 2 3 Pin] -2 close Assignment Ground +12V FAN RPM - Biostar IDEQ 200SB | iDEQ 200S user's manual - Page 20
JUSBV1/JUSBV3 JUSBV1/JUSBV3 Assignment 1 • 00 3 +5V Pin 1-2 close Description 5V for JUSB1/2/3 1 • 00 3 Pin 2-3 close +5V_SB 5V standby to power on JUSB Serial ATA Connector: JSATA1/JSATA2(optional) Pin Assignment Pin Assignment 65 3 2 I__I L OOOOOO. r 7 4 1 1 Ground 2 TX + 4 TX - Biostar IDEQ 200SB | iDEQ 200S user's manual - Page 21
10 11 GP7 12 13 MIDI-INR 14 15 NA 16 *NA: No Assignment Assignment +5V GP4 GPO Ground Ground GP1 GP5 +5V Wake On LAN Header: JWOL1 Pin L 0 0 1 [• 1 2 JWOL1 3 Assignment +5V SB Ground Wake up 1 13 - Biostar IDEQ 200SB | iDEQ 200S user's manual - Page 22
- 4 USBP5- USBP4+ 6 USBP5+ Ground 8 Ground KEY 10 NA Assignment 1 • 0 0 3 P.in1-2close Normal Operation (default) 1 • OO 3 Pin 2-3 close Clear CMOS Procedures: 1. Remove AC power line. 2. Set the jumper to "Pin 1-2 close". 3. Wait for five seconds. 4. Set the jumper to "Pin 2-3 close - Biostar IDEQ 200SB | iDEQ 200S user's manual - Page 23
Section 3 Peripheral Connections - Biostar IDEQ 200SB | iDEQ 200S user's manual - Page 24
3.1r-OVer Your computer offers the following connectors for peripheral devices. As these devices are provided by third-parties, be sure that they function correctly when connected to your computer before you purchase them. Front Panel Connectors : SPDIF Input V eel O -.00► Headphone n IEEE - Biostar IDEQ 200SB | iDEQ 200S user's manual - Page 25
off the computer and the peripheral device. • Read the instructions on the manual or guide provided by the device manufacturer carefully. • Insert the connector that comes from the device manufacturer to the proper I/O port. • Install the drivers or other software that's required by the device so - Biostar IDEQ 200SB | iDEQ 200S user's manual - Page 26
Connecting monitor To connect a monitor, plug the monitor cable into the VGA port located on the rear panel of your computer. 00 0 Figure 3.3 Connecting mouse and keyboard Most of mouse and keyboard are PS/2 compliant. However, lots of the latest keyboard and mouse use the USB connectors instead of - Biostar IDEQ 200SB | iDEQ 200S user's manual - Page 27
OS does not have the driver for your device, install the driver from the driver CD that is provided by the device manufacturer. CI= (o o o o mw) O •.• Digital camera PDA Scanner Figure 3.5 Note: The USB devices support "hot plugging," eliminating the need to power down or restart the computer - Biostar IDEQ 200SB | iDEQ 200S user's manual - Page 28
, and more. The IEEE 1394 devices also support "hot plugging", eliminating the need to power down or restart the computer when attaching a and automatically install the driver for the device. • If the OS does not have the driver for your device, install the driver from the driver CD that is provided - Biostar IDEQ 200SB | iDEQ 200S user's manual - Page 29
3 Chapter 3 • SPDIF (Sony/Philips Digital Interface) jack: SPDIF is a standard audio transfer file format, which provides digital audio instead of analog audio through optical fiber. MD oo Figure 3.7 • "Headphone" jack: Use this jack to connect stereo headphone or amplified speakers to your - Biostar IDEQ 200SB | iDEQ 200S user's manual - Page 30
CD or diskette that is provided by the printer manufacturer. Note: To install the printer driver, please refer to the guide your printer manufacturer provides for you. Connecting LAN You can connect your computer with another computer system or get on broadband Internet connection by using the - Biostar IDEQ 200SB | iDEQ 200S user's manual - Page 31
Section 4 Software Utility - Biostar IDEQ 200SB | iDEQ 200S user's manual - Page 32
the Installation Utility will auto run or you can launch the Driver CD Installation Utility manually. 1 4.F(.If • icro+dawsMe "I Version Dale 1,i/ 02 Driver •J 1) Soilware and Update utiIdy I Use; Manual ----,•• Btuowe M EXIT Figure 4.1 There are two kinds of Installation Procedure - Biostar IDEQ 200SB | iDEQ 200S user's manual - Page 33
exe file to run the utility manually. 5. Use the mouse cursor to click the Driver option on the page. 6.Driver setup utility will search for the instructions to finish the installation. 11. Click on the next driver you want to install. 12. Repeat steps 8 to 10 until you have installed all the drivers - Biostar IDEQ 200SB | iDEQ 200S user's manual - Page 34
1. Click Software and Update Utility option. 2. Click on the software you want to install. 3. The installation utility will start the installation wizard for the software you choose. 4. Follow the instruction steps of the wizard. 5. Repeat steps 2 to 4 if you want to install more. 6. When you are - Biostar IDEQ 200SB | iDEQ 200S user's manual - Page 35
cf - Biostar IDEQ 200SB | iDEQ 200S user's manual - Page 36
the outlet is functioning. If available, try to use a different power cable. 3. If the power cable and wall socket are OK, there may be a power supply failure. Contact your computer dealer for technical support and service. • Keyboard and power LEDs light, and sound comes from the computer, but the - Biostar IDEQ 200SB | iDEQ 200S user's manual - Page 37
Problems • Keyboard doesn't take input, but mouse pointer moves when mouse is moved: 1. Make sure the keyboard, mouse or receiver is connected when you start the computer. 2. If you inadvertently start the system with the keyboard disconnected, shut down the system by pressing and holding the power - Biostar IDEQ 200SB | iDEQ 200S user's manual - Page 38
3 USB Device Problems • Plug in any USB device but the display shows up as an unknown device in the Device Manager 1. Install the driver for your USB device. 2. Then plug in your USB device. • USB device works when first plugged in, but does not work after system is woken - Biostar IDEQ 200SB | iDEQ 200S user's manual - Page 39
last resort, if the computer totally ignores the mouse, keyboard and power button, you can unplug the power cable; wait a moment; and then plug the power cable back in. This forces the computer to restart. 6. If the problem persists, contact your computer dealer for technical support and service. 31 - Biostar IDEQ 200SB | iDEQ 200S user's manual - Page 40
32 - Biostar IDEQ 200SB | iDEQ 200S user's manual - Page 41
Section 6 Taking care of Your Computer • 4w 4 - Biostar IDEQ 200SB | iDEQ 200S user's manual - Page 42
6.1 _General Maintenance Before you install any computer component, we recommend that you read the following instructions. • Electrostatic discharge can damage the components of your computer. Do not remove a component from its protective packaging until you are ready to install it. • Avoid - Biostar IDEQ 200SB | iDEQ 200S user's manual - Page 43
all cautions and follow the instructions that may be marked on the computer. • Except as described elsewhere in this manual, refer all servicing to qualified personnel. Immediately shut off the computer and refer for servicing under the following conditions: 1. When the power cord or plug is damaged - Biostar IDEQ 200SB | iDEQ 200S user's manual - Page 44
36 - Biostar IDEQ 200SB | iDEQ 200S user's manual - Page 45
Appendix Installing Mainboard - Biostar IDEQ 200SB | iDEQ 200S user's manual - Page 46
A.1 Installing Mainboard Before installing mainboard, users have to remove the two-side and top cover panels. Then remove the front cover panel for inserting the mainboard into the chassis. Removing The Front Cover Panel • There are four quick joints on the reverse side of front panel bezel as - Biostar IDEQ 200SB | iDEQ 200S user's manual - Page 47
A Appendix • Then use the screwdriver to remove the two screws on the top of front cover panel. Installing Mainboard • Insert the mainboard into the base of the chassis and place it close to the back panel. • After fixing the mainboard on the base of the chassis, you will find there are six - Biostar IDEQ 200SB | iDEQ 200S user's manual - Page 48
• Connect the cable of LEDs indicator and frontpanel switches to "JPANELl" connector on the Mainboard. • Connect the cable of system fan to "JSFAN1" connector on the mainboard. "0"f, wiElrillElp -- rs lir Figure k7 Completing The Installation • Place the front panel back and fix it with four
-
 1
1 -
 2
2 -
 3
3 -
 4
4 -
 5
5 -
 6
6 -
 7
7 -
8
-
9
-
10
-
11
-
12
-
13
-
14
-
15
-
16
-
17
-
18
-
19
-
20
-
21
-
22
-
23
-
24
-
25
-
26
-
27
-
28
-
29
-
30
-
31
-
32
-
33
-
34
-
35
-
36
-
37
-
38
-
39
-
40
-
41
-
42
-
43
-
44
-
45
-
46
-
47
-
48
 |
 |