Biostar M7VIG PRO D M7VIG Pro D BIOS setup guide
Biostar M7VIG PRO D Manual
 |
View all Biostar M7VIG PRO D manuals
Add to My Manuals
Save this manual to your list of manuals |
Biostar M7VIG PRO D manual content summary:
- Biostar M7VIG PRO D | M7VIG Pro D BIOS setup guide - Page 1
M7VIG Pro-D BIOS Setup BIOS Setup 1 1 Main Menu...3 2 Standard CMOS Features 6 3 Advanced BIOS Features 9 4 Advanced Chipset Features 13 5 Integrated Peripherals 17 6 Power Management Setup 22 7 PnP/PCI Configurations 26 8 PC Health Status 29 9 Frequency Control 31 i - Biostar M7VIG PRO D | M7VIG Pro D BIOS setup guide - Page 2
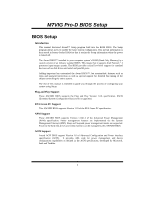
M7VIG Pro-D BIOS Setup BIOS Setup Introduction This manual discussed Award™ Setup program built into the ROM BIOS. The Setup program allows of this manual is intended to guide you through the process of configuring your system using Setup. Plug and Play Support These AWARD BIOS supports the Plug - Biostar M7VIG PRO D | M7VIG Pro D BIOS setup guide - Page 3
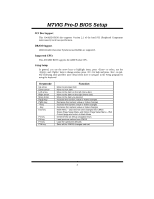
M7VIG Pro-D BIOS Setup PCI Bus Support This AWARD BIOS also supports Version 2.1 of the Intel PCI (Peripheral Component Interconnect) local bus specification. DRAM Support DDR (Double Data Rate Synchronous DRAM) are supported. Supported CPUs This AWARD BIOS supports the AMD Socket CPU. Using Setup - Biostar M7VIG PRO D | M7VIG Pro D BIOS setup guide - Page 4
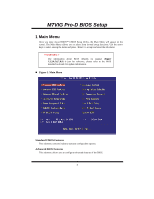
M7VIG Pro-D BIOS Setup 1 Main Menu Once you enter Award BIOS™ CMOS Setup Utility, the Main Menu will appear WARNING !! The information about BIOS defaults on manual (Figure 1,2,3,4,5,6,7,8,9) is just for reference, please refer to the BIOS installed on board, for update information. Figure 1. Main - Biostar M7VIG PRO D | M7VIG Pro D BIOS setup guide - Page 5
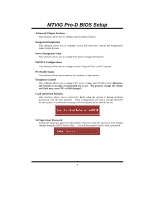
M7VIG Pro-D BIOS Setup Advanced Chipset Features This submenu allows you to configure special change the voltage and clock may cause CPU or M/B damage!) Load Optimized Defaults This selection allows you to reload the BIOS when the system is having problems particularly with the boot sequence. These - Biostar M7VIG PRO D | M7VIG Pro D BIOS setup guide - Page 6
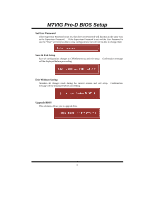
M7VIG Pro-D BIOS Setup Set User Password If the Supervisor Password is not set, then the User Password will function in the Abandon all changes made during the current session and exit setup. Confirmation message will be displayed before proceeding. Upgrade BIOS This submenu allows you to upgrade - Biostar M7VIG PRO D | M7VIG Pro D BIOS setup guide - Page 7
M7VIG Pro-D BIOS Setup 2 Standard CMOS Features The items in Standard CMOS Setup Menu are divided into 10 categories. Each category includes no, one or more than one - Biostar M7VIG PRO D | M7VIG Pro D BIOS setup guide - Page 8
M7VIG Pro-D BIOS Setup Main Menu Selections This table shows the selections that you can make on the Main Menu. Item 3.5 in Select the type of floppy disk drive installed in your system. 1.44M, 3.5 in 2.88M, 3.5 in None Video EGA/VGA CGA 40 Select the default video device. CGA 80 MONO 7 - Biostar M7VIG PRO D | M7VIG Pro D BIOS setup guide - Page 9
M7VIG Pro-D BIOS Setup Item Halt On Base Memory Extended Memory Total Memory Options All Errors No Errors All, but Keyboard All, but Diskette All, but Disk/ Key N/A N/A N/A Description Select the situation in which you want the BIOS to stop the POST process and notify you. Displays the amount of - Biostar M7VIG PRO D | M7VIG Pro D BIOS setup guide - Page 10
M7VIG Pro-D BIOS Setup 3 Advanced BIOS Features Figure 3. Advanced BIOS Setup Virus Warning This option allows you to choose the Virus Warning feature that is used to protect the IDE Hard Disk boot sector. If this function is enabled and an attempt is made to write to the boot sector, BIOS LAN, - Biostar M7VIG PRO D | M7VIG Pro D BIOS setup guide - Page 11
M7VIG Pro-D BIOS Setup Boot Up Floppy Seek Enabling this option will test the floppy drives to determine if they have 40 or 80 tracks. Disabling this option reduces the time it takes to boot-up. The Choices: Disabled, Enabled (default). CPU Internal Cache Depending on the CPU/chipset in use, you - Biostar M7VIG PRO D | M7VIG Pro D BIOS setup guide - Page 12
M7VIG Pro-D BIOS Setup Typematic Rate Setting When a key is held down, the keystroke will (default), Disabled. MPS Version Control For OS The BIOS supports version 1.1 and 1.4 of the Intel multiprocessor specification. Select version supported by the operation system running on this computer. The - Biostar M7VIG PRO D | M7VIG Pro D BIOS setup guide - Page 13
M7VIG Pro-D BIOS Setup Summary Screen Show This item allows you to enable/ disable display the Summary Screen Show. The Choices: Disabled (default), Enabled. 12 - Biostar M7VIG PRO D | M7VIG Pro D BIOS setup guide - Page 14
M7VIG Pro-D BIOS Setup 4 Advanced Chipset Features This submenu allows you to configure the specific features of the chipset installed on your system. This chipset manage bus speeds - Biostar M7VIG PRO D | M7VIG Pro D BIOS setup guide - Page 15
M7VIG Pro-D BIOS Setup DRAM Timing This item determines DRAM clock/ timing follow SPD or not. The Choices: By SPD (default), Manual. DRAM CAS Latency When DRAM is installed, the number of clock cycles of CAS latency depends on the DRAM timing. The Choices: 2.5 (default), 2. Bank Interleave - Biostar M7VIG PRO D | M7VIG Pro D BIOS setup guide - Page 16
M7VIG Pro-D BIOS Manual", it allows user to set AGP output Buffer Drive strength P Ctrl by manual. The Choices: Auto (default), Manual. AGP Driving Value While AGP driving control item set to "Manual ), Enabled. CPU & PCI Bus Control If you highlight the literal "Press Enter" next to the "CPU & PCI - Biostar M7VIG PRO D | M7VIG Pro D BIOS setup guide - Page 17
M7VIG Pro-D BIOS Setup PCI1 Post Write When Enabled, CPU writes are allowed to post on the PCI bus. The Choices: Enabled (default), Disabled. PCI2 Post Write When Enabled, CPU : Disabled (default), Enabled. VGA Share Memory Size This item allows you to select the VGA share memory size. The Choices - Biostar M7VIG PRO D | M7VIG Pro D BIOS setup guide - Page 18
M7VIG Pro-D BIOS Setup 5 Integrated Peripherals Figure 5. Integrated Peripherals OnChip IDE Control The chipset contains a PCI IDE interface with support for two IDE channels. Select "Enabled" to activate the first and / or second IDE interface. If you install a primary and / or secondary add-in IDE - Biostar M7VIG PRO D | M7VIG Pro D BIOS setup guide - Page 19
M7VIG Pro-D BIOS Setup through 4 provides successively increased performance. In Auto mode, the requires a DMA driver (Windows 95 OSR2 or a third party IDE bus master driver). If your hard drive and your system software both support Ultra DMA/100, select Auto to enable BIOS support. The Choices: - Biostar M7VIG PRO D | M7VIG Pro D BIOS setup guide - Page 20
M7VIG Pro-D BIOS Setup Super IO Device If you highlight the literal "Press Enter" : Onboard FDC Controller Select Enabled if your system has a floppy disk controller (FDC) installed on the system board and you wish to use it. If install and FDC or the system has no floppy drive, select Disabled - Biostar M7VIG PRO D | M7VIG Pro D BIOS setup guide - Page 21
M7VIG Pro-D BIOS Setup Onboard Parallel Port This item allows you to determine access onboard parallel option should be enabled if your system has a USB installed on the system board. You will need to disable this feature if you add a higher performance controller. The Choices: All enabled ( - Biostar M7VIG PRO D | M7VIG Pro D BIOS setup guide - Page 22
M7VIG Pro-D BIOS Setup USB Keyboard Support Enables support for USB attached keyboards. The Choices: Disabled (default), Enabled. 21 - Biostar M7VIG PRO D | M7VIG Pro D BIOS setup guide - Page 23
M7VIG Pro-D BIOS Setup 6 Power Management Setup The Power Management Setup Menu allows you to configure your system to utilize energy conservation and power up/power down features. - Biostar M7VIG PRO D | M7VIG Pro D BIOS setup guide - Page 24
M7VIG Pro-D BIOS Setup Min. Power Saving Minimum power management. Suspend Mode = 1 hr. HDD Power Down = 15 min Max. Power Saving Maximum power management only available for sl CPU's. Suspend Mode = 1 min. HDD Power Down = 1 min. User Defined (default) Allows you to set each mode individually. When - Biostar M7VIG PRO D | M7VIG Pro D BIOS setup guide - Page 25
M7VIG Pro-D BIOS Setup Initial display power management signaling. Modem Use manual intervention. There are 3 sources that provide current to the CMOS area that retains these Power-On instructions; the motherboard Wake Up on LAN/Ring An input signal on the serial Ring Indicator (RI) line (in - Biostar M7VIG PRO D | M7VIG Pro D BIOS setup guide - Page 26
M7VIG Pro-D BIOS Setup incoming call on the modem) awakens the system from a soft off which occurs to a device, which is configured as Enabled, even when the system is in a power down mode. VGA off (default), on. LPT & COM LPT/COM (default), COM, LTP, None. HDD & COM On (default), off. - Biostar M7VIG PRO D | M7VIG Pro D BIOS setup guide - Page 27
M7VIG Pro-D BIOS Setup 7 PnP/PCI Configurations This section describes configuring the PCI bus system. PCI, or Personal Computer Interconnect, is a system which allows I/O devices to operate at speeds nearing the speed of the CPU itself uses when communicating with its own special components. This - Biostar M7VIG PRO D | M7VIG Pro D BIOS setup guide - Page 28
M7VIG Pro-D BIOS Setup are reserved in the system BIOS. If the Disabled (default) option is chosen, the system's ESCD will update only when the new configuration varies from the last one. If the Enabled option is chosen, the system is forced to update By" is set to "Manual". IRQ-3 IRQ-4 IRQ-5 - Biostar M7VIG PRO D | M7VIG Pro D BIOS setup guide - Page 29
M7VIG Pro-D BIOS Setup graphic controller is on an ISA bus, the Write Access to the palette will not show up on the ISA bus if the PCI VGA controller responds to the Write. In this case, the PCI VGA to be forwarded to the ISA bus. The non-VGA ISA graphic controller can then snoop the data on the - Biostar M7VIG PRO D | M7VIG Pro D BIOS setup guide - Page 30
M7VIG Pro-D BIOS Setup 8 PC Health Status Figure 8. PC Health Status Current CPU Temperature This field displays the current temperature of the CPU. Current CPUFAN Speed This field displays the current speed of CPU fan. Current SYSFAN Speed This field displays the current speed SYSTEM fan. CPU - Biostar M7VIG PRO D | M7VIG Pro D BIOS setup guide - Page 31
M7VIG Pro-D BIOS Setup Chassis Open Warning This item allows you to enable or disable chassis open warning beep. The choices: Disabled (default), Enabled. Shutdown Temperature This item allows you to set up the CPU shutdown Temperature. This item only effective under Windows 98 ACPI mode. The - Biostar M7VIG PRO D | M7VIG Pro D BIOS setup guide - Page 32
M7VIG Pro-D BIOS Setup 9 Frequency Control Figure 9. Frequency Control Auto Detect PCI/ DIMM Clk Choices: +/-0.25% (default), Disabled, -0.5%, +/-0.5%, +/-0.75%. CPU Host/ PCI Clock This item allows you to select CPU Clock, and CPU over clocking. If unfortunately, the system's frequency that you are - Biostar M7VIG PRO D | M7VIG Pro D BIOS setup guide - Page 33
M7VIG Pro-D BIOS Setup ※ It's strongly recommended to set CPU Vcore and clock in default setting. If the CPU Vcore and clock are not in default setting, it may cause CPU or M/B damage. 32
-
 1
1 -
 2
2 -
 3
3 -
 4
4 -
 5
5 -
 6
6 -
 7
7 -
8
-
9
-
10
-
11
-
12
-
13
-
14
-
15
-
16
-
17
-
18
-
19
-
20
-
21
-
22
-
23
-
24
-
25
-
26
-
27
-
28
-
29
-
30
-
31
-
32
-
33
 |
 |

M7VIG Pro-D BIOS Setup
i
BIOS Setup
.......................................................................................
1
1 Main Menu
....................................................................................................
3
2 Standard CMOS Features
..............................................................................
6
3 Advanced BIOS Features
..............................................................................
9
4 Advanced Chipset Features
.........................................................................
13
5 Integrated Peripherals
.................................................................................
17
6 Power Management Setup
...........................................................................
22
7 PnP/PCI Configurations
..............................................................................
26
8 PC Health Status
.........................................................................................
29
9 Frequency Control
.......................................................................................
31