Biostar NF61S-M2 TE Setup Manual - Page 7
Hardware Installation
 |
View all Biostar NF61S-M2 TE manuals
Add to My Manuals
Save this manual to your list of manuals |
Page 7 highlights
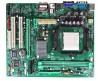
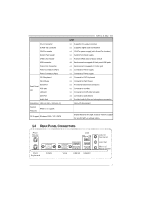
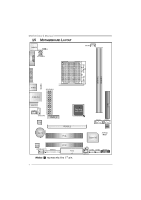
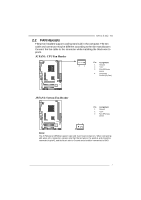
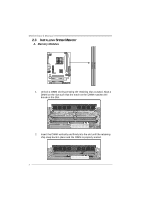
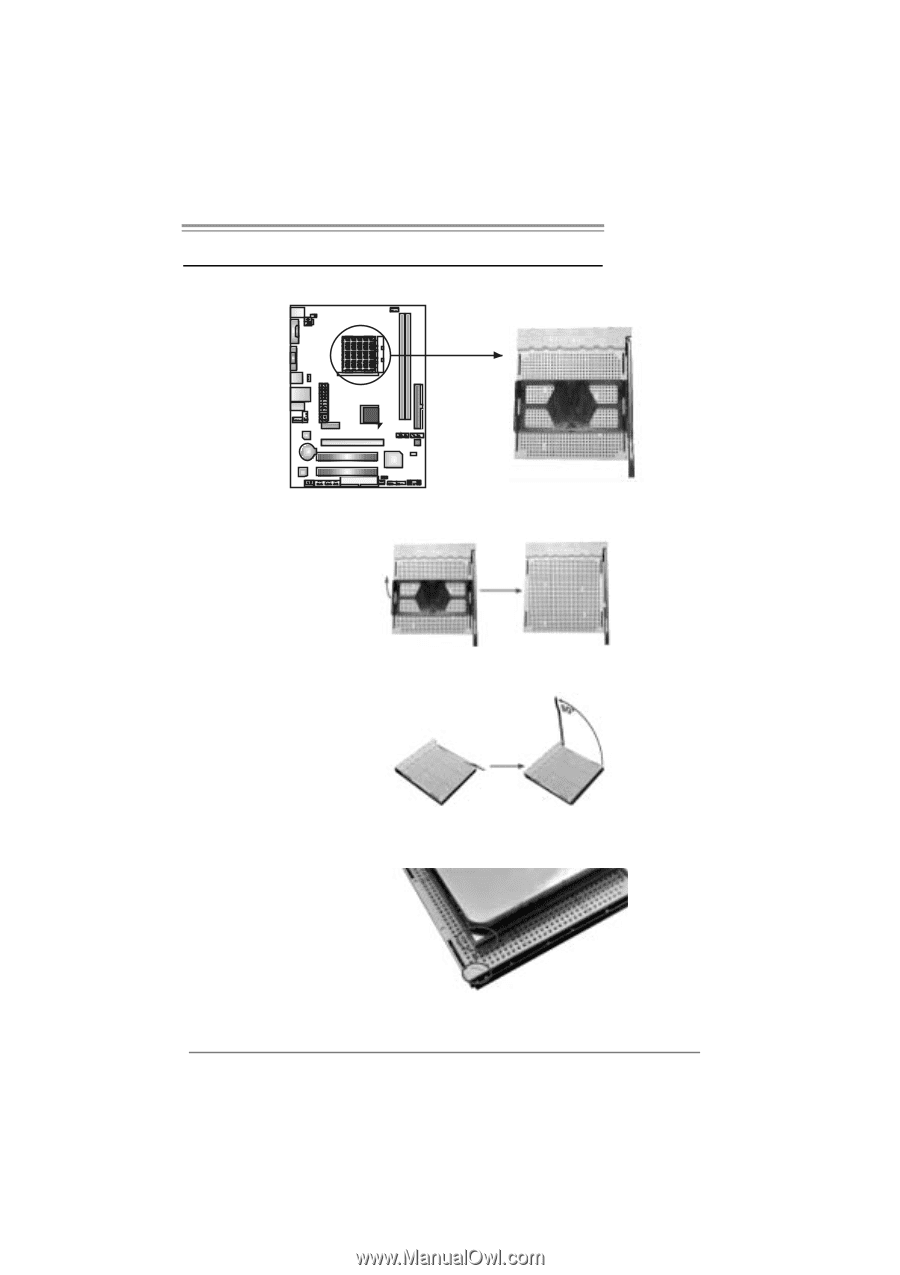
NF61S-M2 TE CHAPTER 2: HARDWARE INSTALLATION 2.1 INST ALLING CENT RAL PROCESSING UNIT (CPU) Step 1: Remove the socket protection cap. Step 2: Pull the lever toward direction A from the socket and then raise the lever up to a 90-degree angle. Step 3: Look for the white triangle on socket, and the gold triangle on CPU should point towards this white triangle. The CPU will fit only in the correct orientation. 5
-
 1
1 -
 2
2 -
 3
3 -
 4
4 -
 5
5 -
 6
6 -
 7
7 -
 8
8 -
 9
9 -
 10
10 -
 11
11 -
 12
12 -
13
-
14
-
15
-
16
-
17
-
18
-
19
-
20
-
21
-
22
-
23
-
24
-
25
-
26
-
27
-
28
-
29
-
30
-
31
-
32
-
33
-
34
-
35
-
36
-
37
-
38
-
39
-
40
-
41
-
42
-
43
-
44
-
45
-
46
-
47
-
48
-
49
 |
 |
NF61S-M2 TE
5
CHAPTER 2: HARDWARE INSTALLATION
2.1
I
NSTALLING
C
ENTRAL
P
ROCESSING
U
NIT
(CPU)
Step 1:
Remove the socket protection cap.
Step 2:
Pull the lever toward direction A from the socket and then raise the
lever up to a 90-degree angle.
Step 3:
Look for the white triangle on socket, and the gold triangle on
CPU should point towards this white triangle. The CPU will fit only
in the correct orientation.