Bissell Rewind Premier Pet Rewind Premier™ Pet User's Guide - Page 11
Pre-Motor, Filter - vacuum parts
 |
View all Bissell Rewind Premier Pet manuals
Add to My Manuals
Save this manual to your list of manuals |
Page 11 highlights
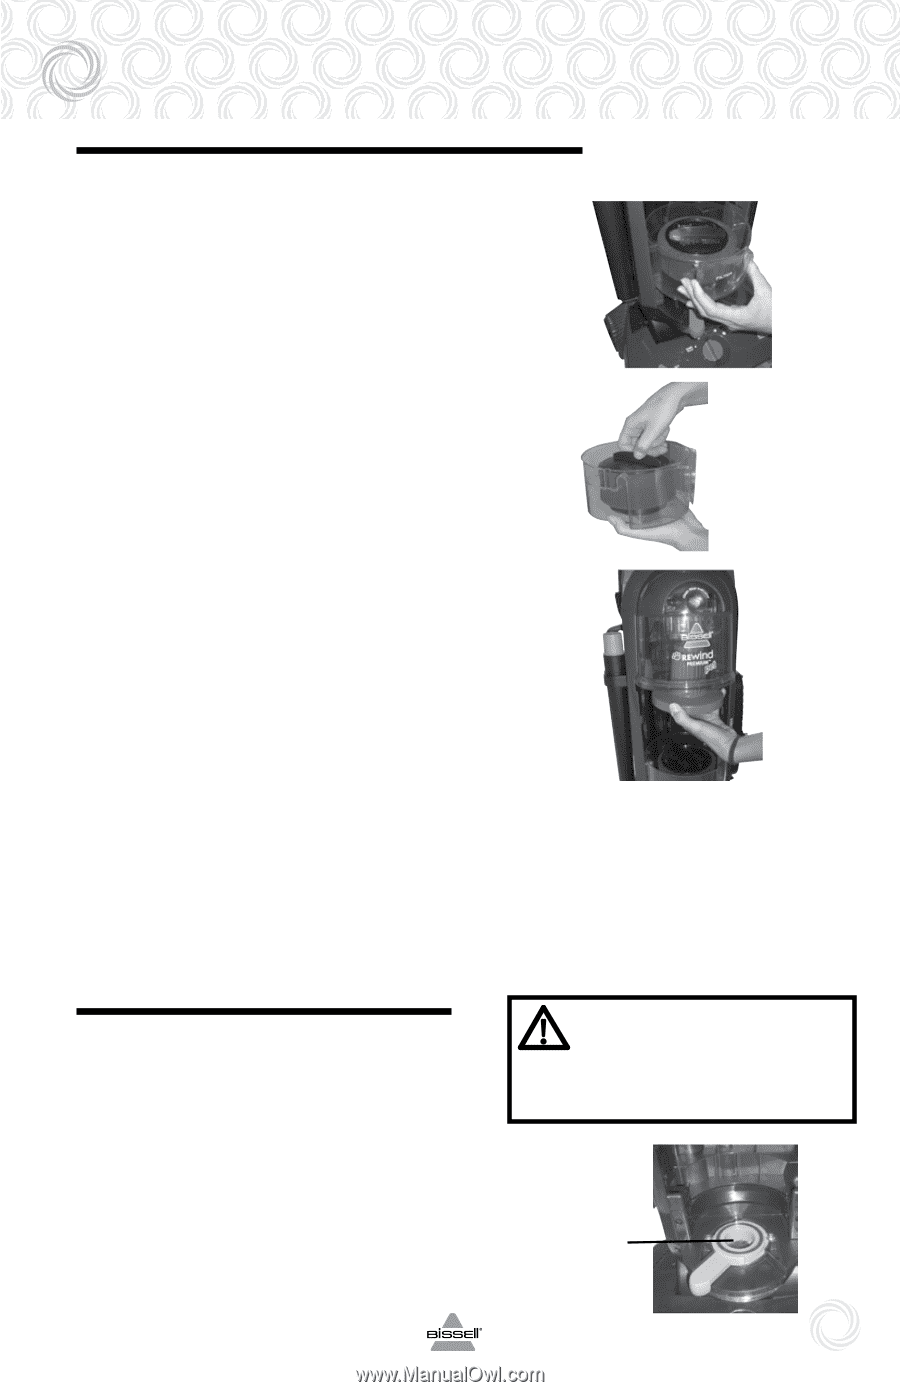
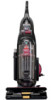
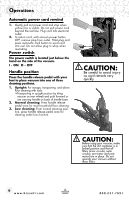
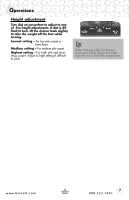
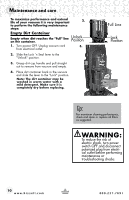
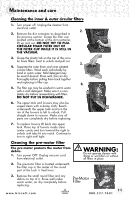
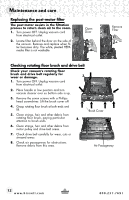
Maintenance and care Cleaning the inner & outer circular filters 1. Turn power off. Unplug the cleaner from electrical outlet. 2. 2. Remove the dirt container as described in the previous section. Grasp the filter cup located at the bottom of the dirt container, lift up and out. Do not try to pull circular foam filter out of the filter cup while it is still in the vacuum. 3. Grasp the plastic tab on the top of the circu- lar foam filters. Twist to unlock and pull out. 3. 4. Separate the outer foam and inner pleated circular filters. Wash each individually by hand in warm water. Mild detergent may be used if desired. Rinse well, then air dry thoroughly before putting them back together and replacing in filter cup. 6. 5. The filter cup may be washed in warm water with a mild detergent. Make sure it is completely dry before reassembling with filters. DO NOT PUT IN DISHWASHER. 6. The upper tank and louvers may also be wiped clean with a damp cloth. Reach underneath the upper tank and turn the rim of the louvers to left to unlock. Pull straight down to remove. Make sure all parts are completely dry before replacing. 7. To replace louvers lift back into upper tank. Place top of louvers inside clear center cavity and turn toward the right to unlock until tabs fit into notch. Continue to turn to right until tight. Cleaning the pre-motor filter The pre-motor protects the motor from debris. 1. Turn power OFF. Unplug vacuum cord from electrical outlet. WARNING: Do not operate cleaner with damp or wet filters or without all filters in place. 2. The pre-motor filter is located underneath the filter cup in the center of the round part of the Lock 'n Seal lever. 3. Remove the small round filter and any debris on top of it. Rinse well under warm water, air dry completely before replacing. www.bissell.com Pre-Motor Filter 11 800.237.7691
-
 1
1 -
2
-
3
-
4
-
5
-
 6
6 -
 7
7 -
 8
8 -
 9
9 -
 10
10 -
 11
11 -
 12
12 -
 13
13 -
 14
14 -
 15
15 -
 16
16 -
17
-
18
-
19
-
20
 |
 |