Bosch 1619EVS Operating Instructions - Page 9
Operating Instructions - accessories
 |
UPC - 000346313222
View all Bosch 1619EVS manuals
Add to My Manuals
Save this manual to your list of manuals |
Page 9 highlights
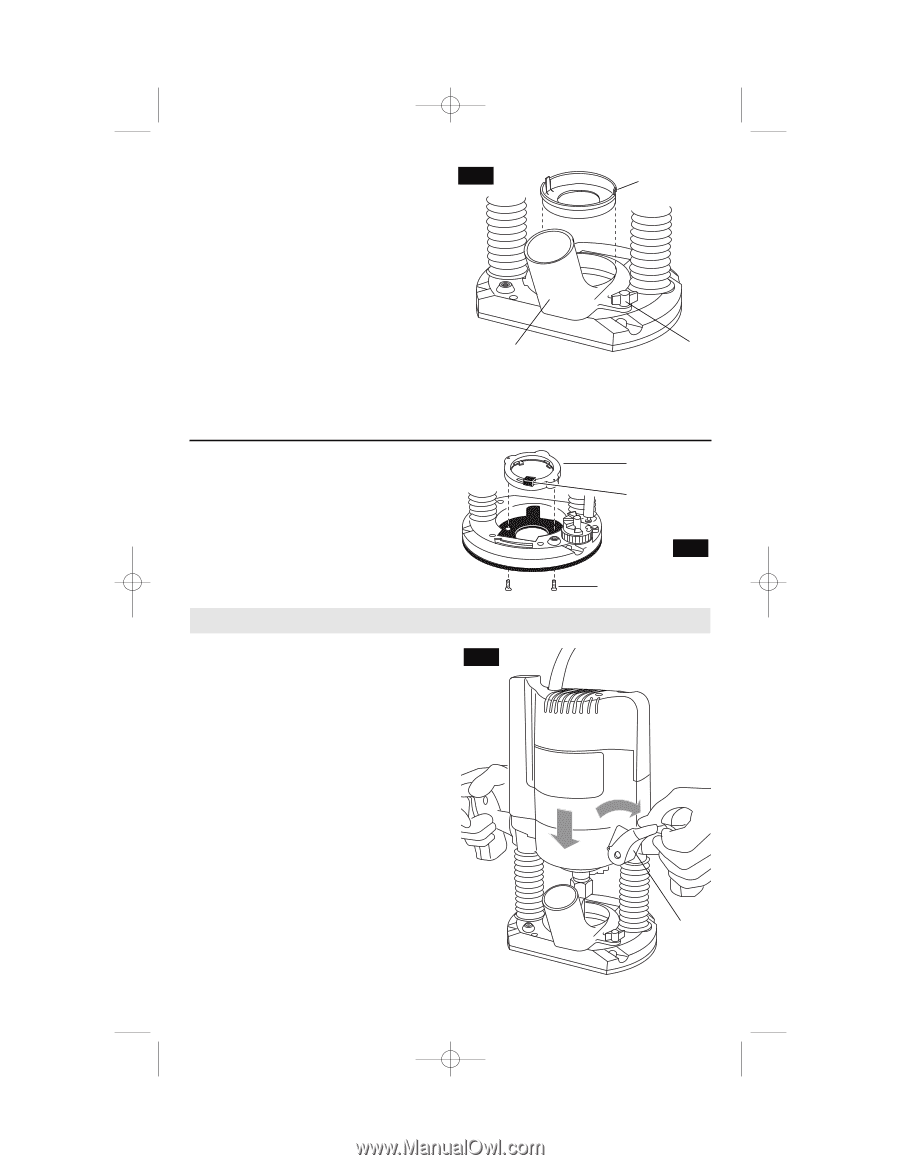
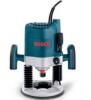
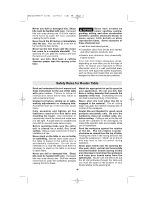
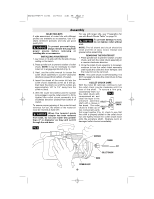
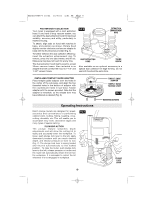
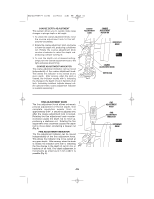
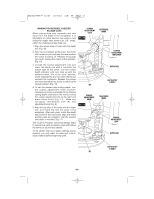
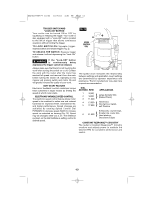
BM2610995777 10/03 10/7/03 4:51 PM Page 9 ROUTER DUST COLLECTION Your router is equipped with a dust extraction hood. If you have a shop vacuum system, you can attach the dust extraction hood for improved visibility, accuracy and utility, particularly in freehand routing. To attach, align tabs on hood with notches in base, and position as shown. Rotate hood slightly counter-clockwise and secure adapter to base with the thumbscrew provided (Fig. 5). To further enhance the dust collection efficiency, insert the extraction enhancement ring. To remove, press the two tabs inward, and lift out. Make sure ring does not touch bit at any time. The dust extraction hood itself is sized to accept 35mm vacuum hoses. Also included is an adapter that will connect the hood to 1-1/4" and 1-1/2" vacuum hoses. FIG. 5 EXTRACTION ENHANCEMENT RING DUST EXTRACTION HOOD THUMB SCREW Also available as an optional accessory is a special dust collection for edge forming. Do not use both hoods at the same time. INSTALLING TEMPLET GUIDE ADAPTER Place templet guide adapter over the holes in the center of the sub-base, and align the two threaded holes in the bottom of adapter with the countersunk holes in sub-base. Fasten adapter with the screws provided. Note that the adapter is reversible, so the release lever may be positioned as desired (Fig. 6). Operating Instructions Bosch plunge routers are designed for speed, accuracy and convenience in performing cabinet work, routing, fluting, beading, covecutting, dovetails, etc. This will enable you to accomplish inlay work, decorative edges and many types of special carving. PLUNGING ACTION The plunge feature simplifies depth adjustments and will allow the cutting bit to easily and accurately enter the workpiece. To lower, push plunge lock lever to the left, apply downward pressure until you reach desired depth, and release pressure on lever to lock (Fig. 7). The plunge lock lever is spring loaded and returns automatically to the locked position. To raise the router, push plunge lock lever to the left, release pressure on router and the router will automatically retract the bit from the workpiece. It is advisable to retract the bit whenever it is not engaged in workpiece. FIG. 7 TEMPLET GUIDE ADAPTER TEMPLET GUIDE RELEASE LEVER FIG. 6 MOUNTING SCREWS PLUNGE LOCK LEVER -9-
-
 1
1 -
2
-
3
-
 4
4 -
 5
5 -
 6
6 -
 7
7 -
 8
8 -
 9
9 -
 10
10 -
 11
11 -
 12
12 -
 13
13 -
 14
14 -
15
-
16
-
17
-
18
-
19
-
20
-
21
-
22
-
23
-
24
-
25
-
26
-
27
-
28
-
29
-
30
-
31
-
32
-
33
-
34
-
35
-
36
-
37
-
38
-
39
-
40
-
41
-
42
-
43
-
44
-
45
-
46
-
47
-
48
-
49
-
50
-
51
-
52
-
53
-
54
-
55
-
56
 |
 |