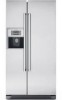
Bosch B20CS51SNS Installation and Use & Care
Bosch B20CS51SNS - 20.2 cu. Ft Manual
 |
View all Bosch B20CS51SNS manuals
Add to My Manuals
Save this manual to your list of manuals |
Bosch B20CS51SNS manual content summary:
- Bosch B20CS51SNS | Installation and Use & Care - Page 1
- Bosch B20CS51SNS | Installation and Use & Care - Page 2
Freezing and storing food 12 Automatic ice and water dispenser 13 Water filter 15 How to save energy 17 Operating noises 17 Defrosting 17 Cleaning the appliance 17 Eliminating minor faults yourself 18 Changing the bulb 20 Customer service 20 Installation instructions 21 Français 26 Espa - Bosch B20CS51SNS | Installation and Use & Care - Page 3
as described in this Owner's Manual. 2. This refrigerator must be properly installed in accordance with the Installation Instructions before it is used. 3. this or any other appliance. 6. In freezers with an automatic icemaker, avoid contact with the moving parts of the ejector mechanism, or with the - Bosch B20CS51SNS | Installation and Use & Care - Page 4
by a qualified servicer. If you intentionally release this CFC refrigerant, you can be subject to fines and imprisonment under provisions of environmental legislation. e IMPORTANT Save these instructions for local inspector's use. Observe all governing codes and ordinances. Note to Installer ć Be - Bosch B20CS51SNS | Installation and Use & Care - Page 5
appliance has been properly grounded. Water connection Have a technician install the appliance and connect it to the water supply according to the enclosed installation instructions. A cold water connection is required for operation of the automatic ice maker. The water pressure must be between 20 - Bosch B20CS51SNS | Installation and Use & Care - Page 6
tinned food, bottles and jars. 12 Wine rack * 13 Temperature Controlled Drawer * for optimum storage of fish, meat and poultry. 14 Ice maker for production and storage of ice cubes 15 Water filter compartment * not all models i If some of the indicate parts are missing from your appliance, these - Bosch B20CS51SNS | Installation and Use & Care - Page 7
, freezer compartment 3b Display for SUPERFREEZEt 3c Temperature display, refrigerator compartment 3d Display for SUPERCOOLt 4 Selection button for refrigerator compartment temperature 5 SUPERCOOL button 6 Reset button, water filter 7 Request button for water/ice 8 Lock button for ice maker for - Bosch B20CS51SNS | Installation and Use & Care - Page 8
Filter change required" display After changing the filter, press the water filter reset button for approx. 5 seconds to switch off the display. Ice maker locked" display Control panel locked" display Water" display Crushed ice" display Ice for the refrigerator and freezer compartments can be - Bosch B20CS51SNS | Installation and Use & Care - Page 9
for the drinking water dispenser (see installation instructions). If moving house Remove all detachable parts and pack each one carefully. Secure the doors and flaps with adhesive tape and transport the appliance in an upright position. 10 Functions Door alarm If refrigerator compartment door is - Bosch B20CS51SNS | Installation and Use & Care - Page 10
refrigerator compartment. The refrigerator compartment is cooled as cold as possible in SUPERCOOLt mode. Using the refrigerator contact of oil and fat with the plastic parts and door seal. - Store highĆpercentage Temperature Controlled Drawer (not all models) The temperature in this compartment - Bosch B20CS51SNS | Installation and Use & Care - Page 11
thick ice. Also: Energy will be lost due to high power consumption. SUPERFREEZE Fast freezing is used to freeze large quantities of fresh food and, depending on the quantity, must be switched on up to 24 hours before the food is placed in the freezer compartment. The freezer compartment is cooled as - Bosch B20CS51SNS | Installation and Use & Care - Page 12
fan assisted hotĆair - In the microwave i Do NOT refreeze food which is beginning to thaw or which has already thawed. The food cannot be refrozen until it has been prepared (boiled or fried). No longer store the frozen produce for the max. storage period. Automatic ice and water dispenser - Cooled - Bosch B20CS51SNS | Installation and Use & Care - Page 13
or food for rapid cooling in the ice cube container. The ice maker may become blocked and be damaged. When the appliance has been switched on, it takes approx. 24 hours until the first batch of ice cubes are ready. When ice cubes are being made, the buzzing water valve, the water flowing into the - Bosch B20CS51SNS | Installation and Use & Care - Page 14
filter. A new filter is available from customer service. q Disconnect the water supply to the appliance. q Press the Ice maker lock button. The symbol lights up. q Remove the ice cube container, empty and reĆinsert. Ensure that the ice cube container engages with the support. Switching on the ice - Bosch B20CS51SNS | Installation and Use & Care - Page 15
i The appliance might be used without a water filter. If you choose this option replace the water filter by a bypass cap. Filter - Product Data Sheet 16 - Bosch B20CS51SNS | Installation and Use & Care - Page 16
refrigerating unit is running. The fan in the circulating air system is running Bubbling, gurgling or whirring noises - refrigerant is flowing through the tubing. Water flowing into the ice maker. Clicking - motor are loose or sticking Please check the removable parts and, if required, reinsert them. - Bosch B20CS51SNS | Installation and Use & Care - Page 17
into contact with live parts in the appliance and Remove obstacles. The temperature in the refrigerator or Temperature has been set too low. freezer ice. Take frozen food out of the appliance, insulate thoroughly and place in a cool location. After approx. 12 hours the ice in the refrigerating - Bosch B20CS51SNS | Installation and Use & Care - Page 18
is interrupted. Water pressure too low. Freezer compartment too warm. Remedial action Turn tap on. Inform plumber. Press the Ice maker lock button. Lower temperature in the freezer compartment (see Selecting the temperature"). Remove and empty the ice cube container. Remove the ice cube container - Bosch B20CS51SNS | Installation and Use & Care - Page 19
out the main plug or switch off the fuse! Changing the bulb on the ice and water dispenser q Attention: Pull out the main plug or switch off the fuse! q Prise out the cover with a screwdriver. Customer service Your local customer service can be found in the telephone directory or in the customer - Bosch B20CS51SNS | Installation and Use & Care - Page 20
the ice maker functions correctly, the appliance must be upright. To ensure that the doors can open all the way, observe lateral minimum distances when installing the appliance in a corner or recess (see section on Appliance and installation dimensions"). Unpacking the appliance q Remove packaging - Bosch B20CS51SNS | Installation and Use & Care - Page 21
installation dimensions If the depth of the adjacent kitchen equipment is more than 23" (60 cm), observe lateral minimum distances in order to utilize the full door opening angle. Door opening angle 90 ° 135 ° Minimum distance 19/16" (40 mm) 51/2"(140 mm) 22 If a panel or cupboard is installed - Bosch B20CS51SNS | Installation and Use & Care - Page 22
that installation is carried out by our customer service. Unscrewing the freezer compartment door q Remove Remove and deposit the door with care! Do not damage the water line. Unscrewing the refrigerator compartment door q Unscrew the refrigerator compartment door in the same way (the refrigerator - Bosch B20CS51SNS | Installation and Use & Care - Page 23
pull out the main plug again and attach the motor compartment cover. Aligning the appliance To ensure that the appliance functions correctly, it must be set level with a spirit level. If the appliance is not level, water may flow out of the ice maker, ice cubes may be irregular or the doors may not - Bosch B20CS51SNS | Installation and Use & Care - Page 24
operating instructions. If the appliance is to be disconnected or stored at temperatures below freezing point, empty the water tank for the drinking water dispenser. Emptying the water tank in the appliance q Pull out the main plug. q Cut off the water supply to the appliance. q Remove the motor - Bosch B20CS51SNS | Installation and Use & Care - Page 25
l'énergie 41 Bruits de fonctionnement 41 Dégivrage 41 Nettoyage de l'appareil 42 Remédier soiĆmême aux petites pannes 43 Changement d'ampoule 45 Appeler le service aprèsĆvente 45 Instructions d'installation 46 English 3 Español 52 26 - Bosch B20CS51SNS | Installation and Use & Care - Page 26
utilisation, ce congélateur devra être correctement installé en conformité avec les instructions d'installation. 3. Ne permettez jamais aux enfants de se agréé ou un technicien du service aprèsĆvente. Certaines réglementations locales peuvent exiger un raccordement à part à la terre. En pareils cas - Bosch B20CS51SNS | Installation and Use & Care - Page 27
é ou qu'il sera éliminé, dans les deux cas par un technicien de service qualifié. Le rejet intentionnel de fluide réfrigérant à base de CFC dans pas son contenu. d PRUDENCE d PRUDENCE - Cette mention précède une instruction assortie d'un risque de blessures légères ou de dégâts si vous ne - Bosch B20CS51SNS | Installation and Use & Care - Page 28
service aprèsĆvente se tient à votre disposition. Pour obtenir des informations avancées et découvrir un choix de nos produits, rendezĆvous à notre site Internet. Veuillez lire la présente notice d'utilisation, les instructions d'installation la butée (voir les dimensions de l'appareil). Contrôler - Bosch B20CS51SNS | Installation and Use & Care - Page 29
de l'appareil (unité de base) ou en tout autre endroit facile d'accès. Installation et raccordement de l'appareil Après l'installation de l'appareil en position verticale, attendez au moins ½ heure avant de le mettre en service. Il peut en effet arriver, pendant le transport, que l'huile présente - Bosch B20CS51SNS | Installation and Use & Care - Page 30
érateur Pour ranger des aliments cuits, produits laitiers. 6 Balconnet à Ĺufs 7 Bac à légumes 8 Bac à fruits 9 Casier à beurre et à fromage 10 Support pour récipients d'un gallon 11 Supports en contreĆporte Pour ranger des conserves, de la viande et des bocaux. 12 Clayettes à bouteilles de vin * 13 - Bosch B20CS51SNS | Installation and Use & Care - Page 31
Distributeur de glaçons Distributeur de glaçons et d'eau 1 Vis sans fin de transport 2 Plot de prélèvement 3 Bac récupérateur d'eau Bandeau de commande et d'affichage 1 Touche de réglage de la température du compartiment congélateur 2 Touche de supercongélation (SUPERFREEZE ) 3 Bandeau d' - Bosch B20CS51SNS | Installation and Use & Care - Page 32
afficher la tempéraĆ ture en degrés Fahrenheit (°F) ou en degrés Celsius (°C). q Appuyez sur le bouton lock (1.). q Appuyez sur le bouton reset water filter et maintenezĆle appuyé pendant 15 secondes (2.). q Appuyez sur la touche de réglage jusqu'à ce que la température voulue s'affiche. Le système - Bosch B20CS51SNS | Installation and Use & Care - Page 33
de courant. q Sortez le filtre à eau. i Lors de la remise en service, incorporez un filtre à eau neuf. q Nettoyez l'intérieur de l'appareil (voir le réservoir d'eau affecté au distributeur d'eau (voir les instructions d'installation). Fonctions Alarme relative à la porte Si vous laissez la porte - Bosch B20CS51SNS | Installation and Use & Care - Page 34
Compartiment réfrigérant La température du compartiment réfrigérateur est réglable entre 33 °F et 45 °F (+1 ºC et +7 ºC). Nous vous recommandons de régler la température sur 39 °F (+4 ºC). Utilisation du compartiment réfrigérateur Vous pouvez ranger les pâtisseries, plats précuisinés, conserves, - Bosch B20CS51SNS | Installation and Use & Care - Page 35
Durées de stockage à 32 °F (0 °C): suivant la qualité de départ Saucisses, charcuterie en tranches, viande rouge, abats, poisson, lait frais, fromage de grandes quantités d'aliments frais. Vous devrez l'enclencher jusqu'à 24 heures avant de ranger ces aliments frais. Pendant la supercongélation - Bosch B20CS51SNS | Installation and Use & Care - Page 36
jusqu'à 10 kg de produits alimentaires en 24 heures. Durée de conservation des produits surgel - des glaçons - de la glace pilée (CrushĆice) d AVERTISĆ SEMENT d Pour prélever de l'eau ou d'eau. Consignes importantes lors de la mise en service de l'appareil neuf Après le raccordement, les - Bosch B20CS51SNS | Installation and Use & Care - Page 37
se bloquer et de s'endommager. Après la mise en service de l'appareil, il faut env. 24 heures pour que les premiers glaçons soient prêts. la touche jusqu'à ce que le symbole des glaçons ou de la glace pilée (CrushĆIce) s'allume. q Placez un récipient approprié contre le plot de prélèvement. i Cessez - Bosch B20CS51SNS | Installation and Use & Care - Page 38
à glaçons, videzĆle puis remettezĆle en place. Veillez à ce que le bac encoche bien sur sa surface d'appui. Pour le remettre en service: q Appuyez sur la touche de verrouillage «Distributeur de glaçons». Le symbole s'éteint. Filtre à eau d AVERTISĆ SEMENT d Pour ne pas encourir le risque d'une - Bosch B20CS51SNS | Installation and Use & Care - Page 39
installé un filtre à eau neuf, n'utilisez pas les glaçons produits par le distributeur au cours des 24 pouvez vous procurer un filtre neuf par le biais du service aprèsĆvente. q Débranchez l'arrivée d'eau à l' q Insérez la cartouche filtrante neuve dans le support et imprimezĆlui un quart de tour (90 - Bosch B20CS51SNS | Installation and Use & Care - Page 40
Filtre - Fiche technique 41 - Bosch B20CS51SNS | Installation and Use & Care - Page 41
Conseils pour économiser de l'énergie q Placez votre appareil dans un endroit frais et bien aéré. Veillez à ce qu'il ne soit pas exposé aux rayons solaires et qu'il ne se trouve pas à proximité d'une source de chaleur (radiateur etc.). Utilisez le cas échéant une plaque isolante. q Attendez que les - Bosch B20CS51SNS | Installation and Use & Care - Page 42
la fiche mâle dans la prise de courant. d AVERTISĆ SEMENT d Pour éviter des dommages corporels ou des dégâts matériels veuillez respecter les instructions suivantes : - Ne nettoyez pas l'appareil avec un nettoyeur à vapeur. - Veillez bien à ce que l'eau de nettoyage ne puisse pas pénétrer dans - Bosch B20CS51SNS | Installation and Use & Care - Page 43
Remédier soiĆmême aux petites pannes Avant d'appeler le service aprèsĆvente : Vérifiez svp si vous ne pouvez pas remédier vousĆmême au dérangement à l'aide des instructions qui suivent. Si vous faites venir le technicien, ses conseils vous seront facturés, même pendant la période de garantie! - Bosch B20CS51SNS | Installation and Use & Care - Page 44
. Mettez l'appareil d'aplomb en vous servant d'un niveau à bulle et de ses roulettes et pieds à vis réglables en hauteur (voir les instructions d'installation). Le distributeur d'eau ne fonctionĆ Robinet d'eau fermé. ne pas. Alimentation en eau coupée. Pression de l'eau trop faible. Ouvrez le - Bosch B20CS51SNS | Installation and Use & Care - Page 45
branchez la fiche mâle de la prise secteur ou coupez le fusible / disjoncteur ! q Soulevez le cacheĆlampe à l'aide d'un tournevis. Appeler le service aprèsĆvente Vous trouverez un centre de SAV près de chez vous dans l'annuaire téléphonique ou dans le répertoire du SAV. Veuillez indiquer au SAV - Bosch B20CS51SNS | Installation and Use & Care - Page 46
votre localité. Veuillez conserver les présentes instructions d'installation. Lieu d'installation Attention: L'appareil est très lourd. et pour pouvoir ouvrir les portes jusqu'à la butée (voir la section «Dimensions de l'appareil et cotes d'encombrement». Déballer l'appareil q Enlevez le maté - Bosch B20CS51SNS | Installation and Use & Care - Page 47
Dimensions de l'appareil et cotes d'encombrement Si la profondeur des équipements de cuisine voisins dépasse 60 cm, il faudra respecter des écarts latéraux minimums afin - Bosch B20CS51SNS | Installation and Use & Care - Page 48
ment le flexible de son raccord. Nous recommandons de confier le montage à notre service aprèsĆvente. Dévisser la porte du compartiment congélateur q Retirez le couvercle que l'appareil repose bien à la verticale sur le lieu d'installation. Raccorder l'appareil au réseau d'eau Le raccordement de l' - Bosch B20CS51SNS | Installation and Use & Care - Page 49
ou du changement du cordon d'alimentation électrique, montez le frein à cordon. Vérifier l'étanchéité du raccordement de l'eau q Mettez l'appareil en service en respectant le contenu de la notice d'utilisation. q Prélevez de l'eau conformément à la notice d'utilisation. La première fois, l'eau - Bosch B20CS51SNS | Installation and Use & Care - Page 50
en respectant le contenu de la notice d'utilisation. Remisage longue durée de l'appareil Mettez l'appareil hors service conformément à la notice d'utilisation ciĆjointe. Si vous voulez mettre l'appareil hors service ou le ranger à un endroit dont la température descend enĆdessous du point de cong - Bosch B20CS51SNS | Installation and Use & Care - Page 51
índice INSTRUCCIONES IMPORTANTES DE SEGURIDAD 51 FELICITACIONES 52 Emplazamiento de la unidad 53 Familiarizándose con el nuevo aparato 55 Conectar el aparato 57 Ajustar la temperatura 57 Desconexión y paro del aparato 58 Funciones 58 Posibilidad de variar la posición del equipo interior del - Bosch B20CS51SNS | Installation and Use & Care - Page 52
para las que ha sido previsto, según se describe en este manual para el usuario. 2. Antes de usarlo, este refrigerador debe instalarse . 6. En congeladores con producción automática de hielo, evite tocar las partes móviles del mecanismo eyector o bien con el elemento calefactor ubicado en el fondo - Bosch B20CS51SNS | Installation and Use & Care - Page 53
gubernamentales. Nota para el instalador asegúrese de dejar estas instrucciones a su cliente. Nota para el consumidor Guarde estas instrucciones junto a su manual del usuario para su uso posterior. Definiciones d PELIGRO d PELIGRO - Esto señaliza que hay peligro de muerte o lesiones graves ante el - Bosch B20CS51SNS | Installation and Use & Care - Page 54
Emplazamiento de la unidad d ADVERĆ TENCIA d No instale el electrodoméstico: - a la intemperie, - en un ambiente donde gotee agua, - en ambientes con peligro de heladas. El electrodoméstico es muy pesado. Con objeto - Bosch B20CS51SNS | Installation and Use & Care - Page 55
Conexión del agua Se requiere de una conexión de agua fría, para el funcionamiento del generador automático de hielo. La presión del agua debe estar comprendida entre 20 a 100 p.s.i. (1.4 a 6.9 bar). La instalación debe cumplir con las reglamentaciones de tubería de agua locales y las leyes - Bosch B20CS51SNS | Installation and Use & Care - Page 56
y almacenar cubitos de hielo 15 Filtro de agua * no disponible en todos los modelos i Posiblemente algunos de los elementos mostrados en la imagen no forman parte del equipamiento del modelo elegido por usted. Ello se debe a que estas instrucciones de uso son válidas para diversos modelos. 57 - Bosch B20CS51SNS | Installation and Use & Care - Page 57
Fabricador de hielo Dispensador de hielo y agua 1 Rosca transportadora Cuadro de mandos 2 Mando contacto para la extracción de agua o hielo 3 Bandeja colectora del agua 1 Tecla para ajustar la temperatura del compartimento de congelación 2 Tecla super congelación (SUPERFREEZE ) 3 Pantalla de - Bosch B20CS51SNS | Installation and Use & Care - Page 58
La temperatura puede visualizarse en grados Farenheit (°F) o bien en grados Celsius (°C). q Pulsar la tecla lock (1.). q Pulsar y mantener pulsada la tecla reset water filter por 15 segundos (2.). q Pulsar las teclas de ajuste repetidas veces, hasta que en la pantalla de visualización se muestre la - Bosch B20CS51SNS | Installation and Use & Care - Page 59
Desconexión y paro del aparato Desconectar el aparato q Extraer el enchufe de conexión del aparato de la toma de corriente de la red eléctrica. Paro del aparato En caso de largos períodos de inactividad de la unidad: q Retirar todos los alimentos del aparato. q Cortar la alimentación de agua del - Bosch B20CS51SNS | Installation and Use & Care - Page 60
q Abrir y alzar ligeramente los cajones y extraerlos. Compartimento frigorífico La temperatura del compartimento frigorífico se puede ajustar entre 33 °F y 45 °F (entre +1 ºC y +7 ºC). Se aconseja ajustar una temperatura de 39 °F (+4 ºC). Utilizar el compartimento frigorífico Guardar pan y bollería, - Bosch B20CS51SNS | Installation and Use & Care - Page 61
grandes cantidades de alimentos frescos. Para ello hay que activar la función ć según la cantidad concreta de alimentos que se desea congelar ć hasta 24 horas antes de introducir los alimentos frescos en el compartimento de congelación. Con la función super congelación se enfría el compartimento de - Bosch B20CS51SNS | Installation and Use & Care - Page 62
se pueden termosellar con una soldadora de plásticos. Capacidad máxima de congelación La capacidad de congelación del aparato permite congelar en un plazo de 24 horas hasta un máximo de 10 kg de alimentos frescos de una sola vez. Calendario de congelación El plazo de conservación varía en funci - Bosch B20CS51SNS | Installation and Use & Care - Page 63
dispensador de cubitos puede fabricar hasta aprox. 100 cubitos de hielo en 24 horas. ¡No colocar botellas ni alimentos en el depósito de los d CUIDADO d El filtro de agua suministrado con el aparato filtra exclusivamente las partículas contenidas en el agua de red, no reteniendo, por lo tanto, - Bosch B20CS51SNS | Installation and Use & Care - Page 64
del dispensador cubitos de hielo durante un periodo de tiempo prolongado, éstos pierden parte de su volumen, saben «a viejo» y se adhieren entre sí. q Retirar se adhieran entre sí. q Pulsar la tecla de bloqueo dispensador de cubitos «Ice maker lock». El símbolo se ilumina. q Retirar el depósito de - Bosch B20CS51SNS | Installation and Use & Care - Page 65
Una vez que cambie el filtro, descarte la producción de hielo de las primeras 24 horas posteriores a la operación de cambio. - Si el hielo no ha sido cuidadosamente 90° en sentido horario. q Insert the cover of the water filter compartment. i El electrodoméstico puede utilizarse sin el filtro de - Bosch B20CS51SNS | Installation and Use & Care - Page 66
Filtro de agua - Hoja de datos del producto 67 - Bosch B20CS51SNS | Installation and Use & Care - Page 67
las tuberías en el dispensador de cubitos. Los ruidos en forma de clic - se escuchan cuando el motor se conecta o desconecta, o la electroválvula en la toma de agua abre y cierra. Los ruidos caracter conduce hasta la bandeja de evaporación situada en la parte posterior de la unidad, donde se evapora. - Bosch B20CS51SNS | Installation and Use & Care - Page 68
lo con agua clara, secándola bien a continuación. q Limpiar el aparato con agua tibia y algo de detergente desinfectante, como por ejemplo un lavavajillas manual suave. Téngase presente que el agua empleada en la limpieza del aparato no debe penetrar en el cuadro de mandos ni entrar en contacto con - Bosch B20CS51SNS | Installation and Use & Care - Page 69
Pequeñas averías de fácil solución Antes de avisar al Servicio de Asistencia Técnica: Compruebe si la avería o fallo que usted ha constatado se encuentra recogida en los siguientes consejos y advertencias. ¡De este forma se evitará usted gastos innecesarios, dado que en estos casos, los gastos del - Bosch B20CS51SNS | Installation and Use & Care - Page 70
Dispensador de agua y hielo Avería No se suministran cubitos de hielo a pesar de que el aparato lleva funcionando largo tiempo. Aunque los cubitos de hielo están en el depósito de cubitos, éstos no se suministran. Los cubitos de hielo han quedado atascados en la salida del depósito de cubitos o en - Bosch B20CS51SNS | Installation and Use & Care - Page 71
Sustituir las bombillas Sustituir la bombilla en el interior del aparato q ¡Atención! Extraer el enchufe de conexión del aparato de la toma de corriente de la red o desconectar el fusible! q Soltar los dos tornillos debajo de la tapa protectora; retirar la tapa. Sustituir la bombilla del - Bosch B20CS51SNS | Installation and Use & Care - Page 72
Instrucciones de montaje Advertencia importante Las presentes instrucciones de montaje son válidas para diferentes modelos. En algunos modelos no hay que ejecutar todas los pasos detallados en las instrucciones de montaje. El aparato sólo podrá ser instalado por un técnico de la marca, de - Bosch B20CS51SNS | Installation and Use & Care - Page 73
Cotas y medidas del aparato En caso que los muebles de cocina contiguos excedan las 23 (60 cm) de profundidad, deberá dejarse un espacio suficiente a los costados, con el fin de aprovechar el ángulo de apertura de la puerta Ángulo de apertura de la puerta 90° 135° Mínima distancia 19/16" (40 mm) - Bosch B20CS51SNS | Installation and Use & Care - Page 74
para empalmar la manguera de alimentación de agua suministrada con el aparato, deberá estar libremente accesible. q Aflojar los tornillos de la cobertura del compartimiento del motor. q Retirar la tapa protectora de la bisagra superior (1). 75 - Bosch B20CS51SNS | Installation and Use & Care - Page 75
fin de poder retirar el aparato de la pared. ¡Importante! Cuando se instale o sustituya el enchufe de conexión a la red eléctrica, montar asimismo la toma de corriente y montar la tapa de protección del espacio del motor. q Instalar el aparato en su emplazamiento definitivo. q Fijar la placa - Bosch B20CS51SNS | Installation and Use & Care - Page 76
éctrica. q Cerrar la alimentación de agua (grifo) del aparato. q Retirar la tapa del recinto del grupo frigorífico que se encuentra en la parte posterior del aparato. q Desenroscar la tubería de alimentación de agua (1) de su acoplamiento al aparato. q Colocar la bandeja colectora de agua plana, de - Bosch B20CS51SNS | Installation and Use & Care - Page 77
Subject to modification. Sous réserve de modifications. Se reserva el derecho a efectuar modificaciones. 9000180246 en, fr, es (8608)
-
 1
1 -
 2
2 -
 3
3 -
 4
4 -
 5
5 -
 6
6 -
 7
7 -
8
-
9
-
10
-
11
-
12
-
13
-
14
-
15
-
16
-
17
-
18
-
19
-
20
-
21
-
22
-
23
-
24
-
25
-
26
-
27
-
28
-
29
-
30
-
31
-
32
-
33
-
34
-
35
-
36
-
37
-
38
-
39
-
40
-
41
-
42
-
43
-
44
-
45
-
46
-
47
-
48
-
49
-
50
-
51
-
52
-
53
-
54
-
55
-
56
-
57
-
58
-
59
-
60
-
61
-
62
-
63
-
64
-
65
-
66
-
67
-
68
-
69
-
70
-
71
-
72
-
73
-
74
-
75
-
76
-
77
 |
 |
