Bosch NGMP655UC Installation Instructions
Bosch NGMP655UC Manual
 |
View all Bosch NGMP655UC manuals
Add to My Manuals
Save this manual to your list of manuals |
Bosch NGMP655UC manual content summary:
- Bosch NGMP655UC | Installation Instructions - Page 1
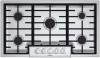
LP Gas Conversion Kit NGM Gas Cooktops NGM30, NGM50, NGM56 NGM80, NGM86, NGMP65, NGMP055 - Bosch NGMP655UC | Installation Instructions - Page 2
- Bosch NGMP655UC | Installation Instructions - Page 3
operation to propane gas operation. This kit cannot be used to convert other Bosch model sealed burner cooktops, ranges or any other brand of cooktops. WARNING This conversion kit shall be installed by a qualified service agency in accordance with the manufacturer's instructions and all applicable - Bosch NGMP655UC | Installation Instructions - Page 4
Preparation Installation Kit Contents Component Quantity Conversion Kit Instructions 1 Conversion Sticker 1 Foam Tape 1 95 Orifice 3 66 Orifice 2 44 Orifice 1 Note: Depending on the model, the kit may contain more components that are necessary to - Bosch NGMP655UC | Installation Instructions - Page 5
conversion process adjusts the flow of gas to the burners to accommodate an LP gas fuel source. CAUTION TURN OFF GAS AND ELECTRICITY. If the cooktop is installed in the counter, 1) shut off the gas valve for the gas supply line to the cooktop. 2) remove the cooktop power cord from the electrical - Bosch NGMP655UC | Installation Instructions - Page 6
of the LP gas orifices as layed out on the orifice package card. Note: The NGMP055UC and NGMP655UC models have an extra hidden orifice underneath the center unit cap. It is necessary to remove the burner cover plate to change the hidden (smaller) center orifice. bottom of cooktop Step 2 - Replace - Bosch NGMP655UC | Installation Instructions - Page 7
grates are correctly placed and the rubber feet on the grates engage the indents in the cooktop for proper position. Step 4 - Convert Valves for LP Gas The bypass jet on each valve must be adjusted. Your cooktop may come with either hollow or solid valve shafts. Determine the bypass screw location - Bosch NGMP655UC | Installation Instructions - Page 8
conducted by the installer according to the instructions given in this section. Turn on gas. Apply a non-corrosive leak detection fluid to all joints and fittings in the gas connection between the shutoff valve and the cooktop. Include gas fittings and joints in the cooktop if connections may have - Bosch NGMP655UC | Installation Instructions - Page 9
model and serial number. Refer to the data plate on the appliance when requesting service. The data plate is located on the bottom of the rough-in box, underneath the visible part of the installed cooktop. This data plate information is also provided in a sticker attached to the product registration - Bosch NGMP655UC | Installation Instructions - Page 10
table de cuisson ou de cuisinière à brûleurs scellés de Bosch ou une toute autre marque de table de cuisson. AVERTISSEMENT Ce kit de conversion doit être installé par une agence d'entretien qualifiée conformément aux instructions du fabricant et à tous les codes et exigences applicables des autorit - Bosch NGMP655UC | Installation Instructions - Page 11
Préparation Contenu du kit d'installation Composant Quantité Instructions du kit de conversion 1 Autocollant de conversion 1 Ruban en mousse 1 Orifice 95 3 Orifice 66 2 Orifice 44 1 Remarque : Selon le modèle, le kit peut contenir d' - Bosch NGMP655UC | Installation Instructions - Page 12
gaz aux brûleurs pour correspondre à celui convenant au gaz propane. MISE EN GARDE ÉTEIGNEZ LE GAZ ET L'ÉLECTRICITÉ. Si la table de cuisson est installée dans le plan de travail : 1) fermez le robinet de gaz relié au tuyau d'alimentation en gaz de la table de cuisson; 2) débranchez le cordon - Bosch NGMP655UC | Installation Instructions - Page 13
cercles blancs correspondant à chaque brûleur comme indiqué dans l'illustration ci-dessous Ces nombres sont gravés sur le dessus de chaque orifice. Il est important d'installer la bonne taille d'orifice pour chaque brûleur. Francais 4 - Bosch NGMP655UC | Installation Instructions - Page 14
Vous pourrez ainsi éviter que l'orifice tombe de la douille au cours de l'insertion. Étape 3 - Remettre les grilles et les capuchons de brûleur en place Remettre les grilles et les capuchons de brûleur en place. S'assurer que les grilles sont correctement mises en place et que les pieds en - Bosch NGMP655UC | Installation Instructions - Page 15
La vérification doit être effectuée par l'installateur conformément aux instructions de cette section. Ouvrez le gaz. Appliquez un liquide de détection table de cuisson si les connexions ont été perturbées pendant l'installation. Des bulles autour des raccords et connexions indiquent la présence - Bosch NGMP655UC | Installation Instructions - Page 16
paration Flammes jaunes : Un ajustement est nécessaire. Avant d'appeler le service de dépannage Pointes jaunes au niveau des cônes extérieurs : Normal re du boîtier, sous la partie visible de la table de cuisson installée. Les informations de la plaque signalétique se retrouvent également sur un - Bosch NGMP655UC | Installation Instructions - Page 17
operación con gas natural a la operación con gas propano. Este kit no puede utilizarse para convertir otros modelos de Bosch de placas con de suministro de gas cerrando la válvula de paso manual individual durante cualquier prueba de presión del sistema de tuberías de suministro de gas con presiones - Bosch NGMP655UC | Installation Instructions - Page 18
Preparación Contenido del kit de instalación Componente Cantidad Instrucciones del kit de conversión 1 Adhesivo de conversión 1 Cinta de espuma 1 Orificio 95 3 Orificio 66 2 Orificio 44 1 Nota: En función del modelo, es posible que el kit contenga más componentes de los que sean - Bosch NGMP655UC | Installation Instructions - Page 19
de presión Ubique el regulador de presión en el extremo inferior derecho de la placa. Nota: La flecha en la parte trasera del regulador debe apuntar en la dirección del flujo de gas a la placa. . Retire la tapa de forma hexagonal del regulador asegurándose de no remover el empaque de la - Bosch NGMP655UC | Installation Instructions - Page 20
al orificio y ayudará a evitar que el orificio se caiga de la llave durante la extracción. Gas Gas Natural LP Importante: Pegue el adhesivo metálico (que se incluye en este kit de conversión) en la parte inferior del electrodoméstico, según se muestra, colocándolo cerca de la placa de datos del - Bosch NGMP655UC | Installation Instructions - Page 21
para la posición correcta. Paso 4: Convierta las válvulas para la utilización de gas LP Se debe ajustar la salida del regulador de cada válvula. Es posible que posición "Off" (Apagado). 5. Inserte cada uno de los orificios de gas LP que se proporcionan en este kit en la llave (utilizando el peque - Bosch NGMP655UC | Installation Instructions - Page 22
, conecte un manómetro (indicador del nivel del agua) u otro dispositivo aprobado para la lectura de la presión de gas al orificio trasero derecho de la hornilla de la parte superior. Utilizando una manguera de hule con un diámetro interior de aproximadamente 1/4 pulg., mantenga la tubería en forma - Bosch NGMP655UC | Installation Instructions - Page 23
: Normal para gas LP. Llamas azul claro: Normal para gas natural. Nota: Si la llama es amarilla en su mayor parte, verifique que el frente del manual. Al llamar, esté preparado para proporcionar la información impresa en la placa de datos de su producto (modelo, número de serie [FD], etc.). - Bosch NGMP655UC | Installation Instructions - Page 24
1901 Main Street,, Suite 600, Irvine, CA 92614 • 800-944-2904 • www.bosch-home.com 9000947165 • Rev. A • 5V0RSS • 01/14 © BSH Home Appliances Corporation, 2014 • All rights reserved
-
 1
1 -
 2
2 -
 3
3 -
 4
4 -
 5
5 -
 6
6 -
 7
7 -
8
-
9
-
10
-
11
-
12
-
13
-
14
-
15
-
16
-
17
-
18
-
19
-
20
-
21
-
22
-
23
-
24
 |
 |

NGM30, NGM50, NGM56
NGM80, NGM86, NGMP65
, NGMP055
NGM Gas Cooktops
LP Gas Conversion Kit