Bosch SHV7ER53UC Installation Instructions - Page 6
Enclosure Requirements - model
 |
View all Bosch SHV7ER53UC manuals
Add to My Manuals
Save this manual to your list of manuals |
Page 6 highlights
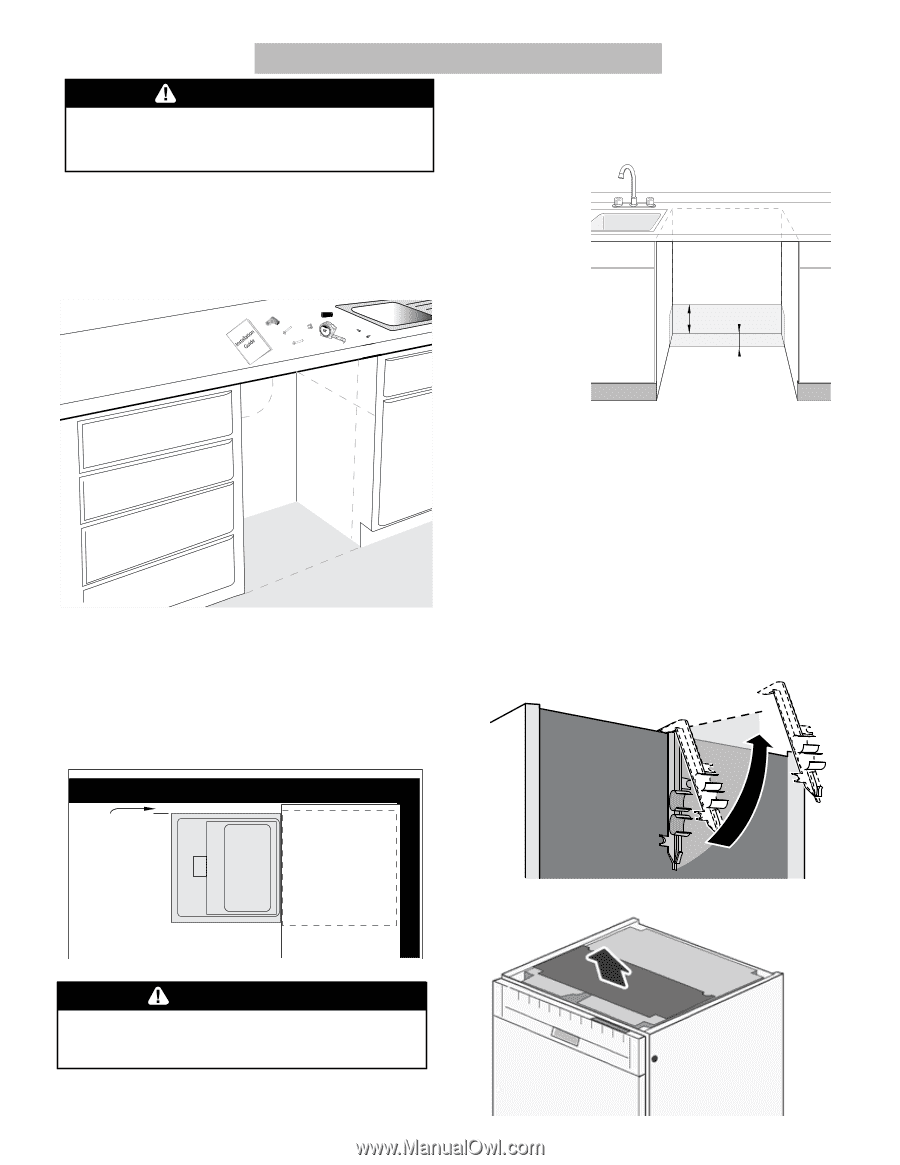
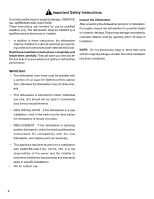
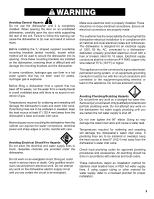
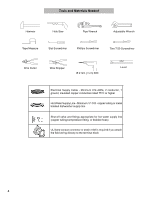
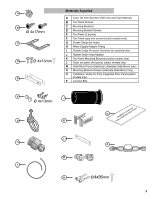
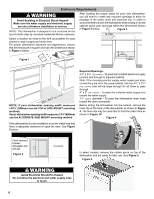
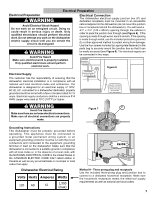
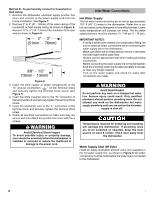
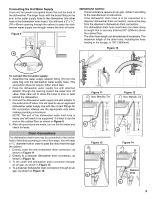
Enclosure Requirements WARNING Avoid Scalding or Electrical Shock Hazard! Make sure the water supply and electrical supply are shut off before installation or service. NOTE: This dishwasher is designed to be enclosed on the top and both sides by standard residential kitchen cabinetry. After locating the proper place for your new dishwasher, you will need to create any required openings to allow for passage of the water, drain and electrical line. In order to avoid interference with the dishwasher when sliding it into the cabinet, place your openings within the dimensions shown in Figure 3 below. Figure 3 Select a location as close to the sink as possible for easy access to water supply and drain lines. For proper dishwasher operation and appearance, ensure that the enclosure is square and has the dimensions shown in Figure 1 below. Figure 1 90° 22 5/8″ (575mm) 34¼″(867mm) 235 /8 - 241 /4″ (600 - 616mm) NOTE: If your dishwasher opening width measures >235/8″ (600mm) use the TOP or SIDE MOUNT mounting methods. If your dishwasher opening width measures 235/8″(600mm) use the ALTERNATE SIDE MOUNT mounting method. 41/2" (114mm) 21/2" (64mm) Required Openings: 43/4″ x 23/8″ (120 x 60mm) - To pass the included electrical supply junction box through to adjacent cabinet. Note: If the incoming electric supply, water supply and drain connections are all in the same cabinet, the one 43/4″ x 23/8″ (120 x 60mm) hole will be large enough for all three to pass through. 4″ x 2″ (100 x 50mm) - To pass the included water supply line toward the water supply 11/4″ (32mm) diameter - To pass the dishwasher drain hose toward the drain connection Before sliding the dishwasher into the cabinet, remove the hose clip at the back of the dishwasher as shown in Figure 4. The hose clip may be used later to hold the drain hose as shown in Figure 10. Figure 4 If the dishwasher is to be installed in a corner, make sure that there is adequate clearance to open the door. See Figure 2 below. Check clearance between dishwasher door and wall Figure 2 Countertop In select models, remove the rubber apron on top of the dishwasher and set aside for later use. See Figure 5. Figure 5 WARNING Avoid Electrical Shock/Fire Hazard Do not allow the electrical and water supply lines to touch. 6 6
-
 1
1 -
 2
2 -
 3
3 -
 4
4 -
 5
5 -
 6
6 -
 7
7 -
 8
8 -
 9
9 -
 10
10 -
 11
11 -
 12
12 -
13
-
14
-
15
-
16
-
17
-
18
-
19
-
20
-
21
-
22
-
23
-
24
-
25
-
26
-
27
-
28
-
29
-
30
-
31
-
32
-
33
-
34
-
35
-
36
-
37
-
38
 |
 |