Bosch SHX78B75UC Installation Instructions
Bosch SHX78B75UC Manual
 |
View all Bosch SHX78B75UC manuals
Add to My Manuals
Save this manual to your list of manuals |
Bosch SHX78B75UC manual content summary:
- Bosch SHX78B75UC | Installation Instructions - Page 1
Installation Instructions Notice d'installation 9001 725 707 (0203) - Bosch SHX78B75UC | Installation Instructions - Page 2
- Bosch SHX78B75UC | Installation Instructions - Page 3
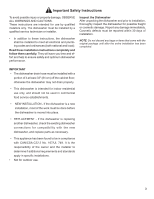
, OBSERVE ALL WARNINGS AND CAUTIONS. These instructions are intended for use by qualified installers only. The dishwasher must be installed by a qualified service technician or installer. • In addition to these instructions, the dishwasher shall be installed to meet all electrical and plumbing codes - Bosch SHX78B75UC | Installation Instructions - Page 4
dishwasher until it is completely installed. When opening the door on an uninstalled dishwasher, carefully open the door while supporting the rear of the unit done in accordance with national and local codes. These instructions depict an installation method for stainless steel braided hose or PEX hot - Bosch SHX78B75UC | Installation Instructions - Page 5
Tools and Materials Needed Hammer Hole Saw Pipe Wrench Adjustable Wrench Tape Measure Slot Screwdriver Phillips Screwdriver Torx T-20 Screwdriver Ø 2 mm (1/16 in) Drill Level Hot Water Supply Line - Minimum 3/8″ O.D. copper tubing or metal braided dishwasher supply line Shut-off valve and - Bosch SHX78B75UC | Installation Instructions - Page 6
(Alternate Side Mount only) N Mounting Bracket Screws (Alternate Side Mount only) O Installation Guide for Fully Integrated Door Panel (select models only) P Power Cord Q Wrench ( mm M R ø 4x30 N Ø 4x36mm * Depending on the model of your dishwasher. Also available from Customer Service. 6 - Bosch SHX78B75UC | Installation Instructions - Page 7
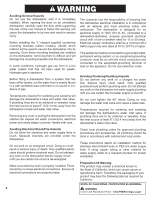
Enclosure Requirements WARNING Avoid Scalding or Electrical Shock Hazard! Make sure the water supply and electrical supply are shut off before installation or service. NOTE: This dishwasher is designed to be enclosed on the top and both sides by standard residential kitchen cabinetry. After - Bosch SHX78B75UC | Installation Instructions - Page 8
apply. Note: Installations requiring hard wiring and terminal block - The accessory terminal block/junction box model, SMZPCJB1UC, designed for permanent wire connection, is not included but can be ordered through Customer Service by calling 1-800-944-2904. Follow the instructions included with the - Bosch SHX78B75UC | Installation Instructions - Page 9
the water supply adaptor fitting (H) from the parts bag onto the dishwasher water supply hose. This inlet hose is heavy and will need to be supported. It is best to lay the end on the and check for leaks. Water Supply Shut Off Valve Install an easily accessible shut-off valve (not supplied) in - Bosch SHX78B75UC | Installation Instructions - Page 10
508mm) max 43″ (1100mm) min 20″ (508mm) max 43″ (1100mm) IMPORTANT NOTES: · If local ordinance require an air gap, install it according to the manufacturer's instructions. · If the dishwasher drain hose is to be connected to a disposer dishwasher drain connection, remove the plug from the disposer - Bosch SHX78B75UC | Installation Instructions - Page 11
brackets down firmly to insert the tabs into the slots. Bend perforated edge down as shown. Figure 15 Top and Side Mount C G Figure 14 Installation of Mounting Brackets Alternate Side Mount for opening 235/8″ (600 mm). Insert a side mount force distributor (M) in each side as shown in Figure 16 - Bosch SHX78B75UC | Installation Instructions - Page 12
~½" (13 mm) WARNING Avoid Tip Over Hazard! Do not use the dishwasher until it is completely installed. When opening the door on an uninstalled dishwasher, carefully open the door while supporting the rear of the unit. Failure to follow this warning can result in serious injury. LEVELING THE - Bosch SHX78B75UC | Installation Instructions - Page 13
or threepiece toe panel (model dependent) to allow height adjustment. 1. Position the slotted rear toe panel (part of E) on the dishwasher first. Allow it to rest on the floor. 2. Position the mating front toe panel (part of E) on top of the rear toe panel allowing the angled edge to rest on the - Bosch SHX78B75UC | Installation Instructions - Page 14
the following steps (in the order listed below) until the problem is corrected to your satisfaction: 1. Contact your installer or the Authorized Service Contractor in your area. 2. E-mail us. See your Use and Care Manual for instructions. 3. Write us at the address below: BSH Home Appliances, Corp - Bosch SHX78B75UC | Installation Instructions - Page 15
15 - Bosch SHX78B75UC | Installation Instructions - Page 16
16 - Bosch SHX78B75UC | Installation Instructions - Page 17
technicien de maintenance ou un installateur qualifié. • Outre ces instructions, l'installation du lave-linge doit être effectuée conformément à service alimentaire commerciaux. • NOUVELLE INSTALLATION - Si le lave-vaisselle est installé pour la première fois, la plupart des travaux d'installation - Bosch SHX78B75UC | Installation Instructions - Page 18
fixer solidement le lave-vaisselle dans l'ouverture. Une fois les pattes de fixation installées sur le lave-vaisselle, il sera difficile de les retirer sans les ément aux codes nationaux et locaux. Ces instructions décrivent la méthode d'installation des flexibles tressés en acier inoxydable ou des - Bosch SHX78B75UC | Installation Instructions - Page 19
. REMARQUE : ne pas jeter les sacs ou les éléments contenus dans l'emballage d'origine avant d'avoir complètement terminé l'installation du lave-vaisselle. Avertissement issue de la proposition 65 de l'État de la Californie : Ce produit pourrait contenir un produit chimique reconnu par l'État - Bosch SHX78B75UC | Installation Instructions - Page 20
de fixation (montage latéral alternatif uniquement) O Guide d'installation pour un panneau de porte pleinement intégré P Guide dde'inpsotartlelaptiloeninpeomuernutninptaéngnréeau P K H Q L R ø 4x30 I M * Selon le modèle de votre lave- N vaisselle. Également disponible auprès du service - Bosch SHX78B75UC | Installation Instructions - Page 21
ouverture de votre lave-vaisselle est inférieure à 23 5/8 po (600mm) utilisez la méthode de MONTAGE LATÉRAL ALTERNATIF. Si le lave-vaisselle doit être installé dans un coin de la pièce, s'assurer qu'il y a un dégagement suffisant pour ouvrir la porte. Voir la Figure 2 ci-dessous. Avant d'encastrer - Bosch SHX78B75UC | Installation Instructions - Page 22
Remarque : Installations utilisant filaires permanentes Le modèle de bornier accessoire / boîte de jonction, SMZPCJB1UC, conçu pour une connexion filaire permanente, n'est pas inclus, mais peut être commandé auprès du service clientèle en composant le 1-800-944-2904. Suivez les instructions fournies - Bosch SHX78B75UC | Installation Instructions - Page 23
branchez pas le lave-vaisselle avant que toutes les étapes d'installation soient terminées. Remarque: utilisez uniquement le cordon d'alimentation inclus le câble est manquant, commandez le kit SMZPC002UC auprès du service client. Raccordements d'arrivée d'eau Alimentation d'eau chaude Le chauffe - Bosch SHX78B75UC | Installation Instructions - Page 24
réglementation locale exige un dispositif de coupure anti-retour, en installer un conformément aux instructions du fabricant. · Si le tuyau de vidange du lave-vaisselle é du tuyau d'alimentation du lavevaisselle est lourde et doit être supportée. Il convient de déposer l'extrémité du tuyau sur le - Bosch SHX78B75UC | Installation Instructions - Page 25
Side est la vis sera placée et fixée dans différents trous du support de montage (voir "Fixation du lave-vaisselle" section sur la page suivante). sans les abîmer ainsi que le lave-vaisselle. Le lave-vaisselle peut être installé dans l'encastrement de façon sécuritaire de trois façons : REMARQUE : si - Bosch SHX78B75UC | Installation Instructions - Page 26
2mm) WAVAERRTNISISNEMGENT Éviter les dangers de basculement. Ne pas utiliser le lave-vaisselle tant que l'installation n'est pas complètement terminée. Pour ouvrir la porte d'un lave-vaisselle dont l'installation n'est pas terminée, agir avec prudence et en soutenant la partie arrière de l'appareil - Bosch SHX78B75UC | Installation Instructions - Page 27
Fixation du panneau de plinthe Votre lave-vaisselle est livré avec un panneau de plinthe qui se compose de trois pièces (certains modèles) pour permettre de régler la hauteur de l'appareil. 1. Positionner tout d'abord le panneau de plinthe (partie de E) à fentes arrière sur le lave-vaisselle. Le - Bosch SHX78B75UC | Installation Instructions - Page 28
-nous un courriel. Pour des instructions, se reporter au Manuel d'utilisation et d'entretien. 3. Écrivez-nous à l'adresse ci-dessous : BSH Home Appliances, Corp. 1901 Main Street, Suite 600 Irvine, CA 92614 4. Appelez le service après-vente au numéro fourni : 1-800-944-2904 Assurez-vous d'inclure - Bosch SHX78B75UC | Installation Instructions - Page 29
29 - Bosch SHX78B75UC | Installation Instructions - Page 30
30
-
 1
1 -
 2
2 -
 3
3 -
 4
4 -
 5
5 -
 6
6 -
 7
7 -
8
-
9
-
10
-
11
-
12
-
13
-
14
-
15
-
16
-
17
-
18
-
19
-
20
-
21
-
22
-
23
-
24
-
25
-
26
-
27
-
28
-
29
-
30
 |
 |

Installation Instructions
Notice d’installation
9001 725 707
(0
2
0
3
)