Bosch VC7C1305T Installation Instructions - Page 8
System Settings - diagram
 |
View all Bosch VC7C1305T manuals
Add to My Manuals
Save this manual to your list of manuals |
Page 8 highlights
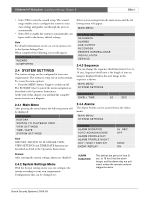
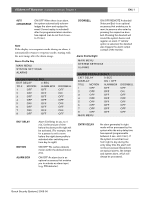
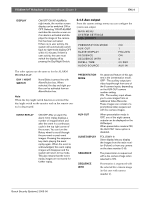
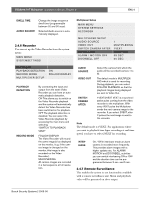
VSS8394/01T Multiplexer | Installation Manual | Chapter 2 EN | 6 • Select YES to start the wizard setup. The wizard setup enables you to configure the system to your own settings and guides you through the process automatically. • Select NO to enable the system to automatically configure itself to the factory default settings. Note For detailed information on the on screen menus refer to the System Settings Part. When completed the following screen will appear: CONFIGURATION WIZARD COMPLETED 2.4 SYSTEM SETTINGS The system settings can be configured to your own requirements. The system is setup via on-screen menus. To access the menu options: • Press the MENU button. Toggle to switch on/off. The ROTARY wheel controls the menu navigation as described in the Operation Instructions. At the end of this chapter you will find the complete menu structure in a diagram. Select system settings from the main menu and the following menu will appear: MAIN MENU SYSTEM SETTINGS SEQUENCE ALARMS AUX-OUTPUT RECORDER REMOTE SURVEILLANCE INSTALLATION SERVICE 2.4.3 Sequence You can change the sequence dwell time from 01 sec to 30 secs. Sequence/dwell time is the length of time an image is displayed before the next image in the sequence is shown. MAIN MENU SYSTEM SETTINGS SEQUENCE DWELL TIME 05 SEC 2.4.1 Main Menu After pressing the menu button the following menu will be displayed: MAINMENU HISTORY SWITCH TO PLAYBACK VIEW VIEW SETTINGS TIME / DATE SYSTEM SETTINGS Note HISTORY, SWITCH TO PLAYBACK VIEW, VIEW SETTINGS and TIME/DATE functions are described in detail in the Operation Instructions. 2.4.4 Alarms The Alarm Profiles can be accessed from the Alarm menu. MAIN MENU SYSTEM SETTINGS ALARMS ALARM DURATION AUTO ACKNOWLEDGE ALARM PROFILE DAY ALARM PROFILE NIGHT DAY / NIGHT SWITCH EVENT REPLAY 05 SEC OFF NONE ON Remark After entering the system settings, alarms are disabled. 2.4.2 System Settings Menu With the System settings menu you can configure the system according to your own requirements. Configurations that can be changed are: ALARM DURATION This defines the period of time (5 sec. to 15 min.) that the alarm beeper and the alarm relay are activated, unless the operator acknowledges the alarm. Bosch Security Systems | 2003-06
-
 1
1 -
2
-
 3
3 -
 4
4 -
 5
5 -
 6
6 -
 7
7 -
 8
8 -
 9
9 -
 10
10 -
 11
11 -
 12
12 -
 13
13 -
14
-
15
-
16
-
17
-
18
-
19
-
20
-
21
-
22
-
23
-
24
-
25
-
26
-
27
-
28
-
29
-
30
-
31
-
32
-
33
-
34
-
35
-
36
-
37
-
38
-
39
-
40
-
41
-
42
-
43
-
44
-
45
-
46
-
47
-
48
-
49
-
50
-
51
-
52
-
53
-
54
-
55
-
56
-
57
-
58
-
59
-
60
-
61
-
62
-
63
-
64
-
65
-
66
-
67
-
68
-
69
-
70
-
71
-
72
-
73
-
74
-
75
-
76
-
77
-
78
-
79
-
80
-
81
-
82
-
83
-
84
-
85
-
86
-
87
-
88
-
89
-
90
-
91
-
92
-
93
-
94
-
95
-
96
-
97
-
98
-
99
-
100
-
101
-
102
-
103
-
104
-
105
-
106
-
107
-
108
-
109
-
110
-
111
-
112
-
113
-
114
-
115
-
116
-
117
-
118
-
119
-
120
-
121
-
122
-
123
-
124
-
125
-
126
-
127
-
128
-
129
-
130
-
131
-
132
-
133
-
134
-
135
-
136
-
137
-
138
-
139
-
140
-
141
-
142
-
143
-
144
-
145
-
146
-
147
-
148
-
149
-
150
-
151
-
152
-
153
-
154
-
155
-
156
-
157
-
158
-
159
-
160
-
161
-
162
-
163
-
164
-
165
-
166
-
167
-
168
-
169
-
170
-
171
-
172
-
173
-
174
-
175
-
176
-
177
-
178
 |
 |