Bosch WTMC3521UC Operating, Care, Installation (all languages)
Bosch WTMC3521UC - Nexxt 500 Series Gas Dryer Manual
 |
View all Bosch WTMC3521UC manuals
Add to My Manuals
Save this manual to your list of manuals |
Bosch WTMC3521UC manual content summary:
- Bosch WTMC3521UC | Operating, Care, Installation (all languages) - Page 1
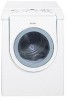
Bosch Nexxt® 500 Series Gas Dryer Models / Modèle / Modelo: WTMC3521UC & WTMC352SUC en Operating, Care and Installation Instructions fr Seche-linge: Notice d'utilsation, de maintenance et d'installation es Secador: Operacíon, cuidado y instrucciones para la instalación - Bosch WTMC3521UC | Operating, Care, Installation (all languages) - Page 2
care 19 Cleaning the dryer 19 Cleaning the lint filter 19 Cleaning the exhaust duct 19 Cleaning the moisture sensor 19 Cleaning the bearing shield 19 Change the light bulb 20 Troubleshooting 20 SERVICE and REPAIR 21 STATEMENT OF WARRANTIES BOSCH CLOTHES DRYERS 22 Exclusions 22 - Bosch WTMC3521UC | Operating, Care, Installation (all languages) - Page 3
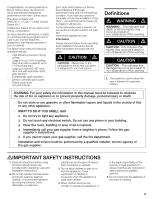
must be performed by a qualified installer, service agency or the gas supplier. dIMPORTANT SAFETY INSTRUCTIONS 1. Read all instructions before using the dryer. Bosch dryers are provided with Operating, Care and Installation Instructions. 2. Do not dry articles that have been previously cleaned - Bosch WTMC3521UC | Operating, Care, Installation (all languages) - Page 4
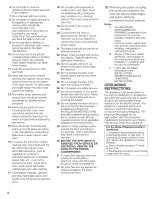
to the weather. 7. Do not tamper with the controls. 8. Do not repair or replace any part of the appliance or attempt any service unless specifically recommended in the userĆmaintenance instructions or in published user repair instructions that you understand and have the skills to carry out. 9. Do - Bosch WTMC3521UC | Operating, Care, Installation (all languages) - Page 5
, manual should be conveyed with the dryer. SAVE THESE INSTRUCTIONS! INSTALLATION INSTRUCTIONS Introduction Read these installation instructions completely and carefully. They will save you time and effort and help to ensure optimum dryer performance. Be sure to observe all listed warnings - Bosch WTMC3521UC | Operating, Care, Installation (all languages) - Page 6
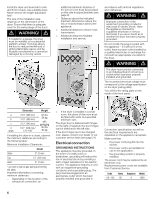
size. The dryer door is delivered with hinges on the right. If required, the door hinges can be switched to the left side. If the door hinges are to be changed over, please contact your dealer or our customer service team (see page 21). Electrical connection GROUNDING INSTRUCTIONS This appliance - Bosch WTMC3521UC | Operating, Care, Installation (all languages) - Page 7
in. W.C. Your dryer must have the correct valve for the type of gas in your home. Valve information is located on the rating plate behind the door below the drum. If the ratingĆplate information does not agree with the type of gas available, contact your dealer or our customer service team (see page - Bosch WTMC3521UC | Operating, Care, Installation (all languages) - Page 8
included in standard delivery of the dryer. Accessories The parts required for the exhaust air system can be obtained from customer service or your local dealer. Please follow the installation instructions supplied by the appropriate manufacturer! Side exhaust kit part no. WTZ 1265 Note: The maximum - Bosch WTMC3521UC | Operating, Care, Installation (all languages) - Page 9
Dryers) part no. WTZ 126S (Silver Dryers) The door catch can be reversed if necessary. The door is hinged on the right at the factory. Pedestal Mounting Kit part no. WTZ 1295 (White Dryers) part. no. WTZ 1295S (Silver Dryers) If mounting the dryer on the pedestal follow the instructions supplied - Bosch WTMC3521UC | Operating, Care, Installation (all languages) - Page 10
button and open the door. 6. If the interior of the dryer feels warm, the dryer has been connected properly. Switch the dryer to Off". 7. If the dryer does not work, switch the dryer to Off". Look in the troubleshooting section (page 20) of the OPERATING INSTRUCTIONS and find the fault. Preparing - Bosch WTMC3521UC | Operating, Care, Installation (all languages) - Page 11
OPERATING INSTRUCTIONS Your new dryer Open the door .... (colored marking) ....and close the door. Lint filter Access panel located on the bottom left corner of the dryer is for Service Access Only. 11 - Bosch WTMC3521UC | Operating, Care, Installation (all languages) - Page 12
sensitive textiles (e.g. acrylic fibers). The temperature of the drying process is reduced, the drying time is extended correspondingly. Signal An acoustic signal indicates in both directions. To switch off the dryer, rotate the program selector to "Off". Indicator lights (LED) Indicate the current state - Bosch WTMC3521UC | Operating, Care, Installation (all languages) - Page 13
a program d CAUTION d Before using your dryer read and follow all installation and operatĆ ing instructions. Preparing the dryer i Check the lint filter. The filter should be cleaned before and after every drying process. Choose an option... Using the dryer rack (Option, see page 8) ...and - Bosch WTMC3521UC | Operating, Care, Installation (all languages) - Page 14
Conduct an appliance test, see page 10. 9. If the dryer does not work, switch the dryer to "Off". Look in the troubleshooting section (page 20) of the operating instructions and find the fault. Temporary disconnection of the dryer Operate your dryer only when you are at home. If you intend going on - Bosch WTMC3521UC | Operating, Care, Installation (all languages) - Page 15
for customer service! Delicates low temp. Press the "Delicates low temp." button for temperature sensitive textiles. Observe the care information or symbols on the textiles. The temperature of the drying process is reduced, the drying time is extended. Signal Your dryer outputs different signals - Bosch WTMC3521UC | Operating, Care, Installation (all languages) - Page 16
rugs), sheer nylon, polypropylene. Air fluff/No heat Operation Using the dryer 1. Open the door. 16 2. Check lint filter. The filter should be cleaned after and before every drying process. Cleaning the filter reduces the drying time and saves energy. 3. Rotate program selector to the desired - Bosch WTMC3521UC | Operating, Care, Installation (all languages) - Page 17
lbs (1 kg)! The laundry must have been spun! Only dry prewashed shoes! The laundry must not touch the drum! It could jam and be damaged. After using the dryer rack, take it out of the dryer immediately. Inserting the dryer rack 1. Open the dryer door. 2. Check that the drum is empty. 3. Remove the - Bosch WTMC3521UC | Operating, Care, Installation (all languages) - Page 18
the dryer rack so that the catches are inserted dryer rack! 3. Close the door. 4. Follow directions for time program on next page. Drying shoes on the dryer parts are on the outside. q Restart the program and reduce the drying duration depending on the degree of residual moisture. 4. After drying - Bosch WTMC3521UC | Operating, Care, Installation (all languages) - Page 19
inside of the door heats up during the drying process. 2. Open the door. q Turn off the circuit breaker q Pull out power supply plug q Close the shutĆoff valve. q Disconnect the duct from the dryer. q Vacuum and reconnect the duct. d WARNING d Remove gas connection before moving the dryer to clean - Bosch WTMC3521UC | Operating, Care, Installation (all languages) - Page 20
the screw. q Plug in dryer or reconnect power supply. Troubleshooting d WARNING! d TO AVOID RISK OF ELECTRICAL SHOCK ! TO AVOID EXPLOSION HAZARD! Repairs or replacement of parts may be carried out by authorized technicians only. Before calling the customer service, check whether you can rectify - Bosch WTMC3521UC | Operating, Care, Installation (all languages) - Page 21
dealer or installer or an authorized service center. Do not attempt to repair the appliance yourself. Any work performed by unauthorized personnel may void the warranty. If you are having a problem with your Bosch dryer and are not pleased with the service you have received: - First, please contact - Bosch WTMC3521UC | Operating, Care, Installation (all languages) - Page 22
2 Year Limited Warranty on Motor Bosch will repair or replace, free of charge, any motor or component part From Date of Installation* of the cover service calls or repairs to correct the installation of the clothes dryer, to provide instructions on the use of your clothes dryer, to replace house - Bosch WTMC3521UC | Operating, Care, Installation (all languages) - Page 23
pas à pas 31 CheckĆlist préalable à l'emploi du sècheĆlinge 32 Préparation pas à pas au transport du sècheĆlinge 32 INSTRUCTIONS D'UTILISATION 33 Présentation de 42 Dérangement et remèdes 43 SERVICE ET RÉPARATIONS 44 DECLARATION DES GARANTIES SECHEĆLINGE BOSCH 45 Exclusions de garantie 45 23 - Bosch WTMC3521UC | Operating, Care, Installation (all languages) - Page 24
appareil font de ce dernier un assistant pratique au service de votre foyer. Ce sècheĆlinge Bosch offre les caractéristiques standard suivantes: - Système chose de particulier. AVERTISSEMENT: Assurez-vous de bien suivre les instructions données dans cette notice pour réduire au minimum le risque - Bosch WTMC3521UC | Operating, Care, Installation (all languages) - Page 25
toutes les instructions figurant dans cette notice avant d'utiliser le sècheĆlinge. A la livraison, les sècheĆlinge Bosch sont accompagnées flux d'air et provoquer une surchauffe. 13. Il faudrait que le personnel de service aprèsĆvente qualifié nettoie régulièrement l'intérieur de la machine et le - Bosch WTMC3521UC | Operating, Care, Installation (all languages) - Page 26
instructions du fabricant peut provoquer des dommages corporels et/ou des dégâts matériels. 30. AVANT DE METTRE L'APPAREIL HORS SERVICE sur le gaz combustible (National Fuel Gas Code), à la norme ANSI Z223.1/NFPA Remarque : Ce sècheĆlinge figure dans la liste UL et CĆUL et offre un fonctionĆ nement - Bosch WTMC3521UC | Operating, Care, Installation (all languages) - Page 27
les circuits de mise au rebut, veuillez consulter votre revendeur ou les services compétents de votre mairie. Avant d'installer le sècheĆlinge Dé l'endommager. Dimensions Poids a 27,0" (686 mm) 125 lbs b 31,8" (808 mm) (56 kg) c 37,2" (945 mm) avec l'emballage d 19,7" (500 mm) 143 - Bosch WTMC3521UC | Operating, Care, Installation (all languages) - Page 28
revendeur ou l'équipe du SAV (voir page 44). Branchement électrique Instructions de mise a terre Il faut impérativement raccorder ce sècheĆlinge vérification de l'appareil à un électricien agréé ou à un technicien du service aprèsĆvente. 28 Ne modifiez jamais la fiche mâle fournie avec l'appareil. - Bosch WTMC3521UC | Operating, Care, Installation (all languages) - Page 29
contacter votre revendeur ou notre équipe du service aprèsĆvente (voir page 44). Conduite du séchoir, ceci conformément au National Fuel Gas Code (Code national sur le gaz combustible), ANSI d'oiseaux ou d'animaux non domestiqués. Les sècheĆlinge Bosch ont été conçus pour rejeter la chaleur et la - Bosch WTMC3521UC | Operating, Care, Installation (all languages) - Page 30
- Sur la face inférieure de l'appareil. 2 1 3 1 ć Orifice de sortie d'air situé à l'arrière de l'appareil (standard) 2 ć Orifice de sortie d'air sur le côté (option) 3 ć Orifice de sortie d'air sur la face inférieure (option) A votre revendeur ou fournisseur de pièces, il faudra demander des - Bosch WTMC3521UC | Operating, Care, Installation (all languages) - Page 31
Accessoires Vous pouvez vous procurer les pièces requises par le système d'échappement d'air auprès du service aprèsĆvente ou de votre revendeur local. Veuillez s.v.p. respecter les instructions de pose fournies par le fabricant concerné. Kit de sortie par le côté N° de réf. WTZ 1265 Remarque : Le - Bosch WTMC3521UC | Operating, Care, Installation (all languages) - Page 32
instructions d'installation publiées par le fabricant du matériel correspondant! i En présence d'un espace très exigu, nous recommandons de fixer l'orifice de départ la prise de courant murale. CheckĆlist préalable à l'emploi du Commutez le sècheĆlinge sur «Extra Dry» (Très sec) puis appuyez sur le - Bosch WTMC3521UC | Operating, Care, Installation (all languages) - Page 33
INSTRUCTIONS D'UTILISATION Présentation de votre nouveau sècheĆlinge. Ouvrez la porte ..... (repère en couleur) ...puis fermez-la. Filtre à peluches Le panneau d'accès sitúe dans le coin inférieur gauche du sèche-linge est un accès de service réservé à un technicien uniquement. 33 - Bosch WTMC3521UC | Operating, Care, Installation (all languages) - Page 34
Le bandeau de commande Bouton Start/Pause Ce bouton sert à faire démarrer, à interrompre et à mettre fin au processus de séchage. Boutons des options (ces options viennent compléter un programme si vous le souhaitez). Voir page 37. Delicates low temp. (Délicats basse température) Appuyez sur ce - Bosch WTMC3521UC | Operating, Care, Installation (all languages) - Page 35
d PRUDENCE d Avant d'utiliser votre sècheĆlinge, veuillez lire et respecter toutes les instructions d'installation et d'utilisation. Préparation du sècheĆlinge i Vérifiez le filtre à peluches. Il faut nettoyer le filtre après et avant chaque séchage. Sélection d'un programme - Bosch WTMC3521UC | Operating, Care, Installation (all languages) - Page 36
matériaux inflammables, tels que des briquets. Le nonĆrespect de ces instructions peut engendrer un risque d'explosion ou d'incendie. Poue eviter Danger de mort nergie Pour économiser de l'énergie, de l'argent et du temps, Bosch vous recommande ceci : - Essorez suffisamment le linge. Avant le séchage - Bosch WTMC3521UC | Operating, Care, Installation (all languages) - Page 37
trouvez à votre domicile. En prévision d'un départ en vacances ou si vous devez ne pas utiliser le pour le séchage En principe, les instructions suivantes s'appliquent à tous les programmes de sècheĆlinge. N'utilisez pas le programme «Very dry/Extra dry» (Très sec/Extra sec). Sélection du programme - Bosch WTMC3521UC | Operating, Care, Installation (all languages) - Page 38
Signal Type Départ Signal bref dry (Humide), Regular dry (Normalement sec), Wrinkle block (AntiĆfroissage). i Si le voyant «Wrinkle block» (bloc antiĆfroissage) s'allume une fois que le programmateur se trouve sur la position Off, ramenez le disjoncteur en position éteinte et prévenez le service - Bosch WTMC3521UC | Operating, Care, Installation (all languages) - Page 39
Utilisation Utilisation du sècheĆlinge 1. Ouvrez la porte. 4. Si nécessaire, sélectionnez «Option» en appuyant sur le bouton. L'explication des options figure à la page 37. i L'appareil actualise l'estimation de la durée restante. 7. Appuyez sur le bouton «Start/Stop». Le voyant «Start/Stop» s' - Bosch WTMC3521UC | Operating, Care, Installation (all languages) - Page 40
le tambour. Veillez à ce qu'aucune pièce de linge ne pende du tiroir. 3. Refermez le hublot. 4. Pour utiliser un programme de durée, suivez les instructions de la page suivante. Séchage de chaussures sur le tiroir : 1. Préparez les chaussures. q Nettoyez les chaussures pour empêcher le tambour de se - Bosch WTMC3521UC | Operating, Care, Installation (all languages) - Page 41
et placez les talons dessus. Ceci permettra d'obtenir un résultat de séchage plus uniforme. 3. Refermez la porte. 1. Amenez le programmateur sur «Time dry/...min» (Séchage à durée réglable/...min). - Sélectionnez la durée de séchage à partir du tableau suivant, en respectant le type de linge. Type - Bosch WTMC3521UC | Operating, Care, Installation (all languages) - Page 42
Si un signal d'alarme et un message E01 avertissement sont èmis pendant un programme de séchage, nettoyez des aiguilles d'une montre. RemplacezĆla par une ampoule neuve adaptée à l'appareil (fournie par le service aprèsĆvente). q Remettez le couvercle en place puis fixezĆle en position à l'aide de la - Bosch WTMC3521UC | Operating, Care, Installation (all languages) - Page 43
mâle de la prise de courant. 4. Fermez le robinet de gaz. 5. Appelez le service aprèsĆvente (voir page 44). Problème Le sècheĆlinge ne démarre pas. Le séchage pas atteint ou durée de séchage trop longue. La mention «E:03» peut s'afficher sur l'écran Capteur d'humidité sale. Conduit d'échappement - Bosch WTMC3521UC | Operating, Care, Installation (all languages) - Page 44
problèmes, reportezĆvous au tableau de la page 51 avant d'appeler le service aprèsĆvente (SAV). Si des opérations de SAV s'avèrent nécessaires satisfait, - Commencez s.v.p. par contacter votre installateur ou l'entreprise de SAV Bosch agréée située dans votre région, et expliquezĆlui les raisons de - Bosch WTMC3521UC | Operating, Care, Installation (all languages) - Page 45
ées par un Centre Bosch du Service AprèsĆVente (SAV). 2 ans de garantie limitée à compter de la date d'installation* Bosch fournira gratuitement les pièces pour rectifier l'installation du sècheĆlinge, pour fournir des instructions sur l'utilisation de cet appareil, pour remplacer les fusibles / - Bosch WTMC3521UC | Operating, Care, Installation (all languages) - Page 46
Limpieza de la protección del rodamiento 65 Cambiar la lamparilla 65 Localización de fallos 66 SERVICIO y REPARACIONES 67 DECLARACIÓN DE GARANTÍA PARA SECADORES PARA ROPA BOSCH 68 Exclusiones 68 46 - Bosch WTMC3521UC | Operating, Care, Installation (all languages) - Page 47
sumamente útil en su hogar. El secador Bosch presenta las siguientes características estándar: - su seguridad, las informaciones contenidas en este manual deben tenerse en cuenta a fin de minimizar u otros electrodomésticos. - SI SIENTE OLOR A GAS q No intente encender ningún electrodoméstico. q No - Bosch WTMC3521UC | Operating, Care, Installation (all languages) - Page 48
todas las instrucciones antes de utilizar el secador. Los secadores Bosch se entregan con instrucciones de manejo, cuidado e instalación. . 7. No juegue con los controles. 8. No reparar o reemplazar ninguna parte del secador ni intentar cualquier tipo de servicio a menos que haya sido recomendado - Bosch WTMC3521UC | Operating, Care, Installation (all languages) - Page 49
POSTERIORES. En caso de un cambio de propietario, este manual debe entregarse conjuntamente con el secador. INSTRUCCIONES PARA LA PUESTA de 7700 ft (2350 m) sin más modificaciones en los componentes de gas natural o gas propano. Información sobre eliminación de residuos Eliminación del embalaje d - Bosch WTMC3521UC | Operating, Care, Installation (all languages) - Page 50
del otro y la parte anterior respecto de la parte posterior. Utilice un nivel 686 mm) 31.8" (808 mm) 37.2" (954 mm) 19.7" (500 mm)/ 170 - 180° 125 lbs (56 kg) con embalaje 143 cerca de la pared como lo permita la tubería de gas y de ventilación Información importante respecto de las distancias mí - Bosch WTMC3521UC | Operating, Care, Installation (all languages) - Page 51
características). La chapa de características la encontrará en la parte interior del panel frontal. Las especificaciones de la conexión al nuevas. ¡Éstas señalan las pérdidas! Cuando instale la alimentación de gas al tubo de ingreso de gas del secador, no exceda 310 lbf in (35 Nm). d ADVERTENĆ - Bosch WTMC3521UC | Operating, Care, Installation (all languages) - Page 52
B149.2. Se recomienda instalar una válvula de paso manual dentro de los 6 ft (1.8 m) antes del conexión de gas Tubo de gas para el secador El tubo de gas que sale de la parte posterior del la entrada de pájaros u otros animales. Los secadores Bosch se han construido para que el aire de secado sea - Bosch WTMC3521UC | Operating, Care, Installation (all languages) - Page 53
de salida se obtienen del servicio técnico para cada tipo de conexión (ver página 53): - Salida de aire lateral - Salida de aire por la parte inferior El cambio de la salida de aire y una conexión opcional, debe efectuarla un técnico calificado. Tubería Para asegurar un rendimiento máximo, la tuber - Bosch WTMC3521UC | Operating, Care, Installation (all languages) - Page 54
. Juego LP Kit Las partes necesarias para la conversión lp, pueden obtenerse del comerciante de la zona. ¡Rogamos se tengan en cuenta las instrucciones suministradas por el fabricante adecuado! Si usted posee un secador a gas propano y desea convertirlo a gas natura, (Service Kit 496297) rogamos - Bosch WTMC3521UC | Operating, Care, Installation (all languages) - Page 55
an tanto los pies ajustables, como la parte inferior del secador. 10. Posicione y nivele Cierre la puerta del secador. q Conmute el secador a «Extra dry» (Extra seco) y enciéndalo. q Párelo después de de alimentación. 4. Desconecte el alimentación de gas. 5. Desconecte el tubo de ventilación de - Bosch WTMC3521UC | Operating, Care, Installation (all languages) - Page 56
INSTRUCCIONES DE FUNCIONAMIENTO Su nuevo secador Abra la puerta .... (con la marca en colore) ...y cierre la puerta. Filtro de pelusas El panel de acceso ubicado en la esquina inferior izquierda del secador, es exclusivamente para casos de servicio 56 - Bosch WTMC3521UC | Operating, Care, Installation (all languages) - Page 57
Panel de manejo Botón Start/Stop (Arranque y parada) Arranca, interrumpe y para el proceso de secado. Botones para seleccionar las opciones (adicionales a los programas, si así se lo requiere). Ver página 60. Delicates low temp. (Ropa fina baja temperatura) Accione este botón cuando se trata de - Bosch WTMC3521UC | Operating, Care, Installation (all languages) - Page 58
Resumen de instrucciones Selección de un programa Uso de la canastilla (Accesorio, ver página 53) d CUIDADO d Antes de usar su secador lea y tenga en cuenta todas las instrucciones de instalación y funcionamiento. Preparación del secador i Controle el filtro de pelusas. Debe limpiárselo antes y - Bosch WTMC3521UC | Operating, Care, Installation (all languages) - Page 59
partes sobresalientes del mismo. ¡Peligro de quebraduras! Protección del medio ambiente Consejos para la racionalización de energía Bosch primera vez: 1. Lea este manual de instrucciones cuidadosamente. 2. Controle W.C./ 3.49 kPa/ 0.506 psig.(Gas Natural o Gas Propano) 5. Quite todos los objetos - Bosch WTMC3521UC | Operating, Care, Installation (all languages) - Page 60
de punto (p. ej. camisas, prendas de jersey) muchas veces encogen cuando se las seca por primera vez. No utilice el programa «Very dry/Extra dry» (Muy seco/Extra seco). Selección del programa Para un secado óptimo, su secador ofrece diversos grupos de programas y opciones adicionales. Seleccione el - Bosch WTMC3521UC | Operating, Care, Installation (all languages) - Page 61
puro, polipropileno. Regular/Cotton (Normal/algodón) Damp dry (Húmedo seco) Regular dry (Medianamente seco) Very dry (Muy seco) Extra dry (Extra seco) Permanent Press (Estampados) Damp dry (Húmedo seco) Regular dry (Medianamente seco) Very dry (muy seco) Time dry (Tiempo de secado) 20 min, 40 min - Bosch WTMC3521UC | Operating, Care, Installation (all languages) - Page 62
Funcionamiento Uso del secador 1. Abra la puerta. 4. Si hace falta, seleccione «Option», presionando el botón. Las «Opciones» se explican el la página 60. 7. Presione el botón «Start/Stop». Le luz indicadora «Start/Stop» quedará encendida permanentemente. i El programa comienza con una señal acú - Bosch WTMC3521UC | Operating, Care, Installation (all languages) - Page 63
para evitar que el tambor se ensucie. q Al preparar el calzado, extienda la lengua de los mismos. q Afloje o quite los cordones. q Extraiga partes adicionales como plantillas. 6. Coloque el filtro para la pelusa. !Éste debe insertarse de modo que quede alineado con el borde del tambor! 2. Coloque - Bosch WTMC3521UC | Operating, Care, Installation (all languages) - Page 64
del secado. 3. Cierre la puerta. 1. Gire el selector de programas a «Time dry/...min». - Seleccione el tiempo de secado según la tabla siguiente y de acuerdo con residual después del secado: q pliegue la prenda de modo que las partes húmedas están hacia fuera, q vuelva a hacer arrancar el proceso de - Bosch WTMC3521UC | Operating, Care, Installation (all languages) - Page 65
lvalo a conectar. d ADVERTENĆ CIA d Desconecte las conexiones de gas antes de mover el secador a fin de limpiar el conducto. Sea cuidadoso de no enchufe de alimentación. q Abra la puerta y localice la lamparilla en la parte superior izquierda del la junta. q Afloje el tornillo de la cobertura y - Bosch WTMC3521UC | Operating, Care, Installation (all languages) - Page 66
del programa o fallo en la máquina. No se ha logrado el grado de humedad deseado o el tiempo de secado es demasiado largo. El display indica «E:03». El ambiente o gabinete no posee la ventilación suficiente. Está sucio el sensor de humedad. El tubo de aire de salida está obstruido o es demasiado - Bosch WTMC3521UC | Operating, Care, Installation (all languages) - Page 67
tiene problemas y no está conforma con el servicio recibido: - Primero rogamos ponerse en contacto con su instalador o bien el servicio autorizado y contratado Bosch de su zona, explicando porque no está conforme. explicando a que se debe su disconformidad. - Si después del trabajo realizado por su - Bosch WTMC3521UC | Operating, Care, Installation (all languages) - Page 68
BOSCH Las garantías brindadas por BSH Home Appliances («Bosch») en esta declaración son aplicables únicamente a secadores Bosch vendidos al consumidor final por Bosch Bosch Bosch. Garantía limitada a 2 años a partir de la fecha de instalación * Bosch Bosch instalación * Bosch se hará Bosch BOSCH BOSCH
-
 1
1 -
 2
2 -
 3
3 -
 4
4 -
 5
5 -
 6
6 -
 7
7 -
8
-
9
-
10
-
11
-
12
-
13
-
14
-
15
-
16
-
17
-
18
-
19
-
20
-
21
-
22
-
23
-
24
-
25
-
26
-
27
-
28
-
29
-
30
-
31
-
32
-
33
-
34
-
35
-
36
-
37
-
38
-
39
-
40
-
41
-
42
-
43
-
44
-
45
-
46
-
47
-
48
-
49
-
50
-
51
-
52
-
53
-
54
-
55
-
56
-
57
-
58
-
59
-
60
-
61
-
62
-
63
-
64
-
65
-
66
-
67
-
68
 |
 |

Bosch Ne
xx
t
®
500 Series Gas Dryer
Models / Modèle / Modelo:
WTMC3521UC & WTMC352SUC
en
Operating, Care and Installation Instructions
fr
Seche-linge: Notice d’utilsation, de maintenance et d’installation
es
Secador: Operacíon, cuidado y instrucciones para la instalación