Brother International BAS-341E Instruction Manual - English
Brother International BAS-341E Manual
 |
View all Brother International BAS-341E manuals
Add to My Manuals
Save this manual to your list of manuals |
Brother International BAS-341E manual content summary:
- Brother International BAS-341E | Instruction Manual - English - Page 1
BAS-341E BAS-342E Electronic Excellent Economy Series INSTRUCTION MANUAL Please read this manual before using the machine. Please keep this manual within easy reach for quick reference. PROGRAMMABLE ELECTRONIC PATTERN SEWER - Brother International BAS-341E | Instruction Manual - English - Page 2
and correct operation before operating the machine so that you will know how to use the machine correctly. SAFETY INSTRUCTIONS 1 Safety indications and their meanings This instruction manual and the indications and symbols that are used on the machine itself are provided in order to ensure safe - Brother International BAS-341E | Instruction Manual - English - Page 3
abnormal noises or smells are noticed, immediately turn off the power switch. Then contact your nearest Brother dealer or a qualified technician. If the machine develops a problem, contact your nearest Brother dealer or a qualified technician. BAS-341E • 342E - Brother International BAS-341E | Instruction Manual - English - Page 4
removed, be absolutely sure to re-install them to their original positions and check that they operate currectly before using the machine. Any problems in machine operation which resuit from unauthorized modifications to the machine will not be covered by the warranty. Have two people present to - Brother International BAS-341E | Instruction Manual - English - Page 5
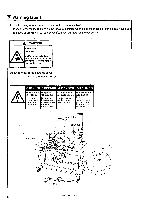
El Warning labels * The following warning labels appear on the sewing machine. Please follow the instructions on the labels at all times when using the machine. If the labels have been removed or are difficult to read, please contact your nearest - Brother International BAS-341E | Instruction Manual - English - Page 6
CONTENTS 1. Name of each parts 2. Specifications 2 3. Preparation 3 3-1. 3 3-2. Positioning 4 3-3. Tilting the sewing machine head 4 3-4. Connecting the ground wire 5 3-5. V-belt tension 5 3-6. Installing the foot switch 5 3-7. Installing the spool stand 6 3-8. Installing the - Brother International BAS-341E | Instruction Manual - English - Page 7
33 9-4. Adjusting the driver needle gurard 33 9-5. Adjusting the shuttle race thread guide 33 9-6. Adjusting the movable knife 34 9-7. Presser foot adjustment 36 9-8. Changing the processing and production of plate blanks 53 15. Troubleshooting 54 16. Option 58 BAS-341E • 342E - Brother International BAS-341E | Instruction Manual - English - Page 8
1. Name of each parts • BAS-341E Thread wiper switch Emergency stop switch It:7,===7117: op OSarz,o a6 a 0 DO 1. Name of each parts Cotton stand Operation panel Programmer a Solenoid valve Integrater Presser lifter pedal Power switch Control box Starting pedal • BAS-342E Presser foot 0 CJ - Brother International BAS-341E | Instruction Manual - English - Page 9
2. Specifications 2. Specifications (BAS-341E • 342E) Stitch type Sewing machine Maximum pattern size (X-Y) Maximum stitch number Stitch length Maximum sewing speed Feed format Rotary hook Needle Data storage method Test function Safety devices Wiper device Thread trimmer device Work clamp heigth - Brother International BAS-341E | Instruction Manual - English - Page 10
3. Preparation 3. Preparation a CAUTION Machine installation should only be carried out ® Hold the machine head with both hands when by a qualified technician. tilting it back or returning it to its original posi- O Contact your Brother dealer or a qualified electrician for any electrical work - Brother International BAS-341E | Instruction Manual - English - Page 11
of the table and slowly raise the machine 0. Then lock it. 4. When returning the machine to its former position, release lock 0. The gas spring will guide the machine to its original position. BAS-341E • 342E - Brother International BAS-341E | Instruction Manual - English - Page 12
3. Preparation 3-4. Connecting the ground wire A DANGER Be sure to connect the ground. If the ground connection is not secure, you run the risk of receiving a serious electric shock. 0 Red - 0 White- 3-phase power supply 0 Black- 0 Yellow/Green Connect to ground ■ Connection method for 3- - Brother International BAS-341E | Instruction Manual - English - Page 13
Preparation 3-7. Installing the spool stand Install the spool stand 0 to the table. 3-8. Installing the programmer (option) [Vertical] 1. Install the programmer support 0 to the work table with the two screws 0. 0 [Flat] 2. Insert the programmer connector 0 securely into the left side of the - Brother International BAS-341E | Instruction Manual - English - Page 14
3-9. Adjustment of air pressure o -CT 3. Preparation 1. Air pressure should be 0.49 MPa [5 kg/cm2]. The air pressure can be adjusted by pulling up and turning the control knob 0 on the integrator 0. After adjustment is complete, push the control knob 0 downward to lock it. 2. If water stands in the - Brother International BAS-341E | Instruction Manual - English - Page 15
4. Preparation 4. Lubrication A CAUTION Turn off the power switch before starting lubricating, otherwise the machine may operate if the foot switch is depressed by mistake, which could result in injury. Be sure to wear protective goggles and gloves when handling the lubricating oil and grease, so - Brother International BAS-341E | Instruction Manual - English - Page 16
5. Correct use 5. Correct use 5-1. Selecting the needle and thread Needle DP X 5 #9 DP X 5 #16 DP X 17NY #19 DP X 17 #21 DP X 17 #25 Thread #100 - #60 #80 - #50 #50 -#20 n n Main application Knitted wear General clothing Denim II Leather • seat belts Different needles and threads are used for - Brother International BAS-341E | Instruction Manual - English - Page 17
5. Correct use 5-3. Threading the upper thread A CAUTION A Turn off the power switch before threading the thread, otherwise the machine may operate if the foot switch is depressed by mistake and serious injury could result. [When using cotton thread and spun yarn] AZ. 0 4 a% 8 7 0 3 0 0 0 10 40 - Brother International BAS-341E | Instruction Manual - English - Page 18
5. Correct use 5-4. Winding the lower thread A CAUTION A Do not touch or place anything against any of the moving parts while winding the lower thread, other- wise personal injury or damage to the machine may result. 1. Place the bobbin all the way onto the shaft. 2. Thread the thread as shown in - Brother International BAS-341E | Instruction Manual - English - Page 19
5. Correct use 5-5. Replacing the bobbin case and threading the thread A CAUTION A Turn off the power switch before removing and replacing the bobbin case, otherwise the machine may operate if the foot switch is depressed by mistake and serious injury could result. 3° mm Ow) 1. Pull the shuttle - Brother International BAS-341E | Instruction Manual - English - Page 20
5-6-2. Lower thread tension Weaker Stronger 5-6-3. Upper thread tension 5. Correct use 0 O. Stronger Weaker @1 m. °Stronger Weaker Set the lower thread tension to as weak a tension as possible and so that the bobbin case drops by its own weight when the end of the thread is held. Turn the - Brother International BAS-341E | Instruction Manual - English - Page 21
5. Correct use 5-6-6. Pretension tension 0 0 CZ> 0 cE> O 1. Raise the work clamp 0 and open the main tension disc 0. The thread take-up spring 0 should not operate when the thread is pulled in the direction of the arrow. 2. Set the thread tension for the thread breakage detector pretension 0 - Brother International BAS-341E | Instruction Manual - English - Page 22
6. Panel operation 6-1. Explanation of panel I- brother BAS-300E series • • MENU O 01,14--s X-SCALE O gif3a-c= Y-SCALE SPEED itE) B.T. COUNTER 7°I)sy `•-/ SPLIT NO. 0 6. Panel operation 0 (;) POWER -F-X:Part T7Vfyztki B.T. SET B.T. CHANGE TEST O STEP BACK • 0 O POWER indicator When - Brother International BAS-341E | Instruction Manual - English - Page 23
6. Panel operation brOther BAS-300E series PROGRAM NO. MENU (Th `-1 X-SCALE n Keg Y-SCALE 0 SPEED O B.T. COUNTER mO •y Is NO . R/W SPLIT NO. 0 PO'IWRER T-Xtbt,t T*547.A B.T. SET B.T. CHANGE • 0 Bobbin Thread COUNTER Illuminates when bobbin thread counter mode has been selected using the - Brother International BAS-341E | Instruction Manual - English - Page 24
use a disk which has been pre-formatted as a 1.44 MB disk. (The programmer can be used to format these disks. Refer to the programmer instruction manual for details.)- • TFD embroidery data can be embroidered after it has been converted by the programmer to BAS-300E data. • Restriction on using 2DD - Brother International BAS-341E | Instruction Manual - English - Page 25
6. Panel operation 00 Unlocked writing possible Window open 6 Locked writing possible 1. Turn on the power switch 0. The POWER indicator 0 will illuminate and the machine model number will appear on the display screen. 2. Hold the disk 0 with the label up and the metal shutter to the front, and - Brother International BAS-341E | Instruction Manual - English - Page 26
6. Panel operation 6-3. Using the program R/W (Read/Write) switch • Programmed stitch patterns stored on floppy disk can be read into memory, and newly programmed patterns can be written to disk for permanent storage and later recall. • a • • n OVA X-SCALE O at* Y-SCALE STEP BACK 0 0 oVo - Brother International BAS-341E | Instruction Manual - English - Page 27
6. Panel operation 6-4. Using the TEST switch (Checking the sewing pattern) Use the TEST switch to begin sewing again from any desired point when the thread breaks or the bobbin thread runs out. 1. Press the TEST switch 65. The test indicator e will light. -7-7. • TEST 7\ 5-,yiivi), STEP BACK - Brother International BAS-341E | Instruction Manual - English - Page 28
6. Panel operation 6-5. Using the emergency stop switch Press the emergency stop switch to immediately stop the sewing machine during actual sewing or when in the test mode. 0 0 as" 0 0 Clearing the error 1. Turn the EMERGENCY STOP switch 0 clockwise and then pull it forward to release it. 2. - Brother International BAS-341E | Instruction Manual - English - Page 29
6. Panel operation 6-6. Adjusting the sewing SPEED control The sewing speed can be changed in steps of 100 spm to the appropriate speeds for each stitch length setting. 1. Press the MENU switch 0 until the SPEED indicator 0 illuminates. (-) Miieh$ `-/ X-SCALE itts Y-SCALE ,(2Ster- h SPEED • O 8r1- - Brother International BAS-341E | Instruction Manual - English - Page 30
6. Panel operation 6-8. Using the bobbin thread counter Set the bobbin thread counter to display the number of pieces of the selected pattern which can be sewn with the amount of thread on the bobbin to avoid running out of bobbin thread in the middle of a patern. brother BAS-300E series 7Q7~L NO. - Brother International BAS-341E | Instruction Manual - English - Page 31
6. Panel operation 6-9. Using production counter Both PRO. NO. and B.T. COUNTER displays are available for the five-digit PRODUCTION counter. brother BAS-300E series 7L1 LNO. PROGRAM NO. MENU (Th fi io X-SCALE 0 *YM-SiCl ALE 0 SPEED irm,47j O B.T. COUNTER R / W A7°I) h NO. SPLIT NO. o PO - Brother International BAS-341E | Instruction Manual - English - Page 32
: "1" ---> "2" -' "3" "1" ---> "2" ... 4. When the starting switch is pressed, only the pattern displayed on the display screen 0 will be sewn. NOTE As to split sewing, refer to the instruction manual of the "electronic programmable pattern tacker programmer" BAS-341E • 342E 25 - Brother International BAS-341E | Instruction Manual - English - Page 33
6. Panel operation 6-11. Shifting a stitch pattern • Programs which have already been programmed can be moved up, down and to the left and right. (However, such patterns will be reset if the power supply is turned off or the program number is changed.) • The feed position can be set to the any - Brother International BAS-341E | Instruction Manual - English - Page 34
7. Sewing A CAUTION 7. Sewing Turn off the power switch at the following times, otherwise the machine may operate if the foot switch is depressed by mistake, which could result in injury. • Threading • When replacing the bobbin and needle • When not using the machine and when leaving the machine - Brother International BAS-341E | Instruction Manual - English - Page 35
7. Sewing It/ 5. Step on the presser lifter switch 0 to raise the presser foot. 6. Insert the work piece under the work clamp, and press the presser lifter switch 0 to lower the clamp. 7. Press the starting pedal 0. NOTE The work clamp will return to the origin, and will then advance to the sewing - Brother International BAS-341E | Instruction Manual - English - Page 36
hook 0 and the inner rotary hook 0. 3. Clean all the dust and th read ends from around the driver 0, the top of the rotary hook thread guide and the shuttle race. 8-2. Lubrication NOTE • Fill the machine with oil when the oil level is down to about one-third full in the oil - Brother International BAS-341E | Instruction Manual - English - Page 37
8. Maintenance and inspection CQ) CD 0 8-3. Draining the oil 3. If using the liquid cooling tank 0, fill it with silicon oil (100 cs). 1. Remove and empty the waste oil container 0 whenever it is full. 2. After emptying the waste oil container 0, screw it back into its original position. 8-4. - Brother International BAS-341E | Instruction Manual - English - Page 38
8-5. Cleaning the eye guard 8. Maintenance and inspection Wipe the eye guard clean with a soft cloth. NOTE Do not use solvents such as kerosene thinner to clean the eye guard. 8-6. Checking the needle on o ' Always check that the tip of the needle is not broken before starting sewing. BAS-341E • - Brother International BAS-341E | Instruction Manual - English - Page 39
9. Standard adjustments 9. Standard adjustments A CAUTION Maintenance and inspection of the sewing machine should only be carried out by a qualified technician. Ask your Brother dealer or a qualified electrician to carry out any maintenance and inspection of the electrical system. Turn off the - Brother International BAS-341E | Instruction Manual - English - Page 40
rotary hook will obstruct the needle, resulting in an excessively high amount of friction. 9-5. Adjusting the shuttle race thread guide O O O The needle groove of the shuttle race thread guide 0 should be aligned with the center of the needle plate hole, and the needle center and the angled section - Brother International BAS-341E | Instruction Manual - English - Page 41
9. Standard adjustments 9-6. Adjusting the movable knife Needle Plate O • Loosen the nut 0 and move thread trimmer rod L 0 to the left or right to adjust so that the V section ® of the movable knife 0 is aligned with the index mark CD on the needle plate when the machine is at the stop position. ■ - Brother International BAS-341E | Instruction Manual - English - Page 42
BAS-341E Movable knife washer -CD 4i. BAS-342E Movable knife washer 9. Standard adjutsments C C C 2. Remove the movable knife, and replace it with a new movable knife. Now check the cutting edge of the movable knife 0 and the fixed knife m. If necessary, use the provided movable knife washer - Brother International BAS-341E | Instruction Manual - English - Page 43
9. Standard adjustments BAS-341E --- BAS-342E r, 4. Fit the thread cutter connecting rod 0 on connecting lever pin 0, and install needle plate 0. When fitting the connecting rod 0 on the connecting lever pin 0 and before tightening screws 0 and 0, move the needle plate back and forth a little bit - Brother International BAS-341E | Instruction Manual - English - Page 44
9-8. Changing the presser foot lift • Standard presser foot 0 lift is 3 mm (max. 8 mm). 9. Standard adjutsments 3 - 5 mm ilncrease , I I //'/ I Decrease 0.5 - 1 mm Adjusting presser foot lift to 3 - 5mm 1. Loosen the stud screw 0 and open the intermittent cover 0. 2. Loosen the nut 0 and adjust - Brother International BAS-341E | Instruction Manual - English - Page 45
9. Standard adjustments 9-9. Wiper adjustment • For vertical wiper (standard) 0 0 112 mm 0 approx. 2 mm 15 mm Fig. A 1. When the thread wiper solenoid plunger 0 is driven to the full stroke, the wiper 0 should be 15 mm in front of the needle center. Loosen screws 0 and shift the entire - Brother International BAS-341E | Instruction Manual - English - Page 46
9. Standard adjutsments 9-11. Adjusting the needle up stop position 0 0 • The needle up stop position has been adjusted so that the tip of the needle stops 17.5 -19.5 mm above the top of the needle plate. • If adjustment is necessary, loosen the screw Oat the "U" mark of the machine pulley 0 and - Brother International BAS-341E | Instruction Manual - English - Page 47
9. Standard adjustments 9-12. Checking the input sensor and DIP switch input brother BAS-300E series • • • ,It/S R/W Mfg • X-SCALE rm f4-c: Y-SCALE 0 SPEED B.T. COUNTER ' , • SPLIT NO. POWER B.T. SET B.T. CHANGE 5-'7. ITEST STEP BACK • 0 -Ell N>Ell Ell CM LA DE cY, Ell Ell O0 OFF OFF - Brother International BAS-341E | Instruction Manual - English - Page 48
9-13. Checking the input voltage 1. Turn on the power switch. 2. Press the menu switch 0 until the X-SCALE indicator 0 illuminates. (Th \--1 SPLIT NO. Ot t LTS X-SCALE 0 3. While pressing the TEST switch 0, press the R/W switch 0. -; . I-. TEST rind R/W 0 9. Standard adjutsments 4. If - Brother International BAS-341E | Instruction Manual - English - Page 49
10. DIP switch 10. DIP switch NOTE When changing DIP switch, the power must be off. 10-1. Panel DIP switch functions -vCvZ OF .CM a ,,AZE .01 -CM .CE -CO OFF "711 .CM ..1=1 .CM -CM .CM I DIP switch SW No. When ON - ® -1 After sewing is complete, the work clamp is raised by the operator - Brother International BAS-341E | Instruction Manual - English - Page 50
■ DIP switch SW No. ® - 5 ® -6 *- 7 10. DIP switch When ON After sewing is completed, work clamp does not automatically rise (only in split mode) Clamping force output is produced (Inner clamping device available as an option) Single-pedal operation using the starting switch; when the starting - Brother International BAS-341E | Instruction Manual - English - Page 51
10. DIP switch 10-2. DIP switches inside the control box A DANGER A Wait at least 5 minutes after turning off the power switch and disconnecting the power cord from the wall outlet before opening the face plate of the control box. Touching areas where high voltages are present can result in severe - Brother International BAS-341E | Instruction Manual - English - Page 52
■ DIP switch @ 10. DIP switch SW No. @ - 1 @ - 2 0 -3 @ - 4 0 -5 @ - 6 When ON The first two stitches at the sewing start will be sewn at low speed (approx. 260 spm) The last two stitches at the sewing end will be sewn at low speed (approx. 260 spm) The last two stitches at the sewing end will be - Brother International BAS-341E | Instruction Manual - English - Page 53
11. Changing special functions using the memory switches 11. Changing special functions using the memory switches The functions of the switches on the operation panel can be changed to carry out special functions. * All of the memory switches are set to OFF at the time of shipment. NOTE The - Brother International BAS-341E | Instruction Manual - English - Page 54
■ Memory Switches (00 - OF) 11. Changing special functions using the memory switches SWNo. When ON memo-00 When moving to the home position, the feed plate moves in the order X--0( and the start position moves in the order Y-X. memo-01 When moving to the home position, the feed plate moves in - Brother International BAS-341E | Instruction Manual - English - Page 55
11. Changing special functions using the memory switches II Memory Switches (10 - 1F) SW No. memo-10 memo-11 When ON Milling device can be used (available as an option) Bobbin thread counter and production counter are adjusted when thread is trimmed memo 12 Work clamp is lowered by pressing work - Brother International BAS-341E | Instruction Manual - English - Page 56
11. Changing special functions using the memory switches • Turn the dial while pressing the STEP BACK switch to change the values. SW No. memo-30 memo-31 memo-32 memo-33 memo-34 memo-35 memo-36 memo-37 memo-38 Possible setting range 1-999 Units X 10ms Initial value 10 Explanation Time until - Brother International BAS-341E | Instruction Manual - English - Page 57
Turn off the power and check. E.20 . E.21 . E.22 Problem with machine motor stopping, or synchronizer connection error. Machine motor operation it back on. If the error appears continually, contact a qualified service technician. E.70 Overlapping option output numbers. Change the option output - Brother International BAS-341E | Instruction Manual - English - Page 58
the power and check. E. F0 Power relay is not operating (malfunction of power supply circuit board). Turn off the power and contact a qualified service technician. - ' E.F1 Bad connection in cable between power supply circuit board and main circuit board. . . Turn off the power and check - Brother International BAS-341E | Instruction Manual - English - Page 59
assembly ,,,- Bobbin case assembly LA S15902-401 Bobbin case assembly LA S15902-401 Needle bar thread guide e A B Needle Needle bar thread guide A S02438-001 DP X 17 # 21 145646-021 Needle bar thread guide A S02438-001 DP X5 # 16 107415-016 Feed plate (341E) Feed plate A S47137-001 Feed - Brother International BAS-341E | Instruction Manual - English - Page 60
14. Notes on the processing and production of plate blanks 14. Notes on the processing and production of plate blanks BAS-341E BAS-342E AfterPlate blank processing Plate blank After processing A * Chamfer other corners of the reverse side of the plate blank with a thickness of 0.3c or thicker, - Brother International BAS-341E | Instruction Manual - English - Page 61
15. Troubleshooting 15. Troubleshooting Problem Cause Check Remedy Page Presser does not rise. length. Position of shuttle race thread guide is incorrect Refer to "Skipped stitches occur". Upper thread length Position of shuttle race thread guide Refer to "Skipped stitches occur". Adjust - Brother International BAS-341E | Instruction Manual - English - Page 62
15. Troubleshooting Problem Cause Check Remedy Page Upper thread breaks. Lower thread breaks. Skipped stitches Needle breaks. Upper thread tension is too strong. Needle is installed incorrectly. Thread - Brother International BAS-341E | Instruction Manual - English - Page 63
15. Troubleshooting Problem Cause Check Remedy Page Upper thread is not trimmed. Fixed knife 13 Adjust the needle bar lift amount 32 Adjust the position of the shuttle race thread 33 guide. Adjust the position of the shuttle race thread 33 gudie. Adjust the upper thread tension. 13 - Brother International BAS-341E | Instruction Manual - English - Page 64
15. Troubleshooting Problem Cause Check Remedy Page Unstable upper thread length or replace the fixed knife. Unstable needle up stop position Inadequate adjustment of V belt tension Electrical trouble Tension pulley position Refer to the details for [E.22] in the error code table. Adjust - Brother International BAS-341E | Instruction Manual - English - Page 65
16. Options 16. Option ■ Programmer assy ■ Inner clamp device ■ One-touch clamping device ■ Milling device ■ WP stitch device ■ Auto bobbin changer ■ Snap fastener and hook attachment device ■ Needle thread presser device Used to create sewing patterns for the BAS-300E series. It can also be used - Brother International BAS-341E | Instruction Manual - English - Page 66
■ Thread breakage detector device 16. Options Available as rotary type or fiber type, stops sewing when a thread breakage is detected and warns the operator. ■ Needle coder device This is a pneumatic-type needle cooler which prevents the thread breaking due to heat. It is particularly useful when - Brother International BAS-341E | Instruction Manual - English - Page 67
INSTRUCTION MANUAL BROTHER INDUSTRIES,LTD. NAGOYA,JAPAN Printed in Japan 151-V41, V42 S93V41-002 1998.11. H
-
 1
1 -
 2
2 -
 3
3 -
 4
4 -
 5
5 -
 6
6 -
 7
7 -
8
-
9
-
10
-
11
-
12
-
13
-
14
-
15
-
16
-
17
-
18
-
19
-
20
-
21
-
22
-
23
-
24
-
25
-
26
-
27
-
28
-
29
-
30
-
31
-
32
-
33
-
34
-
35
-
36
-
37
-
38
-
39
-
40
-
41
-
42
-
43
-
44
-
45
-
46
-
47
-
48
-
49
-
50
-
51
-
52
-
53
-
54
-
55
-
56
-
57
-
58
-
59
-
60
-
61
-
62
-
63
-
64
-
65
-
66
-
67
 |
 |

BAS
-341E
BAS
-342E
Electronic
Excellent
Economy
Series
INSTRUCTION
MANUAL
Please
read
this
manual
before
using
the
machine.
Please
keep
this
manual
within
easy
reach
for
quick
reference.
PROGRAMMABLE
ELECTRONIC
PATTERN
SEWER