Brother International BE-1201B AC-PC Main Board Replacement - English
Brother International BE-1201B AC-PC Manual
 |
View all Brother International BE-1201B AC-PC manuals
Add to My Manuals
Save this manual to your list of manuals |
Brother International BE-1201B AC-PC manual content summary:
- Brother International BE-1201B AC-PC | Main Board Replacement - English - Page 1
Technical Reference Title: Date: Models: Replacing Main Board February 25, 2009 BE-901, BE-901-PC, BE-1201, BE-1201-PC, BES-916, BES-1216 1. Make sure machine is OFF and Unplugged. 2. Remove cover assy. (Six screws removed "A", Three loosened "B") A B A A A A A 3. Identifying Main Bord. ( - Brother International BE-1201B AC-PC | Main Board Replacement - English - Page 2
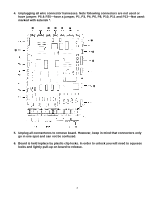
4. Unplugging all wire connector harnesses. Note following connecters are not used or have jumper: P5 & P25-have a jumper, P1, P3, P4, P6, P8, P10, P11 and P13-Not used: marked with asterisk *. * *** * * * * * * 5. Unplug all connectores to remove board. However, keep in mind that connectors - Brother International BE-1201B AC-PC | Main Board Replacement - English - Page 3
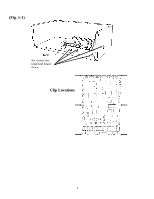
(Fig. 1-1) Six connectors total hold board down. Clip Locations 3 - Brother International BE-1201B AC-PC | Main Board Replacement - English - Page 4
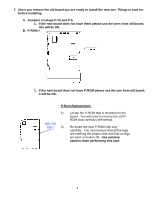
7. Once you remove the old board you are ready to install the new one. Things to look for before installing. A. Jumpers on plugs P-25 and P-5. 1. If the new board does not have them please use the ones from old board; this will be OK. B. P-ROM = 1. If the new board does not have P-ROM please use - Brother International BE-1201B AC-PC | Main Board Replacement - English - Page 5
U-shape cut out to the socket mount. 8. Installing board, please follow reverse instructions on removal. 9. After board is installed and all plugged in you will need to perform a version up-grade in accordance with the model of machine. The machine will act like it is in-operative until this step is
-
 1
1 -
 2
2 -
 3
3 -
 4
4 -
 5
5
 |
 |
1
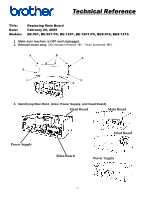
Technical Reference
Title:
Replacing Main Board
Date:
February 25, 2009
Models:
BE-901, BE-901-PC, BE-1201, BE-1201-PC, BES-916, BES-1216
1. Make sure machine is OFF and Unplugged.
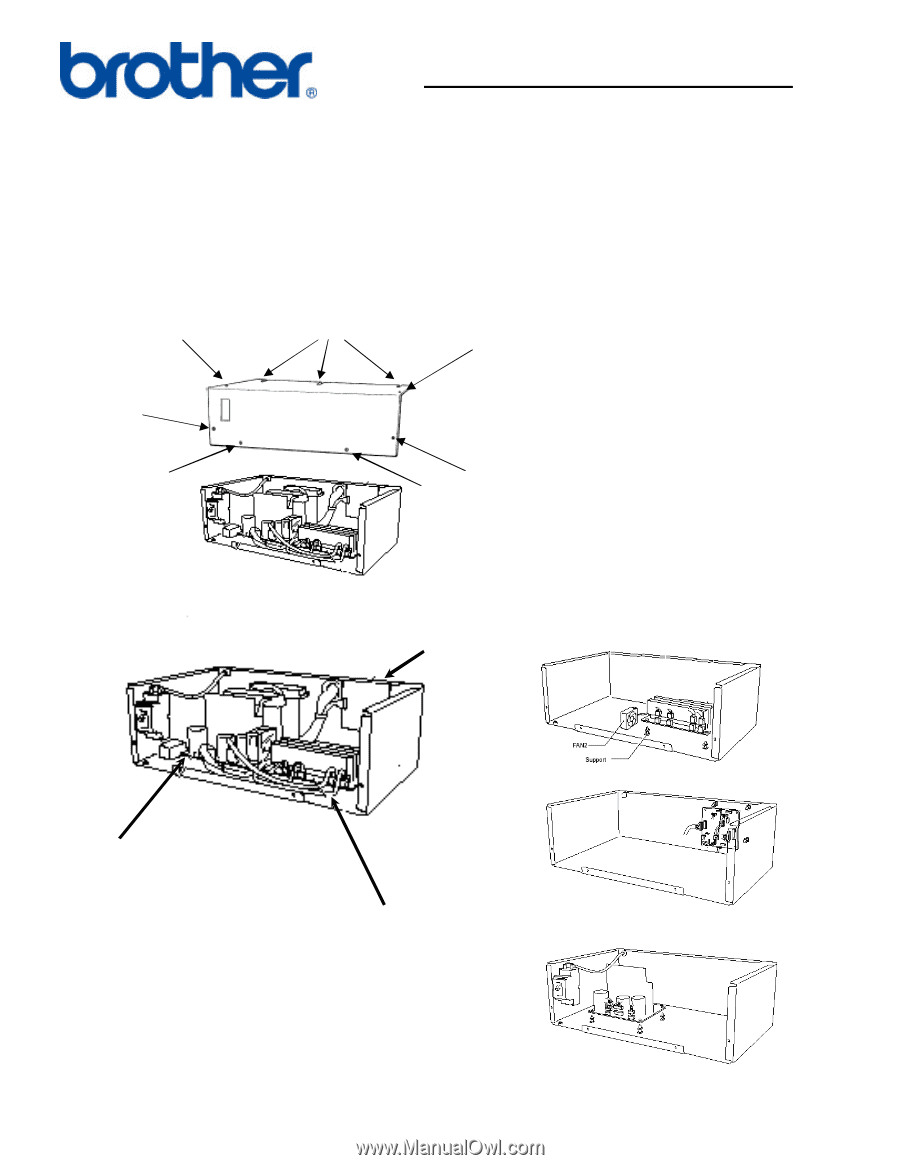
2. Remove cover assy.
(Six screws removed
“A”
, Three loosened
“B”
)
3. Identifying Main Bord. (Also: Power Supply, and Head Board)
A
A
A
A
A
A
B
Power Supply
Main Board
Head Board
Main Board
Head Board
Power Supply