Brother International BE-1204C Tubular to Cap - English
Brother International BE-1204C Manual
 |
View all Brother International BE-1204C manuals
Add to My Manuals
Save this manual to your list of manuals |
Brother International BE-1204C manual content summary:
- Brother International BE-1204C | Tubular to Cap - English - Page 1
BE-1204, 1206 For Technical Assistance Please Call Toll Fre e 1-877-4BROTHER Email: [email protected] Website: http://www.brother-usa.com/industembroidery/tech_down.aspx With the power to the machine OFF. 1. Remove the tubular attachment. This will vary depending on your machine model. BE-1204B - Brother International BE-1204C | Tubular to Cap - English - Page 2
www.brother-usa.com/industembroidery/tech_down.aspx 5. Here is what the fixed driving lever should look like when installed. 6. Install the black thumbscrews on to the pantograph. Adjust centering of cap frame assembly left to right before tightening thumbscrews. 6. Flip mode switch on machine to
-
 1
1 -
 2
2
 |
 |
3/10/05
1
With the power to the machine
OFF
.
1.
Remove the tubular attachment. This will vary
depending on your machine model.
BE-1204B/BE1206B
– Loosen the pair of
black thumbscrews on the pantograph that
hold on each the tubular arms. Slide the
thumbscrews toward the center of the
tubular arms and them remove the arms.
BE-1204C
-
Remove
the pair of black
thumbscrews on the pantograph that hold
on each the tubular arm and remove each
tubular attachment.
3.
Lift up on the cap frame sash so that the
positioning pins fit into the oval holes and lower
on to the pantograph.
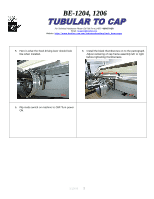
2.
Remove the two black thumbscrews from the cap
frame assembly. Then slide the cap driver onto the
machine. Each cap assembley is labeled as to what
head it goes on.
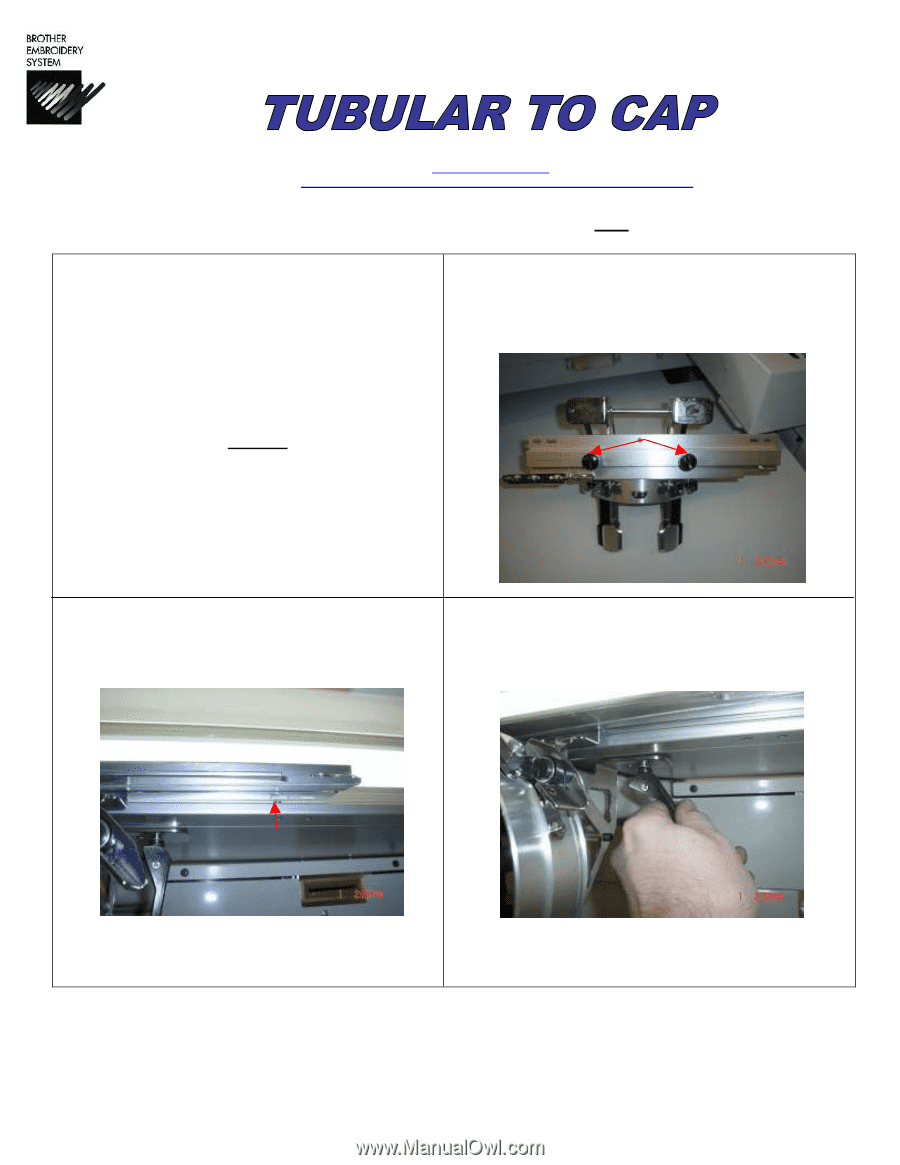
4.
Hold the fixed lever as shown and insert in to the
hole underneath the pantograph. Push up and
toward the inside until it stops. Then lock the fixed
lever by pushing down. Do this to the other side.
For Technical Assistance Please Call Toll Free
1-877-4BROTHER
Email:
Website
:
B
B
E
E
-
-
1
1
2
2
0
0
4
4
,
,
1
1
2
2
0
0
6
6
Positioning Pin