Brother International BM-3600 Users Manual - English and Spanish
Brother International BM-3600 Manual
 |
View all Brother International BM-3600 manuals
Add to My Manuals
Save this manual to your list of manuals |
Brother International BM-3600 manual content summary:
- Brother International BM-3600 | Users Manual - English and Spanish - Page 1
KNOWING YOUR SEWING 1 MACHINE CONOZCA SU MÁQUINA DE COSER STRAIGHT AND ZIGZAG 2 STITCHING COSTURA RECTA Y EN ZIG-ZAG BUILT-IN STITCHES 3 PUNTADAS DE COSTURA INCORPORADAS SEWING BUTTONHOLES AND 4 BUTTONS COSTURA DE OJALES Y BOTONES USING ATTACHMENTS AND APPLICATIONS 5 USO DE ACCESORIOS Y APLICACIONES - Brother International BM-3600 | Users Manual - English and Spanish - Page 2
from the electrical outlet when removing covers, lubricating, or when making any other user servicing adjustments mentioned in the instruction manual. 16. This sewing machine is not intended for use by young children or infirm persons without supervision. (For Australia and New Zealand only) 17 - Brother International BM-3600 | Users Manual - English and Spanish - Page 3
quina de la toma de corriente cuando vaya a quitar alguna tapa, lubricar, o cuando vaya a realizar cualquier tipo de ajuste de mantenimiento indicado en este manual de instrucciones. 16. Esta máquina de coser no está diseñada para ser utilizada por niños o personas enfermas sin la supervisión de un - Brother International BM-3600 | Users Manual - English and Spanish - Page 4
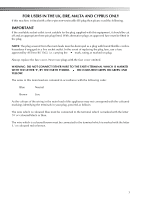
FOR USERS IN THE UK, EIRE, MALTA AND CYPRUS ONLY If this machine is fitted with a three-pin non-rewireable BS plug then please read the following. IMPORTANT If the available socket outlet is not suitable for the - Brother International BM-3600 | Users Manual - English and Spanish - Page 5
tuviera que llevar o enviar la máquina al servicio de reparaciones. PLEASE READ THESE INSTRUCTIONS BEFORE YOU USE THE MACHINE. To use the machine safely 1. Make sure you watch the needle carefully while you are sewing. Do not touch the handwheel, thread take-up lever, needle, or other moving parts - Brother International BM-3600 | Users Manual - English and Spanish - Page 6
follow the troubleshooting table in the Appendix to inspect and adjust the machine yourself. If the problem is still there, consult your local authorized dealer. For additional product information and updates, visit our web site at www.brother.com. The contents of this manual and specifications - Brother International BM-3600 | Users Manual - English and Spanish - Page 7
MACHINE 26 Winding the Bobbin ...26 Lower Threading ...28 Lower Threading (for models equipped with a quick-set bobbin 30 Upper Threading ...32 Using the Needle Threader (for models equipped with a needle threader 34 Drawing up the Lower Thread ...36 Sewing with a Twin Needle ...36 Thread Tension - Brother International BM-3600 | Users Manual - English and Spanish - Page 8
Foot ...65 Using the Narrow Hemmer Foot ...65 Using the Blind Stitch Foot ...67 6. APPENDIX ...69 MAINTENANCE ...69 Changing the Light Bulb ...69 Cleaning ...70 Troubleshooting ...72 INDEX ...79 7 - Brother International BM-3600 | Users Manual - English and Spanish - Page 9
CONTENIDO 1. CONOZCA SU MÁQUINA DE COSER 11 COMPONENTES PRINCIPALES 11 ACCESORIOS ...12 Accesorios opcionales ...13 USO DE LA MÁQUINA DE COSER 14 Conexión de enchufes ...15 Interruptor de la alimentación y de luz de cosido 15 Pedal ...15 Comprobación de la aguja ...16 Cambio de la aguja ...16 - Brother International BM-3600 | Users Manual - English and Spanish - Page 10
5. USO DE ACCESORIOS Y APLICACIONES 56 Costura de cremalleras ...56 Fruncidos ...57 Zurcidos ...58 Aplicaciones ...58 Realización de monogramas y bordados ...59 ACCESORIOS OPCIONALES 62 Utilización del pie móvil ...62 Utilización del pie para acolchados ...63 Utilización del pie para acolchados de - Brother International BM-3600 | Users Manual - English and Spanish - Page 11
KNOWING YOUR SEWING MACHINE 1 KNOWING YOUR SEWING MACHINE THE MAIN PARTS 1 Bobbin winder (page 26) This winds the thread onto the bobbin for use as the lower thread. 2 Spool pin (page 27, 32) This holds the spool of thread. 3 Thread guide (page 27, 32) This is used when winding the thread onto - Brother International BM-3600 | Users Manual - English and Spanish - Page 12
24) Controla la longitud de las puntadas. F Tornillo de ajuste fino de los ojales (página 54) G Rueda Permite subir y bajar la aguja de forma manual. H Interruptor de la alimentación y de luz de cosido (página 15) Puede encender y apagar el interruptor de la alimentación y de luz de cosido. I Conexi - Brother International BM-3600 | Users Manual - English and Spanish - Page 13
KNOWING YOUR SEWING MACHINE / CONOZCA SU MÁQUINA DE COSER ACCESSORIES / ACCESORIOS The following accessories are stored in the flat bed attachment. We have designed these accessories to help you easily perform most sewing tasks. Los siguientes accesorios se encuentran en la unidad de cama plana - Brother International BM-3600 | Users Manual - English and Spanish - Page 14
Optional Accessories / Accesorios opcionales 1. 2. 3. 4. 5. 1 No. Part Name 1 Walking Foot 2 Quilting Foot 3 1/4-inch Quilting Foot 4 Narrow Hemmer Foot 5 Blind Stitch Foot Part Code U.S.A. Others SA107 F034N: XC2165-002 SA129 F005N: XC1948-002 SA125 F001N: XC1944-002 SA127 F003N - Brother International BM-3600 | Users Manual - English and Spanish - Page 15
/ CONOZCA SU MÁQUINA DE COSER USING YOUR SEWING MACHINE USO DE LA MÁQUINA DE COSER WARNING/AVISO ● Use only regular household electricity for the power source. Using other power sources may result in fire, electric shock, or damage to the machine. ● Turn off the main power and remove the plug - Brother International BM-3600 | Users Manual - English and Spanish - Page 16
plug to the machine. 1 Enchufe la clavija del pedal a la máquina. y de luz de cosido 1 This switch turns the main power and sewing light on be removed from the wall outlet. ● When servicing the machine, or when removing covers or changing bulbs, the machine must be unplugged. (For U.S.A. only) ● - Brother International BM-3600 | Users Manual - English and Spanish - Page 17
foot controller can be used on the following machine models: XL-3750, XL-3500i, XL-2600i, LS-590, BM-2700, BM-3600 (Sólo para EE.UU.) ● Pedal: Modelo LS-590, BM-2700, BM-3600 Checking the Needle Comprobación de la aguja The sewing needle must always be straight and sharp for smooth sewing. La aguja - Brother International BM-3600 | Users Manual - English and Spanish - Page 18
/ Tornillo de la presilla de la aguja • Do not use excessive force when loosening or tightening the needle clamp screw, otherwise certain parts of the sewing machine may be damaged. No ejerza una fuerza excesiva para aflojar o apretar el tornillo de la presilla de la aguja, pues podría dañar algunas - Brother International BM-3600 | Users Manual - English and Spanish - Page 19
KNOWING YOUR SEWING MACHINE / CONOZCA SU MÁQUINA DE COSER Changing the Presser Foot Cambio del pie prensatela CAUTION/PRECAUCIÓN ● Always turn off the power before you change the presser foot. If you leave the power on and step on the controller, the machine will start and you may be injured. ● - Brother International BM-3600 | Users Manual - English and Spanish - Page 20
dentro de la unidad de cama plana. Using a Free-arm Style Uso del estilo de brazo libre Free-arm sewing is convenient for sewing tubular and hard-to-reach areas. To change your machine to the free-arm style, lift out the flat bed attachment. La costura de brazo libre es útil para - Brother International BM-3600 | Users Manual - English and Spanish - Page 21
KNOWING YOUR SEWING MACHINE / CONOZCA SU MÁQUINA DE COSER THE CONTROLS / CONTROLES Pattern Selection Dial Selector de puntadas CAUTION/PRECAUCIÓN ● When you use the pattern selection dial to choose a - Brother International BM-3600 | Users Manual - English and Spanish - Page 22
PUNTADA DE DOBLE ACCIÓN BRIDGING STITCH PUNTADA DE PUENTE Width (mm (inch)) Length (mm (inch)) Manual Page Anchura [mm (pulg.)] Longitud [mm (pulg.)] Página del manual 3-5 (1/8 - 3/16) 0-5 (0-3/16) (Changes needle position / Cambio de posición de la aguja) 0-5 (0-3/16) 3-5 (1/8-3/16) 3-5 (1/8-3/16 - Brother International BM-3600 | Users Manual - English and Spanish - Page 23
YOUR SEWING MACHINE / CONOZCA SU MÁQUINA DE COSER Pattern / Dibujo 35 Stitches puntadas 25 Stitches puntadas Stitch Name Nombre de la puntada RAMPART STITCH PUNTADA DE MURALLA Width (mm (inch)) Length (mm (inch)) Manual Page Anchura [mm (pulg.)] Longitud [mm (pulg.)] Página del manual - Brother International BM-3600 | Users Manual - English and Spanish - Page 24
puntadas 25 Stitches puntadas Stitch Name Nombre de la puntada Width (mm (inch)) Length (mm (inch)) Manual Page Anchura [mm (pulg.)] Longitud [mm (pulg.)] Página del manual TREE STITCH PUNTADA DE ÁRBOL 3-5 (1/8-3/16) Fixed / Fija 2.5 (3/32) 50 Fixed / Fija 1 2.5 (3/32) LEGS STITCH PUNTADA - Brother International BM-3600 | Users Manual - English and Spanish - Page 25
KNOWING YOUR SEWING MACHINE / CONOZCA SU MÁQUINA DE COSER Stitch Length Dial Control de longitud THE NUMBER, THE LONGER THE STITCH. With the "0" setting, material is not fed. This is used when sewing a button. The "F" range is for making a satin stitch (close zigzag stitch), which is used for - Brother International BM-3600 | Users Manual - English and Spanish - Page 26
and hold it in that position while width. you lightly push the foot controller. To sew forward, THE HIGHER THE NUMBER, THE WIDER THE release the reverse sewing lever. The machine will STITCH. then sew forward. Suba la aguja a la posición más alta girando la rueda hacia usted (hacia la - Brother International BM-3600 | Users Manual - English and Spanish - Page 27
sewing machine. Using other bobbins may cause damage to the machine. ● We designed the bobbin that comes with this machine. If you use bobbins from other models, the machine Other models Otros modelos 1 2 1Pre-tension disk/ Disco pretensor 2Bobbin winder shaft / Eje de la devanadora de bobina 26 - Brother International BM-3600 | Users Manual - English and Spanish - Page 28
the spool pin and 1 pass the thread around the pre-tension disk. Coloque el carrete de hilo en el portacarrete y foot controller to wind the thread around the bobbin a few times. Then stop the machine. Mientras sujeta el extremo del hilo, pise suavemente el pedal para enrollar el hilo alrededor - Brother International BM-3600 | Users Manual - English and Spanish - Page 29
the instructions tension to loosen, and may break the needle. Un devanado incorrecto de la bobina puede disminuir la tensión del hilo y romper la aguja. 1 2 1 Wound evenly / Enrollado uniforme 2 Wound poorly / Enrollado deficiente ● The bobbin was designed specifically for this sewing machine - Brother International BM-3600 | Users Manual - English and Spanish - Page 30
the power off while threading the machine. If you accidentally step on the foot controller and the machine starts to sew, you could be injured. ● were designed to be used with this machine. Utilice solamente bobinas diseñadas para esta máquina. 1 1 Tension-adjusting spring / Resorte de ajuste de - Brother International BM-3600 | Users Manual - English and Spanish - Page 31
The bobbin was designed specifically for this sewing machine. If bobbins from other models are used, the machine will not operate correctly. Use only the CAUTION/PRECAUCIÓN ● Winding the bobbin improperly may cause the thread tension to loosen, breaking the needle and resulting in injury. Un - Brother International BM-3600 | Users Manual - English and Spanish - Page 32
bobbins that were designed to be used with this machine. Utilice solamente bobinas diseñadas para esta máquina. the wrong direction, it may cause the thread tension to be incorrect or break the needle. ● su lugar. 2 1 • You can begin sewing immediately without drawing up the bobbin thread. If you - Brother International BM-3600 | Users Manual - English and Spanish - Page 33
KNOWING YOUR SEWING MACHINE / CONOZCA SU MÁQUINA DE COSER Upper Threading / Enhebrado del hilo superior 1 Spool pin / Portacarrete 2 Thread guide (back) / Guía del hilo (parte trasera) 3 Thread guide (front) / Guía del hilo (parte delantera) 4 Thread take-up lever / Tirahilo 5 Mark on the - Brother International BM-3600 | Users Manual - English and Spanish - Page 34
guide the thread through the 5 thread take-up lever from right to left. Asegúrese de guiar el hilo de derecha a izquierda por el tirahilo. 1 • If your sewing machine upper thread. ● If you incorrectly feed the thread you may cause sewing problems. ● Si el tirahilo está en posición baja, el hilo - Brother International BM-3600 | Users Manual - English and Spanish - Page 35
KNOWING YOUR SEWING MACHINE / CONOZCA SU MÁQUINA DE COSER Using the Needle Threader lo contrario, el ganchillo podría dañarse. While lowering the needle threader lever, 3 hook the thread onto the guide. Mientras baja la palanca del enhebrador de aguja, enganche el hilo en la guía. 1 2 3 1 Needle - Brother International BM-3600 | Users Manual - English and Spanish - Page 36
power switch is off Raise the needle threader lever and pull out 6 about 5 cm (2 inch) of thread through the needle toward the back of the sewing machine. when threading. ● El enhebrador sólo se puede utilizar con agujas de tamaño 75/11-100/16 para máquinas de coser destinadas a uso Suba la - Brother International BM-3600 | Users Manual - English and Spanish - Page 37
indica en los pasos anteriores del 1 al 3. Replace the bobbin cover. 3 Vuelva a colocar la tapa de la bobina. Sewing with a Twin Needle Costura con aguja gemela We have designed your machine so you can sew with this needle and two top threads. You can use the same color or two different colors of - Brother International BM-3600 | Users Manual - English and Spanish - Page 38
machine. ● When using the twin needle, make sure the stitch width is not set above 3 since this may cause the needle to hit the needle plate and break. ● Make sure that the needle does not strike the presser foot. ● Do not sew same instructions for through the needle bar thread guide / El hilo de la - Brother International BM-3600 | Users Manual - English and Spanish - Page 39
KNOWING YOUR SEWING MACHINE / CONOZCA SU MÁQUINA DE COSER Thread Tension Tensión del hilo The tension of the thread will affect the quality of your stitches. You may need to adjust it when you change fabric or thread. La tensión del - Brother International BM-3600 | Users Manual - English and Spanish - Page 40
FABRIC, THREAD, AND NEEDLE COMBINATIONS COMBINACIONES DE TELA, HILO Y AGUJA Thread 1 Fabric Type Size of Needle Type Size Medium weight fabrics Broadcloth Taffeta Flannel, Gabardine Cotton Thread synthetic mercerized Silk or silk finished 60-80 50-80 75/11-90/14 Lightweight fabrics Lawn - Brother International BM-3600 | Users Manual - English and Spanish - Page 41
KNOWING YOUR SEWING MACHINE / CONOZCA SU MÁQUINA DE COSER Memo/Recuerde ● For clear nylon thread, needle. The wrong combination may also cause the seam to be uneven, the fabric to pucker, or the machine to skip stitches. ● Asegúrese de seguir las combinaciones de aguja, hilo y tela que se indican - Brother International BM-3600 | Users Manual - English and Spanish - Page 42
máquina CAUTION/PRECAUCIÓN ● To avoid being injured, watch the needle carefully while you are using the machine. Keep 2 your hands away from moving parts. ● Do not stretch or pull the fabric during sewing, otherwise the needle may be damaged and you may be injured. ● Do not use bent or broken - Brother International BM-3600 | Users Manual - English and Spanish - Page 43
ni ningún otro objeto durante la costura. El hilo podría engancharse y la aguja podría romperse, y causar lesiones. ■ ■ Changing Sewing Direction Cambio de la dirección de costura Stop the machine at the point where you want to 1 change direction with the needle still in the fabric. Pare la máquina - Brother International BM-3600 | Users Manual - English and Spanish - Page 44
can use a triple stretch stitch for sewing stretch fabrics. Puede utilizar la puntada recta para costuras sobrepuestas y la costura en telas ligeras. La puntada elástica triple es adecuada para coser telas elásticas. ■ Removing the Material from the Machine Extracción del material de la máquina - Brother International BM-3600 | Users Manual - English and Spanish - Page 45
STRAIGHT AND ZIGZAG STITCHING / COSTURA RECTA Y EN ZIG-ZAG We recommend that you sew using the Straight Stitch at the beginning and end of zigzag stitches. (This acts as a reinforcement stitch.) Recomendamos la costura con puntada recta al principio y - Brother International BM-3600 | Users Manual - English and Spanish - Page 46
trousers, without the stitch showing. Use the Blind Hem Stitch when sewing on non-stretch fabrics, and the Stretch Blind Hem Stitch for stretch puntada invisible o la puntada invisible elástica, y luego ajuste la longitud de puntada. Sew on the fold as in Fig. C. 4 Cosa en el pliegue como se indica - Brother International BM-3600 | Users Manual - English and Spanish - Page 47
. Ajuste el selector de puntadas en la puntada de concha. Adjust the thread tension so that it is tighter 2 than normal. Ajuste la tensión del hilo para de costura y con puntadas en zig-zag ligeramente por encima del borde doblado. Sew at a slow speed. 4 Cosa a una velocidad baja. Stitch Name Nombre - Brother International BM-3600 | Users Manual - English and Spanish - Page 48
la goma en la tela. Double Action Stitching Costura de doble acción As you sew, stretch the elastic in front of and 2 behind the presser foot. A medida to join two pieces of fabric together and it is very effective when sewing knitted fabrics. If you are using nylon thread, the stitch will not - Brother International BM-3600 | Users Manual - English and Spanish - Page 49
a lo largo del borde, tirando ligeramente de los dos hilos cuando comience a coser. Use thicker than normal threads for sewing. Utilice hilos más gruesos de lo normal para la costura. After sewing, remove the basting and the 4 paper. Finish by tying knots on the reverse side at the beginning and the - Brother International BM-3600 | Users Manual - English and Spanish - Page 50
the pattern selection dial to the Feather Stitch. 1 Ajuste el selector de puntadas en la puntada de plumas. Place the fabric right side up and sew 1 cm 2 (3/8 inch) from the edge of the fabric. Coloque la tela con el derecho hacia arriba y cosa 1 cm (3/8 pulg.) desde el borde de la tela - Brother International BM-3600 | Users Manual - English and Spanish - Page 51
zig- zag triple Fixed / Fixed 2.5 (3/32) Fixed / Fixed 2.5 (3/32) 3-5 (1/8-3/16) This stitch can be used wherever a zigzag stitch would be used to sew heavyweight stretch fabrics. The Triple Zigzag Stretch Stitch can also be used as a decorative top stitch. Set the pattern selection dial to the - Brother International BM-3600 | Users Manual - English and Spanish - Page 52
These stitches can be used for decorative top stitching and for smocking. Set the pattern selection dial to the Triangle Stitch, Leaf Stitch, etc. Estos tipos de puntadas se pueden emplear para costura sobrepuesta decorativa y costura de smocking. Ajuste el selector de puntadas en la puntada - Brother International BM-3600 | Users Manual - English and Spanish - Page 53
el pie para ojales y ajuste el selector de puntadas en "F". You need to sew the front bar tack first. Lower 3 the presser foot to align the marks on un poco. While gently holding the upper thread, start 6 the machine. Mientras sujeta suavemente el hilo superior, ponga a funcionar la máquina. 1 Marks - Brother International BM-3600 | Users Manual - English and Spanish - Page 54
de la puntada según el diámetro del hilo galón. Lower the presser foot and start sewing. 4 Baje el pie prensatela y comience a coser. 2 4 1 Stop the machine when buttonhole stitching is 8 finished. Once sewing is completed, gently pull the 5 gimp thread to remove any slack, and then trim off the - Brother International BM-3600 | Users Manual - English and Spanish - Page 55
. Si la costura en los dos lados del ojal no es igual, puede realizar los siguientes ajustes. Set the stitch length dial between "F" and 1.5 1 and sew the buttonhole on a scrap piece of fabric to observe how the material is fed. Ajuste el control de longitud de puntada entre "F" y 1,5 y cosa el ojal - Brother International BM-3600 | Users Manual - English and Spanish - Page 56
ponga el selector de puntadas en 4 la puntada en zig-zag, y ajuste la anchura que desee. Turn off the machine. 2 Desconecte la alimentación de la máquina. Change the foot to the button sewing foot. 3 Quite el pie que hay colocado y ponga el pie especial para botones. Place the darning plate on - Brother International BM-3600 | Users Manual - English and Spanish - Page 57
Y APLICACIONES Zipper Insertion Costura de cremalleras Turn off the machine and raise the presser 1 foot. Desconecte la alimentación hand to make sure the needle does not hit the zipper foot before you start sewing. Choosing a different stitch will cause the needle to hit the presser foot and - Brother International BM-3600 | Users Manual - English and Spanish - Page 58
puntadas en la puntada recta. Loosen the tension of the upper thread so that 2 the lower thread lies on the underside of the material. Afloje la tensión del hilo superior de forma que To sew the opposite side of the zipper, first 6 turn the machine off and raise the presser foot el hilo - Brother International BM-3600 | Users Manual - English and Spanish - Page 59
zurcir zig-zag Turn off the machine. 1 Place the darning plate on the needle plate, then turn on the machine. Desconecte la alimentación de la to the fabric. 1 Hilvane el diseño de corte a la tela. Carefully sew around the edge of the design 2 with a zigzag stitch. Cosa con cuidado alrededor - Brother International BM-3600 | Users Manual - English and Spanish - Page 60
y bordados Turn off the machine. 1 Place the darning plate on the needle plate, then turn on the machine. Desconecte la alimentación de not hit a (para el bordado) en la superficie de la tela. pin during sewing. The needle could break, and you may be injured. Stretch the fabric between embroidery - Brother International BM-3600 | Users Manual - English and Spanish - Page 61
rueda y realice unas cuantas puntadas de sujeción. ■ Monogramming / Monogramas Sew by moving the hoop slowly along the 1 lettering at a constant speed forefingers while pressing the fabric with your middle and third fingers and supporting the outside of the hoop with your little fingers. Agarre el - Brother International BM-3600 | Users Manual - English and Spanish - Page 62
■ Embroidering / Bordados Stitch the outline of the design by moving the 1 embroidery hoop. Cosa el contorno del diseño moviendo el aro de bordado. CAUTION/PRECAUCIÓN ● Keep fingers away from moving parts, especially needles. ● Mantenga los dedos alejados de las piezas en movimiento, especialmente - Brother International BM-3600 | Users Manual - English and Spanish - Page 63
0-5 (1/16-3/16) (0-3/16) This foot is very useful for sewing materials such as vinyl cloth, synthetic leather, thin leather, etc. es posible coser puntas en reversa con el pie móvil. 2 3 Turn off the machine. 1 Desconecte la alimentación de la máquina. Raise the needle and the presser foot - Brother International BM-3600 | Users Manual - English and Spanish - Page 64
hit the presser foot and you may be injured. ● Before you start sewing, make sure you turn the handwheel toward you (counterclockwise) to check that the de zurcir The Quilting Foot is useful for darning and free-motion machine quilting. El pie para acolchados resulta útil para zurcidos y y acolchados - Brother International BM-3600 | Users Manual - English and Spanish - Page 65
el diseño dibujado. 1 1 Quilting design / Diseño de acolchado The length of the stitch depends on how 8 quickly you move the fabric and on the machine's sewing speed. Sew while moving the fabric slowly. La longitud de la puntada depende de la rapidez con que mueva la tela y de la velocidad de cosido - Brother International BM-3600 | Users Manual - English and Spanish - Page 66
center / centro) (3/32) You can use the 1/4-inch Quilting Foot to sew seams when piecing together a quilt. Usted podrá utilizar el pie para mm (1/4 inch) / Margen de costura de 6,5 mm (1/4 pulg.) Turn off the machine. 1 Desconecte la alimentación de la máquina. 1 Top of fabric / Parta superior de - Brother International BM-3600 | Users Manual - English and Spanish - Page 67
the foot controller so that both hands 3 are free to guide the material. Turn on the machine. Conecte el pedal de manera que pueda guiar el material con the right side of the presser foot, lightly pull on the thread while slowly sewing. Sin permitir que se salga la tela por el lado derecho del pie - Brother International BM-3600 | Users Manual - English and Spanish - Page 68
foot curl. At the same time, carefully guide the fabric to the right with your left handy not only for blind hem stitching, but also for sewing fabric edges and seams. Este pie resulta útil no machine. 1 Desconecte la alimentación de la máquina. Attach the Blind Stitch Foot. 2 Turn on the machine. - Brother International BM-3600 | Users Manual - English and Spanish - Page 69
con cuidado para guiar la tela. Lower the presser foot and begin sewing. 6 Baje el pie prensatela y comience a coser. 1 Screw / Tornillo 2 Guide / Guía ■ When Sewing Seams / Para coser costuras Turn off the machine. 1 Desconecte la alimentación de la máquina. Attach the Blind Stitch Foot. 2 Turn - Brother International BM-3600 | Users Manual - English and Spanish - Page 70
supply plug from the 1 outlet. Quite el enchufe de la toma de corriente. Loosen the screw on the back of the sewing 2 head. Then remove the light cover from the machine. Afloje el tornillo situado en la parte trasera del cabezal de costura. A continuación, retire la tapa de la bombilla de la - Brother International BM-3600 | Users Manual - English and Spanish - Page 71
una moneda. Levante la placa de la aguja como se indica en la ilustración y, a continuación, deslícela hacia la izquierda para extraerla. Switch the machine off and unplug it. 1 Apague la máquina y desenchúfela. Raise the needle and the presser foot. 2 Levante la aguja y el pie prensatela. Loosen - Brother International BM-3600 | Users Manual - English and Spanish - Page 72
that is scratched; otherwise the upper thread may become tangled, the needle may break, or sewing performance may suffer. For a new bobbin case (part code: XC8993-021), contact your nearest authorized service center. ● Make sure that you fit the bobbin case properly, otherwise the needle may break - Brother International BM-3600 | Users Manual - English and Spanish - Page 73
APPENDIX / ANEXO Troubleshooting If the machine stops working properly, check the following possible problems. If the problem is still there, contact your retailer or the nearest authorized service center. Symptom The sewing machine does not work. The needle breaks. The upper thread breaks. - Brother International BM-3600 | Users Manual - English and Spanish - Page 74
or the nearest authorized service center. - You have not used a bobbin that has been designed for this machine. Incorrect bobbins will not sewing thin fabric, the stitch is too thick. Sew with stabiliser material under the fabric. - The thread tension is incorrect. Adjust the tension - Brother International BM-3600 | Users Manual - English and Spanish - Page 75
or the nearest authorized service center. You have not used a bobbin that has been designed for this machine. Incorrect bobbins will not that you want to sew. The stitch is not sewn correctly. The thread tension is incorrect. The thread is tangled. Adjust the tension of the upper thread. - Brother International BM-3600 | Users Manual - English and Spanish - Page 76
Solución de problemas Si la máquina deja de funcionar correctamente, compruebe los posibles problemas que se exponen a continuación. Si el problema continúa, póngase en contacto con su proveedor o con el servicio de reparaciones autorizado más cercano. Síntoma Causa posible Solución Referencia - Brother International BM-3600 | Users Manual - English and Spanish - Page 77
APPENDIX / ANEXO Síntoma El hilo superior se rompe. El hilo superior se rompe. El hilo inferior está enredado o se rompe. Causa posible Solución No ha enhebrado el hilo superior correctamente. (Por ejemplo, no ha colocado el carrete correctamente o el hilo se ha salido de la guía por encima de - Brother International BM-3600 | Users Manual - English and Spanish - Page 78
Síntoma Causa posible Solución Referencia No ha enhebrado el hilo superior correctamente. Corrija el enhebrado del hilo superior. página 32 No ha devanado el hilo de la bobina Devane el hilo de la bobina correctamente. correctamente. página 26 La tensión del hilo no es correcta. No ha - Brother International BM-3600 | Users Manual - English and Spanish - Page 79
APPENDIX / ANEXO Síntoma Causa posible No se puede utilizar el enhebrador de aguja. Al coser, el resultado de las puntadas no es el correcto. No se ha movido el soporte de la aguja a su posición más alta. No ha insertado la aguja correctamente. El pie prensatela que está utilizando no es el - Brother International BM-3600 | Users Manual - English and Spanish - Page 80
, lower 28 30 needle threader 34 twin needle 37 upper 32 Triple zigzag stretch stitching 50 Troubleshooting 72 Twin needle , attaching 17 37 sewing 36 U Unpacking instructions 4 Upper tension control dial 38 Upper threading 32 W Walking foot 62 Z Zigzag stitching 43 Zipper insertion 56 - Brother International BM-3600 | Users Manual - English and Spanish - Page 81
ÍNDICE A Accesorios 12 , opcionales 13 62 Aguja cambio 16 combinaciones con tela y aguja 39 comprobación 16 Aguja gemela , colocación 17 37 costura 36 Alimentación 15 Aplicaciones 58 B Bobina devanado 26 , Bobina rápida 30 36 Bombilla cambio 69 Bordados 59 Botones costura 55 C - Brother International BM-3600 | Users Manual - English and Spanish - Page 82
ENGLISH/SPANISH 885 -S28 /S29 XD1794-3213 Printed in China
-
 1
1 -
 2
2 -
 3
3 -
 4
4 -
 5
5 -
 6
6 -
 7
7 -
8
-
9
-
10
-
11
-
12
-
13
-
14
-
15
-
16
-
17
-
18
-
19
-
20
-
21
-
22
-
23
-
24
-
25
-
26
-
27
-
28
-
29
-
30
-
31
-
32
-
33
-
34
-
35
-
36
-
37
-
38
-
39
-
40
-
41
-
42
-
43
-
44
-
45
-
46
-
47
-
48
-
49
-
50
-
51
-
52
-
53
-
54
-
55
-
56
-
57
-
58
-
59
-
60
-
61
-
62
-
63
-
64
-
65
-
66
-
67
-
68
-
69
-
70
-
71
-
72
-
73
-
74
-
75
-
76
-
77
-
78
-
79
-
80
-
81
-
82
 |
 |

6
5
4
3
2
1
Operation Manual
Manual de Instrucciones
SEWING BUTTONHOLES AND
BUTTONS
COSTURA DE OJALES Y
BOTONES
PUNTADAS DE COSTURA
INCORPORADAS
BUILT-IN STITCHES
ANEXO
APPENDIX
USING ATTACHMENTS AND
APPLICATIONS
USO DE ACCESORIOS Y
APLICACIONES
STRAIGHT AND ZIGZAG
STITCHING
COSTURA RECTA Y EN ZIG-ZAG
KNOWING YOUR SEWING
MACHINE
CONOZCA SU MÁQUINA DE
COSER