Brother International GT-541 Instruction Manual - English
Brother International GT-541 Manual
 |
View all Brother International GT-541 manuals
Add to My Manuals
Save this manual to your list of manuals |
Brother International GT-541 manual content summary:
- Brother International GT-541 | Instruction Manual - English - Page 1
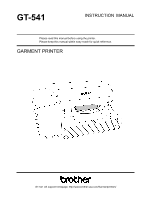
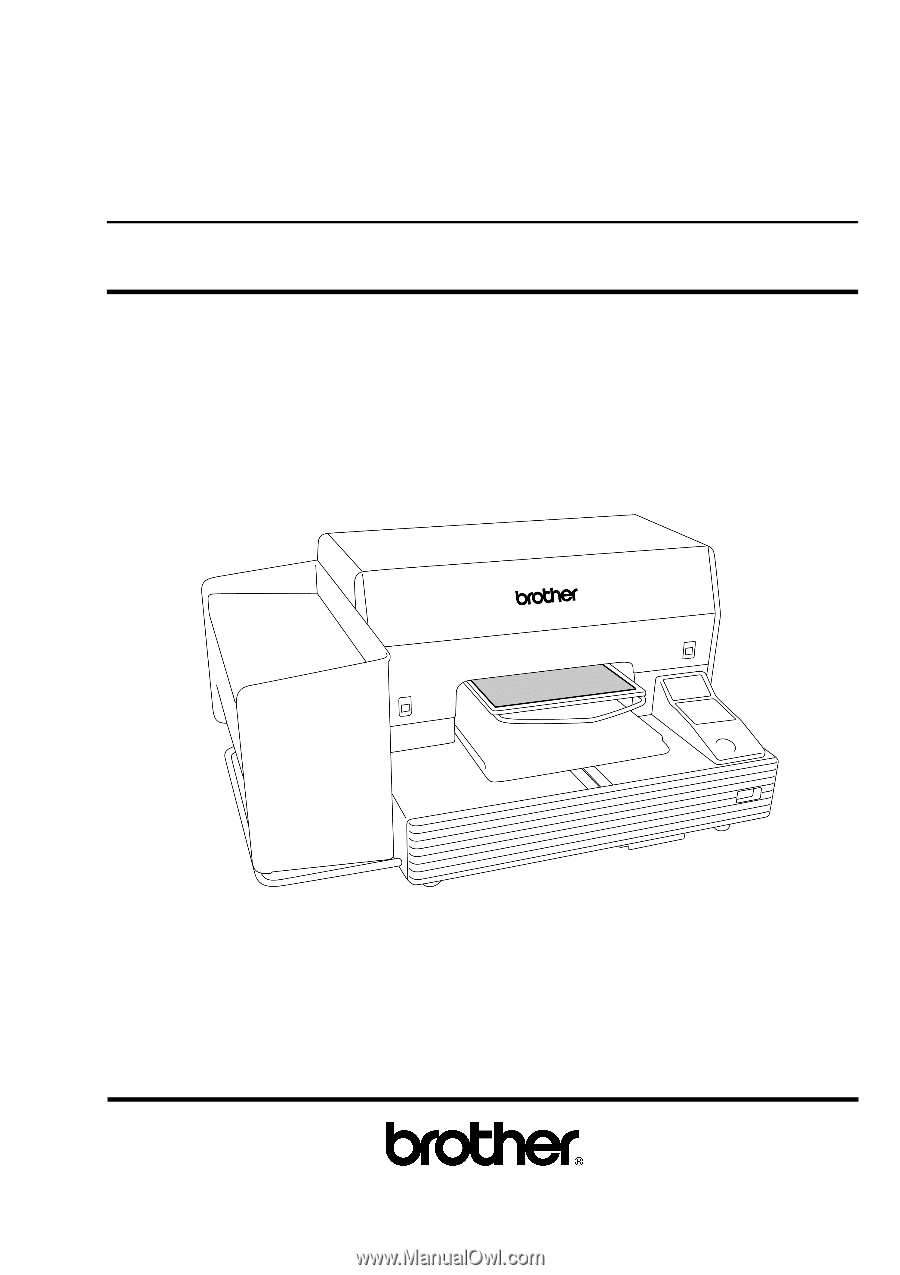
GT-541 INSTRUCTION MANUAL Please read this manual before using the printer. Please keep this manual within easy reach for quick reference. GARMENT PRINTER GT-541 US support homepage http://www.brother-usa.com/Garmentprinters/ - Brother International GT-541 | Instruction Manual - English - Page 2
Note based on California law (USA) on the use and handling of Perchlorate This product contains a CR Coin Lithium Battery which contains Perchlorate Material - special handling may apply. See http://www.dtsc.ca.gov/hazardouswaste/perchlorate. GT-541 - Brother International GT-541 | Instruction Manual - English - Page 3
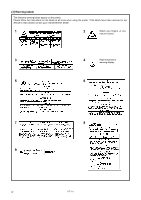
you very much for buying a BROTHER printer. Before using your new printer, please read the safety instructions below and the explanations given in the instruction manual. SAFETY INSTRUCTIONS [1] Safety indications and their meanings This instruction manual and the indications and symbols that - Brother International GT-541 | Instruction Manual - English - Page 4
coming from the printer, otherwise it may cause fire or electric shocks or problems with correct operation. Immediately turn off the power switch and disconnect the power cord, and arrange for a service call to resolve. Maintenance Do not put your hands in the ink cartridge slot, otherwise the - Brother International GT-541 | Instruction Manual - English - Page 5
the eyes with water. Furthermore, do not drink the ink, waste liquid or wash liquid under any circumstances, as they can cause vomiting and diarrhea. Keep the ink, waste liquid and wash liquid out of the reach of children. Use only the proper replacement parts as specified by Brother. GT-541 iii - Brother International GT-541 | Instruction Manual - English - Page 6
follow the instructions on the labels at all times when using the printer. If the labels have been removed or are difficult to read, please contact your nearest Brother dealer. 1 2 Watch your fingers, or you may be injured. 3 4 High temperature warning display 5 6 7 8 9 iv GT-541 - Brother International GT-541 | Instruction Manual - English - Page 7
Ink Cartridge GT-541 Wash Liquid 3932M v - Brother International GT-541 | Instruction Manual - English - Page 8
Requirements...4 1-3-3. Software Information...4 1-3-4. Other Requirements ...5 1-3-5. Consumable Requirements...5 2. Identifying Your Printer's Parts...6 2-1. Front...6 2-2. Left ...7 2-3. Right...7 2-4. Rear...8 2-5. Inside of the Front Cover...9 2-6. Under the Platen...10 2-7. Control Panel - Brother International GT-541 | Instruction Manual - English - Page 9
Ink Cartridge...67 6-1-4. Replacing the Platen Sheet...69 6-1-5. Required Maintenance for the Long Storage 70 7. Troubleshooting...72 7-1. Solving Printer Problems...73 7-2. Solving Print Quality Problems ...75 7-2-1. Procedure for Solving the Print Quality Problems 76 7-2-2. Cleaning the Print - Brother International GT-541 | Instruction Manual - English - Page 10
GT-541 - Brother International GT-541 | Instruction Manual - English - Page 11
Print Heads. Use Wash Liquid. Install the Ink Cartridges in the correct positions as shown. Confirm both the colors of labels on your printer and the Ink Cartridges. When the ink cartridge is used your printer will show "empty" status. At this point you will need to replace with a new Ink Cartridge - Brother International GT-541 | Instruction Manual - English - Page 12
and press the Head Cleaning Button to clean the Print Head. If you are planning not to use your printer for more than two weeks, follow "6-1-5. Required Maintenance for the Long Storage" to prevent ink clogging. Only for the use in the United States This device complies with Part 15 of the - Brother International GT-541 | Instruction Manual - English - Page 13
following parts are included. Contact Brother Customer Service Hot Line if any of these is missing. GT-541 Printer Rear Cover 4 Print Heads Install CD AC cord, UL/CSA 13A Ink Cartridges: Ink GC-50K (black), Ink GC-50M (magenta), Ink GC-50C (cyan), and Ink GC-51Y (yellow) Nozzle Cleaning Kit Basic - Brother International GT-541 | Instruction Manual - English - Page 14
to avoid Print Heads from clogging with dried ink. 1-3-2. Electrical Requirements Power: 120 V, 50/60 Hz (USA) 230 V, 50/60 Hz (Europe) 100 V, 50/60 Hz (Japan) Power Consumptions: 0.8 A (average) 1-3-3. Software Information Supported OS: Latest Windows 2000 Professional, Windows XP (32 bit - Brother International GT-541 | Instruction Manual - English - Page 15
Black Ink Cartridge Magenta Ink Cartridge Cyan Ink Cartridge Yellow Ink Cartridge Waste Ink Cartridge Cap Cleaning Kit Nozzle Cleaning Kit Platen Sheet Platen Sheet S Platen Sheet SS Wash Liquid Item Code GC-50K GC-50M GC-50C GC-51Y SA5629 SA5774 SA5885 SA5620 SA6401 SA8211 SA6248 GT-541 5 - Brother International GT-541 | Instruction Manual - English - Page 16
parts of T-shirt hanging from the Platen (e.g. sleeves) on this T-shirt Tray. Open this to work on the inside of your printer. Push this up to open the Front Cover. Use this to operate your printer. See "2-7. Control Panel" for the details. Turns on/off your printer. Contains the Waste Ink Cartridge - Brother International GT-541 | Instruction Manual - English - Page 17
Cartridge Storage 6 Cleaning Tool Storage 7 Filter Cartridge Storage 6 Description Load an Ink Cartridge of the appropriate color. Store the new Ink Cartridges. Store the Cleaning Kits. Store the four Filter Cartridges. 2-3. Right 1. CompactFlash slot 2. USB port 3. Power cord socket GT-541 - Brother International GT-541 | Instruction Manual - English - Page 18
2. Identifying Your Printer's Parts 2-4. Rear Rear Cover GT-541 8 - Brother International GT-541 | Instruction Manual - English - Page 19
turns off. 2 1 3 No. Name Description 1 Print Heads Jets the ink to the platen. From the left black, magenta, cyan, and yellow. 2 Obstruction Sensor Cancels an operation for safety, if it detects obstructions on the Platen. 3 Wiper Cleaner Cassette Contains the Wiper Cleaner. GT-541 9 - Brother International GT-541 | Instruction Manual - English - Page 20
Description Adjusts the Platen height. Leftmost "A" is the normal T-shirt position. Check the exact height with Platen Button on Control Panel when you print on thicker material. Fixes the Platen. Tighten/Loosen this lever to install/uninstall the Platen and to adjust the Platen height. GT-541 10 - Brother International GT-541 | Instruction Manual - English - Page 21
9 Display 10 Print Button Description Indicates errors or warnings. See "2-7-1. Indication Lamps" for the details. Loads / Ejects the Platen. Cleans the Print Heads. See "7-2-2. Cleaning the Print Heads" in the Instruction Manual for the details. Cancels printing or Print Head cleaning. Returns - Brother International GT-541 | Instruction Manual - English - Page 22
a print data. On: Printing data has been received. Error Lamp Off: No error is detected. On: One or more errors have been detected (See "7-4. Error Messages" in the Instruction Manual for the details). On machine initialization these lamps have a 30 second self check time. GT-541 12 - Brother International GT-541 | Instruction Manual - English - Page 23
the left, / / / ). It flashes when ink is low. 8 Number of Print Shows "Number of prints completed"/ "Total number of prints set by Printer Driver". When one or more errors are detected, error message(s) will be displayed instead. GT-541 13 - Brother International GT-541 | Instruction Manual - English - Page 24
only. Do not use the cartridge housings to move the machine. The machine may tip over or fall down and cause injury. The printer must be used on a suitable stable surface, otherwise it may tip over or fall down and cause injury. Furthermore, the table that supports the printer should be at least 100 - Brother International GT-541 | Instruction Manual - English - Page 25
direct sunlight, dust and extremes of humidity. Never use an extension cable. A working space must be left around the printer. Minimum space of 80 cm on the front, 5 cm on the rear, 30 cm on the left side (for ink cartridges) and 15 cm on the right side (for CF card, USB and power code - Brother International GT-541 | Instruction Manual - English - Page 26
turning on your printer once a week and press the Head Cleaning Button to clean the Print Head. This ensures the ink is kept free flowing. If you are planning not to use your printer for more than two weeks, follow "6-1-5. Required Maintenance for the Long Storage" to prevent ink clogging. GT-541 16 - Brother International GT-541 | Instruction Manual - English - Page 27
Operation Manual/ Instruction Manual), Brother GT File Viewer, and other tools. Make sure the steps because there are some different dialogs shown by Windows OS. After those installations are over, install GT-541 Printer Driver (USB) by connecting USB 2.0 cable. 3-3-1. PC preparation: For Windows XP - Brother International GT-541 | Instruction Manual - English - Page 28
to your PC, this will be the end of PC preparation. 3-3-2. Connection with USB 2.0 Cable: for Windows XP (1) Connect the USB 2.0 cable to your printer (power OFF). We do not recommend connection via a USB hub to the printer. (2) Connect the other end of the USB 2.0 Cable to your PC. GT-541 18 - Brother International GT-541 | Instruction Manual - English - Page 29
(Recommended)", and the click "Next". The installation starts. When "Hardware installation" dialog (not passed Windows Logo testing) appears during installation, Click "Continue Anyway". The installation continues. If the following window appears, follow the instruction below: GT-541 19 - Brother International GT-541 | Instruction Manual - English - Page 30
of more than one GT-541 printer. To connect another GT-541 to the PC, repeat the steps of 3-3-2. Connection with USB 2.0 Cable: for Windows XP. From the second GT-541, the printer names automatically become "GT-541(copyX)". You can change the names as "GT-541 xxx" in the "Printer and Faxes" in the - Brother International GT-541 | Instruction Manual - English - Page 31
to your PC. (3) Turn on your GT-541 printer. Brother GT-541 Printer Driver starts installing automatically. If Brother GT-541 is not installed, the following window appears: follow the instruction below to install it manually: (1) Insert the Install CD, and then click "OK". The following - Brother International GT-541 | Instruction Manual - English - Page 32
for Windows 2000. From the second GT-541, the printer names automatically become "GT-541(copyX)". You can change the names "GT-541 xxx" in the "Printers" in the "Control Panel" for your workability. Modify same as previous section for multiple printers. 3-3-4. Opening the installed manuals (1) Click - Brother International GT-541 | Instruction Manual - English - Page 33
Windows XP and Windows 2000, GT-541 File Output Printer Driver, tools and manuals are installed first from Install CD, and PC must be restarted. Then PC is connected to USB 2.0 cable, the printer turned ON, and USB 2.0 cable connected to the printer. Installation of GT-541 File Output Printer Driver - Brother International GT-541 | Instruction Manual - English - Page 34
warning appears. Click "Install this driver software anyway" and continue. (7) After installation, your PC will need to restart. Remove your Install CD and restart your PC. If you are going to use your printer without connecting it to your PC, this will be the end of PC preparation. GT-541 24 - Brother International GT-541 | Instruction Manual - English - Page 35
Panel" of PC. (5) Click either "Brother GT-541" or Brother GT-541 FileOutput icon and select "Set as Default Printer" on "File" menu. "Brother GT-541" icon is checked and Brother GT-541 is set as the default printer. This will help to do the layout with your application software. The PC setup is now - Brother International GT-541 | Instruction Manual - English - Page 36
Adjusting the Display Contrast (1) Press the OK Button on your printer's Control Panel. The following display appears. (2) Use the Up/ Button. 3-4-2. Adjusting the Speaker Volume (1) Press the OK Button on your printer's Control Panel. The following display appears. (2) Use the Up/Down Button - Brother International GT-541 | Instruction Manual - English - Page 37
Started 3-4-3. Language (1) Press the OK Button on your printer's Control Panel. (2) Use the Up/Down Button to / Italiano and then press the OK button. 3-4-4. Temperature (1) Press the OK Button on your printer's Control Panel. (2) Use the Up/Down Button to select "Temperature", and then press the OK - Brother International GT-541 | Instruction Manual - English - Page 38
This printer should only be used by operators who are appropriately trained in its operation. Do not move the Platen by hand. The Printer may be seriously damaged by this. When a problem occurs with the operation of the printer, contact the place of purchase or a qualified technician. GT-541 28 - Brother International GT-541 | Instruction Manual - English - Page 39
(5) Send data to your Printer. Select Printer Driver: either GT-541 Printer Driver (USB 2.0 Cable) for direct print or GT-541 FileOutput Printer Driver to make print data file (.arp). As for sending .arp file to your Printer, see "5. Printing ARP Files". (6) Install the Platen of the size you have - Brother International GT-541 | Instruction Manual - English - Page 40
and Printers (Windows 7)" in "Control Panel". Doing so causes an error and you may have to restart your printer. Print ARP files: Use "GT-541 FileOutput" Printer Driver, which saves print data in ARP format. With this you can see the detailed print conditions and estimated ink cost. See "5. Printing - Brother International GT-541 | Instruction Manual - English - Page 41
Color Management off" as the style. CorelDRAW 10/11/12 CorelDRAW X3: Select RGB radio button. Check the left top menu: it changes [default settings] to [ Custom (Current settings not saved)]. Also click the orange arrow from [ Generic CMYK printer profile ] to [ Generic Profile ] CorelDRAW X3 GT-541 - Brother International GT-541 | Instruction Manual - English - Page 42
by print menu). GT-541 Printer Driver cannot deal with these information in Color matching. Print: (CorelDRAW 10/11/12/X3): (1) Select [ File ] > [ Print ] menu. Click "Properties" to do Printer Driver settings. Do not check "Print to File" on Print window to make print files. GT-541 32 - Brother International GT-541 | Instruction Manual - English - Page 43
print data in platen size of 10x12 inches, set Width : 10 inches, Height : 12 inches. If the print data file is not saved from the printer driver menu but application menu, the extension of the print data is automatically ".prn" although you added .arp. Before you use GT File Viewer to print, change - Brother International GT-541 | Instruction Manual - English - Page 44
purple turn vague and dull. Convert to RGB in sRGB IEC61966-2.1 profile Color space and improve the Color saturation: select [ Image ] > [ Arrangements ] to select the proper menu. Or use Vivid Processing in Printer Driver (see "4-3. Setting the Printer Driver Condition"). Photoshop CS2 GT-541 34 - Brother International GT-541 | Instruction Manual - English - Page 45
of the PC used is set "Brother GT-541", the layout is set in this window. (2) Photoshop 6/7/CS: Make print options as follows, go to "Page Setup..." to do Printer Driver settings, and then click "Print". Show More Options: Check Pull-down menu: Color Management Source Space/ Document: sRGB IEC61966 - Brother International GT-541 | Instruction Manual - English - Page 46
The swatch replaced. Do not use HKS, Pantone and other licensed palettes. Those spot Colors are treated "special" for screen-printing Color separation (remember you can print each Color by print menu). GT-541 Printer Driver cannot deal with these information in color matching. GT-541 36 - Brother International GT-541 | Instruction Manual - English - Page 47
4. Printing Directly from Applications 4-2-4. Settings for Adobe Illustrator 10/CS/CS2 Set Brother GT-541 as the default printer before you go on to the following steps, otherwise, an image may be printed incorrectly. Make the print data in RGB Color mode to get the best Color accuracy. - Brother International GT-541 | Instruction Manual - English - Page 48
Illustrator 10/CS: Make sure the following settings. Make sure Source Space is either "sRGB IEC61966-2.1" or "Untagged RGB". Print Space/ Profile: Same As Source Click "Properties" (Illustrator 10) or "Setup" (Illustrator CS) to do Printer Driver Settings. Illustrator CS (English Version) GT-541 38 - Brother International GT-541 | Instruction Manual - English - Page 49
be printed. When printing a small image (especially an image smaller than 14 x 16 inches), the Platen Size may be set to Platen 10 x 12 automatically. Confirm the Platen Size in the Printer Driver window before you print. Do not check "Print to File" on Print window to make print files. GT-541 39 - Brother International GT-541 | Instruction Manual - English - Page 50
step (6). (3) Click "Setup...". Click "Continue" when the warning window appears. (4) Another Print window appears. Click "Preferences". (5) Change the Platen Size on Printer Driver window, and then click "OK". (6) Confirm the preview on the original Print window, and then click "Print". GT-541 40 - Brother International GT-541 | Instruction Manual - English - Page 51
Options: Check Print Space/ Profile: Printer Color Management (3) Click "Properties" on Print dialog to do Printer Driver settings. Color Palette (swatch) in install CD: Color Palette GT-541_Colors.aco is available for Photoshop Element. See "4-2-3 Settings for Adobe Photoshop 6/7/CS/CS2". GT-541 41 - Brother International GT-541 | Instruction Manual - English - Page 52
Applications If the application does not have Color Settings, the Color space is sRGB (Windows standard). Just select [ File ] > [ Print ] menu to print. Fit Paper size / Page size to the Platen size you are going to use; either 14x16 or 10x12 and do the layout of the artwork. GT-541 42 - Brother International GT-541 | Instruction Manual - English - Page 53
4. Printing Directly from Applications 4-3. Setting the Printer Driver Condition Set the printer driver condition following the procedure below. (1) Select [ File ] > [ Print ] menu of the graphic application. The Print window appears. (2) Select "Brother GT-541" for the printer, and then click " - Brother International GT-541 | Instruction Manual - English - Page 54
4-3-5. Setting Double Printing Check the Double Printing to print an image clearer and sharper by widening the Color gamut. This is recommended especially for black and white images. When you are using this function, you cannot select the "Ink Volume" or "Yellow / Black Printing". GT-541 44 - Brother International GT-541 | Instruction Manual - English - Page 55
(1) Make sure that your PC is connected to GT-541 printer with USB 2.0 Cable and select the Utility tab. (2) Select "Ink volume check pattern" form the pull down menu, and then click "Print" to send the data to your printer. (3) Set the Platen selected in the Main Setting tab. See "4-4. Uninstalling - Brother International GT-541 | Instruction Manual - English - Page 56
printer prints with yellow ink first, and then prints with other Colors, to optimize quality. Yellow / Black Printing off Yellow / Black Printing on When you are using this function, you cannot select the "Double Printing". 4-3-8. Printing Color Chart For your information, GT-541 Color - Brother International GT-541 | Instruction Manual - English - Page 57
set ink with Heat Press. Use our Color Palette for Photoshop and CorelDRAW, which is in Install CD. See "4-2-3. Settings for CorelDRAW 10/11/12/X3" and "4-2-3. Settings for Adobe Photoshop 6/7/CS/CS2". These are RGB values in Vivid Processing = 0. Colors change as the number increase. GT-541 - Brother International GT-541 | Instruction Manual - English - Page 58
Directly from Applications 4-4. Uninstalling / Installing the Platen Replace the Platen for your print material. When Youth Platen 10 x 12 inches is used, be sure to set "Platen Size" in Printer Driver menu (see "4-3-2. Selecting the Platen Size"). 4-4-1. Uninstalling the Platen (1) Press the Platen - Brother International GT-541 | Instruction Manual - English - Page 59
4-4-2. Installing the Platen (1) Place the Platen. 4. Printing Directly from Applications (2) Tighten the Platen Fixing Lever securely. Adjust the Platen Height (see "4-5. Placing the T-shirt on the Platen "). Platen Fixing Lever GT-541 49 - Brother International GT-541 | Instruction Manual - English - Page 60
hems the hems, use Uni-Directional print (see "7-2-4. Changing the Print Direction"). (1) If the Platen is not ejected, press the Platen Button to eject it. (2) Gently turn the Platen Height Adjustment Lever to the left until it stops. Platen Height Adjustment Lever Platen Fixing Lever Do not - Brother International GT-541 | Instruction Manual - English - Page 61
Printing Directly from Applications (4) Place the T-shirt, with its print side on the top of Platen and the other side underneath the Platen, as shown below. Print Side Pay attention to the hems; neck, arm holes, tags, and the bottom. The side edges may raise and hit the Print Head GT-541 51 - Brother International GT-541 | Instruction Manual - English - Page 62
height is too high, the T-shirt, Print Head, or both of them may be damaged when printing. OObbssttrruucctitoionnSSeennsosor r (10) Press the Platen Button to eject the Platen. If the Platen height is appropriate, you can go to "4-6. Printing" to start printing. If not, go on to the following steps - Brother International GT-541 | Instruction Manual - English - Page 63
set (see "7-2-5. Changing the Auto Head Cleaning Setting"), or after your printer has not been used for more than two hours. In this case, wait until the cleaning completes (takes about 20 seconds), and then printing will automatically start. Keep away from the moving platen. If the Platen is not at - Brother International GT-541 | Instruction Manual - English - Page 64
"4-6-1. Making One Print", you can continue making more prints using the same print data. (1) If you change the printed material, we recommend setting the necessary print condition (see "4-3. Setting the Printer Driver Condition") and the Platen height before you print. (2) Press the Print Button to - Brother International GT-541 | Instruction Manual - English - Page 65
shirt From the Platen". (8) Set the ink with heat onto the T-shirt. Use the Heat Press to set the ink onto the T-shirt. See "4-8. Setting the Ink onto the T-shirt". (9) Repeat (5) to (8) until all the prints are finished. (10) Turn off your printer: See ""3-2-2. Turning Off Your Printer". GT-541 55 - Brother International GT-541 | Instruction Manual - English - Page 66
. Print dialog box appears. (3) Select "Brother GT-541 FileOutput " Printer Driver and click "Properties". The following Main Setting window appears. Set the following items in this window, and then click "OK": Enter the job comment (see "4-3-1. Entering the Job Comment"). Select the Platen size - Brother International GT-541 | Instruction Manual - English - Page 67
the procedures in "4-2. Setting the Applications' Print Condition", as selecting "Brother GT-541 FileOutput" for the printer, and then click "Print" or "OK" on the application's print window. Wait for a while until the following preview window appears. Depending on the application - Brother International GT-541 | Instruction Manual - English - Page 68
Button turns on. If a file name of the data saved in a CompactFlash cannot read properly, see "7-1. Solving Printer Problems". Do not touch the CompactFlash while the Print Button is flashing; it may destroy the saved data. Reading the CompactFlash may take more than two minutes depending on - Brother International GT-541 | Instruction Manual - English - Page 69
and 2. (3) Confirm the print conditions and layout, then click "Send to GT Printer". Also confirm that your printer is connected to PC with USB 2.0 Cable. The ARP file has been sent to your printer. If more than one GT-541 are installed in you PC, the Select Printer dialog appears. Select the - Brother International GT-541 | Instruction Manual - English - Page 70
, as they can cause vomiting and diarrhea. In case of contact with eyes, do not rub but immediately rinse the eyes with water. Keep the ink, waste liquid and wash liquid out of the reach of children. Use only the proper replacement parts as specified by Brother. GT-541 60 - Brother International GT-541 | Instruction Manual - English - Page 71
printing or head cleaning; is in operation it may cause damage to your printer. Do not disassemble the Ink Cartridge. Replace the Wiper Cleaner when Black Ink is empty. See 6-1-2. Replacing the Wiper Cleaner". To keep the best print result, your printer will show empty status for the color cartridge - Brother International GT-541 | Instruction Manual - English - Page 72
damage to the Print Heads. If you have installed a wrong color, immediately contact Brother or your dealer for a service call (4) When you have replaced the Black Ink Cartridge, refer to "6-1-2. Replacing the Wiper Cleaner" and replace the attached Wiper Cleaner and clean the surroundings. This - Brother International GT-541 | Instruction Manual - English - Page 73
your hands or clothing. Do not touch the Clearance Sensor (the bar above the Wiper Cleaner Cassette). (6) If the ink inside of the Wiper Cleaner Cassette is soiled with ink: Wear gloves and remove the ink with a dry cloth, and then clean with a moist cloth Inside the Wiper Cleaner Cassette GT-541 63 - Brother International GT-541 | Instruction Manual - English - Page 74
6. Maintenance (7) Push both sides of the Wiper Cleaner Cassette to open it. (8) Carefully drop off the used Wiper Cleaner And dispose of in in compliance with your local regulations. (9) Insert the two projections of the Wiper Cleaner Cassette into the holes on the new Wiper Cleaner. GT-541 64 - Brother International GT-541 | Instruction Manual - English - Page 75
comes with the new Black Ink Cartridge. The following items are included. (12) Wear the gloves, and wet both sides of a Clean Applicator with the Wash Liquid. Use only the Wash Liquid included to wet the Clean Applicators; using other liquid will cause damage to the Print Heads. GT-541 65 - Brother International GT-541 | Instruction Manual - English - Page 76
Print Head Caps. Use one side of the Clean Applicator to clean one Print Head Cap. Do not use dry Clean Applicator; it cannot clean ink or dust. It may damage the Print Head Caps. Wipe off the dirty ink of Clean Applicator with soft cloth if it is too dirty and wet with Wash Liquid. GT-541 - Brother International GT-541 | Instruction Manual - English - Page 77
> Do not replace the Waste Ink Cartridge while printing or head cleaning. It may contaminate the inside of your printer, which may cause damages to your printer. Be careful not to get ink on your hands or clothing when you handle the Waste Ink Cartridge. Wash with soap if stained with ink. GT-541 67 - Brother International GT-541 | Instruction Manual - English - Page 78
Cartridge from the Waste Cartridge Tray, and put it in the package, in which the new Waste Ink Cartridge came in. (5) Install the new Waste Ink Cartridge into the Waste Cartridge Tray. Make sure that two projections of the Waste Cartridge Tray pierce the two holes of the Waste Ink Cartridge. GT-541 - Brother International GT-541 | Instruction Manual - English - Page 79
6. Maintenance (6) Install the Waste Cartridge Tray. When the error display" ERROR NO WASTE INK TRAY " disappears, the replacement of the Waste Ink Cartridge has been completed. Dispose the used Waste Ink Cartridge in accordance with your local regulations. 6-1-4. Replacing the Platen Sheet - Brother International GT-541 | Instruction Manual - English - Page 80
to use your printer for more than two weeks, clean the Print Head Caps before storage to prevent ink drying on the print heads The Wash Liquid is used for this cleaning. You can use the one in the Nozzle Cleaning Kit, the Cap Cleaning Kit which comes with the new Black Ink Cartridge, or you - Brother International GT-541 | Instruction Manual - English - Page 81
prevent from ink clogging inside. Be careful not to spill the Wash Liquid around the Print Head Caps. If the Wiper Cleaner and the surroundings are dirty, refer to "6-1-2. Replacing the Wiper Cleaner" and clean them. (7) Close the Front Cover. (8) Turn on your printer wait for initialization - Brother International GT-541 | Instruction Manual - English - Page 82
7. Troubleshooting WARNING Do not put your hands in the ink cartridge slot, otherwise the needle inside the slot may cause injury. CAUTION Ensure there is adequate space left for safe working. The Platen moves forward while operating and it may be injured. Do not handle the platen while printing. If - Brother International GT-541 | Instruction Manual - English - Page 83
Connect GT-541 directly to PC properly. with USB. USB hub is not operationally approved. Noise is disturbing the Disconnect the USB 2.0 cable communication between GT-541 once, and wait for 5 seconds and the PC. and connect it again. If this does not solve the problem, turn off GT-541 - Brother International GT-541 | Instruction Manual - English - Page 84
Troubleshooting Problem Pressing the Print Button does not start printing. GT-541 does not turn on. An error occurred just after turning on GT-541. GT-541 cannot read data from CompactFlash. The file name of the print data saved in a CompactFlash is not displayed properly. Cause Solution GT-541 - Brother International GT-541 | Instruction Manual - English - Page 85
See "4-3. Setting the Printer Driver Condition" and select proper Vivid Processing & Ink Volume. See "6-1-1. Replacing the Ink Cartridge". Press the Head Cleaning Button to clean the Print Heads. Or select "Head Cleaning" menu and try "Powerful Cleaning". After Head Cleaning, check the nozzles with - Brother International GT-541 | Instruction Manual - English - Page 86
causes misfiring or damage the Print Head. Please replace the Wiper Cleaner and clean the Wiper Blade and caps when you insert the new Black Ink Cartridge; Check if it is too dirty to wipe off the waste ink. Please use Cap Cleaning Kit. If the black ink is not changed frequently please consider the - Brother International GT-541 | Instruction Manual - English - Page 87
is full it must be changed. Wiper Cleaner (5) Check the Wiper Blade, and if it is damaged or worn , replace it using the Wiper ASSY (see "7-2-10. Replacing the Wiper Blade" for the details). Wiper Blade Step 3: Check the ink tubes and do "Powerful" head cleaning. Check the ink tube inside to see if - Brother International GT-541 | Instruction Manual - English - Page 88
Initial" mode after the Print Head Nozzle cleaning. If the problem is not solved, proceed to the next step. Step 6: Contact Brother Customer Service or your dealer. If you are asked to replace the Print Head (PRINT HEAD) by yourself, see "7-2-7. Replacing the Print Head" for the procedure. GT-541 78 - Brother International GT-541 | Instruction Manual - English - Page 89
your printer starts cleaning the Print Heads. The message changes to "Stand By" when the head cleaning has been completed. The "Initial" cleaning cannot happen with the Waste Ink Cartridge is full, and the message "WASTE INK FULL" on the display. In this case, replace the Waste Ink Cartridge - Brother International GT-541 | Instruction Manual - English - Page 90
Pattern You can identify which Print Head has the problem by using the Nozzle Check Pattern. (1) Install the Platen 14 x 16 (see "4-4. Uninstalling / Installing the Platen"). (2) Set the Platen height to the "A" position (see "4-5. Placing the T-shirt on the Platen"). (3) Place a sheet of paper (A4 - Brother International GT-541 | Instruction Manual - English - Page 91
(arrow 2), the Print Head of the color (in the following example: Black) has the problem. The Print Heads need to be cleaned (see "7-2-2. Cleaning the Print Heads"). 2 1 7-2-4. Changing the Print Direction When there are large gaps between the Print Heads and printed medium, or when printing on very - Brother International GT-541 | Instruction Manual - English - Page 92
7. Troubleshooting 7-2-5. Changing the Auto Head Cleaning Setting Your printer automatically cleans its Print Heads every 24 prints. However more frequent Print Heads cleaning needs to be done depending on the environment. In this case, change the Auto Head Cleaning frequency as follows. (1) Press - Brother International GT-541 | Instruction Manual - English - Page 93
OK Button. (4) Press the Up/Down Button to select "Nozzle Cleaning", and then press the OK Button. The Head Caps and the Wiper Blade prepare for cleaning. The following message appears. (5) Turn off your printer. (6) Open the Front Cover Using both hands after unlocking the cover locks. GT-541 83 - Brother International GT-541 | Instruction Manual - English - Page 94
(the bar above the Wiper Cleaner Cassette). (8) Open the Nozzle cleaning Kit. Wear the gloves and wet a Clean Applicator with full of Wash Liquid. Use Clean Applicators in Nozzle Cleaning Kit (round form), not in Cap Cleaning Kit (green stick with flat form) of Black Ink Cartridge. GT-541 84 - Brother International GT-541 | Instruction Manual - English - Page 95
one Clean Applicator for each color. (10) Insert the Wiper Cleaner Cassette straight into your printer. Do not touch the Clearance Sensor (the bar above the Wiper Cleaner Cassette); (11) Close the Front Cover, and then turn on your printer. (12) Do the "Powerful" head cleaning and print the - Brother International GT-541 | Instruction Manual - English - Page 96
/Down Button to select the color of Print Head to be replaced, and then press the OK Button. The following message appears. (e.g. Black) (6) Remove the Ink Cartridge of color, and then press the OK Button.. The black example is shown. The message "Set Filter Cartridge & Press OK" appears. GT-541 86 - Brother International GT-541 | Instruction Manual - English - Page 97
Ink Cartridge Slot, and then press the OK Button. The ink draining of the head begins. Wait until the message "Turn Off & Please Change [X] Head" appears (8) Turn off your printer. (9) Open the Front Cover by unlocking the Cover Locks with both hands The Print Heads are on the left. Tube Print Heads - Brother International GT-541 | Instruction Manual - English - Page 98
7. Troubleshooting (10) Turn up the appropriate flat cable connector tab, and then disconnect the flat cable. Connector tab Flat cable Connector tab Flat cable (11) Wear the gloves included with the new Print Head, and then remove the tube fitting from the new Print Head. Tube fitting GT-541 88 - Brother International GT-541 | Instruction Manual - English - Page 99
(12) Rotate the tube connector 90 degrees as shown below. 7. Troubleshooting (13) Disconnect the tube and put the tube fitting removed from the new Print Head to prevent the ink from coming out. (14) Turn the lever to the direction of the arrow to unlock the Print Head. Lever GT-541 89 - Brother International GT-541 | Instruction Manual - English - Page 100
lifting up the knob. Knob (16) Remove the Protective Tube from the new Print Head, and then install the new Print Head by holding the knob, and holding the flat cable with the other hand. Make sure the V-shaped groove of the Print Head hits the pin. Protective Tube Pin V-shaped groove GT-541 90 - Brother International GT-541 | Instruction Manual - English - Page 101
7. Troubleshooting (17) Press down the Print Head knob securely and push in the Print Head backward to align the Print Head properly. (18) Turn the lever to the direction of the arrow to lock the Print Head. (19) Remove the Nozzle Protection Seal by pulling it up. Nozzle Protection Seal GT-541 91 - Brother International GT-541 | Instruction Manual - English - Page 102
the new Print Head, and then rotate the tube connector 90 degrees to the direction of the arrow. (23) Close the Front Cover. (24) Remove the Filter Cartridge, and then install the cartridge previously removed. (25) Turn on your printer. (26) Press the Platen Button to eject the Platen. GT-541 92 - Brother International GT-541 | Instruction Manual - English - Page 103
and Magenta seems to move down. (33) If the quality is OK go on to the next section "7-2-8. Adjustment after the Print Head replacement" to complete the adjustment after the Print Head replacement. If you still see the problem in print quality, contact your Brother dealer for assistance. GT-541 93 - Brother International GT-541 | Instruction Manual - English - Page 104
is unclear then the print head timing may need to be adjusted. (1) Make sure your printer is connected to your PC. (2) Turn on your PC. (3) Prepare some sheets of paper and tapes to fix on the Platen. (4) Execute GT Firing Adjustment in Brother GT-Tools. Follow the instruction dialogs. GT-541 94 - Brother International GT-541 | Instruction Manual - English - Page 105
move the Print Heads. Print Heads Carriage Shafts (4) Soak a cloth with sewing oil and use it to apply the sewing oil on the Carriage Shafts. (5) Close the Front Cover. (6) Turn on your printer. (7) Adjust the timing of firing. See "7-2-8. Adjustment after the Print Head replacement". GT-541 95 - Brother International GT-541 | Instruction Manual - English - Page 106
7. Troubleshooting 7-2-10. Replacing the Wiper Blade The Wiper Blade needs to be replaced periodically , to solve the ink jetting problem. Use the Wiper ASSY (sold separately) for the replacement. Wiper Blade (1) Turn on your printer if it is off. (2) Press the OK Button to open the Menu Display. - Brother International GT-541 | Instruction Manual - English - Page 107
(7) Pull out the Wiper Cleaner Cassette. Do not tilt the Wiper Cleaner Cassette; ink may get on your hands or clothing. Do not touch the Clearance Sensor (the bar above the Wiper Cleaner Cassette); it may cause a malfunction. (8) Open the Wiper Replacing Kit and put on the gloves. GT-541 97 - Brother International GT-541 | Instruction Manual - English - Page 108
7. Troubleshooting (9) Push the right Operation Arm about 5 mm (0.2 inches) to the right and pull out the Wiper Blade as holding its left. Do not push the Operation Arm by force. Operation GT-541 98 - Brother International GT-541 | Instruction Manual - English - Page 109
(10) Remove the Wiper Blade by pulling it to the left. 7. Troubleshooting (11) Insert the left projection of the new Wiper Blade to the slit of the left Operation Arm. Projections Slits GT-541 99 - Brother International GT-541 | Instruction Manual - English - Page 110
7. Troubleshooting (12) Insert the right projection of the new Wiper Blade to the slit of the right Operation Arm by pushing the right Operation Arm about . They can be easily damaged.. (13) Confirm that both projections of the Wiper Blade are inserted to the slits of the Operation Arms. 100 GT-541 - Brother International GT-541 | Instruction Manual - English - Page 111
If your printer turns on without any problem, replacement of the Wiper Blade has been completed. If there is problem ( such as abnormal noise or an error )then turn off your printer, and check if the Wiper Blade, the Wiper Cleaner and the Wiper Cleaner Cassette are correctly installed. GT-541 101 - Brother International GT-541 | Instruction Manual - English - Page 112
"Setup...", and then click "Continue". Print window appears. (5) Click "Preference". (6) Change the Platen Size in the Printer Driver Window, and then click "OK". (7) Click "Print" in the Print window. (8) Confirm the preview, and then click "Print" to send the data to your printer. 102 GT-541 - Brother International GT-541 | Instruction Manual - English - Page 113
―― ―― 7. Troubleshooting Solution Check the Platen Size in the Printer Driver window before you send the print data to your printer. See "4-2-4. Setting Adobe Illustrator 10 Print Condition". The setting in the Properties of the Print window is applied. Upgrade CorelDRAW to X3(13). GT-541 103 - Brother International GT-541 | Instruction Manual - English - Page 114
a new yellow ink cartridge. Warning: The Waste Ink Cartridge is almost full. Prepare a new Waste Ink Cartridge. You can keep printing for a while, but replacement is soon required. The Print Head Wiper Blade needs See "7-2-10. Replacing the Wiper Blade" to be replaced. and replace to a new - Brother International GT-541 | Instruction Manual - English - Page 115
7. Troubleshooting Error code Message 2022 EMPTY Cyan 2023 EMPTY Yellow Meaning Solution The Cyan Ink Cartridge ran out of ink. Replace to a new Cyan Cartridge. The Yellow Ink Cartridge ran out of ink. Replace to a new Yellow Cartridge. 2030 WASTE INK FULL The Waste Ink Cartridge is full. - Brother International GT-541 | Instruction Manual - English - Page 116
correspond. Reboot GT-541 and send print data again. GT-541 received a command that Contact your dealer or Brother is not supported. These errors might happen when GT-541 malfunctions by environmental reasons. If A maintenance command is mixed the error does not show, the printer is in normal - Brother International GT-541 | Instruction Manual - English - Page 117
. GT-541 received a print job in which commands are arranged improperly. Reboot GT-541 and send print data again. Contact your dealer or Brother . These errors might happen when GT-541 malfunctions by environmental reasons. If the error does not show, the printer is available. Maintenance sequence - Brother International GT-541 | Instruction Manual - English - Page 118
7. Troubleshooting Error code Message Meaning Machine Error Communication error inside the 5000 or firmware. ** SHBY: Send MSG TO Machine Error Communication error inside the 5003 or firmware. ** SHBY:ILGL MSGID 5032 Machine Error 5033 Machine Error 5034 Machine Error 5035 Machine - Brother International GT-541 | Instruction Manual - English - Page 119
Error: XX Received an error response from the Maintenance Unit while re-initializing after inserting the ** Wiper Cleaner Cassette. 6000 Fail: PLTN Load Platen loading error 6001 Fail: PLTN Unload Platen unloading error ** 6002 Fail: PLTN LF Platen moving error GT-541 7. Troubleshooting - Brother International GT-541 | Instruction Manual - English - Page 120
by referring to "7-2-9. Cleaning the Carriage Shafts". If the cleaning has no effect, contact your dealer or Brother . Failure in stopping the Carriage at the proper position (ASIC error) ** CR time-out of the Carriage during printing ** CR time-out of the Carriage during flashing GT-541 110 - Brother International GT-541 | Instruction Manual - English - Page 121
Head VLTG Print Head Error inside the program (Returning value defect of SH) Error inside the program (Time-out of waiting for the vent/message of SH) ** Error inside the program (General program error of SH) Error inside the program (System call error of BY) GT-541 7. Troubleshooting - Brother International GT-541 | Instruction Manual - English - Page 122
(Commands other than CR/LF) 7124 PRG: BY ILGL Dir Error inside the program (Undefined print direction) Error inside the program 7125 PRG: BY Too near (Moving error: It is too close to move.) ** 7126 PRG: BY ILGL Mode Error inside the program (Undefined print mode) Solution GT-541 112 - Brother International GT-541 | Instruction Manual - English - Page 123
Wiper Driver Overheat The operation stopped because the Wipe Driver has overheated. ** WI Wiper initialization error The Wiper initialization was not made before moving the Wiper. ** WS Wipe Sensor error Failure in the Wiper Sensor or Wiper Motor ** 7. Troubleshooting Solution GT-541 113 - Brother International GT-541 | Instruction Manual - English - Page 124
Dimensions Weight (GT-541 including Platen) Maximum print area Print Software Specification Supported OS Supported interface Minimum system requirements Recommended Applications for precise output Latest Windows 2000 Professional / Windows XP (32 bit) / Windows Vista (32 bit / 64 bit) / Windows - Brother International GT-541 | Instruction Manual - English - Page 125
GT-541 - Brother International GT-541 | Instruction Manual - English - Page 126
INSTRUCTION MANUAL http://www.brother.com/ 1-5, Kitajizoyama, Noda-cho, Kariya 448-0803, Japan. Phone: 81-566-95-0088 © 2005-2007, 2010 Brother Industries, Ltd. All Rights Reserved. This is the original instructions. GT-541 SA6124-801 E 2010.01. B (1)
-
 1
1 -
 2
2 -
 3
3 -
 4
4 -
 5
5 -
 6
6 -
 7
7 -
8
-
9
-
10
-
11
-
12
-
13
-
14
-
15
-
16
-
17
-
18
-
19
-
20
-
21
-
22
-
23
-
24
-
25
-
26
-
27
-
28
-
29
-
30
-
31
-
32
-
33
-
34
-
35
-
36
-
37
-
38
-
39
-
40
-
41
-
42
-
43
-
44
-
45
-
46
-
47
-
48
-
49
-
50
-
51
-
52
-
53
-
54
-
55
-
56
-
57
-
58
-
59
-
60
-
61
-
62
-
63
-
64
-
65
-
66
-
67
-
68
-
69
-
70
-
71
-
72
-
73
-
74
-
75
-
76
-
77
-
78
-
79
-
80
-
81
-
82
-
83
-
84
-
85
-
86
-
87
-
88
-
89
-
90
-
91
-
92
-
93
-
94
-
95
-
96
-
97
-
98
-
99
-
100
-
101
-
102
-
103
-
104
-
105
-
106
-
107
-
108
-
109
-
110
-
111
-
112
-
113
-
114
-
115
-
116
-
117
-
118
-
119
-
120
-
121
-
122
-
123
-
124
-
125
-
126
 |
 |
GT-541 US support homepage http://www.brother-usa.com/Garmentprinters/
GT-541
Please read this manual before using the printer.
Please keep this manual within easy reach for quick reference.
GARMENT PRINTER
INSTRUCTION MANUAL