Brother International HL-3075CW Network Users Manual - English
Brother International HL-3075CW Manual
 |
View all Brother International HL-3075CW manuals
Add to My Manuals
Save this manual to your list of manuals |
Brother International HL-3075CW manual content summary:
- Brother International HL-3075CW | Network Users Manual - English - Page 1
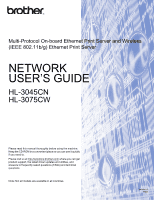
Server and Wireless (IEEE 802.11b/g) Ethernet Print Server NETWORK USER'S GUIDE HL-3045CN HL-3075CW Please read this manual thoroughly before using the machine. Keep the CD-ROM in a convenient place so you can use it quickly if you need to. Please visit us at http://solutions.brother.com/ where - Brother International HL-3075CW | Network Users Manual - English - Page 2
icons throughout this User's Guide: IMPORTANT indicates a Brother logo is a registered trademark of Brother Industries, Ltd. Brother is a registered trademark of Brother WPA, WPA2, Wi-Fi Protected Access and Wi-Fi Protected Setup are either trademarks or registered trademarks of Wi-Fi Alliance in - Brother International HL-3075CW | Network Users Manual - English - Page 3
this manual and the specifications of this product are subject to change without notice. Brother outside the country of purchase as it may violate the wireless telecommunication and power regulations of that country. „ Windows® Windows® 7. „ The printer illustration is based on HL-3075CW. ii - Brother International HL-3075CW | Network Users Manual - English - Page 4
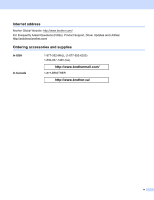
of a Brother authorized service center, call 1-877-BROTHER (1-877-276-8437). „ Service center locations (Canada) For the location of a Brother authorized service center, call 1-877-BROTHER. If you have any comments or suggestions, please write to us at: In USA In Canada Printer Customer Support - Brother International HL-3075CW | Network Users Manual - English - Page 5
http://www.brother.com/ For Frequently Asked Questions (FAQs), Product Support, Driver Updates and Utilities: http://solutions.brother.com/ Ordering accessories and supplies In USA In Canada 1-877-552-MALL (1-877-552-6255) 1-800-947-1445 (fax) http://www.brothermall.com/ 1-877-BROTHER http://www - Brother International HL-3075CW | Network Users Manual - English - Page 6
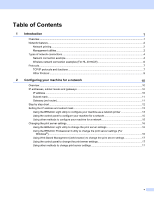
Table of Contents 1 Introduction 1 Overview...1 Network features...2 Network printing...2 Management utilities...2 Types of network connections ...4 Network connection example ...4 Wireless network connection examples (For HL-3075CW 6 Protocols...7 TCP/IP protocols and functions ...7 Other - Brother International HL-3075CW | Network Users Manual - English - Page 7
configure your machine for a wireless network ...27 Using the PIN Method of Wi-Fi Protected Setup to configure your machine for a wireless network ...27 4 Wireless configuration for Windows® using the Brother automatic installer application (For HL-3075CW) 28 Configuration in Infrastructure mode - Brother International HL-3075CW | Network Users Manual - English - Page 8
Status (For HL-3075CW wireless network only 55 Reset the network settings to the factory default 59 Printing the Network Configuration page 60 9 Driver Deployment Wizard (Windows® only) 61 Overview...61 Connection methods...61 Peer-to-peer ...61 Network Shared...62 Local Printer (USB)...62 - Brother International HL-3075CW | Network Users Manual - English - Page 9
Server® 2003 75 Specifying a different URL...77 Other sources of information ...77 13 Network printing from Macintosh using the BR-Script 3 driver (For HL- 3075CW) 78 Overview...78 How to choose the printer driver (TCP/IP 78 14 Security features 82 Overview...82 Security terms...82 Security - Brother International HL-3075CW | Network Users Manual - English - Page 10
...118 Web Based Management (web browser) troubleshooting (TCP/IP 118 Wireless network troubleshooting (For HL-3075CW 119 Wireless connection problem ...119 A Appendix 120 Using services ...120 Other ways to set the IP address (For advanced users and administrators 120 Using DHCP to configure - Brother International HL-3075CW | Network Users Manual - English - Page 11
1 1 Overview 1 Your Brother machine can be shared on a 10/100 MB wired or IEEE 802.11b/802.11g wireless Ethernet network using the internal network print server. The print server provides printing services for Windows® XP, Windows Vista®, Windows® 7, Windows Server® 2003/2008 supporting the TCP/IP - Brother International HL-3075CW | Network Users Manual - English - Page 12
10.6.x computers. For installing BRAdmin Light on Windows®, please see the Quick Setup Guide we provided with the machine. For Macintosh users, BRAdmin Light can be downloaded from the Brother Solutions Center at http://solutions.brother.com/. For more information on BRAdmin Light, visit us at http - Brother International HL-3075CW | Network Users Manual - English - Page 13
. For more information and downloading, visit us at http://solutions.brother.com/. 1 Internet Information Server 4.0 or Internet Information Services 5.0/5.1/6.0/7.0 BRPrint Auditor (for Windows®) 1 The BRPrint Auditor software brings the monitoring power of Brother network management tools to - Brother International HL-3075CW | Network Users Manual - English - Page 14
Network printer (your machine) TCP/IP „ In a smaller network of 2 or 3 computers, we recommend the Peer-to-Peer printing method as it is easier to configure than the Network Shared printing method. See Network Shared printing on page 5. „ Each computer must use the TCP/IP Protocol. „ The Brother - Brother International HL-3075CW | Network Users Manual - English - Page 15
computer 2) Also known as "Server" or "Print server" 3) TCP/IP or USB 4) Printer (your machine) „ In a larger network, we recommend a Network Shared printing environment. „ The "Server" or the "Print server" must use the TCP/IP print protocol. „ The Brother machine needs to have an appropriate IP - Brother International HL-3075CW | Network Users Manual - English - Page 16
act as a bridge or a gateway to a wired network. When the Brother wireless machine (your machine) is part of this network, it receives all print jobs via an access point. 1 4 2 3 1) Access point 2) Wireless network printer (your machine) 3) Wireless capable computer communicating with the access - Brother International HL-3075CW | Network Users Manual - English - Page 17
on a network. Protocols allow users to gain access to network connected resources. The print server used on this Brother product supports the TCP/ /BOOTP/RARP protocols, please contact your network administrator. APIPA 1 If you do not assign an IP address manually (using the control panel of the - Brother International HL-3075CW | Network Users Manual - English - Page 18
Telnet server for command line configuration. SNMP 1 The Simple Network Management Protocol (SNMP) is used to manage network devices including computers, routers and Brother network ready machines. The Brother print server supports SNMPv1, SNMPv2c and SNMPv3. Note For the SNMPv3 protocol - Brother International HL-3075CW | Network Users Manual - English - Page 19
protocol enables Windows Vista® and Windows® 7 users to install the Brother printer 1 driver by right-clicking the machine icon from the Network folder. See Installation when using Web Services (For Windows Vista® and Windows® 7 users) on page 127. The Web Services also let you check the current - Brother International HL-3075CW | Network Users Manual - English - Page 20
using TCP/IP protocol. We recommend that you use the Brother installer on the Brother CD-ROM to install the Brother software as this will guide you through the software and network installation. Please follow the instructions in the supplied Quick Setup Guide. Note If you do not wish to, or are - Brother International HL-3075CW | Network Users Manual - English - Page 21
on page 122. 2 If the APIPA protocol is disabled, the default IP address of a Brother print server is 192.0.0.192. However, you can easily change this IP address number to match with the IP address details of your network. For information on how to change the IP address, see Setting the IP address - Brother International HL-3075CW | Network Users Manual - English - Page 22
the subnet mask i o Configure the gateway i b Change the print server settings. o Using the BRAdmin Light utility i o Using the Using the control panel i o Using other methods i Configuring your machine for a network See page 13 See page 13 See page 13 See page 16 See page 16 See - Brother International HL-3075CW | Network Users Manual - English - Page 23
a wireless network. ("xxxxxxxxxxxx" is your machine's MAC Address / Ethernet Address.) • The default password for Brother print servers is "access". a Start the BRAdmin Light utility. „ For Windows® Click Start / All Programs / Brother / BRAdmin Light / BRAdmin Light. „ For Macintosh Download the - Brother International HL-3075CW | Network Users Manual - English - Page 24
page. See Printing the Network Configuration page on page 60. d Choose STATIC from Boot Method. Enter the IP Address, Subnet Mask and Gateway (if needed) of your print server. Windows® Macintosh e Click OK. f With the correctly programmed IP address, you will see the Brother print server in the - Brother International HL-3075CW | Network Users Manual - English - Page 25
your machine for a network using the control panel Network menu. See Network menu on page 45. Using other methods to configure your machine for a network You can configure your machine for a network using other methods. See Other ways to set the IP address (For advanced users and administrators) on - Brother International HL-3075CW | Network Users Manual - English - Page 26
your machine for a wireless network (For HL-3075CW) in Chapter 3. Using the BRAdmin Light utility to change the print server settings 2 a Start the BRAdmin Light utility. „ For Windows® Click Start/All Programs/Brother/BRAdmin Light/BRAdmin Light. „ For Macintosh Download the latest BRAdmin Light - Brother International HL-3075CW | Network Users Manual - English - Page 27
and change the print server settings using the control panel Network menu. See Network menu on page 45. Using other methods to change print server settings 2 You can configure your network printer using other methods. See Other ways to set the IP address (For advanced users and administrators) on - Brother International HL-3075CW | Network Users Manual - English - Page 28
a wireless network (For HL-3075CW)3 3 Configuring your machine for a wireless network (For HL-3075CW) 3 Overview 3 To connect your printer to your wireless network, you need to follow the steps in the Quick Setup Guide or the Network User's Guide. We recommend that you use the Brother installer - Brother International HL-3075CW | Network Users Manual - English - Page 29
, see Wireless network (for HL-3075CW) on page 129. Authentication and encryption 3 Most wireless networks use some Brother wireless device supports. Authentication methods 3 The Brother machine supports the following methods: „ Open System Wireless devices are allowed to access the network - Brother International HL-3075CW | Network Users Manual - English - Page 30
Configuring your machine for a wireless network (For HL-3075CW) „ WPA-PSK/WPA2-PSK Enables a Wi-Fi Protected Access Pre-shared Key (WPA-PSK/WPA2-PSK), which enables the Brother wireless machine to associate with access points using TKIP for WPA-PSK or AES for WPA-PSK and WPA2-PSK encryption (WPA- - Brother International HL-3075CW | Network Users Manual - English - Page 31
for a wireless network (For HL-3075CW) Network Key 3 digits of hexadecimal data. e.g. "71f2234ab56cd709e5412aa2ba" „ WPA-PSK/WPA2-PSK and TKIP or AES Uses a Pre-Shared Key (PSK) that is 8 or more characters in length, up to a maximum of 63 characters. „ LEAP Uses User ID and Password. • User - Brother International HL-3075CW | Network Users Manual - English - Page 32
supports Wi-Fi Protected Setup) c Configure your machine for a wireless network. (See page 27.) Configuring your machine for a wireless network (For Windows®) See page 28. (For Macintosh) See page 32. See page 30. Installing the printer driver See the Quick Setup Guide See the Quick Setup - Brother International HL-3075CW | Network Users Manual - English - Page 33
your machine for a wireless network (For HL-3075CW) Confirm your network environment 3 Connected to a computer with an access point in the network (Infrastructure mode) 3 1 3 4 2 3 1) Access point 2) Wireless network printer (your machine) 3) Wireless capable computer connected to - Brother International HL-3075CW | Network Users Manual - English - Page 34
your machine to your wireless network and install the network software and printer driver which you need to complete the configuration of your machine for a wireless network. You will be guided by the on-screen instructions until you are able to use your Brother wireless network machine. You must - Brother International HL-3075CW | Network Users Manual - English - Page 35
Configuring your machine for a wireless network (For HL-3075CW) Configuration using WPS or AOSS from the control panel menu to configure your machine for a wireless network (Infrastructure mode only) 3 If your wireless access point (A) supports either Wi-Fi Protected Setup (PBC 1) or AOSS™, you - Brother International HL-3075CW | Network Users Manual - English - Page 36
Configuring your machine for a wireless network (For HL-3075CW) Configuration using the PIN Method of Wi-Fi Protected Setup to configure your machine for a wireless network (Infrastructure mode only) 3 If your wireless access point (A) supports Wi-Fi Protected Setup, you can also configure using - Brother International HL-3075CW | Network Users Manual - English - Page 37
Configuring your machine for a wireless network (For HL-3075CW) Configure your machine for a wireless network 3 Using the Brother installer application on the CD-ROM to configure your machine for a wireless network (Recommended) 3 For installation, see Wireless configuration for Windows® using - Brother International HL-3075CW | Network Users Manual - English - Page 38
(ForHL-3075CW)4 using the Brother automatic installer application (For HL-3075CW) 4 Configuration in Infrastructure mode 4 Before configuring the wireless settings IMPORTANT 4 4 The following instructions will install your Brother machine in a network environment using the Brother installer - Brother International HL-3075CW | Network Users Manual - English - Page 39
start.exe program from the root folder of the Brother CD-ROM. • When the User Account Control screen appears, (Windows Vista®) click Allow. (Windows® 7) click Yes. d Click Wireless Network users. e Choose Wireless Setup and Driver Install (Recommended), and then click Next. f Choose Temporarily use - Brother International HL-3075CW | Network Users Manual - English - Page 40
(For HL-3075CW)5 5 Wireless Configuration for Macintosh using the Brother installer application (For HL-3075CW) 5 Configuration in Infrastructure mode 5 Before configuring the wireless settings 5 IMPORTANT The following instructions will install your Brother machine in a network environment - Brother International HL-3075CW | Network Users Manual - English - Page 41
Check the box after you confirm the SSID and Network Key, and then click Next. f Follow the screen instructions to configure the wireless settings. 5 After you have completed the wireless setup, you can proceed to the printer driver installation. Click Next in the installation dialog and follow - Brother International HL-3075CW | Network Users Manual - English - Page 42
using WPS or AOSS from the control panel (For HL-3075CW) 6 Overview 6 If your wireless access point/router supports either Wi-Fi Protected Setup (PBC 1) or AOSS™, you can configure the machine easily without knowing your wireless network settings. Your Brother machine has the WPS/AOSS menu on the - Brother International HL-3075CW | Network Users Manual - English - Page 43
you are sure that you can print, configure the software settings following the instructions. If you have previously configured the wireless settings of the printer, you must reset the print server back to its factory default settings (see Reset the network settings to the factory default on page - Brother International HL-3075CW | Network Users Manual - English - Page 44
HL-3075CW) g If the LCD shows Connected, the machine has successfully connected to your access point/router. You can now use your machine in a wireless network reset the print server back to its factory default settings and try again. (For resetting, see Reset the network downloading Setup mode - Brother International HL-3075CW | Network Users Manual - English - Page 45
using WPS or AOSS from the control panel (For HL-3075CW) (Windows®) You have completed the wireless network setup. If you would like to continue installing the printer driver necessary for operating your device, please choose Install Printer Driver from the CD-ROM menu. (Macintosh) You have - Brother International HL-3075CW | Network Users Manual - English - Page 46
that manages the wireless LAN), you can setup the wireless network and security settings. See the user's guide for your wireless access point/router for instructions on how to access the Wi-Fi Protected Setup mode. Note Routers or access points that support Wi-Fi Protected Setup have a symbol as - Brother International HL-3075CW | Network Users Manual - English - Page 47
access point/router. See the instruction manual that came with your access reset the print server back to its factory default settings and try again. For resetting, see Reset the network settings to the factory default on page 59. You have completed the wireless setup. To install the printer driver - Brother International HL-3075CW | Network Users Manual - English - Page 48
Wireless configuration using the PIN Method of Wi-Fi Protected Setup (For HL-3075CW) For Windows® users 7 IMPORTANT DO NOT printer model and the language. c Click Install Printer Driver on the menu screen. 7 Note Choose the Install Printer Driver icon for your region. d Click Wireless Network users - Brother International HL-3075CW | Network Users Manual - English - Page 49
Wireless configuration using the PIN Method of Wi-Fi Protected Setup (For HL-3075CW) Note When the User Account Control screen appears, (Windows Vista®) click Allow. (Windows® 7) click Yes. 7 e Choose Driver Install Only, and then click Next. f When the License Agreement window appears, click Yes if - Brother International HL-3075CW | Network Users Manual - English - Page 50
Wireless configuration using the PIN Method of Wi-Fi Protected Setup (For HL-3075CW) g Choose Standard Installation, and then click Next. h Choose Search the network for devices and choose from a list of discovered devices (Recommended). Or enter your printer's IP address or its node name. Click - Brother International HL-3075CW | Network Users Manual - English - Page 51
Wireless configuration using the PIN Method of Wi-Fi Protected Setup (For HL-3075CW) i Choose your printer, and then click Next. Note If your printer takes a long time to appear on the list, 1 minute or more, then click Refresh. 7 j Click Finish. Note • If you want to register your product on- - Brother International HL-3075CW | Network Users Manual - English - Page 52
(For HL-3075CW) For Macintosh users 7 IMPORTANT DO NOT try to cancel any of the screens during this installation. a Turn on your Macintosh. b Put the installation CD-ROM into your CD-ROM drive. c Double-click the Start Here OSX icon. Follow the on-screen instructions. 7 d Choose Wireless Network - Brother International HL-3075CW | Network Users Manual - English - Page 53
Wireless configuration using the PIN Method of Wi-Fi Protected Setup (For HL-3075CW) e Follow the on-screen instructions until this screen appears. Choose your machine from the list, and then click OK. 7 Note • If there is more than one of the same printer model connected on your network, the MAC - Brother International HL-3075CW | Network Users Manual - English - Page 54
This printer has one back lit Liquid Crystal Display (LCD), seven buttons and two Light Emitting Diodes (LEDs) on the control panel. The LCD is a 16 character single line display. With the control panel you can do the following: Change the print server settings using the control panel See Network - Brother International HL-3075CW | Network Users Manual - English - Page 55
can be used to configure many aspects of the network. See Changing the print server settings on page 16. TCP/IP 8 This on your machine. b Press + or - to choose Network. Press OK. c For HL-3075CW (For wired) Press + or - to choose Wired LAN. (For wireless) Press + or - to choose WLAN. Press OK. - Brother International HL-3075CW | Network Users Manual - English - Page 56
machine to scan the network for a server. 2 Static mode In this mode the machine's IP address must be manually assigned. Once entered the IP address is locked to the assigned address. 3 RARP mode The Brother print server IP address can be configured using the Reverse ARP (RARP) service on your host - Brother International HL-3075CW | Network Users Manual - English - Page 57
any of the Menu buttons (+, -, OK or Back) of the control panel on your machine. b Press + or - to choose Network. Press OK. c For HL-3075CW (For wired) Press + or - to choose Wired LAN. (For wireless) Press + or - to choose WLAN. Press OK. d Press + or - to choose TCP/IP. Press OK. e Press + or - Brother International HL-3075CW | Network Users Manual - English - Page 58
any of the Menu buttons (+, -, OK or Back) of the control panel on your machine. b Press + or - to choose Network. Press OK. c For HL-3075CW (For wired) Press + or - to choose Wired LAN. (For wireless) Press + or - to choose WLAN. Press OK. d Press + or - to choose TCP/IP. Press OK. e Press + or - Brother International HL-3075CW | Network Users Manual - English - Page 59
any of the Menu buttons (+, -, OK or Back) of the control panel on your machine. b Press + or - to choose Network. Press OK. c For HL-3075CW (For wired) Press + or - to choose Wired LAN. (For wireless) Press + or - to choose WLAN. Press OK. d Press + or - to choose TCP/IP. Press OK. e Press + or - Brother International HL-3075CW | Network Users Manual - English - Page 60
This field displays how many times the printer attempts to scan the network to obtain the IP address through the panel on your machine. b Press + or - to choose Network. Press OK. c For HL-3075CW (For wired) Press + or - to choose Wired LAN. (For wireless) Press + or - to choose WLAN. Press OK. d - Brother International HL-3075CW | Network Users Manual - English - Page 61
Choosing Off means the IP address doesn't change, when the print server cannot obtain an IP address through the Boot Method you your machine. b Press + or - to choose Network. Press OK. c For HL-3075CW (For wired) Press + or - to choose Wired LAN. (For wireless) Press + or - to choose WLAN. Press - Brother International HL-3075CW | Network Users Manual - English - Page 62
on the IPv6 protocol, visit http://solutions.brother.com/. a Press any of the Menu buttons (+, -, OK or Back) of the control panel on your machine. b Press + or - to choose Network. Press OK. c For HL-3075CW (For wired) Press + or - to choose Wired LAN. (For wireless) Press + or - to choose WLAN - Brother International HL-3075CW | Network Users Manual - English - Page 63
allows you to reset the print server back to its factory default settings. For more information and resetting, see Reset the network settings to the factory default on page 59. Set to Default (For HL-3075CW) 8 The Set to Default allows you to reset each wired or wireless network setting to the - Brother International HL-3075CW | Network Users Manual - English - Page 64
or - to choose On. Press OK. 8 8 WPS or AOSS (For HL-3075CW wireless network only) 8 If your wireless access point/router supports either Wi-Fi Protected Setup (PBC 1) or AOSS™, you can configure the machine easily without a computer. Your Brother machine has the WPS/AOSS menu on the control panel - Brother International HL-3075CW | Network Users Manual - English - Page 65
settings. See the user's guide for your wireless access point/router for instructions on how to access the Wi-Fi Protected Setup mode. (See Wireless configuration using the PIN Method of Wi-Fi Protected Setup (For HL-3075CW) in Chapter 7.) WLAN Status (For HL-3075CW wireless network only) 8 Status - Brother International HL-3075CW | Network Users Manual - English - Page 66
Status. Press OK. e Press + or - to choose Signal. Press OK. f The current wireless network status will be displayed; Strong, Medium, Weak, or None. g Press OK again. Channel This field displays the current wireless network channel. a Press any of the Menu buttons (+, -, OK or Back) of the control - Brother International HL-3075CW | Network Users Manual - English - Page 67
or - to choose WLAN Status. Press OK. e Press + or - to choose Speed. Press OK. f The current wireless network speed will be displayed. g Press OK again. SSID 8 8 This field displays the current wireless network SSID. The display shows up to 32 characters of the SSID name. a Press any of the - Brother International HL-3075CW | Network Users Manual - English - Page 68
panel features Comm. Mode 8 This field displays the current wireless network communication mode; Ad-hoc or Infrastructure. a Press any of the Menu buttons (+, -, OK or Back) of the control panel on your machine. b Press + or - to choose Network. Press OK. c Press + or - to choose WLAN. Press - Brother International HL-3075CW | Network Users Manual - English - Page 69
Control panel features Reset the network settings to the factory default 8 You can reset the print server back to its factory default settings (resetting all information such as the password and IP address information.) Note You can also reset the print server back to its factory default settings - Brother International HL-3075CW | Network Users Manual - English - Page 70
server in the machine is "BRNxxxxxxxxxxxx" for a wired network or "BRWxxxxxxxxxxxx" for a wireless network (For HL-3075CW). The Network Configuration page prints a report listing all the current network settings. You can print the Network Configuration page using the control panel. a Make sure - Brother International HL-3075CW | Network Users Manual - English - Page 71
does not have to be connected to a network. Connection methods 9 The Driver Deployment Wizard supports the three connection methods. Peer-to-peer 9 The device is connected to the network but each user prints directly to the printer WITHOUT printing through a central queue. 1 Windows R 1 Windows - Brother International HL-3075CW | Network Users Manual - English - Page 72
device is connected to a network and a central print queue is used to manage all print jobs. 1 Windows R 1 Windows R Windows R 3 TCP/IP 1 Windows R 2 4 1) Client computer 2) Also known as "Server" or "Print server" 3) TCP/IP or USB 4) Printer (your machine) Local Printer (USB) The device is - Brother International HL-3075CW | Network Users Manual - English - Page 73
Note When the User Account Control screen appears, (Windows Vista®) click Allow. (Windows® 7) click Yes. d Click Next in response to the Welcome message. e Read the license agreement carefully. Then follow the on-screen instructions. f Click Finish. Now the Driver Deployment Wizard software has been - Brother International HL-3075CW | Network Users Manual - English - Page 74
, and then click Next. c Choose your connection type to the printer that you want to print to. d Choose the option you require, and follow the on-screen instructions. If you choose Brother Peer-to-Peer Network Printer, the following screen is displayed. 9 „ Setting the IP Address If the machine - Brother International HL-3075CW | Network Users Manual - English - Page 75
„ Creating an executable file The Driver Deployment Wizard software can also be used to create self running .EXE files. These self-running .EXE files can be saved to the network, copied to a CD-ROM, USB memory or even E-mailed to another user. Once run, the driver and its settings are automatically - Brother International HL-3075CW | Network Users Manual - English - Page 76
• If you work in a "queue" based network and you create an executable file for another user who does not have access to the same printer queue that you define into the executable file, the driver when installed on the remote computer will default to LPT1 printing. • If you check the box of Currently - Brother International HL-3075CW | Network Users Manual - English - Page 77
and UNIX users are also able to connect to the machine and manage it. • You can also use the BRAdmin applications to manage the machine and its network configuration. • This print server also supports HTTPS for secure management using SSL. See Managing your network printer securely on page - Brother International HL-3075CW | Network Users Manual - English - Page 78
the User's Guide on the CD-ROM. c Click Network Configuration. d Enter a user name and a password. The default User Name is "admin" and the default Password is "access". e Click OK. f You can now change the print server settings. Note If you have changed the protocol settings, restart the printer - Brother International HL-3075CW | Network Users Manual - English - Page 79
your machine to your network and install the network software and printer driver which you need to complete the configuration of your machine for a network. You will be guided by the on-screen instructions until you are able to use your Brother network machine. If you are a Windows® user and want to - Brother International HL-3075CW | Network Users Manual - English - Page 80
Next. Note • When the User Account Control screen appears, (Windows Vista®) click Continue. (Windows® 7) click Yes. • If the printer driver that you are installing does not have a Digital Certificate you will see a warning message. Click Install this driver software anyway to continue with the - Brother International HL-3075CW | Network Users Manual - English - Page 81
to complete the Wizard. j Now that you have configured the port, you must specify which printer driver you wish to use. Choose the appropriate driver from the list of supported printers. If you are using a driver supplied with the machine on the CD-ROM then choose the Have Disk option to browse to - Brother International HL-3075CW | Network Users Manual - English - Page 82
the IP address of your network printer. Click Next. g Click Finish. h Close Printer Ports and Properties dialog box. Other sources of information 11 11 See Configuring your machine for a network on page 10 and Configuring your machine for a wireless network (For HL-3075CW) on page 18 to learn - Brother International HL-3075CW | Network Users Manual - English - Page 83
. • The default password for Brother print servers is "access". • This print server also supports the IPPS printing, see Printing documents securely using IPPS on page 92. IPP printing for Windows® XP, Windows Vista®, Windows® 7 and Windows Server® 2003/2008 12 Use the following instructions if you - Brother International HL-3075CW | Network Users Manual - English - Page 84
used. Go to g. g If your printer is not in the list of supported printers, click Have Disk. You will then be asked to insert the driver disk. h Click Browse... and choose the appropriate Brother printer driver that is contained in the CD-ROM or in the network share. Click Open. For example, choose - Brother International HL-3075CW | Network Users Manual - English - Page 85
it will appear as "BRNxxxxxxxxxxxx" for a wired network or "BRWxxxxxxxxxxxx" for a wireless network. g When you click Next, Windows® XP and Windows Server® 2003 will make a connection with the URL that you specified. „ If the printer driver has already been installed: 12 If the appropriate - Brother International HL-3075CW | Network Users Manual - English - Page 86
Browse... and choose the appropriate Brother printer driver that is contained in the CD-ROM or in the network share. Click Open. For example, choose the "X:\install\your language\PCL\32 1" folder (where X is your drive letter). Click Open. 1 32 folder for 32-bit OS users and 64 folder for 64-bit - Brother International HL-3075CW | Network Users Manual - English - Page 87
and process data. Where "printer's IP address" is the printer's IP address or the node name. „ For example: http://192.168.1.2/ http://BRN123456765432/ Other sources of information 12 For how to configure the IP address of the printer, see Configuring your machine for a network in Chapter 2. 12 77 - Brother International HL-3075CW | Network Users Manual - English - Page 88
HL-3075CW)13 Network printing from Macintosh using the BR-Script 3 driver (For HL-3075CW) 13 Overview 13 This chapter explains how to configure the BR-Script 3 (PostScript® 3™ language emulation) printer driver on a Network. How to choose the printer driver (TCP/IP) 13 For Mac OS X 10.4.11 users - Brother International HL-3075CW | Network Users Manual - English - Page 89
), use the PostScript® service "BRNxxxxxxxxxxxx_AT" for Macintosh. Where "xxxxxxxxxxxx" is your machine's MAC Address (Ethernet Address). h From the Print Using pop-up menu, choose your model. For example, choose Brother HL-3075CW BR-Script3. 13 i Click Add and the printer will be available from - Brother International HL-3075CW | Network Users Manual - English - Page 90
Network printing from Macintosh using the BR-Script 3 driver (For HL-3075CW) For Mac OS X 10.5.x to 10.6.x 13 a Turn on your Macintosh. b Choose System Preferences from the Apple menu. c Choose Print & Fax. d Click + which is located below the Printers section. e Choose IP. f Choose Line - Brother International HL-3075CW | Network Users Manual - English - Page 91
Network printing from Macintosh using the BR-Script 3 driver (For HL-3075CW) h From the Print Using pop-up menu, choose your model. For example, choose Brother HL-3075CW BR-Script3. i Click Add and the printer will be available from the Printers. The printer is now ready to print. 13 81 - Brother International HL-3075CW | Network Users Manual - English - Page 92
into your overall network security plan to help protect your data and prevent unauthorized access to the machine. This chapter explains various security protocols supported and how to configure them. Security terms 14 „ CA (Certificate Authority) A CA is an entity that issues digital certificates - Brother International HL-3075CW | Network Users Manual - English - Page 93
Network Management Protocol version 3 (SNMPv3) provides user authentication and data encryption to manage network devices securely. Security methods for E-mail notification 14 The Brother print server supports an authentication method that encrypts the password when the client receives E-mail. 83 - Brother International HL-3075CW | Network Users Manual - English - Page 94
by default it will appear as "BRNxxxxxxxxxxxx" for a wired network or "BRWxxxxxxxxxxxx" for a wireless network. c Click Network Configuration. d Enter a user name and a password. The default User Name is "admin" and the default Password is "access". e Click OK. f Click Configure Protocol. Now you - Brother International HL-3075CW | Network Users Manual - English - Page 95
print server. 14 • For Windows® users, as the print server supports TCP/IP and NetBIOS names, you can also enter the NetBIOS name of the print server. The NetBIOS name can be seen on the Network Configuration page. To learn how to print the Network Configuration page, see Printing the Network - Brother International HL-3075CW | Network Users Manual - English - Page 96
BRAdmin. d Click Network Configuration. e Enter a user name and a password. The default User Name is "admin" and the default Password is "access". f -write access With this mode the print server uses version 3 of the SNMP protocol. If you want to manage the print server securely, use this mode. Note - Brother International HL-3075CW | Network Users Manual - English - Page 97
mode. „ SNMPv1/v2c read-write access In this mode the print server uses version 1 and version 2c of the SNMP protocol. You can use all Brother applications under this mode. However, it is not secure since it will not authenticate the user and the data will not be encrypted. Note For more information - Brother International HL-3075CW | Network Users Manual - English - Page 98
utility or Web BRAdmin that are available as a download from http://solutions.brother.com/. If you use an older version of BRAdmin 1 to manage your Brother machines the user authentication will not be secure. „ If you want to avoid access to your printer from older versions of BRAdmin 1, you need to - Brother International HL-3075CW | Network Users Manual - English - Page 99
Secure Function Lock 2.0 (For HL-3075CW) 14 Secure Function Lock 2.0 from Brother helps you to save money and increase security by restricting the functions available on your Brother machine. Secure Function Lock allows you to configure passwords for selected users, granting them access to some - Brother International HL-3075CW | Network Users Manual - English - Page 100
digit alphanumeric group name or user name in the ID Number/Name box and then enter a four-digit password in the PIN box. d Uncheck the functions that you want to restrict in the Print the printer driver is checked. For more information about the printer driver, see the User's Guide on the CD-ROM. 90 - Brother International HL-3075CW | Network Users Manual - English - Page 101
Secure Function Lock feature does not support the BR-Script 3 printer driver for printing. Setting up public mode 14 You can set up the public mode to restrict what functions are available for public users. Public users do not need to enter a password to access the features made available through - Brother International HL-3075CW | Network Users Manual - English - Page 102
. Note • Communication using IPPS cannot prevent unauthorized access to the print server. • IPPS is available for Windows® XP, Windows Vista®, Windows® 7 and Windows Server® 2003/2008. To use the IPPS protocol, the following printer settings are required. „ A certificate and private key must be - Brother International HL-3075CW | Network Users Manual - English - Page 103
by default it will appear as "BRNxxxxxxxxxxxx" for a wired network or "BRWxxxxxxxxxxxx" for a wireless network. c Click Network Configuration. d Enter a user name and a password. The default User Name is "admin" and the default Password is "access". e Click Configure Protocol. 14 f Make sure that - Brother International HL-3075CW | Network Users Manual - English - Page 104
Management. This is useful if your ISP (Internet Service Provider) implements the "Outbound Port 25 Blocking (OP25B)" service. By changing the SMTP port number to a specific Receive Configuration dialog appears. i Follow the instructions on-screen if you want to test with the current settings. 94 - Brother International HL-3075CW | Network Users Manual - English - Page 105
server. • For Windows® users, as the print server supports TCP/IP and NetBIOS, you can also enter the NetBIOS name of the print server. The NetBIOS name can be seen on the Network Configuration page. To learn how to print the Network Configuration page, see Printing the Network Configuration page on - Brother International HL-3075CW | Network Users Manual - English - Page 106
Security features c Click Network Configuration. d Enter a user name and a password. The default User Name is "admin" and the default Password is "access". e Click OK. f Click Configure Certificate. g You can configure the certificate settings from the screen below. Note • The functions that are - Brother International HL-3075CW | Network Users Manual - English - Page 107
Common Name that was used for the self-signed certificate. c Now the self-signed certificate is created successfully. d Follow the on-screen instructions to configure the other security settings. e Restart the printer to activate the configuration. f Now the self-signed certificate is saved in your - Brother International HL-3075CW | Network Users Manual - English - Page 108
Internet Explorer® 6.0. If you use another web browser, follow the help text of the web browser itself. For Windows Vista® and Windows® 7 users that have administrator rights 14 a Click the button and All Programs. b Right-click Internet Explorer, and then click Run as administrator. Note When - Brother International HL-3075CW | Network Users Manual - English - Page 109
into your browser to access your printer (where "printer's IP address" is the printer's IP address or the node name). Then, click Continue to this website (not recommended). d Click Certificate Error, and then click View certificates. For the rest of the instructions, follow the steps from d on page - Brother International HL-3075CW | Network Users Manual - English - Page 110
® and Windows® 7 users that do not have administrator rights a Click the button and All Programs. b Right-click Internet Explorer, and then click Run as administrator. Security features 14 c Choose the Administrator that you want to install with and enter the administrator password, and then - Brother International HL-3075CW | Network Users Manual - English - Page 111
's IP address/" into your browser to access your printer (where "printer's IP address" is the printer's IP address or the node name). Then, click Continue to this website (not recommended). e Click Certificate Error, and then click View certificates. f Choose the Details - Brother International HL-3075CW | Network Users Manual - English - Page 112
g Click Next. Security features h Make sure that DER encoded binary X.509 (.CER) is chosen, and then click Next. i Click Browse.... 14 102 - Brother International HL-3075CW | Network Users Manual - English - Page 113
j Click Browse Folders. Security features k Choose a folder you want to save the certificate file in and enter a file name, and then click Save. Note If you choose Desktop, the certificate file is saved to the Desktop of the Administrator that you chose. l Click Next. 14 103 - Brother International HL-3075CW | Network Users Manual - English - Page 114
m Click Finish. n Click OK. o Click OK. Security features 14 104 - Brother International HL-3075CW | Network Users Manual - English - Page 115
Security features p Open the folder that you saved the certificate file in k and double-click the certificate file. For the rest of the instructions, follow the steps from d on page 101. 14 105 - Brother International HL-3075CW | Network Users Manual - English - Page 116
Security features For Windows® XP and Windows Server® 2003/2008 users 14 a Start your web browser. b Type "https://printer's IP address/" into your browser to access your printer (where "printer's IP address" is the IP address or the node name that you assigned for the certificate). c When the - Brother International HL-3075CW | Network Users Manual - English - Page 117
e When the Certificate Import Wizard appears, click Next. Security features f Choose Place all certificates in the following store and then, click Browse.... g Choose Trusted Root Certification Authorities and then, click OK. 14 107 - Brother International HL-3075CW | Network Users Manual - English - Page 118
h Click Next. i Click Finish. Security features j Click Yes, if the fingerprint (thumbprint) is correct. 14 108 - Brother International HL-3075CW | Network Users Manual - English - Page 119
Security features Note The fingerprint (thumbprint) is printed on the Network Configuration page. To learn how to print the Network Configuration page, see Printing the Network Configuration page on page 60. k Click OK. l Now the self-signed certificate is installed on your computer, and the SSL/TLS - Brother International HL-3075CW | Network Users Manual - English - Page 120
bytes. Enter an identifier such as an IP address, node name or domain name to use when accessing this printer through SSL/TLS communication. The node name is displayed by default. The Common Name is required. • A certificate. For more information, visit us at http://solutions.brother.com/. 14 110 - Brother International HL-3075CW | Network Users Manual - English - Page 121
the steps below to install it into the print server. Note Only a certificate issued with this printer's CSR can be installed. a Click Install instructions to configure the other security settings. e Restart the printer to activate the configuration. f Now the certificate is saved in your printer. - Brother International HL-3075CW | Network Users Manual - English - Page 122
you want to import. c Enter the password if the file is encrypted, and then click Submit. d Now the certificate and private key are imported successfully. e Follow the on-screen instructions to configure the other security settings. f Restart the printer to activate the configuration. g Now the - Brother International HL-3075CW | Network Users Manual - English - Page 123
at: http://solutions.brother.com/ This chapter is divided into the following sections: „ General problems „ Network print software installation problems „ Printing problems „ Protocol-specific troubleshooting „ Wireless network specific troubleshooting (For HL-3075CW) General problems 15 CD-ROM - Brother International HL-3075CW | Network Users Manual - English - Page 124
the administrator password and click OK. 3) Click the General tab. Make sure that Off (not recommended) is selected. 4) Click OK. Note After the Brother software package is installed, turn your Firewall back on. Windows® XP SP2 / SP3 users: 15 1) Click the Start button, Control Panel, Network and - Brother International HL-3075CW | Network Users Manual - English - Page 125
Troubleshooting Network print software installation problems 15 The Brother print server is not found during setup of the network print software installation or from the printer driver of the Brother machine in Windows®. The Brother print server is not found using the Simple Network - Brother International HL-3075CW | Network Users Manual - English - Page 126
the necessary network connection to the machine. In this case, you will need to disable the Firewall on your computer and re-install the drivers. For more information, see General problems on page 113. If you are using personal Firewall software, see the User's Guide for your software or contact - Brother International HL-3075CW | Network Users Manual - English - Page 127
settings and try from the initial setup again. For resetting, see Reset the network settings to the factory default on page 59. Error during printing 15 15 If you try to print while other users are printing large amounts of data (e.g. many pages or color pages with high resolution), the machine - Brother International HL-3075CW | Network Users Manual - English - Page 128
your Firewall to allow Port 631 data through. To send a print job using IPP to a printer using Port 80 (the standard HTTP port) enter the following with the Brother print server. Web Based Management (web browser) troubleshooting (TCP/IP) 15 a If you cannot connect to the print server using - Brother International HL-3075CW | Network Users Manual - English - Page 129
troubleshooting (For HL-3075CW) 15 Note If you want to confirm the wireless network status, see b on page 115. Wireless connection problem 15 The wireless network connection is sometimes disabled. 15 The wireless network connection status is affected by the environment where the Brother - Brother International HL-3075CW | Network Users Manual - English - Page 130
to print to the Brother print server. The Brother print server provides the following predefined services (do a SHOW SERVICE command in the Brother print server remote console to see a list of available services): Enter HELP at the command prompt for a list of supported commands. Service (Example - Brother International HL-3075CW | Network Users Manual - English - Page 131
network.) BRN008077310107 1 00:80:77:31:01:07 192.189.207.3 and: BRN008077310107:ht=ethernet:ha=008077310107:\ip=192.189.207.3: Certain BOOTP host software implementations will not respond to BOOTP requests if you have not included a download filename in the configuration file. If this is the - Brother International HL-3075CW | Network Users Manual - English - Page 132
systems, type: ps -ef | grep -v grep | grep rarpd The Brother print server will get the IP address from the RARP daemon when the printer is powered on. Using APIPA to configure the IP address 0 The Brother print server supports the Automatic Private IP Addressing (APIPA) protocol. With APIPA, DHCP - Brother International HL-3075CW | Network Users Manual - English - Page 133
network print server and ipaddress is the IP address of the print server. For example: „ Windows® systems Windows® systems require the dash "-" character between each digit your Brother print server reset the print server (which will then allow you to use the ARP command again). To configure the print - Brother International HL-3075CW | Network Users Manual - English - Page 134
password will not appear on the screen). You will be prompted for a user name. Enter anything in response to this prompt. You will then get the Local> prompt. Type SET IP ADDRESS ipaddress, where ipaddress is the desired IP address you wish to assign to the print server (check with your network - Brother International HL-3075CW | Network Users Manual - English - Page 135
a web browser that supports Java. Please note this software is not included on the CD-ROM that was supplied with your Brother product. Please visit http://solutions.brother.com/ to learn more about this software and to download it. 1 Internet Information Server 4.0 or Internet Information Services - Brother International HL-3075CW | Network Users Manual - English - Page 136
The opening screen will appear automatically. Choose your printer model and the language. c Click Install Printer Driver on the menu screen. Note Choose the Install Printer Driver icon for your region. d Click Network cable users. Note When the User Account Control screen appears, (Windows Vista - Brother International HL-3075CW | Network Users Manual - English - Page 137
then choose Network. b The machine's Web Services Name will be shown with the printer icon. Right-click the machine you want to install. Note The Web Services Name for the Brother machine is your model name and the MAC Address (Ethernet Address) of your machine (e.g. Brother HL-XXXX [XXXXXXXXXXXX - Brother International HL-3075CW | Network Users Manual - English - Page 138
.com/. 4 If you require more advanced printer management, use the latest Brother BRAdmin Professional 3 utility version that is available as a download from http://solutions.brother.com/. 5 Client computers with a web browser supporting Java. 6 Available when using BRAdmin Professional 3 or Web - Brother International HL-3075CW | Network Users Manual - English - Page 139
Appendix Wireless network (for HL-3075CW) 0 Network board NC-7500w model name LAN You can connect your machine to a network for Network Printing. B Support for Windows® XP, Windows® XP Professional x64 Edition, Windows Vista®, Windows® 7, Windows Server® 2003/2003 x64 Edition and Windows - Brother International HL-3075CW | Network Users Manual - English - Page 140
printer management, use the latest Brother BRAdmin Professional 3 utility version that is available as a download from http://solutions.brother.com/. 5 Client computers with a web browser supporting . (HL-3045CN) Level one Network Level two TCP/IP (HL-3075CW) Ethernet Factory Reset Level three - Brother International HL-3075CW | Network Users Manual - English - Page 141
Level one Level two Level three Level four Options Network Wired LAN TCP/IP IP Boot 0 to 32767 For HL- 3075CW) in Chapter 6. WPS w/PIN Code - See Wireless configuration using the PIN Method of Wi-Fi Protected Setup (For HL- 3075CW) , Off* Factory - Reset - Restart Printer? 131 - Brother International HL-3075CW | Network Users Manual - English - Page 142
20 Control panel 17 CSR 82 Custom Raw Port 8 D DHCP 7, 46, 120 Digital signature 82 DNS 7, 84, 85, 93, 95 Driver Deployment Wizard 1, 61 E EAP-FAST 20 Encryption 19 Ethernet 53 F Factory default 59 Factory Reset 53 Firewall 113, 116 G Gateway 49 H C HTTP 9 HTTPS 85 I Infrastructure - Brother International HL-3075CW | Network Users Manual - English - Page 143
7, 45 TCP/IP printing 69 Telnet 8, 124 TEXT_P1 120 TKIP 20 Trademarks i W Web Based Management (web browser) ....... 3, 84, 85 Web BRAdmin 3 Web browser (HTTP 17 Web server (HTTP 9 Web server (HTTPS 83 Web services 9 C WEP 20 Wi-Fi Protected Setup 25, 32, 36 Wireless network 6, 18 WPA2
-
 1
1 -
 2
2 -
 3
3 -
 4
4 -
 5
5 -
 6
6 -
 7
7 -
8
-
9
-
10
-
11
-
12
-
13
-
14
-
15
-
16
-
17
-
18
-
19
-
20
-
21
-
22
-
23
-
24
-
25
-
26
-
27
-
28
-
29
-
30
-
31
-
32
-
33
-
34
-
35
-
36
-
37
-
38
-
39
-
40
-
41
-
42
-
43
-
44
-
45
-
46
-
47
-
48
-
49
-
50
-
51
-
52
-
53
-
54
-
55
-
56
-
57
-
58
-
59
-
60
-
61
-
62
-
63
-
64
-
65
-
66
-
67
-
68
-
69
-
70
-
71
-
72
-
73
-
74
-
75
-
76
-
77
-
78
-
79
-
80
-
81
-
82
-
83
-
84
-
85
-
86
-
87
-
88
-
89
-
90
-
91
-
92
-
93
-
94
-
95
-
96
-
97
-
98
-
99
-
100
-
101
-
102
-
103
-
104
-
105
-
106
-
107
-
108
-
109
-
110
-
111
-
112
-
113
-
114
-
115
-
116
-
117
-
118
-
119
-
120
-
121
-
122
-
123
-
124
-
125
-
126
-
127
-
128
-
129
-
130
-
131
-
132
-
133
-
134
-
135
-
136
-
137
-
138
-
139
-
140
-
141
-
142
-
143
 |
 |

NETWORK
USER’S GUIDE
Multi-Protocol On-board Ethernet Print Server and Wireless
(IEEE 802.11b/g) Ethernet Print Server
HL-3045CN
HL-3075CW
Please read this manual thoroughly before using the machine.
Keep the CD-ROM in a convenient place so you can use it quickly
if you need to.
Please visit us at http://solutions.brother.com/
where you can get
product support, the latest driver updates and utilities, and
answers to frequently asked questions (FAQs) and technical
questions.
Note: Not all models are available in all countries.
Version
0
ENG