Brother International HL 5370DW Users Manual - English
Brother International HL 5370DW - B/W Laser Printer Manual
 |
UPC - 012502622482
View all Brother International HL 5370DW manuals
Add to My Manuals
Save this manual to your list of manuals |
Brother International HL 5370DW manual content summary:
- Brother International HL 5370DW | Users Manual - English - Page 1
Brother Laser Printer USER'S GUIDE HL-5340D HL-5350DN HL-5370DW For visually-impaired users You can read this manual with Screen Reader 'text-to-speech' software. You must set up the hardware and install the driver before you can use the printer. Please use the Quick Setup Guide to set up the - Brother International HL 5370DW | Users Manual - English - Page 2
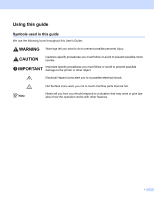
throughout this User's Guide: Warnings tell you what to do to prevent possible personal injury. Cautions specify procedures you must follow or avoid to prevent possible minor injuries. Important specify procedures you must follow or avoid to prevent possible damage to the printer or other object - Brother International HL 5370DW | Users Manual - English - Page 3
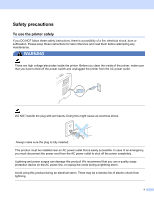
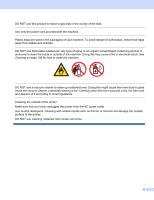
of a fire, electrical shock, burn or suffocation. Please keep these instructions for later reference and read them before attempting any maintenance. WARNING There are high voltage electrodes inside the printer. Before you clean the inside of the printer, make sure that you have turned off the power - Brother International HL 5370DW | Users Manual - English - Page 4
the vacuum cleaner, potentially starting a fire. Carefully clean the toner dust with a dry, lint-free cloth and dispose of it according to local regulations. Cleaning the outside of the printer: Make sure that you have unplugged the printer from the AC power outlet. Use neutral detergents. Cleaning - Brother International HL 5370DW | Users Manual - English - Page 5
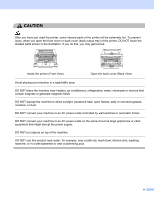
the front cover or back cover (back output tray) of the printer, DO NOT touch the shaded parts shown in the illustration. If you do this, you may get burned. Inside the printer (Front View) Open the back cover (Back View) Avoid placing your machine in a high-traffic area. DO NOT place the machine - Brother International HL 5370DW | Users Manual - English - Page 6
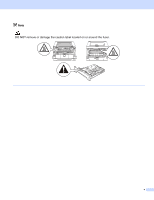
Note DO NOT remove or damage the caution label located on or around the fuser. v - Brother International HL 5370DW | Users Manual - English - Page 7
of IBM in the United States and/or other countries. Each company whose software title is mentioned in this manual has a Software License publication. © 2008 Brother Industries Ltd. Shipment of the Printer If for any reason you must ship your printer, carefully package the printer to avoid any - Brother International HL 5370DW | Users Manual - English - Page 8
on both sides of the paper 25 Manual duplex printing ...25 Automatic duplex printing ...29 Booklet printing...31 3 Driver and Software 32 Printer driver ...32 Features in the printer driver (for Windows 35 Using the BR-Script3 printer driver (PostScript® 3™ language emulation for Windows - Brother International HL 5370DW | Users Manual - English - Page 9
93 Toner cartridge ...94 Drum unit ...101 Cleaning ...106 Cleaning the outside of the printer 106 Cleaning the inside of the printer...108 Cleaning the paper pick-up roller...111 Cleaning the corona wires ...113 Cleaning the corona wire...113 7 Troubleshooting 115 Identifying your problem ...115 - Brother International HL 5370DW | Users Manual - English - Page 10
A Appendix 139 Printer specifications...139 Engine ...139 Controller ...140 Software ...141 Control panel ...141 Paper handling ...141 Media specifications ...142 Supplies ...142 Dimensions / weights...143 Other...143 Computer requirements...144 Important information for choosing your paper 145 - Brother International HL 5370DW | Users Manual - English - Page 11
Printer1 1 1 1 Quick Setup Guide Printer CD-ROM AC Power Cord Drum Unit and Toner Cartridge Assembly Interface cable 1 The interface cable at this time. Connecting the interface cable is done during the printer driver installation process. Make sure that you connect it to the USB port of - Brother International HL 5370DW | Users Manual - English - Page 12
About this Printer Third party USB ports are not supported by Macintosh. „ Parallel cable 1 DO NOT use a parallel interface cable that is longer than 6 feet (2.0 meters). Use a shielded interface cable that is IEEE 1284-compliant. „ Network cable (For HL-5350DN and 5370DW only) Use a straight - Brother International HL 5370DW | Users Manual - English - Page 13
1 2 3 7 9 6 4 5 8 1 Front Cover Release Button 2 Control Panel 3 Face-down Output Tray Support Flap 1 (Support Flap 1) 4 Front Cover 5 Paper Tray 6 Power Switch 7 Face-down Output Tray 8 Multi-purpose Tray (MP Tray) 9 Face-down Output Tray Support Flap 2 (Support Flap 2) About this Printer 1 1 3 - Brother International HL 5370DW | Users Manual - English - Page 14
2 3 About this Printer 1 1 10 9 8 7 6 4 5 1 Back Cover (Back Output Tray) 2 Duplex Tray 3 AC Power Connector 4 10BASE-T / 100BASE-TX (Ethernet) Port (HL-5350DN and HL-5370DW only) 5 Network Activity LEDs (Light Emitting Diodes) (For HL-5350DN and HL-5370DW only) 6 HL-5370DW: Wireless Activity - Brother International HL 5370DW | Users Manual - English - Page 15
appliances, such as an air conditioner, copier, shredder and so on. If you cannot avoid using the printer with these appliances, we recommend that you use a voltage transformer or a high-frequency noise filter. Use a voltage regulator if the power source is not stable. Environment 1 „ Put your - Brother International HL 5370DW | Users Manual - English - Page 16
of paper The printer loads paper from the installed paper tray or the multi-purpose tray. The names for the paper trays in the printer driver and this guide are as follows: 2 2 2 Paper tray Multi-purpose tray Optional lower tray unit Duplex unit for automatic duplex printing Tray 1 MP Tray Tray - Brother International HL 5370DW | Users Manual - English - Page 17
Printing Methods Media type Envelopes Tray 1 Tray 2/ Tray 3 MP Tray p Up to 3 sheets DX Choose the media type from the printer driver Envelopes Env. Thin 2 Env. Thick Paper size Number of sheets (80 g/m2 / 20 lb) Tray 1 A4, Letter, Legal 1, B5 (ISO), Executive, A5, A6, B6 (ISO), Folio - Brother International HL 5370DW | Users Manual - English - Page 18
19309 specifications. IMPORTANT DO NOT use ink jet paper because it may cause a paper jam or damage your printer. If you use paper that is not recommended, a paper jam or misfeed may occur in the printer. DO NOT put different types of paper in the paper tray at the same time because it may cause - Brother International HL 5370DW | Users Manual - English - Page 19
were previously printed by a laser printer. „ DO NOT use envelopes that cannot be printer. This damage is not covered under any Brother warranty or service agreement. Note • DO NOT print envelopes using duplex printing. • You must choose the same paper size from your application as the paper in the tray - Brother International HL 5370DW | Users Manual - English - Page 20
cannot be printed on is shown in the table below: Note 2 When using BR-Script emulation, the edges of the paper that cannot be printed on are 4.32 mm (0.17 in). Portrait 2 A4 1 4.23 mm (0.16 in.) 2 6.01 mm (0.24 in.) 3 4.23 mm (0.16 in.) 4 6.01 - Brother International HL 5370DW | Users Manual - English - Page 21
for Tray1. (For the recommended paper to use, see About paper on page 6.) a Pull the paper tray completely out of the printer. Printing Methods 2 2 2 2 b While pressing the blue paper-guide release lever (1), slide the paper guides to fit the paper size. Make sure that the guides are firmly in the - Brother International HL 5370DW | Users Manual - English - Page 22
of the paper tray. 2 1 c Put paper in the tray, and make sure that the paper is below the maximum paper mark (bbb). The side to be printed on must be face down. IMPORTANT Make sure the paper guides touch the sides of the paper so it will feed properly. d Put the paper tray firmly back in the printer - Brother International HL 5370DW | Users Manual - English - Page 23
Printing Methods e Lift up the support flap to prevent paper from sliding off the face-down output tray, or remove each page as soon as it comes out of the printer. 2 1 13 - Brother International HL 5370DW | Users Manual - English - Page 24
the printer driver: Paper Size......(1) Media Type......(2) Paper Source......(3) and any other settings you may want to make. (See Chapter 3: Driver and Software.) 2 „ Windows® printer driver 1 2 „ BR-Script printer driver for Windows® 1 2 3 3 Note To use the BR-Script printer driver for - Brother International HL 5370DW | Users Manual - English - Page 25
„ Macintosh printer driver 1 Printing Methods 2 3 g Send the print data to the printer. IMPORTANT When printing on transparencies, remove each transparency at once after printing. Stacking the printed transparencies may cause a paper jam or the transparency to curl. 15 - Brother International HL 5370DW | Users Manual - English - Page 26
paper to use, see About paper on page 6.) a Open the MP tray and lower it gently. Printing Methods 2 2 b Pull out the MP tray support flap (1). 1 c Lift up the support flap to prevent paper from sliding off the face-down output tray, or remove each page as soon as it comes out of the printer - Brother International HL 5370DW | Users Manual - English - Page 27
paper in the MP tray. Make sure that the paper stays under the maximum paper mark (b) on both sides of the tray. The side to be printed on must be face up with the leading edge (top of the paper) in first. 2 e While pressing the paper-guide release lever (1), slide the paper guide to fit the paper - Brother International HL 5370DW | Users Manual - English - Page 28
the printer driver: Paper Size......(1) Media Type......(2) Paper Source......(3) and any other settings you may want to make. (See Chapter 3: Driver and Software.) 2 „ Windows® printer driver 1 2 „ BR-Script printer driver for Windows® 1 2 3 3 Note To use the BR-Script printer driver for - Brother International HL 5370DW | Users Manual - English - Page 29
„ Macintosh printer driver 1 Printing Methods 2 3 g Send the print data to the printer. IMPORTANT When printing on transparencies, remove each transparency at once after printing. Stacking the printed transparencies may cause a paper jam or the transparency to curl. 19 - Brother International HL 5370DW | Users Manual - English - Page 30
2 When the back output tray is pulled down, the printer has a straight paper path from the MP tray through to the back of the printer. Use this paper feed and output method when you want to print on thick paper, labels or envelopes. (For the recommended paper to use, see About paper on page 6 and - Brother International HL 5370DW | Users Manual - English - Page 31
d Pull out the MP tray support flap (1). Printing Methods 2 1 e Put paper in the MP tray. Make sure that the paper stays under the maximum paper mark (b). Note • DO NOT put more than 3 envelopes in the MP tray. • Envelope joints that are sealed by the manufacturer should be secure. • The side to - Brother International HL 5370DW | Users Manual - English - Page 32
Methods g Choose the following from the printer driver: Paper Size......(1) Media Type......(2) Paper Source......(3) and any other settings you may want to make. (See Chapter 3: Driver and Software.) 2 „ Windows® printer driver 1 2 „ BR-Script printer driver for Windows® 1 2 3 3 22 - Brother International HL 5370DW | Users Manual - English - Page 33
or Envelope C6, 2 choose User Defined... (For more information on envelope sizes, see Paper size on page 146.) „ Macintosh printer driver 1 3 Note For other envelopes which are not listed in the printer driver, such as Envelope #9 or Envelope C6, choose Custom Page Sizes. (For more information - Brother International HL 5370DW | Users Manual - English - Page 34
print again. • When you put paper in the MP tray, remember the following: • Put the leading edge (top of the paper) in first and push it gently into the tray. • Make sure that the paper is straight and in the proper position in the MP tray. If it is not, the paper may not be fed properly - Brother International HL 5370DW | Users Manual - English - Page 35
use bond paper. Manual duplex printing 2 „ The BR-Script printer driver (PostScript® 3™ emulation) does not support manual duplex printing. „ If you are using the Macintosh Printer Driver, see Duplex Printing on page 62. Manual duplex printing from the paper tray 2 a In the printer driver choose - Brother International HL 5370DW | Users Manual - English - Page 36
, in the same order 1, put them back in the paper tray with the side to be printed on (blank side) face down. Follow the instructions on the computer screen. 1 Put papers in opposite order when the Back output tray is opened. f The printer will now automatically print all the odd-numbered pages on - Brother International HL 5370DW | Users Manual - English - Page 37
the printer driver choose the Basic tab, and choose the Duplex printing mode from the Duplex / Booklet setting, and then from the Basic tab choose the Paper Source to be MP Tray. b Click the Duplex Settings... button, the Duplex Settings will appear. c Choose Manual Duplex from Duplex Mode settings - Brother International HL 5370DW | Users Manual - English - Page 38
side) face up. Follow the instructions on the computer screen. 2 1 Put papers in opposite order when the Back output tray is opened. f The printer will now automatically print all the odd-numbered pages. Paper orientation for manual duplex printing 2 The printer prints the second page first. If - Brother International HL 5370DW | Users Manual - English - Page 39
printing If you are using the Macintosh Printer Driver, see Duplex Printing on page 62. a Put paper in the paper tray or MP tray. b For the Windows® printer driver 1 Open the Properties dialog box in the printer driver. 2 From the General tab, click the Printing Preferences button. 3 From the Basic - Brother International HL 5370DW | Users Manual - English - Page 40
printer driver 1 Open the Properties dialog box in the printer driver. 2 From the General tab, click the Printing Preferences button. 2 3 From the Layout tab, choose Orientation, Print on Both Sides and Page Order. 4 Click OK. The printer will print on both sides of the paper automatically - Brother International HL 5370DW | Users Manual - English - Page 41
a Put paper in the paper tray or MP tray. b For the Windows® printer driver 1 Open the Properties dialog box in the printer driver. 2 From the General tab, click the Printing Preferences button. 3 From the Basic tab, choose Booklet from the Duplex / Booklet setting. 4 Click the Duplex Settings - Brother International HL 5370DW | Users Manual - English - Page 42
language (PDL). 3 The printer drivers for the supported versions of Windows® and Macintosh are on the CD-ROM we have supplied or on the Brother Solutions Center at http://solutions.brother.com/. Install the drivers by following the Quick Setup Guide. The latest printer driver can be downloaded - Brother International HL 5370DW | Users Manual - English - Page 43
Edition Mac OS X 10.3.9 or greater p p Linux® 1 p 1 For the information on supported Linux distribution and to download the printer driver, visit us at http://solutions.brother.com/. You can also download the printer driver from a link on the supplied CD-ROM. If you download from a link on CD - Brother International HL 5370DW | Users Manual - English - Page 44
You can change the following printer settings when you print from your computer. „ Paper Size „ Orientation „ Copies „ Media Type „ Resolution „ Print Settings „ Multiple Page „ Duplex / Booklet 3 „ Paper Source „ Scaling „ Reverse Print „ Use Watermark 1 3 „ Header-Footer Print 3 „ Toner Save Mode - Brother International HL 5370DW | Users Manual - English - Page 45
printer driver.) Printer Properties dialog box. Basic tab 3 You can also change settings by clicking the illustration on the left side of the Basic tab. 1 6 2 3 5 4 a Choose the Paper Size, Orientation, Copies, Media Type , Resolution and Print Settings(1). b Choose the Multiple Page and Duplex - Brother International HL 5370DW | Users Manual - English - Page 46
types of media in your printer. For the best print quality, select the type of media that you wish to use. Plain Paper Env. Thick Thin Paper Env. Thin Thick Paper Recycled Paper Thicker Paper Envelopes Bond Paper Transparencies Note • When using ordinary plain paper (20 to 28 lb) choose - Brother International HL 5370DW | Users Manual - English - Page 47
Driver and Software Resolution You can choose the resolution as follows. „ 300 dpi „ 600 dpi „ HQ 1200 „ 1200 dpi Note If you use the high quality 1200 dpi setting (1200 x 1200 dpi) the print speed will be slower. 3 3 Print Setting 3 You can manually change the print setting. „ General This - Brother International HL 5370DW | Users Manual - English - Page 48
set the following settings. • Duplex Mode • Use Duplex Unit In this mode, the printer prints on both sides of the paper automatically. • Manual Duplex In this mode, the printer prints all the even numbered page first. Then the printer driver will stop and show the instructions required to re - Brother International HL 5370DW | Users Manual - English - Page 49
Driver and Software Paper Source 3 You can choose Auto Select, Tray1, Tray2 1, Tray3 1, MP Tray or Manual and specify separate trays for printing the first page and for printing from the second page onwards. 1 Tray2 and Tray3 are options. You must add Tray2 or Tray3 in - Brother International HL 5370DW | Users Manual - English - Page 50
Driver and Software Use Watermark 3 You can put a logo or text into will print. Toner Save Mode 3 You can save running costs by turning on the Toner Save Mode, which reduces the print density. Note • We do not recommend Toner Save for printing Photo or Gray Scale images. • Toner Save Mode - Brother International HL 5370DW | Users Manual - English - Page 51
Driver and Software „ Header-Footer Print Lock Lock the current settings of the Header-Footer Print option to prevent changes being made. Other Print Options... You can set the following in Printer Function: „ Use Reprint „ Sleep Time „ Macro „ Page Protection „ Density Adjustment „ Error Message - Brother International HL 5370DW | Users Manual - English - Page 52
http://solutions.brother.com/ and see "Information". Macro 3 You can save a page of a document as a macro to printer memory. Printer Default. The page protection feature allows the printer to create the full-page image to be printed in memory before physically moving the paper through the printer - Brother International HL 5370DW | Users Manual - English - Page 53
print quality problem. „ Reduce Paper Curl If you choose this setting, the paper curl may be reduced. If you are printing only a few pages, you do not need to choose this setting. We recommend that you change the printer driver setting in Media Type to a Thin Paper setting. „ Improve Toner Fixing - Brother International HL 5370DW | Users Manual - English - Page 54
Driver and Software Accessories tab 3 Note From the Start menu, select Control Panel and then Printers and Faxes 1. Right-click the Brother HL5340D/HL-5350DN/HL-5370DW series icon and select Properties to access the Accessories tab. 1 Printers for Windows® 2000 users. 3 When you install the - Brother International HL 5370DW | Users Manual - English - Page 55
finds the currently installed optional devices and shows the available settings in the printer driver. When you click Auto Detect, options that are installed on the printer will be listed in Installed Options(1). You can manually add or remove the options by choosing an optional device you 3 want - Brother International HL 5370DW | Users Manual - English - Page 56
is a website offering information about your Brother product including FAQs (Frequently Asked Questions), User's Guides, driver updates and tips for using your printer. „ Genuine Supplies Website...(2) You can visit our website for original/genuine Brother supplies by clicking this button. „ Print - Brother International HL 5370DW | Users Manual - English - Page 57
Driver and Software Status Monitor 3 This reports the printer status (any errors that may happen with the printer) when printing. If you would like to turn the status monitor on, follow these steps: Click the Start button, All Programs 1, Brother, your printer (e.g. Brother HL-5370DW), and then - Brother International HL 5370DW | Users Manual - English - Page 58
Settings tab 3 Note From the Start menu, select Control Panel and then Printers and Faxes 1. Right-click the Brother HL5340D/HL-5350DN/HL-5370DW BR-Script3 icon and select Properties to access the Device Settings tab. 1 Printers for Windows® 2000 users. Choose the options you have installed. 48 - Brother International HL 5370DW | Users Manual - English - Page 59
clicking Printing Preferences... in the General tab of the Brother HL-5340D/HL-5350DN/HL-5370DW BR-Script3 Properties dialog box. „ Layout tab 3 You can change the layout setting by choosing the settings for Orientation, Print on Both Sides (Duplex), Page Order and Page Per Sheet. „ Orientation - Brother International HL 5370DW | Users Manual - English - Page 60
„ Paper/Quality tab Choose the Paper Source. Driver and Software 3 „ Paper Source You can choose Automatically Select, Auto Select, Tray1, Tray2 1, Tray3 1, MP Tray or Manual Feed. 1 Tray2 and Tray3 are options. 50 - Brother International HL 5370DW | Users Manual - English - Page 61
Driver and Software 3 1 2 3 a Choose the Paper Size and Copy Count(1). „ Paper Size From the drop-down box choose the Paper printer fonts for printing documents that contain TrueType fonts. This will permit faster printing; however, you might lose special characters not supported by the printer - Brother International HL 5370DW | Users Manual - English - Page 62
types of media in your printer. For the best print quality, select the type of media that you wish to use. Plain Paper Env. Thick Thin Paper Env. Thin Thick Paper Recycled Paper Thicker Paper Envelopes Bond Paper Transparencies „ Toner Save You can conserve toner use with this feature. When - Brother International HL 5370DW | Users Manual - English - Page 63
you set High Quality Image Printing to On, the printing speed will be slower. „ Reduce Paper Curl If you choose this setting, the paper curl may be reduced. If you are printing only a few pages, you do not need to choose this setting. We recommend that you change the printer driver setting in Media - Brother International HL 5370DW | Users Manual - English - Page 64
the printer driver (for Macintosh) This printer supports Mac OS X 10.3.9 or greater. Note The screens in this section are based on Mac OS X 10.5. The screens on your Macintosh will vary depending on your operating system. 3 3 Choosing page setup options 3 You can set the Paper Size, Orientation - Brother International HL 5370DW | Users Manual - English - Page 65
Driver and Software „ For Mac OS X 10.5 For more page setup options, click the disclosure triangle beside the Printer pop-up menu. 3 Choosing printing options 3 To control special printing features, choose the options in the Print dialog box. 55 - Brother International HL 5370DW | Users Manual - English - Page 66
make the following cover page settings: Driver and Software 3 3 „ Print Tray 2 or Manual, and specify separate trays for printing the first page and for printing from the second page onwards. 1 Tray2 and Tray3 are options. 2 The printer automatically turns on the Manual Feed mode when you put paper - Brother International HL 5370DW | Users Manual - English - Page 67
Layout Driver and Software 3 3 „ Pages per Sheet Choose how many pages will appear on each side of the paper. „ Layout Direction When you specify the pages per sheet, you can also specify the direction of the layout. „ Border If you want to add a border, use this function. „ Two-sided See Duplex - Brother International HL 5370DW | Users Manual - English - Page 68
settings by choosing a setting in the Print Settings list: Basic tab Driver and Software 3 3 „ Media Type You can change the media type to one of the following: „ Plain Paper „ Thin Paper „ Thick Paper „ Thicker Paper „ Bond Paper „ Transparencies „ Envelopes „ Env. Thick „ Env. Thin „ Recycled - Brother International HL 5370DW | Users Manual - English - Page 69
Driver and Software „ Toner Save Mode You can conserve toner use with this feature. When you set Toner Save Mode to On, print appears lighter. The default setting is Off. Note • We do not recommend Toner Save for printing Photo or Gray Scale images. • Toner Save Mode is not available for 1200 - Brother International HL 5370DW | Users Manual - English - Page 70
print quality problem. „ Reduce Paper Curl If you choose this setting, the paper curl may be reduced. If you are printing only a few pages, you do not need to choose this setting. We recommend that you change the printer driver setting in Media Type to a thin setting. 3 „ Improve Toner Fixing - Brother International HL 5370DW | Users Manual - English - Page 71
„ Support Driver and Software 3 „ Brother Solutions Center The Brother Solutions Center (http://solutions.brother.com/) is a website offering information about your Brother product including FAQs (Frequently Asked Questions), User's Guides, driver updates and tips for using your printer. „ Visit - Brother International HL 5370DW | Users Manual - English - Page 72
Printing „ Use duplex unit. Select Layout. Choose Long-edge binding or Short-edge binding in Two-Sided. Driver and Software 3 3 „ Manual duplex Select Paper Handling. „ For Mac OS X 10.3 and 10.4 Choose Odd numbered pages and print. Turn the paper over and reload it in the tray, and then choose - Brother International HL 5370DW | Users Manual - English - Page 73
Driver and Software „ For Mac OS X 10.5 Choose Odd Only and print. Turn the paper over and reload it in the tray, and then choose Even Only and print. 3 Status Monitor 3 This reports the printer status (any errors that may happen with the printer) when printing. If you would like to turn the - Brother International HL 5370DW | Users Manual - English - Page 74
instructions. Note If you use a USB cable, only one printer driver per printer can be registered in the Printer Setup Utility (For Mac OS X 10.3 and 10.4) or Print & Fax (For Mac OS X 10.5). Before installing the BR-Script3 printer driver, delete from the Printer list any other Brother drivers - Brother International HL 5370DW | Users Manual - English - Page 75
b Open the Utilities folder. c Double-click the Printer Setup Utility icon. Driver and Software 3 d Click Add. For Mac OS X 10.3 users, go to e. For Mac OS X 10.4 or greater users, go to f. 65 - Brother International HL 5370DW | Users Manual - English - Page 76
e Choose USB. Driver and Software 3 f Choose the model name and make sure that Brother is in Printer Model (Print Using), then select the model name that shows BR-Script in the Model Name (Model), and then click Add. For Mac OS X 10.3 users: 66 - Brother International HL 5370DW | Users Manual - English - Page 77
For Mac OS X 10.4 or greater users: Driver and Software 3 g From the Printer Setup Utility menu, choose Quit Printer Setup Utility. 67 - Brother International HL 5370DW | Users Manual - English - Page 78
„ For Mac OS X 10.5 a From the Apple menu choose System Preferences. b Select Print & Fax. Driver and Software 3 68 - Brother International HL 5370DW | Users Manual - English - Page 79
c Click +. Driver and Software 3 d Choose the Printer Name and choose Select a driver to use... in Print Using, and then choose the Printer Name that shows BR-Script in Model Name, and click Add. e Quit System Preferences. 69 - Brother International HL 5370DW | Users Manual - English - Page 80
and Windows Server® 2003/2008 3 a Click the Start button, point to All Programs 1, Brother and then to your printer name. b Click UnInstall. c Follow the on-screen instructions. 1 Programs for windows® 2000 users Printer driver for Macintosh 3 For Mac OS X 10.3 and 10.4 3 a Disconnect the USB - Brother International HL 5370DW | Users Manual - English - Page 81
Driver and Software e Drag the folder (from the Macintosh HD (Startup Disk), choose Library, Printers, Brother) into the Trash and then empty the Trash. f Restart the Macintosh. 3 71 - Brother International HL 5370DW | Users Manual - English - Page 82
installing BRAdmin Light on Windows®, please see the Quick Setup Guide we provided with the machine. For Macintosh users, BRAdmin Light will be installed automatically when you install the printer driver. If you have already installed the printer driver, you do not have to install it again. For - Brother International HL 5370DW | Users Manual - English - Page 83
which this printer supports the PCL6 language of the Hewlett-Packard LaserJet laser printer. Many applications support this type of laser printer. Using this mode will allow your printer to run at its best with those applications. „ BR-Script 3 Mode BR-Script is an original Brother page description - Brother International HL 5370DW | Users Manual - English - Page 84
turn the high-speed and bi-directional parallel communications on or off by using Remote Printer Console. (See Remote Printer Console on page 75.) Note This function takes a few seconds to work. If you want to speed up printing, choose the required interface manually by using Remote Printer Console - Brother International HL 5370DW | Users Manual - English - Page 85
Driver and Software Remote Printer Console 3 Remote Printer Console is software to change many of the printer settings independently of your application. For example, you can change the settings for printer margin, sleep mode, character set and so on. These settings are then remembered and used - Brother International HL 5370DW | Users Manual - English - Page 86
4 occur in the back of the printer. 2) Toner LED The Toner LED indicates when the Toner is low or at the end of its life. 3) Drum LED The Drum LED indicates when the Drum is nearing the end of its life. 4) Paper LED The Paper LED indicates when the printer is in one of the following states - Brother International HL 5370DW | Users Manual - English - Page 87
LED Control Panel Printer status Sleep mode The printer is in sleep mode. Pressing Go wakes up the printer from sleep mode to ready mode. 4 Ready to print The printer is ready to print. Warming up The printer is warming up. The Status LED will turn on for 1 second and off for 1 second. 77 - Brother International HL 5370DW | Users Manual - English - Page 88
toner Replace the toner cartridge with a new one. See Replacing the toner cartridge on page 95. Cartridge error The drum unit assembly is not installed correctly. Take the drum unit out of the machine and put it back in. No toner Open the front cover, install the toner cartridge. See Toner cartridge - Brother International HL 5370DW | Users Manual - English - Page 89
you get a new drum unit to replace the current one. See Replacing the drum unit on page 102. The Drum LED will turn on for 2 seconds and off for 3 seconds. 4 Replace drum Replace the drum with a new one. See Replacing the drum unit on page 102. No paper Put paper in the tray. Then press Go. See - Brother International HL 5370DW | Users Manual - English - Page 90
will turn on for 0.5 seconds and off for 0.5 seconds. Size mismatch Put the same size paper in the paper tray or MP tray that is selected in the printer driver, and then press Go. Paper jam (back cover or duplex tray) Clear the paper jam. See Paper jams and how to clear them on page 120. If the - Brother International HL 5370DW | Users Manual - English - Page 91
of the printer. Too many trays Maximum number of optional trays is two. Remove additional trays. Buffer error Check the cable connection between the PC and printer. Memory full 4 The printer memory is full and the printer cannot print full pages of a document. See Solving print problems on - Brother International HL 5370DW | Users Manual - English - Page 92
the error. LED error indication 4 LEDs Back Cover Toner Fuser unit failure 1 Main PCB failure Laser unit failure Main motor failure High voltage failure DIMM error FAN Failure Drum Paper Status 1 If this error occurs, turn off the printer power switch, wait a few seconds, and then turn - Brother International HL 5370DW | Users Manual - English - Page 93
For example, the LED indication below shows a fuser unit failure. Control Panel 4 Make a note of the indication, referring to the table on page 82, and report the error status to your dealer or Brother Customer Service. Note Make sure that the front cover is completely closed before you report a - Brother International HL 5370DW | Users Manual - English - Page 94
If you press Job Cancel while printing, the printer will immediately stop printing and will then eject the paper. Cancel all the received jobs: 4 To will be printed. If you want to use the reprint function open the driver's Properties dialog box and go to the Advanced tab, select the Other Print - Brother International HL 5370DW | Users Manual - English - Page 95
down until the Back Cover, Toner, 4 Drum and Paper LEDs light up. Release Go. Make sure that the Back Cover, Toner, Drum and Paper LEDs are off. d Press Go again. The printer will print a test page. Using the printer driver 4 If you are using the Windows® printer driver, click the Print Test - Brother International HL 5370DW | Users Manual - English - Page 96
. c Press Go three times within 2 seconds. The printer will print the current printer settings page. 4 4 4 Using the printer driver 4 If you are using the Windows® printer driver, you can print the current printer settings page by clicking the Print Settings button in the Support dialog. 86 - Brother International HL 5370DW | Users Manual - English - Page 97
up. Release Go. Make sure that the Back Cover, Toner, Drum and Paper LEDs are off. d Press Go twice. The printer will print a list of the internal fonts. Using the printer driver 4 If you are using the Brother's Windows® printer driver, you can print a list of the internal fonts by clicking - Brother International HL 5370DW | Users Manual - English - Page 98
the print server back to its factory default settings (resetting all information such as the password and IP address information), follow these steps: Network default settings (HL-5350DN / HL-5370DW only) 4 a Turn off the printer. b Make sure that the front cover is closed and the power cord - Brother International HL 5370DW | Users Manual - English - Page 99
up to 250 sheets of 80 g/m2 (21 lb) paper. When both optional trays are installed, the printer can hold up to 800 sheets of plain paper. If you want to buy an optional lower tray unit, call the dealer you bought the printer from. For setup, see the User's Guide that we have supplied with the lower - Brother International HL 5370DW | Users Manual - English - Page 100
SO-DIMM (memory module) 5 For HL-5340D The HL-5340D printer has 16 MB of standard memory and one slot for optional memory expansion. You can expand the memory up to 528 MB by installing dual in-line memory modules (SO-DIMMs). For HL-5350DN / HL-5370DW The printers have 32 MB of standard memory and - Brother International HL 5370DW | Users Manual - English - Page 101
you install or remove the DIMM. b Remove the DIMM cover. 5 c Unpack the DIMM and hold it by its edges. CAUTION To prevent damage to the printer from static electricity, DO NOT touch the memory chips or the board surface. d Hold the DIMM by the edges and align the notches in the - Brother International HL 5370DW | Users Manual - English - Page 102
Put the DIMM cover back on. Options 5 f Reconnect the interface cable to your printer. Plug the printer back in, and then turn on the power switch. Note To make sure that you have installed the DIMM properly, you can print the printer settings page that shows the current memory size. See Print the - Brother International HL 5370DW | Users Manual - English - Page 103
hot. To prevent injury, when you open the front cover or back cover (back output tray) of the printer, DO NOT touch the shaded parts shown in the illustration. If you do this, you may get burned. Consumables Toner Cartridge See Toner cartridge on page 94. 6 Drum Unit See Drum unit on page 101. 93 - Brother International HL 5370DW | Users Manual - English - Page 104
Routine Maintenance Toner cartridge 6 The life of the original toner cartridge that came with the printer may be either a standard 1 or high yield toner cartridge 2, and depends on the model and country you bought the printer in. 1 Standard toner cartridges print approximately 3,000 A4 or Letter- - Brother International HL 5370DW | Users Manual - English - Page 105
6 Replacing the toner cartridge 6 6 Note • To ensure high quality printing, we recommend that you use only genuine Brother toner cartridges. When you want to buy toner cartridges, call your dealer. • We recommend that you clean the printer when you replace the toner cartridge. See Cleaning on - Brother International HL 5370DW | Users Manual - English - Page 106
b Take out the drum unit and toner cartridge assembly. Routine Maintenance IMPORTANT We recommend that you put the drum unit and toner cartridge assembly on a piece of disposable paper or cloth in case you accidentally spill or scatter toner. 6 To prevent damage to the printer caused by static - Brother International HL 5370DW | Users Manual - English - Page 107
problems, DO NOT touch the shaded parts shown in the illustrations. Note • Be sure to seal up the toner cartridge tightly in a bag so that toner powder does not spill out of the cartridge. • Go to http://www.brother-usa.com/environment/ for instructions on how to return the used toner cartridge - Brother International HL 5370DW | Users Manual - English - Page 108
you put it in the printer. If toner cartridges are left unpacked for a long time the toner life will be shortened. 6 If an unpacked drum unit is put in direct sunlight or room light, the unit may be damaged. CAUTION Put the toner cartridge in the drum unit immediately after you have removed - Brother International HL 5370DW | Users Manual - English - Page 109
cannot guarantee this optimum performance if toner or toner cartridges of other specifications are used. Brother does not therefore recommend the use of cartridges other than genuine Brother branded cartridges with this machine. If damage is caused to the drum unit or other part of this machine - Brother International HL 5370DW | Users Manual - English - Page 110
the tab to the home position (a) (1). If you do not, printed pages may have a vertical stripe. h Put the drum unit and toner cartridge assembly back in the printer. Close the front cover. Note DO NOT turn off the printer power switch or open the front cover until the Status LED lights up. 100 - Brother International HL 5370DW | Users Manual - English - Page 111
genuine Brother toner. The printer should be used only in a clean, dustfree environment with adequate ventilation. • Printing with a third-party drum unit may reduce not only the print quality but also the quality and life of the printer itself. Warranty coverage does not apply to problems caused - Brother International HL 5370DW | Users Manual - English - Page 112
unit, clean the inside of the printer.See Cleaning on page 106. When you replace the drum unit with a new one, you need to reset the drum counter by completing the following steps: a Press the front cover release button and then open the front cover. 6 b Take out the drum unit and toner cartridge - Brother International HL 5370DW | Users Manual - English - Page 113
Routine Maintenance IMPORTANT We recommend that you put the drum unit and toner cartridge assembly on a piece of disposable paper or cloth in case you accidentally spill or scatter toner. To prevent damage to the printer caused by static electricity, DO NOT touch the electrodes shown in the - Brother International HL 5370DW | Users Manual - English - Page 114
quality problems, DO NOT touch the shaded parts shown in the illustrations. 6 d Unpack the new drum unit. IMPORTANT Wait to unpack a drum unit until immediately before you put it in the printer. Exposure to direct sunlight or room light may damage the drum unit. e Put the toner cartridge firmly - Brother International HL 5370DW | Users Manual - English - Page 115
the drum unit and toner cartridge assembly back in the printer. Routine Maintenance g Press and hold down the Go for about 4 seconds until all the LEDs light up. Once all four LEDs are lit, release Go. 6 IMPORTANT Do not reset the drum counter when you only replace the toner cartridge. h Close - Brother International HL 5370DW | Users Manual - English - Page 116
the outside and inside of the printer regularly with a dry, lint-free cloth. When you replace the toner cartridge or the drum unit, make sure that you clean the inside of the printer. If printed pages are stained with toner, clean the inside of the printer with a dry, lint-free cloth. Cleaning - Brother International HL 5370DW | Users Manual - English - Page 117
lint-free cloth to remove dust. Routine Maintenance d Remove anything that is stuck inside the paper tray. e Wipe the inside of the paper tray with a dry, lint-free cloth to remove dust. 6 f Put the paper tray back in the printer. g Plug the printer back in, and then turn on the power switch. 107 - Brother International HL 5370DW | Users Manual - English - Page 118
Cleaning the inside of the printer a Turn off the printer power switch and then unplug the printer. Routine Maintenance 6 b Press the front cover release button and then open the front cover. 6 c Take out the drum unit and toner cartridge assembly. 108 - Brother International HL 5370DW | Users Manual - English - Page 119
you touch the internal parts of the printer. IMPORTANT 6 We recommend that you put the drum unit and toner cartridge assembly on a piece of disposable paper or cloth in case you accidentally spill or scatter toner. Handle the toner cartridge carefully. If toner scatters on your hands or clothes - Brother International HL 5370DW | Users Manual - English - Page 120
d Wipe the scanner window with a dry, lint-free cloth. Routine Maintenance 6 e Put the drum unit and toner cartridge assembly back in the printer. f Close the front cover. g Plug the printer back in, and then turn on the power switch. 110 - Brother International HL 5370DW | Users Manual - English - Page 121
pick-up roller is stained, the printer may not feed paper. In that case, clean the paper pick-up roller as follows: a Turn off the power switch and unplug the printer. 6 b Unplug the power cord and interface cable from the printer. c Pull the paper tray out of the printer. d Dampen a soft cloth with - Brother International HL 5370DW | Users Manual - English - Page 122
e Wipe the two paper pick-up rollers (1) inside the printer. 1 f Put the paper tray back in the printer. Routine Maintenance 6 g Make sure that you have turned off the power switch, and then connect the power cord and interface cable to the printer. h Plug in the power cord and turn on the power - Brother International HL 5370DW | Users Manual - English - Page 123
Cleaning the corona wires Cleaning the corona wire If you have print quality problems, clean the corona wire as follows: a Press the front cover release button and then open the front cover. Routine Maintenance 6 6 6 b Take out the drum unit and toner cartridge assembly. 113 - Brother International HL 5370DW | Users Manual - English - Page 124
Routine Maintenance IMPORTANT We recommend that you put the drum unit and toner cartridge assembly on a piece of disposable paper or cloth in case you accidentally spill or scatter toner. To prevent damage to the printer caused by static electricity, DO NOT touch the electrodes shown in the - Brother International HL 5370DW | Users Manual - English - Page 125
been removed. „ The toner cartridge and drum unit are installed properly. „ The front and back covers are fully closed. „ Paper is inserted properly in the paper tray. „ The interface cable is securely connected to the printer and the computer. „ The correct driver for the printer has been chosen - Brother International HL 5370DW | Users Manual - English - Page 126
the drum unit on page 102. Replace Drum „ See Replacing the drum unit on page 102 Duplex Disabled „ Close the back cover of the printer and put the duplex tray back in. Drum Error „ See Cleaning the corona wire on page 113. Front Cover is Open „ Close the front cover of the printer. 7 Fuser - Brother International HL 5370DW | Users Manual - English - Page 127
Tray 3. Replace Fuser Unit Call your dealer or Brother Customer Service for a replacement fuser unit. Replace Laser Unit Replace Toner Toner Low Call your dealer or Brother Customer Service for a replacement laser unit. „ See Replacing the toner cartridge on page 95. „ Buy a new toner cartridge - Brother International HL 5370DW | Users Manual - English - Page 128
Troubleshooting Error message printout 7 The printer can also report problems by printing an error driver and try again. The best combination of these settings will vary depending on your document: „ Graphics 1 „ TrueType Mode 1 „ Use Printer TrueType® Fonts 1 Choose the Basic tab, choose Manual - Brother International HL 5370DW | Users Manual - English - Page 129
Troubleshooting Paper handling 7 First, make sure that you are using paper that meets Brother recommended paper specifications. (See About paper on page 6.) Problem Recommendation The printer does not feed paper. „ If there is paper in the paper tray, make sure it is straight. If the paper is - Brother International HL 5370DW | Users Manual - English - Page 130
Troubleshooting Paper jams and how to clear them 7 Jam MP tray / Tray1 / Tray2 / Tray3 / Inside 7 If a paper jam occurs inside the MP tray or paper tray, the printer will flash the Paper LED as shown below. 7 CAUTION After you have just used the printer, some internal parts of the printer will be - Brother International HL 5370DW | Users Manual - English - Page 131
remove all paper from the paper tray and straighten the stack when you add new paper. This helps prevent multiple sheets of paper from feeding through the printer at one time and prevents paper jams. • Please confirm that you have installed both a toner cartridge and a drum unit in the machine - Brother International HL 5370DW | Users Manual - English - Page 132
spill or scatter toner. To prevent damage to the printer caused by static electricity, DO NOT touch the electrodes shown in the illustration. c Close the front cover. 7 Note Do not put the drum unit and toner cartridge assembly back in at this point. d Pull the paper tray completely out of - Brother International HL 5370DW | Users Manual - English - Page 133
e Pull the jammed paper down and out of the printer. Troubleshooting f Push down the blue lock lever and take the toner cartridge out of the drum unit. Clear the jammed paper if there is any inside the drum unit. 7 IMPORTANT Handle the toner cartridge carefully. If toner scatters on your hands or - Brother International HL 5370DW | Users Manual - English - Page 134
Troubleshooting g Put the toner cartridge back into the drum unit until you hear it lock into place. If you put the cartridge in properly, the blue lock lever will lift automatically. h Open the front cover. Put the drum unit and toner cartridge assembly back in the printer. 7 i Put the paper tray - Brother International HL 5370DW | Users Manual - English - Page 135
Troubleshooting Jam Rear / Duplex 7 If a paper jam occurs behind the back cover (back output tray) or inside the duplex tray, the printer will flash the Back Cover and Paper LED as shown below. CAUTION 7 After you have just used the printer, some internal parts of the printer will be extremely - Brother International HL 5370DW | Users Manual - English - Page 136
then open the front cover. Troubleshooting 7 b Slowly take out the drum unit and toner cartridge assembly. The jammed paper will be pulled out with the drum unit and toner cartridge assembly. IMPORTANT We recommend that you put the drum unit and toner cartridge assembly on a piece of disposable - Brother International HL 5370DW | Users Manual - English - Page 137
the back cover. Troubleshooting d Pull the tabs at the left and right hand sides toward you to open the fuser cover (1). 7 1 e Using both hands, gently pull the jammed paper out of the fuser unit. CAUTION After you have just used the printer, some internal parts of the printer will be extremely - Brother International HL 5370DW | Users Manual - English - Page 138
f Put the drum unit and toner cartridge assembly back in the printer (press firmly). g Fully close the front and back covers. h Pull the duplex tray completely out of the printer. Troubleshooting i Pull the jammed paper out of the printer or the duplex tray. 7 j Put the duplex tray back in the - Brother International HL 5370DW | Users Manual - English - Page 139
you use paper that meets our specifications. Rough-surfaced paper may cause the problem. See About paper on page 6. „ The drum unit may be damaged. Put in a new drum unit. See Replacing the drum unit on page 102. „ The fuser unit may be contaminated. Call Brother Customer Service. Toner specks 129 - Brother International HL 5370DW | Users Manual - English - Page 140
drum unit. See Replacing the drum unit on page 102. „ The fuser unit may be contaminated. Call Brother Customer Service. 7 All black White lines across the page „ Make sure that you use paper that meets our specifications. A rough surfaced paper or thick print media can cause problems. „ Make - Brother International HL 5370DW | Users Manual - English - Page 141
Troubleshooting Examples of poor print quality Recommendation „ If the problem is not solved after printing a few pages, the drum unit may have glue from a label stuck on the OPC drum surface. Clean the drum unit as follows: 7 1) Put the print sample in front of the drum unit, and find the - Brother International HL 5370DW | Users Manual - English - Page 142
the page. „ The toner cartridge may be damaged. Put in a new toner cartridge. See Replacing the toner cartridge on page 95. „ The fuser unit may be smudged. Call your dealer or Brother Customer Service. „ Make sure that a torn piece of paper is not inside the printer covering the scanner window - Brother International HL 5370DW | Users Manual - English - Page 143
Troubleshooting Examples of poor print quality Recommendation „ Check the paper type and quality. High temperatures and high humidity will cause paper to curl. See About paper on page 6. „ If you do not use the printer often, the paper may have been in the paper tray too long. Turn over the stack - Brother International HL 5370DW | Users Manual - English - Page 144
Troubleshooting Examples of poor print quality Recommendation „ Open the back cover and make sure that the two blue levers on the left and right hand sides are in the up position. Poor Fixing 7 „ Choose Improve Toner Fixing mode in the printer driver. See Improve Print Output in Advanced tab on - Brother International HL 5370DW | Users Manual - English - Page 145
Troubleshooting Examples of poor print quality Recommendation „ Lift up the Face-down Output Tray Support Flap 2 (Support Flap 2) (1). 1 Curled „ Choose Reduce Paper Curl mode in the printer driver. See Improve Print Output in Advanced tab on page 39 (For Windows® printer driver), Advanced - Brother International HL 5370DW | Users Manual - English - Page 146
Troubleshooting Solving print problems 7 Problem Recommendation The printer prints unexpectedly „ Make sure that the printer cable is not too to Auto by using the supplied Windows® driver. „ Change the following settings in the supplied Windows® driver and try again. The best combination of - Brother International HL 5370DW | Users Manual - English - Page 147
install the driver. Click the Start button, All Programs 1, your printer, and then User's Guide. You can also view the manuals in PDF format by accessing the Brother Solutions Center (http://solutions.brother.com/). 1 Programs for Windows® 2000 users Other problems 7 Problem Recommendation The - Brother International HL 5370DW | Users Manual - English - Page 148
Troubleshooting BR-Script 3 7 Problem Recommendation The print speed slows down. Add optional memory. (See Installing extra memory on page 91.) The printer Printers and Faxes windows. For Windows® 2000: Click Start button, and select Settings and then Printers. 2) Right-click the Brother HL - Brother International HL 5370DW | Users Manual - English - Page 149
Linux 1200 dpi 4 HQ1200 600 dpi 300 dpi 1 The printing speed may change depending on the type of document you print. 2 Print speed may be slower when the printer is connected by wireless LAN. 3 From standard paper tray. 4 If you use the high quality 1200 dpi setting (1200 x 1200 dpi) the print - Brother International HL 5370DW | Users Manual - English - Page 150
Appendix Controller 0 Model HL-5340D HL-5350DN HL-5370DW Processor 300MHz Memory Standard 16 MB 32 See the Network User's Guide locator on the CD-ROM for details on the supported network protocols. 3 Brother original Windows® and Macintosh utility for printer and print server management. - Brother International HL 5370DW | Users Manual - English - Page 151
, Toner, Drum, Paper and Status 2 buttons: Job Cancel and Go HL-5370DW Paper handling 0 Paper Input 1 Paper Output 1 Duplex Model Multi-purpose tray Paper tray (Standard) Lower tray (Option) Face-down Face-up Manual Duplex Automatic Duplex 1 Calculated with 80 g/m2 (20 lb) paper HL-5340D 50 - Brother International HL 5370DW | Users Manual - English - Page 152
3 Automatic duplex printing Letter ,Legal 3 and Folio 3 1 Up to 3 envelopes 2 Up to 10 sheets 3 Legal or Folio size paper is not available in some regions outside the USA and Canada. Supplies 0 Toner Cartridge Drum Unit Model Standard cartridge High yield cartridge HL-5340D HL-5350DN HL-5370DW - Brother International HL 5370DW | Users Manual - English - Page 153
5350DN 371 × 384 × 246 mm (14.6 × 15.1 × 9.7 in.) Approx. 9.5 kg (20.9 lb) HL-5370DW Other 0 Model Power consumption Noise level Sound Pressure Sound power Ecology Power save Toner save 1 HL-5340D HL-5350DN HL-5370DW Printing Average 675 W at Average 675 W at Average 675 W at 25 °C (77 - Brother International HL 5370DW | Users Manual - English - Page 154
Version Processor Minimum Minimum Recomm Hard Disk Speed RAM ended Space to RAM install Supported PC Interface 2 Windows® Operating System 1 Explorer® 5.5 or greater 2 Third party USB/Parallel ports are not supported. For the latest driver updates, visit http://solutions.brother.com/. 144 - Brother International HL 5370DW | Users Manual - English - Page 155
for laser printers. Basis weight 0 The basis weight of the paper in general use varies in different countries. We recommend that you use paper that weighs 75 to 90 g/m2 (20 to 24 lb), although this printer is able to print on thinner or thicker paper than A these weights. g/m2 lb Unit 80 - Brother International HL 5370DW | Users Manual - English - Page 156
, the amount of water can sometimes be about 10% in a high humidity environment. When the amount of water increases, the characteristics of the paper changes greatly. The fixing of the toner may become worse. For storage of the paper and during use, we recommend that the humidity of the surrounding - Brother International HL 5370DW | Users Manual - English - Page 157
Paper size Envelope C5 B5 (JIS) B5 (ISO) B6 (ISO) Folio A4 Long Envelope DL-L 3 × 5 mm 162 × 229 mm 182 × 257 mm 176 × 250 mm 125 × 176 mm 210 × 405 mm 220 × 110 mm Appendix in. 8.5 × 13 in. 3 × 5 in. A 147 - Brother International HL 5370DW | Users Manual - English - Page 158
enter the DNS name of the print server. As the print server supports TCP/IP and NetBIOS, you can also enter the NetBIOS name of the • The current printer IP Address is found on the Print Settings. For that instructions, See Print the Printer Settings page on page 86. c Click Printer Settings. d - Brother International HL 5370DW | Users Manual - English - Page 159
Symbol and character sets list OCR symbol sets When you choose the OCR-A or OCR-B font, the matching symbol set is always used. OCR A (0O) OCR B (1O) HP LaserJet mode ABICOMP Brazil / Portugal (13P) Desktop (7J) HP German (0G) ISO Latin1 (0N) ISO Latin5 (5N) ISO2 IRV (2U) ISO5 ASCII (0U) ISO11 - Brother International HL 5370DW | Users Manual - English - Page 160
Appendix Quick reference for bar code control commands 0 The printer can print bar codes in the HP LaserJet emulation modes. Print bar codes or expanded characters 0 Code Dec Hex ESC i 27 105 1B 69 Format: - Brother International HL 5370DW | Users Manual - English - Page 161
Black 2 = Vertical stripes 3 = Horizontal stripes 4 = Cross hatch Bar code 0 n = 'mnnn' or 'Mnnn' (nnn = 0 ~ 32767) This parameter shows the bar code width. The unit of 'nnn' is a percentage. Bar code human readable line ON or OFF 0 n = 'r0' or 'R0 n = 'r1' or 'R1 Human readable line OFF - Brother International HL 5370DW | Users Manual - English - Page 162
All others This parameter shows whether the printer prints the human readable line below the bar 32767) Quiet zone is the space on both sides of the bar codes. Its width can be shown using the units that are set by the 'u' or 'U' parameter. (For the description of 'u' or 'U' parameter, see the - Brother International HL 5370DW | Users Manual - English - Page 163
of bar codes or expanded characters as shown above. It can start with 'h', 'H', 'd', or 'D'. The height of bar codes is shown in the 'u'- or 'U'-specified unit. The default setting of the bar code height (12 mm, 18 mm or 22 mm) is determined by the bar code mode selected by 't' or - Brother International HL 5370DW | Users Manual - English - Page 164
will cause a data error that results in the bar code data being printed as normal print data. If the check digit is not correct, the printer decides the correct check digit automatically so that the correct bar code data will be printed. When EAN13 is selected, adding '+' and a two-digit or - Brother International HL 5370DW | Users Manual - English - Page 165
Appendix Box drawing 0 ESC i ... E (or e) 'E' or 'e' is a terminator. Line block drawing 0 ESC i ... V (or v) 'V' or 'v' is a terminator. Expanded character data start 0 n = 'l' or 'L' Data that follows 'l' or 'L' is read as expanded character data (or labeling data). Expanded character - Brother International HL 5370DW | Users Manual - English - Page 166
Appendix Table of Code (EAN) 128 set C Code(EAN) 128 set C describes an original command. The correspondence table is as follows. No. Code 128 Set C Input command 0 00 NUL 1 01 SOH 2 02 STX 3 03 ETX 4 04 EOT 5 05 ENQ 6 06 ACK 7 07 BEL 8 08 BS 9 09 HT 10 10 LF 11 - Brother International HL 5370DW | Users Manual - English - Page 167
Example Program Listings WIDTH "LPT1:",255 'CODE 39 LPRINT CHR$(27);"it0r1s0o0x00y00bCODE39?\"; 'Interleaved 2 of 5 LPRINT CHR$(27);"it1r1s0o0x00y20b123456?\"; 'FIM LPRINT CHR$(27);"it3r1o0x00y40bA\"; 'Post Net LPRINT CHR$(27);"it4r1o0x00y60b1234567890?\"; 'EAN-8 LPRINT CHR$(27);" - Brother International HL 5370DW | Users Manual - English - Page 168
for all your printer needs. You can download the latest drivers, software and utilities, read FAQs and troubleshooting tips to learn how to get the most from your Brother product. http://solutions.brother.com/ You can check here for Brother driver updates. Customer Service 0 Visit http://www - Brother International HL 5370DW | Users Manual - English - Page 169
-stop resource for all your printer needs. You can download the latest software and utilities and read FAQs and troubleshooting tips to learn how to get the most from your Brother product. http://solutions.brother.com/ You can check here for Brother driver updates. Customer Service 0 In USA: In - Brother International HL 5370DW | Users Manual - English - Page 170
: 1-877-552-MALL (1-877-552-6255) 1-800-947-1445 (fax) http://www.brothermall.com/ 1-877-BROTHER http://www.brother.ca/ Description Toner Cartridge Drum Unit Lower Tray Item TN-620 (Standard, prints approx. 3,000 pages) 1 TN-650 (High Yield, prints approx. 8,000 pages) 1 DR-620 LT-5300 1 Approx - Brother International HL 5370DW | Users Manual - English - Page 171
54, 137 Manual duplex printing 25 Media specifications 142 D Media type 6 Memory 90, 140 Memory full 81 Multi-purpose tray 16, 27 N Network 72 Network connectivity 140 Network default settings 88 No paper 79 No tray 80 O OPC drum 131 P Paper 6, 145 Paper handling 141 Paper jams 80 - Brother International HL 5370DW | Users Manual - English - Page 172
(USA/Canada 160 Service centres (Europe and other countries) ........ 158 Size mismatch 80 Sleep time 42, 53, 60 SO-DIMM 90 Software 72 Specifications 139 Status Monitor 116 Symbol 148 T Toner cartridge 94 Toner low 78 Too many trays 81 Trademarks vi Troubleshooting 115 U Unprintable
-
 1
1 -
 2
2 -
 3
3 -
 4
4 -
 5
5 -
 6
6 -
 7
7 -
8
-
9
-
10
-
11
-
12
-
13
-
14
-
15
-
16
-
17
-
18
-
19
-
20
-
21
-
22
-
23
-
24
-
25
-
26
-
27
-
28
-
29
-
30
-
31
-
32
-
33
-
34
-
35
-
36
-
37
-
38
-
39
-
40
-
41
-
42
-
43
-
44
-
45
-
46
-
47
-
48
-
49
-
50
-
51
-
52
-
53
-
54
-
55
-
56
-
57
-
58
-
59
-
60
-
61
-
62
-
63
-
64
-
65
-
66
-
67
-
68
-
69
-
70
-
71
-
72
-
73
-
74
-
75
-
76
-
77
-
78
-
79
-
80
-
81
-
82
-
83
-
84
-
85
-
86
-
87
-
88
-
89
-
90
-
91
-
92
-
93
-
94
-
95
-
96
-
97
-
98
-
99
-
100
-
101
-
102
-
103
-
104
-
105
-
106
-
107
-
108
-
109
-
110
-
111
-
112
-
113
-
114
-
115
-
116
-
117
-
118
-
119
-
120
-
121
-
122
-
123
-
124
-
125
-
126
-
127
-
128
-
129
-
130
-
131
-
132
-
133
-
134
-
135
-
136
-
137
-
138
-
139
-
140
-
141
-
142
-
143
-
144
-
145
-
146
-
147
-
148
-
149
-
150
-
151
-
152
-
153
-
154
-
155
-
156
-
157
-
158
-
159
-
160
-
161
-
162
-
163
-
164
-
165
-
166
-
167
-
168
-
169
-
170
-
171
-
172
 |
 |

USER’S GUIDE
Brother Laser Printer
HL-5340D
HL-5350DN
HL-5370DW
For visually-impaired users
You can read this manual with Screen
Reader 'text-to-speech' software.
You must set up the hardware and install the driver before you can use the printer.
Please use the Quick Setup Guide to set up the printer. You can find a printed copy in the box.
Please read this User's Guide thoroughly before you use the printer. Keep the CD-ROM in a convenient place so you
can use it quickly if you need to.
You can also read the User's Guide in HTML format by visiting our web site at http://solutions.brother.com/
or
accessing it from the CD-ROM directly.
Please visit us at http://solutions.brother.com/
where you can get product support, the latest driver updates and
utilities, and answers to frequently asked questions (FAQs) and technical questions.
Version A
USA