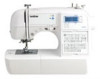
Brother International HS-3000 Users Manual - English
Brother International HS-3000 Manual
 |
View all Brother International HS-3000 manuals
Add to My Manuals
Save this manual to your list of manuals |
Brother International HS-3000 manual content summary:
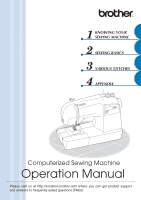
- Brother International HS-3000 | Users Manual - English - Page 1
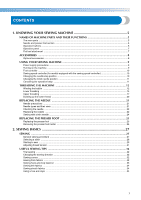
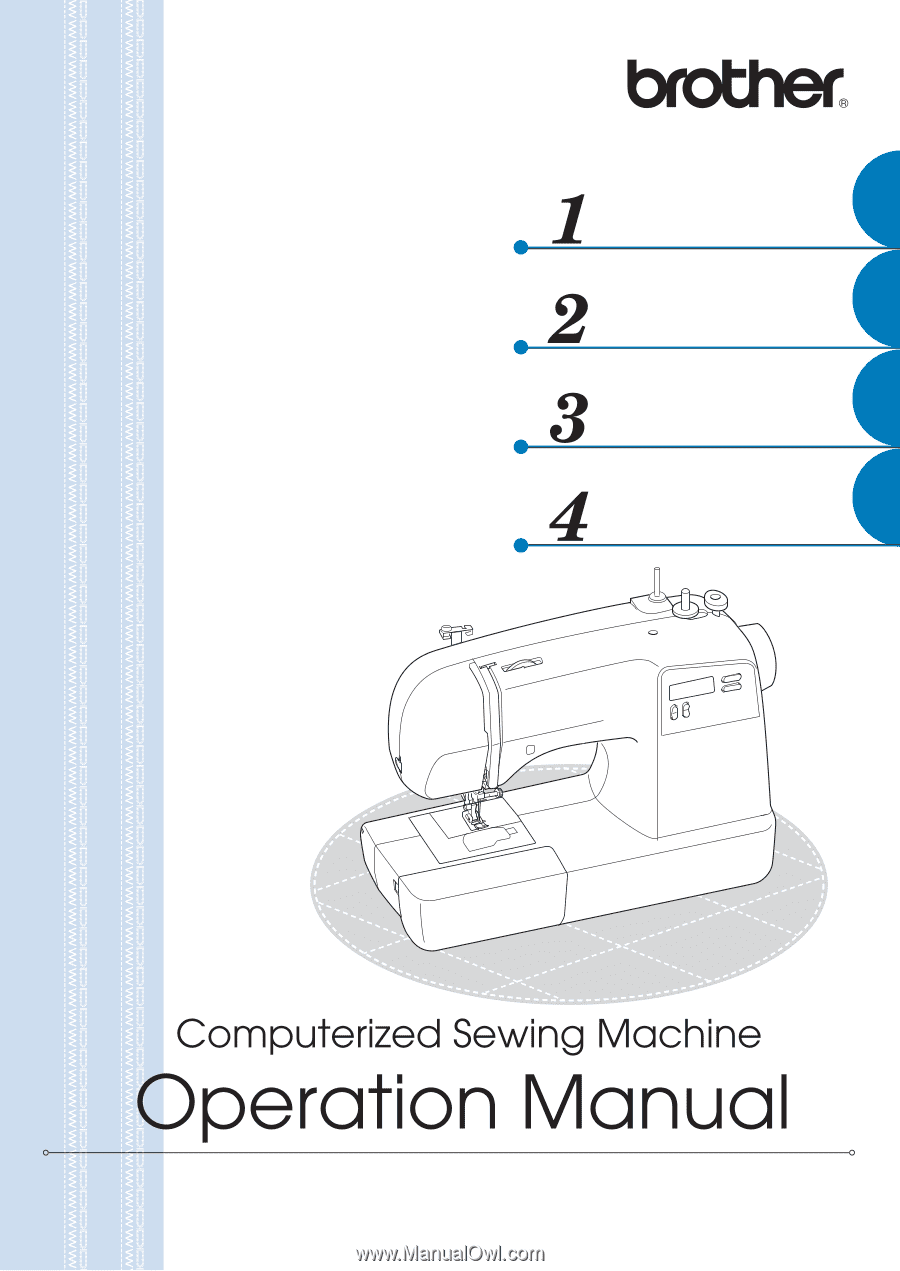
KNOWING YOUR SEWING MACHINE SEWING BASICS VARIOUS STITCHES APPENDIX Please visit us at http://solutions.brother.com where you can get product support and answers to frequently asked questions (FAQs). - Brother International HS-3000 | Users Manual - English - Page 2
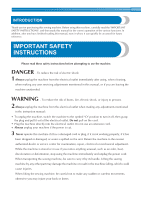
Please read these safety instructions before attempting to use the machine. DANGER - To reduce the risk of electric shock: 1 Always unplug the machine from the electrical outlet immediately after using, when cleaning, when making any user servicing adjustments mentioned in this manual, or if you are - Brother International HS-3000 | Users Manual - English - Page 3
, and follow careful instruction when freehand stitching so that you do not deflect the needle and cause it to break. 6 This machine is not a toy: • Your close attention is necessary when the machine is used by or near children. • The plastic bag that this sewing machine was supplied in should be - Brother International HS-3000 | Users Manual - English - Page 4
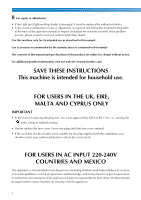
subject to change without notice. For additional product information, visit our web site at www.brother.com SAVE THESE INSTRUCTIONS This machine is intended for household use. FOR USERS IN THE UK, EIRE, MALTA AND CYPRUS ONLY IMPORTANT • In the event of replacing the plug fuse, use a fuse approved by - Brother International HS-3000 | Users Manual - English - Page 5
Flat bed attachment ...7 ACCESSORIES ...8 Optional accessories ...8 USING YOUR SEWING MACHINE 9 Power supply precautions ...9 Turning on the machine ...9 Foot controller ...10 Sewing speed controller (for models equipped with the sewing speed controller 10 Changing the needle stop position ...10 - Brother International HS-3000 | Users Manual - English - Page 6
...66 Deleting characters ...66 Sewing the character stitches ...67 ADJUSTING STITCHES (for models equipped with character stitches 68 4. APPENDIX ...70 MAINTENANCE ...70 Cleaning the machine surface ...70 Cleaning the bobbin case ...70 TROUBLESHOOTING ...72 ERROR MESSAGES ...75 Operation - Brother International HS-3000 | Users Manual - English - Page 7
the feed dog position lever to lower the feed dogs. p Presser foot lever (page 17) Used to raise and lower the presser foot. q Foot controller (page 10) You can use this to control the sewing speed, and to start and stop sewing. r Handle Carry the sewing machine by its handle when transporting the - Brother International HS-3000 | Users Manual - English - Page 8
bar thread guide. k Needle clamp screw Use the needle clamp screw to hold the needle in place. Operation buttons The operation buttons help you to easily perform various basic sewing machine operations. The operation buttons differ depending on the sewing machine model. a Presser foot lever Raise - Brother International HS-3000 | Users Manual - English - Page 9
panel The operation panel, located on the front of the sewing machine, allows you to select a stitch and specify how the stitch will be sewn. 1 3 ABC a LCD (liquid crystal display) The number of the selected stitch (1), the presser foot to be used (2), the stitch length (mm) (3), and the stitch - Brother International HS-3000 | Users Manual - English - Page 10
these accessories to help you be able to carry out most sewing tasks. Note (For U.S.A. only) ● Foot controller: Model T This foot controller can be used on the following machine models: HS-3000, SQ-9000. ● The screw of the presser foot holder is available through your authorized dealer. (Part code - Brother International HS-3000 | Users Manual - English - Page 11
USING YOUR SEWING MACHINE Power supply precautions 1 Be sure to observe the following precautions concerning the power supply. WARNING ● Use only regular household electricity for the power source. Using other power sources may result in fire, electric shock, or damage to the machine. ● Make - Brother International HS-3000 | Users Manual - English - Page 12
dust to build up on the foot controller. Doing so could cause a fire or an electric shock. a Sewing speed controller • The speed set using the sewing speed controller is the foot controller's maximum sewing speed. Changing the needle stop position Normally, the sewing machine is set to leave the - Brother International HS-3000 | Users Manual - English - Page 13
"+" side of (stitch selection key). Hold down the "-" side of (stitch width b adjustment key) and turn on the sewing machine. After turning on the sewing machine, release the "-" side of (stitch width adjustment key). X The initial needle position changes to the center needle position. Memo - Brother International HS-3000 | Users Manual - English - Page 14
bobbins (part code: SA156, SFB) that have been designed for this sewing machine. Using other bobbins may cause damage to the machine. ● We designed the bobbin that comes with this machine. If you use bobbins from other models, the machine will not work properly. Only use the bobbin that comes with - Brother International HS-3000 | Users Manual - English - Page 15
machine. 1 Note ● If the sewing machine is to be operated using the foot controller, connect the foot controller before turning on the machine. ● When the foot with the sewing speed controller). Trim the excess thread above the bobbin. g CAUTION ● Make sure you follow the instructions carefully. - Brother International HS-3000 | Users Manual - English - Page 16
may become tangled in the bobbin or the needle may bend or break when the bobbin thread starts to run out. a Sewing speed controller Turn on the sewing machine. g Press the foot controller or press (start/ h stop button) (for models equipped with the start/stop button) to start. Note ● If the - Brother International HS-3000 | Users Manual - English - Page 17
may cause incorrect thread tension (page 31). CAUTION ● Make sure you turn the power off while threading the machine. If you accidentally step on the foot controller and the machine starts to sew, you could be injured. Raise the needle to its highest position by turning a the handwheel toward you - Brother International HS-3000 | Users Manual - English - Page 18
KNOWING YOUR SEWING MACHINE Replace the bobbin cover. Put the left tab in e place (see arrow or press (needle position button) (for models equipped with the needle position button), and raise the presser foot lever. Slide the button and open the cover. b 1 2 a Cover b Slide button Put the - Brother International HS-3000 | Users Manual - English - Page 19
guide c Mark on the handwheel CAUTION ● Make sure you thread the machine properly. Otherwise, the thread could tangle and break the needle. Raise the presser foot using the presser foot foot lever or a Mark b Needle position button • If the needle is not correctly raised, the sewing machine can - Brother International HS-3000 | Users Manual - English - Page 20
foot lever and the thread take-up lever before you feed the upper thread. ● If you incorrectly feed the thread you may cause sewing problems. ■ Using the needle threader (for models equipped with the needle threader) CAUTION ● The needle threader can only be used with home sewing machine guide - Brother International HS-3000 | Users Manual - English - Page 21
d Pull out about 5 cm (2 inch) of thread through g the needle toward the back of the sewing machine. 1 X The end of the needle threader rotates toward you and the hook passes through the eye of the . a 5 cm (2 inch) Note ● If you incorrectly feed the thread you may cause sewing problems. 19 - Brother International HS-3000 | Users Manual - English - Page 22
SEWING MACHINE Drawing up the lower thread Lightly hold the end of the upper thread. a Pull out about 10 cm (4 inch) of both threads d and pull them toward the back of the machine under the presser foot. Draw up the lower thread as described in b steps 1 to 4. Replace the bobbin cover. c 20 - Brother International HS-3000 | Users Manual - English - Page 23
This section provides information on sewing machine needles. 1 Needle precautions Be sure to observe the following precautions concerning the handling of the needle. Failure to observe these precautions is extremely dangerous. Be sure to read and carefully follow the instructions below. CAUTION - Brother International HS-3000 | Users Manual - English - Page 24
Replacing the needle Replace the needle as described below. Use the screwdriver and a needle that has been determined to be straight according to the instructions CAUTION ● Before replacing the needle, be sure to turn off the sewing machine, otherwise injuries may occur if the foot controller or the - Brother International HS-3000 | Users Manual - English - Page 25
a Screwdriver b Needle clamp screw • Do not apply strong force when loosening or tightening the needle clamp screw, otherwise certain parts of the sewing machine may be damaged. CAUTION ● Be sure to insert the needle until it touches the needle stopper and securely tighten the needle clamp screw - Brother International HS-3000 | Users Manual - English - Page 26
be sure to attach zigzag foot "J", otherwise the needle may break or the machine may be damaged. ● When changing the sewing direction, be sure to machine to the needle bar thread guide. The path for threading the machine to the needle bar thread guide is the same as for normally threading the machine - Brother International HS-3000 | Users Manual - English - Page 27
be read. CAUTION ● Before replacing the presser foot, be sure to turn off the sewing machine, otherwise injuries may occur if the foot controller or the start/stop button is accidentally pressed and the machine starts sewing. Raise the presser foot lever. c a Presser foot holder b Shank c Pin Note - Brother International HS-3000 | Users Manual - English - Page 28
the sewing machine or when installing a presser foot that does not use the presser foot holder, such as the quilting foot. Use the screwdriver to remove the presser foot holder. ■ Removing the presser foot holder Remove the presser foot. a • For details, refer to "Replacing the presser foot" (page - Brother International HS-3000 | Users Manual - English - Page 29
the sewing machine. For details on turning on the machine, refer to "Turning on the machine" (page 9). p 2 Select the stitch. Select the stitch appropriate for the area to be sewn. For details on selecting a stitch, refer to "Selecting a stitch" (page 28). p 3 Attach the presser foot. Attach - Brother International HS-3000 | Users Manual - English - Page 30
on the sewing machine. a Attach the presser foot indicated on the LCD. d a The presser foot to use • For details, refer to "Replacing the presser foot" (page or disappears from the LCD. When the stitch length or stitch width is reset back to the auto setting, the reappears around or on the LCD. - Brother International HS-3000 | Users Manual - English - Page 31
or a Mark b Needle position button Raise the presser foot lever. b a Presser foot lever Place the fabric under the presser foot, pass c the thread under the presser foot, and then pull out about 5 cm (2 inch) of thread toward the rear of the machine. a 5 cm (2 inch) While holding the end of the - Brother International HS-3000 | Users Manual - English - Page 32
models equipped with (start/stop button), if the foot controller is not connected, press once.) or a Start/stop button X The machine starts sewing. Take your foot off the foot controller, or press h (start/stop button) once (if the machine was started by pressing (start/stop button)) (for models - Brother International HS-3000 | Users Manual - English - Page 33
that you do a test sample on scrap of a fabric before you start to sew. ■ Correct tension Correct tension is important as too much or too little tension will seams or cause puckers on your fabric. 1 Memo ● When you finish sewing, remove the bobbin cover and then make sure that the thread is shown - Brother International HS-3000 | Users Manual - English - Page 34
TIPS Various ways to achieve better results for your sewing projects are described below. Refer to these tips when sewing your project. Trial sewing Lower the presser foot lever and continue c sewing. After you select a stitch, the machine automatically sets the stitch width and length for the - Brother International HS-3000 | Users Manual - English - Page 35
And then, sew the edge of the hookand-loop fastener at a slow speed. If the needle does not pass through the hook-andloop fastener, replace the needle with the needle for thick fabrics (page 21). a Edge of the hook-and-loop fastener • Once the trouble spot has been passed, the foot will return to - Brother International HS-3000 | Users Manual - English - Page 36
stretch fabrics First, baste the pieces of fabric together, and then sew without stretching the fabric. a Basting Using a free-arm style Free-arm sewing is convenient for sewing tubular and hard-to-reach areas. To change your machine to the free-arm style, lift out the flat bed attachment. Slide - Brother International HS-3000 | Users Manual - English - Page 37
40 stitches model Twin Needle Walking Foot Reverse (Rev.)/ Reinforcement (Rfc.) Stitching Stitch Name Pattern No. Application Stitch Width Stitch Length [mm (inch.)] [mm (inch.)] Auto Manual Auto Manual Left J 00 00 00 00 00 00 00 Basic stitching, sewing gathers or pintucks, etc - Brother International HS-3000 | Users Manual - English - Page 38
Walking Foot Reverse (Rev.)/ Reinforcement (Rfc.) Stitching Stitch Name Pattern No. Application Stitch Width Stitch Length [mm (inch.)] [mm (inch.)] Auto Manual Auto Manual J 16 16 16 15 15 15 decorative stitching and 15 sewing overcasting on both pieces of fabrics, 5.0 (3/16) 2.5-7.0 - Brother International HS-3000 | Users Manual - English - Page 39
50 stitches model 40 stitches model Twin Needle Walking Foot Reverse (Rev.)/ Reinforcement (Rfc.) Stitching Stitch Name Pattern No. Application Stitch Width Stitch Length [mm (inch.)] [mm (inch.)] Auto Manual Auto Manual Decorative hemming on thin, medium weight 5.0 (3/16) 3.5 (1/8) N 28 - Brother International HS-3000 | Users Manual - English - Page 40
model 50 stitches model 40 stitches model Twin Needle Walking Foot Reverse (Rev.)/ Reinforcement (Rfc.) Stitching Stitch Name 46 40 40 - - motion quilting, satin 0.0-7.0 0.0-4.0 No Yes Rfc. stitching, button sewing (0-1/4) (0-3/16) J 47 47 47 41 41 - - Attaching appliqués and binding 1.5 - Brother International HS-3000 | Users Manual - English - Page 41
model 50 stitches model 40 stitches model Twin Needle Walking Foot Reverse (Rev.)/ Reinforcement (Rfc.) Stitching Stitch Name Pattern No. Application Stitch Width Stitch Length [mm (inch.)] [mm (inch.)] Auto Manual Auto Manual N 63 59 55 47 - - - For decoration, etc. 7.0 (1/4) 2.5 (3/32 - Brother International HS-3000 | Users Manual - English - Page 42
stitches model 50 stitches model 40 stitches model Twin Needle Walking Foot Reverse (Rev.)/ Reinforcement (Rfc.) Stitching Stitch Name or less. Stitch Width Stitch Length [mm (inch.)] [mm (inch.)] Auto Manual Auto Manual 7.0 (1/4) 0.0-7.0 (0-1/4) 0.4 (1/64) 0.1-1.0 (1/64-1/16) Ye*s* ( - Brother International HS-3000 | Users Manual - English - Page 43
Walking Foot Reverse (Rev.)/ Reinforcement (Rfc.) Stitching Stitch Name Pattern No. Application Stitch Width Stitch Length [mm (inch.)] [mm (inch.)] Auto Manual Auto Manual ) 1.4 (1/16) 0.0-7.0 0.2-4.0 No No Rfc. (0-1/4) (1/64-3/16) N 99 89 79 69 59 49 39 For decoration, etc. 6.0 (15/64) - Brother International HS-3000 | Users Manual - English - Page 44
Twin Needle Walking Foot Reverse (Rev sewing stretch materials. Stitch Name Pattern No. Application Stitch Width Stitch Length [mm (inch.)] [mm (inch.)] Auto Manual Auto Manual overcasting foot "G" or zigzag foot "J". a Sew with the edge of the fabric against the d presser foot guide. Select - Brother International HS-3000 | Users Manual - English - Page 45
40 stitches model Twin Needle Walking Foot Reverse (Rev.)/ Reinforcement (Rfc.) Stitching Stitch Name Pattern No. Application Stitch Width Stitch Length [mm (inch.)] [mm (inch.)] Auto Manual Auto Manual Left J 00 00 00 00 00 00 00 Basic stitching, sewing gathers or pintucks, etc - Brother International HS-3000 | Users Manual - English - Page 46
Walking Foot Reverse (Rev.)/ Reinforcement (Rfc.) Stitching You can use the Blind Hem Stitch to finish the edge of a project, like the hem of a pair of trousers, without the stitch showing. Pattern No. Stitch Width Stitch Length [mm (inch.)] [mm (inch.)] Stitch Name Application Auto Manual - Brother International HS-3000 | Users Manual - English - Page 47
of fabric b Right side of fabric • For details on changing the stitch width, refer to "Selecting a stitch" (page 28). Sew with the fold of the hem against the l presser foot guide. Remove the basting stitching and turn the m fabric right side up. 1 2 a Wrong side of fabric b Right side of - Brother International HS-3000 | Users Manual - English - Page 48
model Twin Needle Walking Foot Reverse (Rev.)/ Reinforcement (Rfc.) Stitching BUTTONHOLE SEWING Buttonholes can be sewn and buttons can be sewn on. Stitch Name Pattern No. Application Stitch Width Stitch Length [mm (inch.)] [mm (inch.)] Auto Manual Auto Manual Horizontal buttonholes A 34 - Brother International HS-3000 | Users Manual - English - Page 49
25 mm (1 inch) on the scale. 1 2 a 10 mm (3/8 inch) b 15 mm (9/16 inch) Attach buttonhole foot "A". c a Marks on fabric b Buttonhole sewing Pull out the button guide plate of buttonhole b foot "A", and then insert the button that will be put through the buttonhole. A Select a stitch. d Position - Brother International HS-3000 | Users Manual - English - Page 50
lever The buttonhole lever is positioned behind the bracket on the buttonhole foot. 1 a Seam ripper b Pin For keyhole buttonholes, use a commercial your left hand, and then start sewing. X Once sewing is completed, the machine automatically sews reinforcement stitches, then stops. a Eyelet - Brother International HS-3000 | Users Manual - English - Page 51
, use a gimp thread. Hook the gimp thread onto the part of a buttonhole foot "A" shown in the illustration so that it fits into the grooves, and then loosely tie it. Button sewing Buttons can be sewn on with the sewing machine. Buttons with 2 or with 4 holes can be attached. Measure the distance - Brother International HS-3000 | Users Manual - English - Page 52
foot and d the fabric. Turn the handwheel toward you h (counterclockwise) to check that the needle correctly goes into the two holes of the button. Adjust the stitch width to the distance between the button holes. • When attaching four-hole buttons, first sew the sewing machine, and then sew them - Brother International HS-3000 | Users Manual - English - Page 53
Manual Manual Pattern Presser Foot 100 stitches model 90 stitches model 80 stitches model 70 stitches model 60 stitches model 50 stitches model 40 stitches model Twin Needle Walking Foot stitch width of 5.0 mm (3/16 inch) or less. 1 2 Sew from the bottom of the zipper toward the d top on both - Brother International HS-3000 | Users Manual - English - Page 54
Walking Foot Reverse (Rev.)/ Reinforcement (Rfc.) Stitching Stretch fabrics can be sewn and elastic tape can be attached. Pattern No. Stitch Name Application Stitch Width Stitch Length [mm (inch.)] [mm (inch.)] Auto Manual Auto Manual Stretch stitch J 03 03 03 03 03 03 03 Sewing - Brother International HS-3000 | Users Manual - English - Page 55
Twin Needle Walking Foot Reverse (Rev.)/ Reinforcement (Rfc.) Stitching The stitches that can be used for sewing appliqués, patchwork and quilts are described below. Pattern No. Stitch Width Stitch Length [mm (inch.)] [mm (inch.)] Stitch Name Application Auto Manual Auto Manual Zigzag stitch - Brother International HS-3000 | Users Manual - English - Page 56
b Remove the basting, if necessary. f Memo ● Make reinforcing straight stitches at the beginning and the end of stitching. Select stitch or . c Sew with the side of the presser foot aligned d with the edge of the fabric. ■ For a seam allowance on the right side Align the right side of the presser - Brother International HS-3000 | Users Manual - English - Page 57
b holder. • For details, refer to "Removing the presser foot holder" (page 26). Note ● When sewing with the walking foot, sew at a speed between slow and medium. 3 ■ Using the optional quilting guide Use the quilting guide to sew parallel stitches that are equally spaced. Hook the connecting - Brother International HS-3000 | Users Manual - English - Page 58
of the machine) a Pin on quilting foot b Presser foot holder screw c Needle clamp screw Hold the quilting foot in place with your right c hand, and then tighten the presser foot holder screw using the screwdriver in your left hand. X The feed dogs are lowered. Turn on the sewing machine, and then - Brother International HS-3000 | Users Manual - English - Page 59
stitches model 40 stitches model Twin Needle Walking Foot Reverse (Rev.)/ Reinforcement (Rfc.) Stitching Stitch Name Pattern No. Application Stitch Width Stitch Length [mm (inch.)] [mm (inch.)] Auto Manual Auto Manual Triple stretch stitch Attaching sleeves, sew- J 02 02 02 02 02 02 - Brother International HS-3000 | Users Manual - English - Page 60
hold the end of the upper thread in f your left hand, and then start sewing. a Do not reduce the gap. X Once sewing is completed, the machine automatically sews reinforcement stitches, then stops. Raise the presser foot lever, remove the g fabric, and cut the thread. Raise the buttonhole lever to - Brother International HS-3000 | Users Manual - English - Page 61
stitches model Twin Needle Walking Foot Reverse (Rev.)/ Reinforcement (Rfc.) Stitching Various decorative stitches can be sewn with this sewing machine. Pattern No. Stitch Name Application Stitch Width Stitch Length [mm (inch.)] [mm (inch.)] Auto Manual Auto Manual Fagoting stitch J 19 19 - Brother International HS-3000 | Users Manual - English - Page 62
Walking Foot Reverse (Rev.)/ Reinforcement (Rfc.) Stitching Stitch Name Decorative stitch Pattern No. Application Stitch Width Stitch Length [mm (inch.)] [mm (inch.)] Auto Manual Auto Manual of water-soluble stabilizer. 3 1 Sew with the center of the presser foot f aligned along the center of - Brother International HS-3000 | Users Manual - English - Page 63
is used on the collars of blouses and to decorate the edges of handkerchiefs. Attach monogramming foot "N". a Select stitch . b Stitch along the edge of the fabric, making c sure not to sew directly on the edge of the fabric. Smocking The decorative stitch created by stitching or embroidering over - Brother International HS-3000 | Users Manual - English - Page 64
. 1 Joining Decorative bridging stitches can be sewn over the seam allowance of joined fabrics. This is used when making a crazy quilt. Attach zigzag foot "J". a Sew together the right sides of the two pieces b of fabric, and then open up the seam allowances. 2 1 1 3 a Wrong side of fabric b 6.5 mm - Brother International HS-3000 | Users Manual - English - Page 65
the sewing machine may be damaged. Manually pass the thread through the eye of the needle from the front to the back. For details, refer to "Upper threading" (page 17). Insert the wing needle. a • Use a 130/705H 100/16 wing needle. • For details on inserting a needle, refer to "Replacing the - Brother International HS-3000 | Users Manual - English - Page 66
key) to enter the selected character. N Turn on the sewing machine. a Press the character stitch key and confirm that b the foot to use • For details, refer to "Replacing the presser foot" (page 25). If you would like to only sew this single f character, start sewing. If you would like to sew - Brother International HS-3000 | Users Manual - English - Page 67
of characters will be stored in memory even if you turn off the machine. Press (stitch selection keys) to select the b next character, "O" (No. 15). ■ Adding new characters after sewing After sewing a combination of characters, you N can add characters to the combination using the following - Brother International HS-3000 | Users Manual - English - Page 68
VARIOUS STITCHES ■ Making a new combination of characters after sewing Memo ● When you have finished sewing, the pattern No. of the first character in the current combination is shown on the LCD. N Checking characters You can check the characters in a combination - Brother International HS-3000 | Users Manual - English - Page 69
characters" (page 64) Attach monogramming foot "N". b • For details, refer to "Replacing the presser foot" (page 25). Start sewing. c X The stitch is sewn in the direction indicated by the arrow. Memo ● When sewing characters, the machine automatically sews reinforcement stitches for each character - Brother International HS-3000 | Users Manual - English - Page 70
sewing, and adjust the stitch pattern as shown below. Memo ● The character stitches "034" (No. 31 + No. 34+ No. 35) are used for making adjustments. Attach monogramming foot "N". a • For details, refer to "Replacing the presser foot ● The setting is saved in memory even if you turn off the machine. - Brother International HS-3000 | Users Manual - English - Page 71
characters "034" again. f Memo ● You can sew when you are in the stitch adjustment mode. If the stitch pattern still comes out poorly, adjust the stitch again. Adjust the stitch until the - Brother International HS-3000 | Users Manual - English - Page 72
APPENDIX 4 APPENDIX MAINTENANCE Simple sewing machine maintenance operations are described below. Cleaning the machine surface If the surface of the machine is dirty, lightly soak a cloth in neutral detergent, squeeze it out firmly, and then wipe the surface of the machine. After cleaning it - Brother International HS-3000 | Users Manual - English - Page 73
that is scratched, otherwise the upper thread may become tangled, the needle may break or sewing performance may suffer. For a new bobbin case (part code: XC3152-021), contact your nearest authorized service center. 4 ● Make sure that you fit the bobbin case properly, otherwise the needle may - Brother International HS-3000 | Users Manual - English - Page 74
. If you need additional help, the Brother Solutions Center offers the latest FAQs and troubleshooting tips. Visit us at [http://solutions.brother.com]. If the problem persists, contact your dealer or the nearest authorized service center. Symptom The sewing machine does not work. The needle breaks - Brother International HS-3000 | Users Manual - English - Page 75
foot. Contact your retailer or the nearest authorized service center. - The bobbin case is scratched, or has a burr on it. Replace the bobbin case. Contact your retailer or the nearest authorized service center. - You have not used a bobbin that has been designed for this machine. Incorrect - Brother International HS-3000 | Users Manual - English - Page 76
. Clean the bobbin case. Correct the upper threading. Replace the bobbin case. Contact your retailer or the nearest authorized service center. Incorrect bobbins will not work properly. Only use a bobbin that has been designed for this machine. Raise the needle either by turning the handwheel toward - Brother International HS-3000 | Users Manual - English - Page 77
sewing machine is set up, an error message appears on the operation panel. Follow the instructions foot controller was pressed (or the start/stop button was pressed if the foot while the sewing machine is being used, the machine may be malfunctioning. Contact your nearest authorized service center. - Brother International HS-3000 | Users Manual - English - Page 78
Q quick-set bobbin 6, 16 quilting 55 quilting foot 56 quilting guide 55 R reinforcement stitching 57 reverse/reinforcement stitch button 6 S scallop stitching 61 seam ripper 48 sewing machine needles 21 sewing speed controller 6 sewing the character stitches 67 sleeve holes 57 smocking - Brother International HS-3000 | Users Manual - English - Page 79
fabrics 34 thread cutter 30 thread guide 17 thread tension 31 trial sewing 32 triple stretch stitch 43 troubleshooting 72 twin needle 24 U upper tension-control dial 31 upper threading 17 utility stitch indicator 7, 28 utility stitch key 7, 28 W walking foot 55 wing needle 63 Z zigzag - Brother International HS-3000 | Users Manual - English - Page 80
English 885-S39 XE7680-001 Printed in China
-
 1
1 -
 2
2 -
 3
3 -
 4
4 -
 5
5 -
 6
6 -
 7
7 -
8
-
9
-
10
-
11
-
12
-
13
-
14
-
15
-
16
-
17
-
18
-
19
-
20
-
21
-
22
-
23
-
24
-
25
-
26
-
27
-
28
-
29
-
30
-
31
-
32
-
33
-
34
-
35
-
36
-
37
-
38
-
39
-
40
-
41
-
42
-
43
-
44
-
45
-
46
-
47
-
48
-
49
-
50
-
51
-
52
-
53
-
54
-
55
-
56
-
57
-
58
-
59
-
60
-
61
-
62
-
63
-
64
-
65
-
66
-
67
-
68
-
69
-
70
-
71
-
72
-
73
-
74
-
75
-
76
-
77
-
78
-
79
-
80
 |
 |
Please visit us at http://solutions.brother.com where you can get product support
and answers to frequently asked questions (FAQs).
KNOWING YOUR
SEWING MACHINE
SEWING BASICS
VARIOUS STITCHES
APPENDIX