Brother International LS-1520 Users Manual - English
Brother International LS-1520 Manual
 |
View all Brother International LS-1520 manuals
Add to My Manuals
Save this manual to your list of manuals |
Brother International LS-1520 manual content summary:
- Brother International LS-1520 | Users Manual - English - Page 1
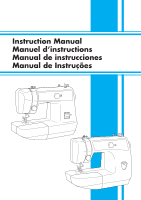
Instruction Manual Manuel d'instructions Manual de instrucciones Manual de Instruções - Brother International LS-1520 | Users Manual - English - Page 2
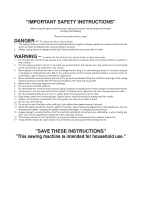
the needle, changing the needle, threading the bobbin, or changing the presser foot. 15. Always unplug the sewing machine from the electrical outlet when removing covers, lubricating, or when making any other user service adjustments mentioned in this instruction manual. 16. This sewing machine is - Brother International LS-1520 | Users Manual - English - Page 3
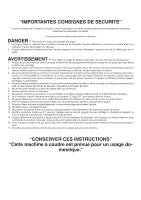
les précautions suivantes: "Lire toutes les instructions avant d'utiliser la machine." DANGER - Pour réduire le risque de décharge électrique: 1. Ne jamais laisser la machine sans surveillance lorsqu'elle est branchée. Toujours débrancher la machine à coudre après son utilisation et avant de - Brother International LS-1520 | Users Manual - English - Page 4
especificados en este manual. 3. Nunca haga funcionar la máquina de coser si el cordón de alimentación ventilación de la máquina de coser y el pedal sin acumulacíon de polvo. Suciedad y restos de . 10. Mantener los dedos alejados de todas las partes movibles de la máquina. Tener un cuidado especial - Brother International LS-1520 | Users Manual - English - Page 5
máquina com as aberturas da ventilação bloqueadas. Mantenha estas aberturas e o pedal livres de pó ou fiapos de tecido. 5. Não coloque nenhum objeto nos lubrificar a máquina ou ao efetuar qualquer um dos ajustes mencionados neste manual. 16. Esta máquina de costura não é destinada para ser usada - Brother International LS-1520 | Users Manual - English - Page 6
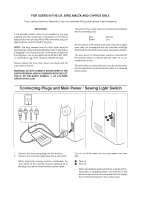
USERS IN THE UK, EIRE, MALTA AND CYPRUS ONLY. If your sewing machine cords is Power / Sewing Light Switch 1 2 1. Connect the three-prong plug into the machine. 2. Connect the electrical supply plug into a wall outlet. - When leaving the sewing machine unattended, the main switch of the machine - Brother International LS-1520 | Users Manual - English - Page 7
CONTENTS Page PRINCIPAL PARTS 1 PRINCIPAL PARTS 2 ACCESSORIES 3 OPERATING YOUR SEWING MACHINE 4 Connecting Plugs 4 Main Power and Sewing Light Switches 5 Foot Controller 5 Inserting the Needle 6 Checking the Needle 6 Changing the Presser Foot 7 Converting to Free-Arm Style 8 Steadying the - Brother International LS-1520 | Users Manual - English - Page 8
COSER 4 Conexión de los enchufes 4 Interruptor principal y de luz 5 Pedal 5 Inserción de la aguja 6 Comprobación de la aguja 6 Cambio COSTURA ....... 4 Tomadas de ligação 4 Interruptor de força e de iluminação 5 Pedal do motor 5 Colocação da agulha 6 Verificação da agulha 6 Troca do pé - Brother International LS-1520 | Users Manual - English - Page 9
PRINCIPAL PARTS PIECES PRINCIPALES ELEMENTOS PRINCIPALES PRINCIPAIS COMPONENTES 3 5 1 2 3 5 6 1 2 6 4 4 8 F 9 0 E D C A B G N IH O J L 7 M K P * The illustrations of the sewing machine on the following pages may differ slightly from your machine. * Les - Brother International LS-1520 | Users Manual - English - Page 10
B Shuttle hook C Bobbin case D Feed dogs E Needle F Needle clamp screw G Shuttle cover H Spool pin I Bobbin winder J Balance wheel K Foot controller jack L Presser foot lever M Main power/sewing light switch N Built-in handle O Thread guide/bobbin winding tension disc P Foot controller 1 Sélecteur - Brother International LS-1520 | Users Manual - English - Page 11
ACCESSORIES ACCESSOIRES 1 Buttonhole foot (1 pc.) 2 Zipper foot (1 pc.) 3 Button sewing Foot (1 pc.) 4 Needle set (regular single needle No. 14) (3 pcs.) 5 Twin needle (1 pc.) 6 Bobbins Parts code for zigzag presser foot: 138135-051 Foot puntada zigzag: 138135-051 Pedal: X57319-051 (zona - Brother International LS-1520 | Users Manual - English - Page 12
foot controller and the power supply plug on the cord, into the jack on the machine. 2. Insert the power supply plug into an electrical outlet. CAUTION: 1. When changing the light bulb or when the sewing machine is not in use, the power quina, el cordón, se encuentra situado entre el pedal y el - Brother International LS-1520 | Users Manual - English - Page 13
excess oil. Note (For U.S.A. only): This foot controller can be used for sewing machine model LS-2220/2720. 2. Il est nécessaire d'huiler une nouvelle machine ou une machine n'ayant pas été utilisée pendant une longue période de temps selon les instructions page 43. Après l'avoir huilée, essuyer - Brother International LS-1520 | Users Manual - English - Page 14
power switch to "O". 1. Remove the power supply plug from the electrical outlet. 2. Raise the needle bar to its highest position. 3. Lower the presser foot. 4. If a needle is already installed, remove the needle by loosening the needle Introduzca otra aguja, con la parte redonda cara a usted. Hay - Brother International LS-1520 | Users Manual - English - Page 15
presser foot according to your sewing needs. SNAP-ON TYPE Turn power switch to "O". 1. Raise the needle to its highest position by turning the balance wheel toward you (counterclockwise), and raise the presser foot lever. 2. Release the foot palanca que hay en la parte trasera del soporte. 3. Coloque - Brother International LS-1520 | Users Manual - English - Page 16
Modèle bras libre Free-Arm sewing is convenient for sewing tubular and hard-toreach areas on garments. To change your machine to the free-arm style, lift ajustar su altura girando el cojinete de goma que se encuentra en la parte anterior derecha de la placa de base hasta que la máquina quede estable - Brother International LS-1520 | Users Manual - English - Page 17
Pour sélectionner un modèle de point, tourner le sélecteur de modèle dans l'un ou l'autre sens. Sur la page suivante, vous trouverez une liste avec les longueurs et les largeurs de points en fonction du modèle choisi. 1 Sélecteur de modèle de point DISTINTOS MANDOS CONTROLES DIVERSOS Selector - Brother International LS-1520 | Users Manual - English - Page 18
NAME 4-STEP AUTOMATIC BUTTONHOLE ZIGZAG STITCH ZIGZAG STITCH ZIGZAG STITCH ZIGZAG (SATIN) STITCH STRAIGHT STITCH STRAIGHT STITCH (Left needle position) STRETCH BLIND STITCH SHELL TUCK STITCH ELASTIC STITCH PAGE IN INSTRUCTIONS 30 26 26 26 26 24 24 27 29 28 MOTIFS ET NOMS DES POINTS MODÈLE - Brother International LS-1520 | Users Manual - English - Page 19
PUNTADA ZIGZAG PUNTADA ZIGZAG (DE REALCE) PUNTADA RECTA PUNTADA RECTA (aguja a la izquierda) PUNTADA INVISIBLE ELÁSTICA PUNTADA ONDAS PUNTADA ELÁSTICA PÁGINA DEL manual 30 26 26 26 26 24 24 27 29 28 PADRÕES E NOMES DOS PONTOS PONTO 1(a-b-c-d) 2 3 4 5 6-10 11 12 13 14 DESIGNAÇÃO DO PONTO - Brother International LS-1520 | Users Manual - English - Page 20
is full. 6. When the machine stops, cut the thread between bobbin and spool, push the shaft to the left and remove the full bobbin from the shaft. CAUTION: Although the needle bar does not move when the bobbin winding shaft is slid toward the bobbin presser, the balance wheel will continue to turn - Brother International LS-1520 | Users Manual - English - Page 21
alrededor de la canilla y pare la máquina. 5. Deshaga el exceso de hilo arriba de la canilla. Siga bobinando el hilo en la canilla presionando el pedal. NOTA: La máquina se para automáticamente cuando la canilla está llena. 6. Cuando la máquina se pare, corte el hilo entre la canilla y el carrete - Brother International LS-1520 | Users Manual - English - Page 22
érieur (canette) Turn power switch to "O". 1. Raise the needle to its highest position by turning the balance wheel toward you (counterclockwise) and raise the presser foot lifter. 2. Open the shuttle cover behind the extension table on the front of the machine and remove the bobbin case by pulling - Brother International LS-1520 | Users Manual - English - Page 23
A 1 2 B-3 3 B-1 C B-2 2 4 Upper (Needle) Threading Mise en place du fil supérieur (fil de l'aiguille) Enhebrado superior (de la aguja) Passagem da linha superior (agulha) 1 2 3 4 15 - Brother International LS-1520 | Users Manual - English - Page 24
1. Raise the presser foot using the presser foot lifter and turn the balance wheel toward you (counterclockwise) to raise the thread take-up lever to its highest position. 2. Pull up the spool pin and place a spool of thread on this pin. 3. Pass the thread through both thread guides: the rear - Brother International LS-1520 | Users Manual - English - Page 25
thread will come up from the bobbin in a large loop. 4. Pull out about 15 cm (6") of both threads and place them toward the back of the machine straight behind the presser foot. The upper thread should pass between the toes of the presser foot. 1 Upper thread 2 Lower thread hacia la parte atrás de - Brother International LS-1520 | Users Manual - English - Page 26
Twin-Needle Sewing Your sewing machine is designed for twin-needle sewing which allows you to sew using two upper threads. You can use the same color or two different colors of thread for decorative stitches. Twinneedle sewing works well with these stitches: the Straight Stitch (6-10)-and the - Brother International LS-1520 | Users Manual - English - Page 27
está cara a usted. PARA INSTALAR EL PORTA CARRETES EXTRA Coloque el porta carretes vertical extra en el orificio previsto arriba de la máquina, en la parte derecha. Coloque el segundo carrete de hilo en el eje tal como indica la fig. A. 1 Porta carretes extra ENHEBRADO DE LA AGUJA DOBLE Cada una - Brother International LS-1520 | Users Manual - English - Page 28
des fils Thread tension will affect the quality of your stitches. It may need to be adjusted when you change fabric or thread type. NOTE: It is recommended that a test sample be made on a fabric scrap before sewing on your project. The basic thread tension setting is "5". Possible problems and how - Brother International LS-1520 | Users Manual - English - Page 29
sewing with thin thread on thin fabrics, the thread tension may not be adjusted adequately with the upper tension control dial. Therefore, the thread tension must be adjusted according to the procedure described below. C Bobbin tension pontos com laçadas na parte superior (direito) do tecido. - Brother International LS-1520 | Users Manual - English - Page 30
SEWING FABRICS, NEEDLES AND THREADS COMBINATIONS VERY THIN LIGHTWEIGHT MEDIUM WEIGHT HEAVYWEIGHT SEWING needle and thread size from the above chart. 2. Use the same size thread for the upper (spool) and lower (bobbin) threads #75/11 #90/14 (Livrés avec la machine) #100/16 Coton: 60-80 Soie: "A" - Brother International LS-1520 | Users Manual - English - Page 31
TABLA DE RELACIÓN ENTRE TEJIDOS, HILOS Y AGUJAS MUY FINO LIGERO MEDIO TEJIDOS TAMAÑO DE AGUJA TAMAÑO DE HILO Punto fino, Encaje fino, Lino fino, Seda, Tul, Gasa n° 65/9 Algodón: 80 Sintético/ Fibra larga de poliéster Algodón fino. Velo, Tafetán, Sintéticos, Seda, Batista n° 75/11 Algod - Brother International LS-1520 | Users Manual - English - Page 32
threads toward the back behind the presser foot. 4. Place the fabric under the presser foot and position the needle 1 cm (3/8") from the edge of the fabric. 5. Lower the presser foot. 6. To backtack, press the reverse sewing lever down as far as possible and lightly touch the foot controller. Sew - Brother International LS-1520 | Users Manual - English - Page 33
costura y pare. 2. Baje la palanca de retroceso y presione suavemente el pedal para coser hacia atrás sobre 1 cm (3/8") a partir de la próxima costura, tire unos 10 cm (4") de ambos hilos y páselos hacia la parte atrás de la máquina. El hilo superior debe pasar entre los salientes del prensatelas. - Brother International LS-1520 | Users Manual - English - Page 34
) Pattern ZIGZAG STITCH Set the pattern selection dial to the appropriate Zigzag Stitch (2, 3 or 4) with the desired width. It is recommended to sew using the Straight Stitch at the beginning and end of the Zigzag Stitches. 2 (Point zigzag) 3 (Point zigzag) 4 (Point zigzag) Modèle POINT - Brother International LS-1520 | Users Manual - English - Page 35
showing. 1. Set the pattern selection dial to 12. 2. Both the threads should be the same color as the fabric. 3. Fold back the fabric Leave a 6 mm (1/4") overlap at the edge. 4. Sew on the fold as in fig. C. 5. When the fabric is unfolded you will have a Stretch Blind Stitch hem as shown in fig. - Brother International LS-1520 | Users Manual - English - Page 36
sewing knitted fabrics. When nylon thread is used, the stitch will not be visible. 1. Place the edge of the two pieces of fabric together and center them under the presser foot. 2. Sew 14. REMIENDOS 1. Coloque una tela de refuerzo debajo de la parte a remendar. 2. Siguiendo la línea de la rasgadura, - Brother International LS-1520 | Users Manual - English - Page 37
tighter thread tension than normal. 3. At a slow speed, sew the fabric on the bias, placing it under the presser foot so tension du fil supérieur doit être légèrement plus forte que la normale. 3. Coudre lentement le tissu sur le biais après l'avoir placé sous le pied-de-biche de sorte que la machine - Brother International LS-1520 | Users Manual - English - Page 38
will be sewn first. Place the fabric under the presser foot so that the middle of the front of the tailor's chalk line is directly in the center of the presser foot de boutonnières à la machine donne des résultats très fiables tal como se ilustra. 1 Parte delantera de la marca con jaboncillo - Brother International LS-1520 | Users Manual - English - Page 39
) a b Step b (Left side) c Step c (Back end of buttonhole) Step d (Right side) d Pattern ac c a b ac c a d How to Sew 1. Set the pattern selection dial to a. 2. Lower the presser foot and sew 5 to 6 stitches. 3. Stop the machine when the needle is at the left side of the stitches and raise the - Brother International LS-1520 | Users Manual - English - Page 40
ño en d. 2. Cosa el lado derecho hasta que la aguja alcance las puntadas cosidas en el primer paso (Paso a). FAZER UMA BOTOEIRA Passo Parte costurada Passo a (mosca da frente da boto- eira) a b Passo b (lado esquerdo) c Passo c (mosca de trás da botoei- ra) Passo d (lado direito) d Padr - Brother International LS-1520 | Users Manual - English - Page 41
10) with the desired length and sew to the edge of the front bar tack. 2. Remove the fabric from the machine. It is recommended that pins recta (6-10) del largo deseado y cosa hasta el final del remate de la parte delantera. 2. Retire el tejido de la máquina. Se recomienda colocar alfileres en ambos - Brother International LS-1520 | Users Manual - English - Page 42
de la boutonnière sont dissemblables, procéder aux réglages suivants: 1. After sewing the left side of the buttonhole, stitch the right side and observe the feeding. incluye, gire el tornillo en el sentido del -. Si la parte derecha es demasiada fina, con el grande destornillador incluido, gire - Brother International LS-1520 | Users Manual - English - Page 43
a button between the foot and the fabric, turn the balance wheel and make sure that the needle enters the holes without hitting the button. If it hits, see step 1. 5. At a slow speed, sew approximately 10 stitches. 6. Remove the material from the machine. Cut the upper and lower threads leaving 15cm - Brother International LS-1520 | Users Manual - English - Page 44
the edge of the zipper guiding the zipper foot along the zipper teeth. 6. To sew the opposite side of the zipper, release the foot by raising the lever located at the back of the presser foot holder assembly, install the zipper foot on the other side of the zipper and continue sewing using the other - Brother International LS-1520 | Users Manual - English - Page 45
length. 2. Loosen the tension of the upper thread (to about 2) so that the lower thread lies on the underside of the fabric. 3. Sew a single row or superior (para cerca de 2) de forma que a linha inferior se mantenha na parte de baixo (do avesso) do tecido (i.e., que não seja puxada para o lado - Brother International LS-1520 | Users Manual - English - Page 46
presser foot and presser foot holder assembly or use an embroidering presser foot (sold separately). 5. Begin sewing alternating between gently drawing the work away from you and pulling it toward you. With the darning plate on the machine, the feed dogs will son support ou Coloque a parte a ser - Brother International LS-1520 | Users Manual - English - Page 47
a shape to be used as a decoration on a garment or project. 1. Baste the cut design to the fabric in the desired location where desired. 2. Carefully sew around the edge of the cutout design with the appropriate Zigzag Stitch (2, 3, 4 or 5). Pour créer une applique, il suffit de découper un morceau - Brother International LS-1520 | Users Manual - English - Page 48
presser bar with both the presser foot and presser foot holder assembly removed. 5. Placer l'ouvrage sous l'aiguille et abaisser la barre du pied-debiche, sans pied et sans support. 6. Pull the lower thread firme possível, com o avesso do tecido na parte de cima do aro interior. 5. Coloque o tecido - Brother International LS-1520 | Users Manual - English - Page 49
pattern selection dial to the Straight Stitch (6-10) with the desired length and sew a few stitches at the end of the last letter. MONOGRAMMES (fig. the desired length and sew a few stitches at the end of the design. CAUTION: Keep fingers away from moving parts, especially needles. 3. Pour arrêter - Brother International LS-1520 | Users Manual - English - Page 50
Remplacement de l'ampoule 1. Remove the power supply plug from the electrical outlet. 2. Loosen the face plate screw as shown in fig. A. 3. Remove the face plate from the machine as illustrated in fig. B. 4. Replace the sewing light bulb. See fig. C. 1 Bulb 2 Loosen 3 Tighten 5. Reattach the face - Brother International LS-1520 | Users Manual - English - Page 51
without thread installed for a short time. 4. Be sure to wipe any excess oil off the machine. NOTE: The machine should be oiled once a week if it is used more than one hour a day. If the machine is used more often, oil every day. Sewing machine oil is available from your local sewing machine dealer - Brother International LS-1520 | Users Manual - English - Page 52
NOTE: When the needle is lowered, the shuttle hook cannot be removed. Cleaning the Shuttle Race 1. Remove any accumulated lint and thread with a brush from the retaining ring, hook, driver and race body. 2. A cloth dampened with machine oil should be used to wipe the shuttle race clean of lint. - Brother International LS-1520 | Users Manual - English - Page 53
. Performance Checklist Liste de vérification en cas de défaillances Whenever sewing difficulties are encountered, review the section in this instruction manual that details the operation you are performing to make sure you are correctly using the machine. If the problem continues, the following - Brother International LS-1520 | Users Manual - English - Page 54
not sharp. M Page 6 No M The combination of needle size/ thread size/fabric is incorrect. M Page 22 No M Lower (bobbin) thread is tangled. M Page 17 No M Bobbin is not threaded properly in the shuttle hook. M Page 14 No M Lower thread tension is too tight. M Page 21 No M Lower - Brother International LS-1520 | Users Manual - English - Page 55
PERFORMANCE CHECK LIST FABRIC DOES NOT FEED PROPERLY NEEDLE BREAKS MACHINE IS NOISY OR SLOW MACHINE DOES NOT START The combination of needle size/ thread size/fabric is incorrect. M Page 22 No M Damaged or worn needle is used. M Page 6 No M Thread is tangled. M Pages 12-17 No M - Brother International LS-1520 | Users Manual - English - Page 56
LISTE DE VERIFICATION EN CAS DE DEFAILLANCES RUPTURE DU FIL SUPERIEUR RUPTURE fil supérieur n'est pas bien enfilé. Le fil inférieur (canette) est emmêlé. L'aiguille est mal installée. Mauvaise tension des fils. Le fil est trop tendu. M Page 16 Non M Le fil supérieur est emmêlé. M Page - Brother International LS-1520 | Users Manual - English - Page 57
LISTE DE VERIFICATION DES DEFAILLANCES L'ENTRAINEMENT DU TISSU N'EST PAS CORRECT L'AIGUILLE CASSE LA MACHINE EST BRUYANTE OU LENTE LA MACHINE NE DEMARRE PAS La combinaison aiguille/fil/tissu est incorrecte. M Page 22 Non M Une aiguille endommagée ou usée est utilisée. M Page 6 Non M - Brother International LS-1520 | Users Manual - English - Page 58
LISTADO DE POSIBLES INCIDENCIAS ROTURA DEL HILO SUPERIOR ROTURA DEL HILO INFERIOR (de la canilla) SALTO DE PUNTADAS BAGAS EN LAS PUNTADAS ARRUGAS EN EL TEJIDO ROTURA DEL HILO SUPERIOR M Página 16 No M El hilo superior está enredado El hilo inferior (de la canilla) está enredado M Pá - Brother International LS-1520 | Users Manual - English - Page 59
de alimentación está desconectado de la toma de corriente. M Página 4 No M El interruptor principal está apagado M Página 5 No M No se usa bien el pedal M Página 5 No M El eje de bobinado de la canilla se ha deslizado hacia el presor de la canilla. M Página 12 No M M M M PONGASE - Brother International LS-1520 | Users Manual - English - Page 60
LISTA DE CONTROLO DA EXECUÇÃO A LINHA SUPERIOR PARTE ROMPIMENTO DA LINHA INFERIOR (DA BOBINA) PONTOS FALSOS LAÇADAS NAS COSTURAS O TECIDO FRANZE Fio superior passado errado A linha inferior está emaranhada A agulha está mal - Brother International LS-1520 | Users Manual - English - Page 61
CONTROLO DA EXECUÇÃO O TECIDO NÃO ESTÁ A SER CORRETAMENTE ALIMENTADO A AGULHA PARTE A MÁQUINA É RUIDOSA OU LENTA A MÁQUINA NÃO ARRANCA A relação entre Não M O interruptor da máquina está desligado M Pág. 5 Não M O pedal não está sendo usado corretamente M Pág. 5 Não M O eixo do enrolador - Brother International LS-1520 | Users Manual - English - Page 62
and packing materials for future use. It may become necessary to reship the sewing machine. Improper packing or improper packing material could result in damage during shipping. Instructions for repacking the machine are illustrated below. Conserver le carton et les matériaux d'emballage pour - Brother International LS-1520 | Users Manual - English - Page 63
Foot Controller 5 Free-Arm Style 8 G Gathering 37 L Lower Threading 14 M Main Power Switch 5 Monogramming 40-41 N Needle Replacement/inspection 6 O Oiling 43 P Pattern Selection Dial 9 Performance Checklist 46, 47 Principal Parts 1-2 R Relative Chart of Sewing Fabrics, Needles and Threads - Brother International LS-1520 | Users Manual - English - Page 64
des boutonnières 34 F Fronces 37 G Graissage 43 Guide de dépannage 48, 49 I Insertion de fermeture à de l'ampoule 42 Levier de couture en marche arrière 12 Liste de vérification des défaillances 48, 49 M Mise en place du tension supérieure 20 T Tableau de comparaison tissus/aiguilles/fils 22 - Brother International LS-1520 | Users Manual - English - Page 65
45 Listado de posibles incidencias 50, 51 Página M Modalidad brazo libre 8 Monogramas 40-41 O Ojales 30, 32-33 P Palanca de retroceso 12 Pedal 5 Poner cremalleras 36 Puntada elástica 28 Puntada invisible 27 Puntada invisible elástica 27 Puntada de realce 26 Puntada de unión 28 Puntada - Brother International LS-1520 | Users Manual - English - Page 66
ção 43 Página P Para puxar o fio da bobina 17 Para retirar a lançadeira 44 Passagem da linha inferior (bobina 14 Passagem da linha superior 15-16 Pedal do motor 5 Pont cheio 26 Ponto concha 29 Ponto invisivel elástico 27 Ponto reto 24-25 Ponto ziguezague 26 Pregar botões 35 Pregar - Brother International LS-1520 | Users Manual - English - Page 67
ENGLISH FRANÇAIS ESPAÑOL PORTUGUÊS 194404-011 Printed in China
-
 1
1 -
 2
2 -
 3
3 -
 4
4 -
 5
5 -
 6
6 -
 7
7 -
8
-
9
-
10
-
11
-
12
-
13
-
14
-
15
-
16
-
17
-
18
-
19
-
20
-
21
-
22
-
23
-
24
-
25
-
26
-
27
-
28
-
29
-
30
-
31
-
32
-
33
-
34
-
35
-
36
-
37
-
38
-
39
-
40
-
41
-
42
-
43
-
44
-
45
-
46
-
47
-
48
-
49
-
50
-
51
-
52
-
53
-
54
-
55
-
56
-
57
-
58
-
59
-
60
-
61
-
62
-
63
-
64
-
65
-
66
-
67
 |
 |
Instruction Manual
Manuel d’instructions
Manual de instrucciones
Manual de Instruções