Brother International LS-2125i Users Manual - Multi
Brother International LS-2125i - Basic Sewing And Mending Machine Manual
 |
UPC - 012502615293
View all Brother International LS-2125i manuals
Add to My Manuals
Save this manual to your list of manuals |
Brother International LS-2125i manual content summary:
- Brother International LS-2125i | Users Manual - Multi - Page 1
Instruction Manual Manuel d'instructions Manual de instrucciones Manual de Instruções - Brother International LS-2125i | Users Manual - Multi - Page 2
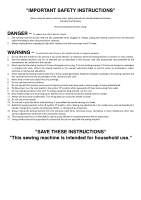
the needle, threading the bobbin, or changing the presser foot. 15. Always unplug the sewing machine from the electrical outlet when removing covers, lubricating, or when making any other user service adjustments mentioned in this instruction manual. 16. This sewing machine is not intended for use - Brother International LS-2125i | Users Manual - Multi - Page 3
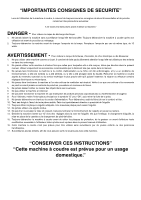
CONSIGNES DE SECURITE" Lors de l'utilisation de la machine à coudre, il convient de toujours suivre les consignes de sécurité essentielles et de prendre notamment les précautions suivantes: "Lire toutes les instructions avant d'utiliser la machine." DANGER - Pour réduire le risque de décharge - Brother International LS-2125i | Users Manual - Multi - Page 4
especificados en este manual. 3. Nunca haga funcionar la máquina de coser si el cordón de alimentación o la de todas las partes movibles de la máquina. Tener un cuidado especial con la aguja. 11. Usar siempre la placa de agujas apropiada. Una placa de agujas impropia puede producir la rotura de - Brother International LS-2125i | Users Manual - Multi - Page 5
o plugue da tomada ao remover alguma tampa ou cobertura, ao lubrificar a máquina ou ao efetuar qualquer um dos ajustes mencionados neste manual. 16. Esta máquina de costura não é destinada para ser usada por crianças pequenas ou pessoas deficientes sem supervisão. 17. Crianças pequenas devem ser - Brother International LS-2125i | Users Manual - Multi - Page 6
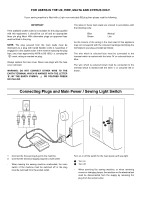
USERS IN THE UK, EIRE, MALTA AND CYPRUS ONLY. If your sewing machine be destroyed as a plug with bared flexible cords is hazardous if engaged in a live socket outlet power and sew-light. 1 Turn on 2 Turn off - When servicing the sewing machine, or when removing covers or changing lamps, the machine - Brother International LS-2125i | Users Manual - Multi - Page 7
CONTENTS Page PRINCIPAL PARTS 1 PRINCIPAL PARTS 2 ACCESSORIES 3 OPERATING YOUR SEWING MACHINE 4 Connecting Plugs 4 Main Power and Sewing Light Switches 5 Foot Controller 5 Inserting the Needle 6 Checking the Needle 6 Changing the Presser Foot 7 Converting to Free-Arm Style 8 Steadying the - Brother International LS-2125i | Users Manual - Multi - Page 8
TEJIDOS, HILOS Y AGUJAS 23 Puntada recta 24 Puntadas zigzag 26 Puntadas invisibles 27 Puntada elástica 28 Puntada ondas 29 Para coser ojales 30 Ajuste fino de los ojales 34 Coser botones 35 Poner de cremalleras 36 Fruncido 37 Zurcido 38 Aplicaciones 39 Monogramas y bordados 40 Cambio - Brother International LS-2125i | Users Manual - Multi - Page 9
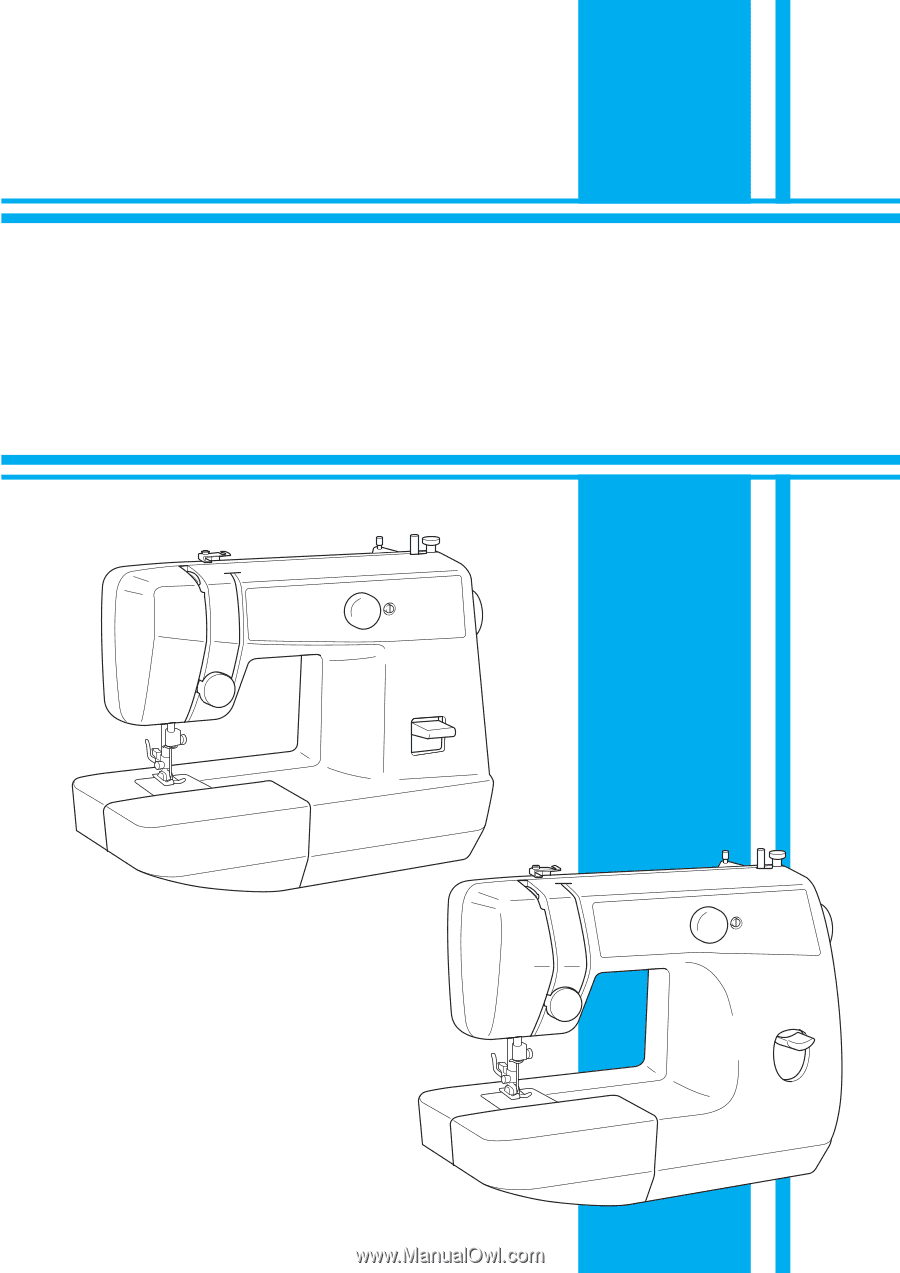
P * The illustrations of the sewing machine on the following pages may differ slightly from your machine. * Les illustrations représentées aux pages suivantes peuvent différer légèrement de votre machine à coudre. * Las ilustraciones de la máquina de coser, representadas en las siguientes páginas - Brother International LS-2125i | Users Manual - Multi - Page 10
case n Feed dogs o Needle p Needle clamp screw q Shuttle cover r Spool pin s Bobbin winder t Balance wheel u Foot controller jack v Presser foot lever w Main power/sewing light switch x Built-in handle y Thread guide/bobbin winding tension disc z Foot controller ELEMENTOS PRINCIPALES a Selector de - Brother International LS-2125i | Users Manual - Multi - Page 11
foot (1 pc.) c Button sewing Foot (1 pc.) d Needle set (regular single needle No. 14) (3 pcs.) e Twin needle (1 pc.) f Bobbins (3 pcs.) g Darning plate (1 pc.) h Screwdriver (1 pc.) i Extra spool pin (1 pc.) Parts code for zigzag presser foot: 138135-051 Foot (1 pc.) Code des éléments pour le pied - Brother International LS-2125i | Users Manual - Multi - Page 12
SEWING MACHINE Connecting Plugs 1. Insert the foot controller plug, located between the foot controller and the power supply plug on the cord, into the jack on the machine. 2. Insert the power supply plug into an electrical outlet. CAUTION: 1. When changing the light bulb or when the sewing machine - Brother International LS-2125i | Users Manual - Multi - Page 13
excess oil. Note (For U.S.A. only): This foot controller can be used for sewing machine model LS-2220/2720. a Foot controller: Model N Interrupteur principal et de la lampe Cet interrupteur permet d'allumer et d'éteindre la machine ainsi que la lampe de couture. (Voir fig. A.) a Allumer (pousser - Brother International LS-2125i | Users Manual - Multi - Page 14
power switch to "O". 1. Remove the power supply plug from the electrical outlet. 2. Raise the needle bar to its highest position. 3. Lower the presser foot 1. The sewing needle must always be straight and sharp for smooth sewing. 2. To está doblada, coloque la parte plana de la aguja hacia abajo como - Brother International LS-2125i | Users Manual - Multi - Page 15
to your sewing needs. SNAP-ON TYPE Turn power switch to "O". 1. Raise the needle to its highest position by turning the balance wheel toward you (counterclockwise), and raise the presser foot lever. 2. Release the foot by raising the lever located at the back of the presser foot holder assembly - Brother International LS-2125i | Users Manual - Multi - Page 16
Converting to Free-Arm Style Free-Arm sewing is convenient for sewing tubular and hard-toreach areas on garments. To change your machine to the free-arm style, lift up on the extension table and pull it out. a Lift the bottom of the extension table up toward you. b Pull the extension table - Brother International LS-2125i | Users Manual - Multi - Page 17
ou l'autre sens. Sur la page suivante, vous trouverez une liste avec les longueurs et les largeurs de points en fonction du modèle choisi. a Sélecteur de modèle de point DISTINTOS MANDOS Selector de puntadas Para seleccionar una puntada, sólo hace falta girar el disco en cualquier dirección. En la - Brother International LS-2125i | Users Manual - Multi - Page 18
STITCH STRAIGHT STITCH STRAIGHT STITCH (Left needle position) STRETCH BLIND STITCH SHELL TUCK STITCH ELASTIC STITCH PAGE IN INSTRUCTIONS 30 26 26 26 26 24 24 27 29 28 MOTIFS ET NOMS DES POINTS MODÈLE 1(a-b-c-d) 2 3 4 5 6-10 11 12 13 14 NOM DU POINT BOUTONNIÈRE AUTOMATIQUE EN 4 TEMPS POINT ZIGZAG - Brother International LS-2125i | Users Manual - Multi - Page 19
2 3 4 5 6-10 11 12 13 14 NOMBRE OJAL AUTOMÁTICO DE 4 PASOS PUNTADA ZIGZAG PUNTADA ZIGZAG PUNTADA ZIGZAG PUNTADA ZIGZAG (DE REALCE) PUNTADA RECTA PUNTADA RECTA (aguja a la izquierda) PUNTADA INVISIBLE ELÁSTICA PUNTADA ONDAS PUNTADA ELÁSTICA PÁGINA DEL manual 30 26 26 26 26 24 24 27 29 28 PADRÕES - Brother International LS-2125i | Users Manual - Multi - Page 20
bar does not move when the bobbin winding shaft is slid toward the bobbin presser, the balance wheel will continue to turn. Therefore, do not touch the balance wheel while the bobbin is being wound. ENFILAGE DE LA MACHINE Remplissage de la canette 1. Placer la bobine de fil sur le porte-bobine et - Brother International LS-2125i | Users Manual - Multi - Page 21
Muelle d Ranura 4. Sujetando el extremo del hilo, presione suavemente el pedal para que el hilo dé un par de vueltas alrededor de la canilla y pare la máquina. 5. Deshaga el exceso de hilo arriba de la canilla. Siga bobinando el hilo en la canilla presionando el pedal. NOTA: La máquina se para autom - Brother International LS-2125i | Users Manual - Multi - Page 22
Lower (bobbin) Threading Turn power switch to "O". 1. Raise the needle to its highest position by turning the balance wheel toward you (counterclockwise) and raise the presser foot lifter. 2. Open the shuttle cover behind the extension table on the front of the machine and remove the bobbin case by - Brother International LS-2125i | Users Manual - Multi - Page 23
A B-1 B-2 1 2 B-3 3 C 2 4 Upper (Needle) Threading Mise en place du fil supérieur (fil de l'aiguille) Enhebrado superior (de la aguja) Passagem da linha superior (agulha) 1 2 3 4 15 - Brother International LS-2125i | Users Manual - Multi - Page 24
1. Raise the presser foot using the presser foot lifter and turn the balance wheel toward you (counterclockwise) to raise the thread take-up lever to its highest position. 2. Pull up the spool pin and place a spool of thread on this pin. 3. Pass the thread through both thread guides: the rear one - Brother International LS-2125i | Users Manual - Multi - Page 25
lower thread will come up from the bobbin in a large loop. 4. Pull out about 15 cm (6") of both threads and place them toward the back of the machine straight behind the presser foot. The upper thread should pass between the toes of the presser foot. a Upper thread b Lower thread loop c Lower thread - Brother International LS-2125i | Users Manual - Multi - Page 26
Enfilage de l'aiguille de droite Suivre les mêmes instructions que pour l'enfilage d'une aiguille normale. Voir page 15 pour de plus amples détails. 2. Enfilage de l'aiguille de gauche Enfiler l'aiguille de gauche de la même manière que l'aiguille de droite mais sans passer le fil par le guide-fils - Brother International LS-2125i | Users Manual - Multi - Page 27
de coser ha sido concebida para poder utilizar una aguja doble y permitir la costura con dos hilos superiores. Puede usar el mismo color de hilo o dos hilos de carretel extra (vertical) no orifício correspondente, localizado na parte superior direita da máquina. Coloque um segundo carretel neste - Brother International LS-2125i | Users Manual - Multi - Page 28
you change fabric or thread type. NOTE: It is recommended that a test sample be made on a fabric scrap before sewing on your project. The basic thread tension setting is "5". Possible problems and how to correct them. A Upper tension is too tight. Locks appear on the surface of the fabric. A-1 Upper - Brother International LS-2125i | Users Manual - Multi - Page 29
, no adjustment is needed. When sewing with thin thread on thin fabrics, the thread tension may not be adjusted adequately with the upper tension control dial. Therefore, the thread tension must be adjusted according to the procedure described below. C Bobbin tension is too loose. Locks appear on - Brother International LS-2125i | Users Manual - Multi - Page 30
THREADS COMBINATIONS VERY THIN SEWING FABRICS Fine tricot, Fine SIZES #65/9 #75/11 #90/14 (Supplied with your machine.) #100/16 #90/14 (Ball point) Cotton: 80 Synthetic thread for the upper (spool) and lower (bobbin) threads. TABLEAU DES COMBINAISONS TISSU/AIGUILLE/FIL TRES FINS LEGERS MOYENS - Brother International LS-2125i | Users Manual - Multi - Page 31
n° 90/14 (Provista con la máquina) PESADO Tejano, Gabardina, Tweed, Pana, Toldo, Dril n° 100/16 PRENDAS DE PUNTO Prendas de punto simple, Prendas de punto doble, Jersey, Tricot n° 90/14 (Punta de bola) NOTA: 1.Elija la aguja y el hilo correctos en la tabla arriba. 2.Utilice el mismo tama - Brother International LS-2125i | Users Manual - Multi - Page 32
toward the back of the machine. The upper thread should pass between the toes of the presser foot. Puntada recta Número de puntada 6-10 (Aguja en el centro) 11 (Aguja a la izquierda) La puntada recta (No 6-10 ó 11) se usa para costuras de remate y para coser materiales ligeros. Point droit 6-10 - Brother International LS-2125i | Users Manual - Multi - Page 33
e inferior hacia la parte atrás del prensatelas. 4. Coloque el tejido debajo del prensatelas y posicione la aguja a 1 cm (3/8") de la orilla del tejido. 5. Baje el prensatelas. 6. Para retroceder, baje completamente la palanca de retroceso y presione ligeramente el pedal para coser 5 ó 10 puntadas - Brother International LS-2125i | Users Manual - Multi - Page 34
(2, 3 or 4) with the desired width. It is recommended to sew using the Straight Stitch at the beginning and end of the Zigzag coser con puntada recta al principio y al final de una costura de zigzag. Número de puntada 5 Costuras zigzag (de realce) PUNTADA ZIGZAG (DE REALCE) Las puntadas de - Brother International LS-2125i | Users Manual - Multi - Page 35
mm (1/4") overlap at the edge. 4. Sew on the fold as in fig. C. de puntadas en 12. 2. Ambos hilos deben ser del mismo color que el tejido. 3. Doble el tejido según la orilla que desee hacer tal como ilustra la fig. A. Luego, déle la vuelta tal como indica la fig. B. Deje unos 6 mm (1/4") sin coser - Brother International LS-2125i | Users Manual - Multi - Page 36
together and center them under the presser foot. 2. Sew them together using the Elastic Stitch taking de part et d'autre du pied-de-biche (voir fig. B). ASSEMBLAGE DE TISSUS Le point élastique peut servir à assembler deux morceaux de tissu. Il s'avère particulièrement efficace pour la couture de - Brother International LS-2125i | Users Manual - Multi - Page 37
(lace-like) edge on a lightweight fabric. 1. Set the pattern selection dial to 13. 2. Use a tighter thread tension than normal. 3. At a slow speed, sew the fabric on the bias, placing it under the presser foot so that the straight stitches are sewn on the seamline and the zigzag stitches are sewn - Brother International LS-2125i | Users Manual - Multi - Page 38
of the tailor's chalk line is directly in the center of the presser foot and aligned with the two red lines on the insert as shown below. a Front of chalk mark b Red lines Création d'une boutonnière Modèle 1(b ac d) Pied-de-biche Pied pour boutonnières REMARQUE: 1. Il est vivement conseill - Brother International LS-2125i | Users Manual - Multi - Page 39
same as a). 2. Lower the presser foot and sew 5 to 6 stitches. 3. Stop the machine when the needle is at the de modèle sur b. 2. Coudre la longueur de la ligne pré-définie à la craie. 3. Arrêter la machine lorsque l'aiguille se trouve à gauche des points et lever l'aiguille. 1. Mettre le sélecteur de - Brother International LS-2125i | Users Manual - Multi - Page 40
UN OJAL Pasos Paso a (remate de la parte delantera del ojal) Paso b (lado izquierdo) Zona de cosido a b Paso c c (remate de la parte atrás del ojal) Paso d (lado derecho) d Diseño ac c a b ac c a d Como coser 1. Ponga el selector de diseño en a. 2. Baje el prensatelas y cosa 5 ó 6 puntadas - Brother International LS-2125i | Users Manual - Multi - Page 41
with the desired length and sew to the edge of the front bar tack. 2. Remove the fabric from the machine. It is recommended that pins del remate de la parte delantera. 2. Retire el tejido de la máquina. Se recomienda colocar alfileres en ambos extremos del ojal para evitar el corte de las puntadas. - Brother International LS-2125i | Users Manual - Multi - Page 42
uniform, the following adjustments can be made. 1. After sewing the left side of the buttonhole, stitch the right side de coser la parte izquierda del ojal, cosa la parte derecha y mire la alimentación del tejido. 2. Si la parte derecha del ojal es demasiada gruesa o fina con relación a la parte - Brother International LS-2125i | Users Manual - Multi - Page 43
in fig. A. 4. Place a button between the foot and the fabric, turn the balance wheel and make sure that the needle enters the holes without hitting the button. If it hits, see step 1. 5. At a slow speed, sew approximately 10 stitches. 6. Remove the material from the machine. Cut the upper and lower - Brother International LS-2125i | Users Manual - Multi - Page 44
the fabric close to the edge of the zipper guiding the zipper foot along the zipper teeth. 6. To sew the opposite side of the zipper, release the foot by raising the lever located at the back of the presser foot holder assembly, install the zipper foot on the other side of the zipper and continue - Brother International LS-2125i | Users Manual - Multi - Page 45
length. 2. Loosen the tension of the upper thread (to about 2) so that the lower thread lies on the underside of the fabric. 3. Sew a single row or para cerca de 2) de forma que a linha inferior se mantenha na parte de baixo (do avesso) do tecido (i.e., que não seja puxada para o lado de cima). - Brother International LS-2125i | Users Manual - Multi - Page 46
. 4. Either remove both the presser foot and presser foot holder assembly or use an embroidering presser foot (sold separately). 5. Begin sewing alternating between gently drawing the work away from you and pulling it toward you. With the darning plate on the machine, the feed dogs will not - Brother International LS-2125i | Users Manual - Multi - Page 47
design to the fabric in the desired location where desired. 2. Carefully sew around the edge of the cutout design with the appropriate Zigzag Stitch (2, Modèle Pour créer une applique, il suffit de découper un morceau d'un tissu contrastant et de lui donner la forme d'une décoration à appliquer sur - Brother International LS-2125i | Users Manual - Multi - Page 48
lower the presser bar with both the presser foot and presser foot holder assembly removed. 6. de- biche, sans pied et sans support. 6. Tirer le fil inférieur vers le haut à travers l'ouvrage à la position de départ en tournant le volant et faire quelques points de maintien. 7. Saisir le tambour des - Brother International LS-2125i | Users Manual - Multi - Page 49
the desired length and sew a few stitches at the end of the design. CAUTION: Keep fingers away from moving parts, especially needles. MONOGRAMMES déplacer lentement. 3. Pour arrêter la couture, régler le sélecteur de modèle de point sur le point droit (6-10) avec la longueur souhaitée et coudre - Brother International LS-2125i | Users Manual - Multi - Page 50
fig. B. 4. Replace the sewing light bulb. See fig. C. a Bulb b Loosen c Tighten 5. Reattach the face plate and fasten the screw as shown in fig. D. Remplacement de l'ampoule 1. Retirer la fiche d'alimentation de la prise de courant. 2. Desserrer la vis du capot de la machine comme indiqué à la fig - Brother International LS-2125i | Users Manual - Multi - Page 51
ário ou no centro de reparações local. Não aplique óleo em demasia, pois poderá manchar a linha ou o tecido. A Cleaning Removing the Shuttle Hook 1. Remove the needle. 2. Remove the extension table and open the shuttle cover on the front of the free arm. 3. Take out the bobbin case by opening its - Brother International LS-2125i | Users Manual - Multi - Page 52
ère. 2. Nettoyer la coursière avec un chiffon imbibé d'huile pour machine. 3. Nettoyer la bourre du crochet de la navette comme indiqué au point 2. 4. Remonter le crochet avec l'encoche vers le haut et repousser les pattes de blocage en place, pour qu'elles maintiennent l'anneau en place. a Anneau - Brother International LS-2125i | Users Manual - Multi - Page 53
na parte superior dos deutes e no corpo da lançadeira com uma escova. Performance Checklist Whenever sewing difficulties are encountered, review the section in this instruction manual that details the operation you are performing to make sure you are correctly using the machine. If the problem - Brother International LS-2125i | Users Manual - Multi - Page 54
No Needle is bent or not sharp. Lower (bobbin) thread is tangled. Page 17 No Bobbin is not threaded properly in the shuttle hook. Page 14 No Lower thread tension is too tight. Page 21 No Lower threading is is incorrect. Page 22 No Page 16 No CONTACT YOUR LOCAL SERVICE CENTER 46 - Brother International LS-2125i | Users Manual - Multi - Page 55
CHECK LIST NEEDLE BREAKS MACHINE IS NOISY OR SLOW MACHINE DOES NOT START The Power supply plug is removed from outlet. Page 4 No Main power switch is turned off. Page 5 No Foot controller is not used correctly. Page 5 No The bobbin winding shaft is slid toward the bobbin presser - Brother International LS-2125i | Users Manual - Multi - Page 56
Le fil inférieur (canette) est emmêlé. L'aiguille est mal installée. Mauvaise tension des fils. Le fil est trop tendu. Page 16 Non Le fil supérieur est emmêlé. Page 17 Non La canette est mal installée dans le crochet de la navette. Page 6 Non Une aiguille endommagée ou usée est utilis - Brother International LS-2125i | Users Manual - Multi - Page 57
MACHINE EST BRUYANTE OU LENTE LA MACHINE NE DEMARRE PAS La combinaison aiguille/fil/tissu est incorrecte. L'aiguille est mal installée. Des Page 5 Non L'axe de bobinage de la canette est glissé vers la position de bobinage. Page 12 Non CONTACTER LE SERVICE TECHNIQUE LE PLUS PROCHE 49 - Brother International LS-2125i | Users Manual - Multi - Page 58
es demasiado tirante Página 20 No El carrete está mal colocado Página 17 No El hilo inferior es demasiado tirante Página 6 No La combinación tamaño de aguja/grueso de hilo/ tejido no es correcta Página 21 No El hilo inferior está mal enhebrado Página 23 No Hay polvo en el fondo - Brother International LS-2125i | Users Manual - Multi - Page 59
INCIDENCIAS EL TEJIDO NO ARRASTRA BIEN LAAGUJA SE ROMPE LA MAQUINA ES RUIDOSA O FUNCIONA MUY DESPACIO LA MAQUINA NO ARRANCA La combinaison aiguille/fil/tissu est incorrecte. La aguja está mal colocada Hay polvo en la placa de agujas Página 23 No Se está usando una aguja dañada o gastada - Brother International LS-2125i | Users Manual - Multi - Page 60
LISTA DE CONTROLO DA EXECUÇÃO A LINHA SUPERIOR PARTE ROMPIMENTO DA LINHA INFERIOR (DA BOBINA) PONTOS FALSOS LAÇADAS NAS COSTURAS O TECIDO FRANZE Fio superior passado errado A linha inferior está emaranhada A agulha está mal - Brother International LS-2125i | Users Manual - Multi - Page 61
LISTA DE CONTROLO DA EXECUÇÃO O TECIDO NÃO ESTÁ A SER CORRETAMENTE ALIMENTADO A AGULHA PARTE A MÁQUINA É RUIDOSA OU LENTA A MÁQUINA NÃO ARRANCA A relação entre a agulha, linha e tecido não está correta. A agulha não está colocada corretamente Pág. 23 Não A agulha em uso está danificada ou - Brother International LS-2125i | Users Manual - Multi - Page 62
for future use. It may become necessary to reship the sewing machine. Improper packing or improper packing material could result in damage during shipping. Instructions for repacking the machine are illustrated below. Emballage de la machine Conserver le carton et les matériaux d'emballage pour - Brother International LS-2125i | Users Manual - Multi - Page 63
-21 Troubleshooting 46, 47 Twin-Needle Sewing 18 U Upper Tension Control Dial 20 Upper Threading 15-16 W Winding the Bobbin 12 F Feed Dog Cleaning 45 Foot Controller 5 Free-Arm Style 8 Z Zigzag Stitching 26 Zipper Insertion 36 G Gathering 37 L Lower Threading 14 M Main Power Switch - Brother International LS-2125i | Users Manual - Multi - Page 64
6 Appliques 39 B Boutonnière 30-31, 33 Broderies 40-41 C Coudre un bouton 35 Couture avec une aiguille jumelée 18 E Emballage 54 Equilibrage des boutonnières 34 F Fronces 37 G Graissage 43 Guide de dépannage 48, 49 I Insertion de fermeture à glissière 36 Interrupteur principal 5 L Lampe - Brother International LS-2125i | Users Manual - Multi - Page 65
3 Aguja Cambio/Verificación 6 Ajuste fino de los ojales 34 Aplicaciones 39 B Bobinado de la canilla 13 Bombilla Cambio de la bombilla 42 Interruptor 5 Bordado 40-41 C Conexión de los enchufes 4 Costura con dos agujas 19 Costura de botones 35 D Disco de tensión del hilo superior 20 - Brother International LS-2125i | Users Manual - Multi - Page 66
cheio 26 Ponto concha 29 Ponto invisivel elástico 27 Ponto reto 24-25 Ponto ziguezague 26 Pregar botões 35 Pregar zípers 36 Principais componentes 1, 2 Q Quadro proporcional de tecidos, agulhas e linhas para costura ........ 23 R Reembalagem da máquina 54 T Tensão da linha 20-21 Tomadas - Brother International LS-2125i | Users Manual - Multi - Page 67
ENGLISH FRANÇAIS ESPAÑOL PORTUGUÊS 194404-011 Printed in China
-
 1
1 -
 2
2 -
 3
3 -
 4
4 -
 5
5 -
 6
6 -
 7
7 -
8
-
9
-
10
-
11
-
12
-
13
-
14
-
15
-
16
-
17
-
18
-
19
-
20
-
21
-
22
-
23
-
24
-
25
-
26
-
27
-
28
-
29
-
30
-
31
-
32
-
33
-
34
-
35
-
36
-
37
-
38
-
39
-
40
-
41
-
42
-
43
-
44
-
45
-
46
-
47
-
48
-
49
-
50
-
51
-
52
-
53
-
54
-
55
-
56
-
57
-
58
-
59
-
60
-
61
-
62
-
63
-
64
-
65
-
66
-
67
 |
 |
Instruction Manual
Manuel d’instructions
Manual de instrucciones
Manual de Instruções