Brother International LS-2125i Users Manual - English
Brother International LS-2125i - Basic Sewing And Mending Machine Manual
 |
UPC - 012502615293
View all Brother International LS-2125i manuals
Add to My Manuals
Save this manual to your list of manuals |
Brother International LS-2125i manual content summary:
- Brother International LS-2125i | Users Manual - English - Page 1
KNOWING YOUR SEWING MACHINE SEWING BASICS UTILITY STITCHES APPENDIX Basic Sewing and Mending Machine Operation Manual Please visit us at http://solutions.brother.com where you can get product support and answers to frequently asked questions (FAQs). - Brother International LS-2125i | Users Manual - English - Page 2
- Brother International LS-2125i | Users Manual - English - Page 3
changing the needle, threading the bobbin, or changing the presser foot. 15. Always unplug the sewing machine from the electrical outlet when removing covers, lubricating, or when making any other user service adjustments mentioned in this instruction manual. 16. This sewing machine is not intended - Brother International LS-2125i | Users Manual - English - Page 4
FOR USERS IN THE UK, EIRE, MALTA AND CYPRUS ONLY If this machine is fitted with a three-pin non-rewireable BS plug then please read the following. IMPORTANT If the available socket outlet is not suitable for the - Brother International LS-2125i | Users Manual - English - Page 5
presser feet, needle, or other parts to assure correct installation. For repair or adjustment In the event a malfunction occurs or adjustment is required, first follow the troubleshooting table in the back of the operation manual to inspect and adjust the machine yourself. If the problem persists - Brother International LS-2125i | Users Manual - English - Page 6
main parts ...6 Needle and presser foot section ...8 Flat bed attachment ...8 ACCESSORIES ...9 USING YOUR SEWING MACHINE 10 Power supply precautions ...10 Power supply ...10 Foot controller ...11 Steadying the machine ...11 THREADING THE MACHINE 12 Winding the bobbin ...12 Lower threading ...14 - Brother International LS-2125i | Users Manual - English - Page 7
...43 Elastic stitching ...44 4. APPENDIX ...45 MAINTENANCE ...45 Oiling ...45 Changing the bulb ...45 Cleaning the machine surface ...46 Cleaning the shuttle race ...46 Cleaning the feed dogs ...47 Repacking the machine ...48 Bobbin case tension adjustment ...48 TROUBLESHOOTING ...50 INDEX ...53 5 - Brother International LS-2125i | Users Manual - English - Page 8
SEWING MACHINE 1 KNOWING YOUR SEWING MACHINE NAMES OF MACHINE PARTS AND THEIR FUNCTIONS The main parts Thread take-up lever (page 16) d Upper tension control dial (page 28) This controls the tension of the upper thread. e Flat bed attachment with accessory storage (page 8 and 31) f Reverse sewing - Brother International LS-2125i | Users Manual - English - Page 9
pre-tension disc/thread guide (page 12 and 16) The thread guide/bobbin winding pre-tension disc is used when winding the thread onto the bobbin and threading the machine. p Foot controller (page 11) Use the foot controller to control the sewing speed and to start and stop sewing. Part code; XC7359 - Brother International LS-2125i | Users Manual - English - Page 10
KNOWING YOUR SEWING MACHINE Needle and presser foot section Flat bed attachment The accessories are stored in a compartment inside the flat bed attachment. Lift the bottom of the flat bed attachment a toward you, and then pull the flat bed attachment out to remove it. a Presser foot holder - Brother International LS-2125i | Users Manual - English - Page 11
. We have designed these accessories to help you be able to carry out most sewing tasks. 1 Note (For U.S.A. only) ● Foot controller: Model KD-1902, N This foot controller can be used on the following machine models: LS-2220/2720/1520/2125/2125i. ● The screw of the presser foot holder is available - Brother International LS-2125i | Users Manual - English - Page 12
authorized dealer for repairs before continuing use. ● Unplug the power cord if the machine is not to be used for a long period of time. Otherwise a fire may result. Power supply Set the main power switch to "I". b Insert the foot controller plug, located a between the foot controller and the - Brother International LS-2125i | Users Manual - English - Page 13
Note ● If a power outage occurs while the sewing machine is being operated, turn off the ● When connecting the foot controller, be sure 1 to turn off the sewing machine in order to prevent the machine from accidentally being started. sewing machine and unplug the power supply cord. When - Brother International LS-2125i | Users Manual - English - Page 14
for this sewing machine. Using other bobbins may cause damage to the machine. ● We designed the bobbin that comes with this machine. If you use bobbins from other models, the machine will not work properly. Only use the bobbin that comes with this machine or bobbins of the same type (part code - Brother International LS-2125i | Users Manual - English - Page 15
While holding the end of the thread, gently f press the foot controller to wind the thread Cut the thread, slide the bobbin winder shaft j to the left and remove the bobbin. around the bobbin a few times. Then stop the machine. Memo ● When the sewing machine is started or the 1 handwheel is - Brother International LS-2125i | Users Manual - English - Page 16
enclosed bobbin or bobbins of the same type (part code: SA156, SFB: XA5539-151). Actual size 11.5 mm (7/16 inches) This model Other models CAUTION ● Make sure you turn the power off while threading the machine. If you accidentally step on the foot controller and the machine starts to sew, you - Brother International LS-2125i | Users Manual - English - Page 17
fits into the notch at the top of the shuttle race. a Bobbin case finger b Notch Close the shuttle cover. g CAUTION ● Make sure that the bobbin case is properly placed back into the machine. If it is incorrectly installed, it will fall out from the shuttle when the machine starts to sew. 1 15 - Brother International LS-2125i | Users Manual - English - Page 18
YOUR SEWING MACHINE Upper threading Set the upper thread and thread the needle. a Spool pin b Thread guide (rear) c Thread guide (front) d Thread take-up lever CAUTION ● Make sure you thread the machine properly. Otherwise, the thread could tangle and break the needle. Raise the presser foot - Brother International LS-2125i | Users Manual - English - Page 19
inches) Note ● If the thread take-up lever is lowered, the upper thread cannot be wrapped around the thread take-up lever. Make sure you raise the presser foot lever and the thread take-up lever before you feed the upper thread. ● If you incorrectly feed the thread you may cause sewing problems. 17 - Brother International LS-2125i | Users Manual - English - Page 20
KNOWING YOUR SEWING MACHINE Drawing up the lower thread Lightly hold the end of the upper thread. a Pull out about 15 cm (6 inches) of both d threads and pull them toward the back of the machine under the presser foot. a Upper thread While holding the end of the upper thread, b raise the needle - Brother International LS-2125i | Users Manual - English - Page 21
carefully follow the instructions below. CAUTION ● Only use home sewing machine needles. Use of any other needle may bend the needle or damage the machine. ● Never use bent needles. Bent needles can easily break, possibly resulting in injury. Selecting the needle depending on the thread and fabric - Brother International LS-2125i | Users Manual - English - Page 22
straight according to the instructions in "Checking the needle" . Turn off the sewing machine. a CAUTION ● Before replacing the needle, be sure to turn off the sewing machine, otherwise injuries may occur if the foot controller is accidentally pressed and the machine starts sewing. Raise the needle - Brother International LS-2125i | Users Manual - English - Page 23
or tightening the needle clamp screw, otherwise certain parts of the sewing machine may be damaged. CAUTION ● Be sure to insert e rear of the machine, insert the needle until it touches the needle stopper. a Needle stopper a Needle clamp screw b Needle bar thread guide c Needle bar Align - Brother International LS-2125i | Users Manual - English - Page 24
the needle may break or the machine may be damaged. ● Slowly turn the handwheel toward you (counterclockwise) and check that the needle does not touch the presser foot. If the needle hits the presser foot, the needle may bend or break. ● When changing the sewing direction, be sure to raise the - Brother International LS-2125i | Users Manual - English - Page 25
feet may cause an accident or injury. Replacing the presser foot Press the black button at the back of the d presser foot holder to release the presser foot. Replace the presser foot as described below. If the sewing machine has been turned on, a turn it off. CAUTION ● Before replacing the - Brother International LS-2125i | Users Manual - English - Page 26
KNOWING YOUR SEWING MACHINE Raise the presser foot lever to check that the g presser foot is securely attached. ■ Attaching the presser foot holder Align the presser foot holder with the lower- a left side of the presser bar. Removing the presser foot holder Remove the presser foot holder when - Brother International LS-2125i | Users Manual - English - Page 27
2 SEWING BASICS SEWING Basic sewing operations are described below. Before operating the sewing machine, read the following precautions. 2 CAUTION ● While the machine is in operation, pay special attention to the needle location. In addition, keep your hands away from all moving parts such as - Brother International LS-2125i | Users Manual - English - Page 28
SEWING BASICS Selecting stitching Turning the stitch selection dial in either direction, select the desired stitch. Number on dial aPattern selection dial Stitch name Pattern 1 4-step automatic - Brother International LS-2125i | Users Manual - English - Page 29
the fabric under the presser foot, pass d the thread under the presser foot, and then pull out about 5 cm (2 inches) of thread toward the rear of the machine. a 5 cm (2 inches) X The machine starts sewing. Take your foot off the foot controller. h X The machine stops sewing. Raise the needle to - Brother International LS-2125i | Users Manual - English - Page 30
SEWING BASICS Pull the fabric to the left side of the machine, k and then pass the threads through the thread cutter on the back of the presser foot bar to cut them. Thread tension The thread tension will affect the quality of your stitches. You may need to adjust it when you change fabric or - Brother International LS-2125i | Users Manual - English - Page 31
the screw more than one full turn. In addition, be sure to return the screw to its original position before the next time that the machine is used. Note ● The bobbin thread tension has been adjusted at the factory for general use. For most sewing applications, no adjustment is needed. 29 - Brother International LS-2125i | Users Manual - English - Page 32
■ If the fabric does not fit under the presser foot If the fabric does not fit easily under the presser foot, raise the presser foot lever even higher to bring the presser foot to its highest position. Lower the presser foot lever and continue c sewing. 30 CAUTION ● If fabric more than 6 mm (15 - Brother International LS-2125i | Users Manual - English - Page 33
fabrics First, baste the pieces of fabric together, and then sew without stretching the fabric. a Basting Using a free-arm style Free-arm sewing is convenient for sewing tubular and hard-to-reach areas. To change your machine to the free-arm style, lift the bottom of the flat bed attachment toward - Brother International LS-2125i | Users Manual - English - Page 34
operation. They are also useful for sewing sewing is finished, cut the thread. d • For details, refer to "Starting to sew" (page 27). CAUTION ● Slowly turn the handwheel toward you (counterclockwise) and check that the needle does not touch the presser foot. If the needle hits the presser foot - Brother International LS-2125i | Users Manual - English - Page 35
Attaching Straight stitch zippers, basic (Center needle stitching, and position) sewing gathers or darning, etc. Number on stitching. Start sewing. d • For details, refer to "Starting to sew" (page 27). When sewing is finished, cut the thread. e • For details, refer to "Starting to sew" (page - Brother International LS-2125i | Users Manual - English - Page 36
Select the stretch blind stitch (8). f Remove the flat bed attachment and make g free-arm sewing possible. • For details on free-arm sewing, refer to"Using a free-arm style" (page 31). Slide the part that you wish to sew onto the h arm, make sure that the fabric feeds correctly, and then start - Brother International LS-2125i | Users Manual - English - Page 37
6 Straight stitch (Center needle position) Application Attaching zippers, basic stitching, and sewing gathers or darning, etc. Place the darning plate on the needle plate as a shown below, and then remove both the presser foot and presser foot holder assembly. 3 a Wrong side of fabric b Right - Brother International LS-2125i | Users Manual - English - Page 38
of the presser foot and aligned with the two red lines on the insert. Pass the upper thread down through the hole in the presser foot. a Presser foot scale b Pin c Marks on buttonhole foot d 5 mm (3/16 inches) 36 a Mark on fabric b Red marks on the sliding insert Start sewing. Sew 5 to 6 stitches - Brother International LS-2125i | Users Manual - English - Page 39
the stitching sewn in step e. For reinforcement, turn the fabric 90 degrees counterclockwise, select the straight stitch (6 through 10) with the desired length, and then sew to the edge of the front bar tack. Raise the presser foot lever, remove the o fabric, and cut the thread. 37 - Brother International LS-2125i | Users Manual - English - Page 40
the darning plate on the needle plate as c shown below. Place a button between the presser foot and d the fabric. • When attaching four-hole buttons, first sew the two holes closest to you. Then, slide the button so that the needle goes into the two holes toward the rear of the sewing machine, and - Brother International LS-2125i | Users Manual - English - Page 41
to sew a few reinforcement stitches. Pull the fabric to the left side of the machine, g and then cut the upper and lower threads, leaving a length of 15 cm (6 inches). Pull the upper thread at the end of the h stitching to the wrong side of the fabric, and then tie it with the bobbin thread. Use - Brother International LS-2125i | Users Manual - English - Page 42
of the zipper, attach the shank to the right pin of the zipper foot. Number on dial Stitch name 6 Straight stitch (Center needle position) Application Attaching zippers, basic stitching, and sewing gathers or darning, etc. Sew from the bottom of the zipper toward the d top on both sides. The - Brother International LS-2125i | Users Manual - English - Page 43
fabric. a CAUTION ● Be careful that the needle does not hit a pin during sewing, as the needle can break. You may also be injured. Cut away any fabric embroidering Place the darning plate on the needle plate as a shown below, and then remove both the presser foot and presser foot holder assembly. - Brother International LS-2125i | Users Manual - English - Page 44
of both hands while pressing the fabric with the middle and third fingers, and support the outside of the hoop with your little fingers. Start sewing. h CAUTION ● Be sure to keep your fingers away from moving parts, especially needles. Memo ● Be sure to keep the stitches close together. Select the - Brother International LS-2125i | Users Manual - English - Page 45
decorative stitches can be sewn with this sewing machine. Gathering Shell tuck stitching Number on dial Stitch name Application 6 Attaching zippers, Straight stitch basic stitching, (Center needle and sewing position) gathers or darning, etc. Number on dial Stitch name Application - Brother International LS-2125i | Users Manual - English - Page 46
reinforcement fabric under the tear to be mended, and then sew over the tear. ■ Joining fabric Put the edges of the two pieces of fabric together, and then place them under the presser foot with the fabric edges under the center of the presser foot. Then, start sewing the edges of the two fabrics - Brother International LS-2125i | Users Manual - English - Page 47
use it more than an hour a day. If you use it more often, oil every day. ● Sewing machine oil is available at your local sewing machine dealer or service center. ● Do not apply too much oil as it may soil the thread and fabric. Note ● Hold the face plate securely while removing or attaching it. 45 - Brother International LS-2125i | Users Manual - English - Page 48
electric shock may occur. Turn off the machine and unplug it. a Raise the needle and the presser foot, and b then remove the presser foot and the needle. Remove the flat bed attachment and open the c shuttle cover at the front of the free arm. Remove the bobbin case by pulling its latch d toward you - Brother International LS-2125i | Users Manual - English - Page 49
bobbin case, the presser foot and k the needle before using the machine. Cleaning the feed dogs a Retaining ring b Hook c Hook center post Use a brush to remove any accumulated lint g and thread a brush to clean the lint from the upper e part of the feed dogs and shuttle race body. a Retaining ring - Brother International LS-2125i | Users Manual - English - Page 50
is needed to transport this sewing machine. Bobbin case tension adjustment The bobbin thread tension has already been adjusted at the factory for general use. For most sewing applications, no adjustment is needed. When sewing with thin thread on thin fabrics, the thread tension may not be adjusted - Brother International LS-2125i | Users Manual - English - Page 51
dial to a higher number. Note ● If the loops still appear on the wrong side of the fabric after you adjust the upper tension, 4 the bobbin thread may be too tight. In this case, turn the screw counterclockwise being careful not to over-loosen the screw, approximately 30-45 degrees to - Brother International LS-2125i | Users Manual - English - Page 52
Center offers the latest FAQs and troubleshooting tips. Visit us at [http://solutions.brother.com]. If the problem persists, contact your dealer or the nearest authorized service center. Symptom The sewing machine does not work. The needle breaks. The upper thread breaks. Possible cause How to - Brother International LS-2125i | Users Manual - English - Page 53
. Contact your retailer or the nearest authorised service center. - The upper thread breaks. The area around the hole in the presser foot is scratched. Replace the presser foot. Contact your retailer or the nearest authorised service center. - The bobbin case is scratched, or has a burr on - Brother International LS-2125i | Users Manual - English - Page 54
has built up in the feed dogs or in the shuttle race. You have not threaded the upper thread properly. The bobbin case is scratched. You have not used bobbin that has been designed for this machine. Insufficient oiling. The presser foot that you are using is not correct for the type of stitch. The - Brother International LS-2125i | Users Manual - English - Page 55
fabrics 30 thin fabrics 31 thread cutter 28 thread guide 16 thread tension 28 trial sewing 30 troubleshooting 50 , twin needle 21 22 U upper tension-control dial 28, 29, 48 upper threading 16 W winding the bobbin 12 Z zigzag stitches 30, 32, 41 zipper foot 40 zipper insertion 40 53 - Brother International LS-2125i | Users Manual - English - Page 56
English XE4592-001 Printed in China
-
 1
1 -
 2
2 -
 3
3 -
 4
4 -
 5
5 -
 6
6 -
 7
7 -
8
-
9
-
10
-
11
-
12
-
13
-
14
-
15
-
16
-
17
-
18
-
19
-
20
-
21
-
22
-
23
-
24
-
25
-
26
-
27
-
28
-
29
-
30
-
31
-
32
-
33
-
34
-
35
-
36
-
37
-
38
-
39
-
40
-
41
-
42
-
43
-
44
-
45
-
46
-
47
-
48
-
49
-
50
-
51
-
52
-
53
-
54
-
55
-
56
 |
 |
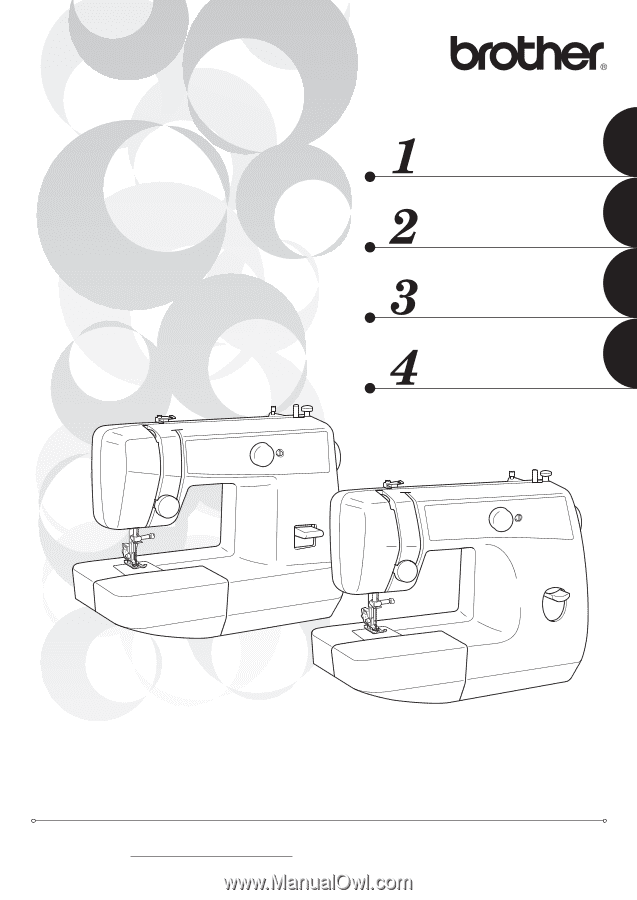
Operation Manual
Basic Sewing and Mending Machine
APPENDIX
UTILITY STITCHES
SEWING BASICS
KNOWING YOUR
SEWING MACHINE
Please visit us at
where you can get product support and answers to frequently
asked questions (FAQs).