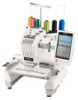
Brother International PR655 Installation Guide for KIT CW PRCW1
Brother International PR655 Manual
 |
View all Brother International PR655 manuals
Add to My Manuals
Save this manual to your list of manuals |
Brother International PR655 manual content summary:
- Brother International PR655 | Installation Guide for KIT CW PRCW1 - Page 1
presente guida prima dell'installazione. • Antes de instalar, lea este guía. • Leia este guia antes da instalação KIT CW Installation Guide Installationsanleitung für KIT CW Guide d'installation du KIT CW KIT CW Installatiegids Guida all'installazione di KIT CW Guía de instalación del KIT CW Guia - Brother International PR655 | Installation Guide for KIT CW PRCW1 - Page 2
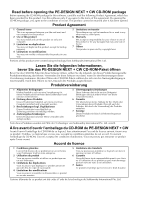
Read before opening the PE-DESIGN NEXT + CW CD-ROM package Before opening the CD-ROM package for this software, carefully read the following Product Agreement, which has been provided for this product. Use this software only if you agree to the terms of this agreement. By opening the CD-ROM package, - Brother International PR655 | Installation Guide for KIT CW PRCW1 - Page 3
Lees dit s.v.p. voordat u het cd-rompakket PE-DESIGN NEXT + CW opent Lees onderstaande Productovereenkomst die van toepassing is op dit product voordat u het cd-rompakket voor deze software opent. Gebruik deze software alleen als u akkoord gaat met de voorwaarden van deze overeenkomst. Wanneer u het - Brother International PR655 | Installation Guide for KIT CW PRCW1 - Page 4
Leia antes de abrir a embalagem do CD-ROM do PE-DESIGN NEXT + CW Antes de abrir a embalagem do CD-ROM deste software, leia atentamente o Contrato do Produto a seguir, o qual foi fornecido para este produto. Utilize este software somente se você concordar com os termos deste Contrato do Produto. Ao - Brother International PR655 | Installation Guide for KIT CW PRCW1 - Page 5
at the time of printing. Please be aware that some contents of this Installation Guide and product specifications are subject to change without notice. CAUTION • The cutwork functions can be used with upgraded Brother multi-needle embroidery machines (except PR-600, PR-600II and PR-620). Using - Brother International PR655 | Installation Guide for KIT CW PRCW1 - Page 6
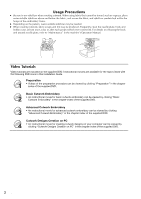
fabric, and secure the fabric and stabilizer sandwiched within the hoops of the embroidery frame. z Depending on the pattern, water-soluble stabilizer Maintenance" in the machine's Operation Manual. Video Tutorials Video tutorials are included on the supplied DVD. Instructional movies are available - Brother International PR655 | Installation Guide for KIT CW PRCW1 - Page 7
ENGLISH CONTENTS GETTING STARTED...4 Using the Manuals ...4 Included Accessories ...5 Optional Accessories ...6 INSTALLING THE UPGRADE KIT CW...6 Installation Procedure ...6 [Step 1]Obtaining the Certification Key ...7 [Step 2]Upgrading the Machine ...9 [Step 2-1] Using USB media ...9 [Step 2-2] - Brother International PR655 | Installation Guide for KIT CW PRCW1 - Page 8
guide first. Upgrade KIT CW Operation Manual (For machines) (PDF version) The Operation Manual provides descriptions for using the machine with the added cutwork functions. Be sure to use the machine of the machine. PE-DESIGN NEXT + CW Instruction Manual (PDF version) The Instruction Manual provides - Brother International PR655 | Installation Guide for KIT CW PRCW1 - Page 9
-needle embroidery machines) XF1985-001 • Certification Key Issuing Wizard • Embroidery patterns Guide XF1979-001 This manual 5. Pattern List XF1981-001 This provides an introduction to the cutwork patterns on the enclosed CD-ROM1 (for machines Instruction Manual download information. 5 - Brother International PR655 | Installation Guide for KIT CW PRCW1 - Page 10
USB port (required to upgrade the embroidery machine) when using computer Installation Procedure For installation, procedures must be performed using both your computer and on your machine. In this Installation Guide, operations performed from the machine will be indicated with before the step - Brother International PR655 | Installation Guide for KIT CW PRCW1 - Page 11
serial number (SER. NO.) located on the label attached to the back of the embroidery machine. • Make sure the internal machine identification number (No.) is recorded accurately as these numbers need to be entered within the Certification Key Issuing Wizard in order to obtain the Certification - Brother International PR655 | Installation Guide for KIT CW PRCW1 - Page 12
procedure without downloading the latest file. Follow step l, and skip "[Step 2] Upgrading the Machine" on page 9, then start the procedure from "[Step 3] Certifying the Upgrade" on page 12. g Download the manual. Select your preferred language and click "Download" to save the file to your computer - Brother International PR655 | Installation Guide for KIT CW PRCW1 - Page 13
refer to the procedure described in [Step 2-2] (page 10). ■ [Step 2-1] Using USB media a While pressing the automatic needlethreading button, turn the embroidery machine on. b Copy the upgrade program downloaded in step f of "Obtaining the Certification Key" (page 8) to the USB media. k Write down - Brother International PR655 | Installation Guide for KIT CW PRCW1 - Page 14
the USB media into the primary (top) USB port connector on the right side of the machine screen. Note • When the message "Upgrade complete." appears, installation of the upgrade application has the computer a While pressing the automatic needlethreading button, turn the embroidery machine on. 10 - Brother International PR655 | Installation Guide for KIT CW PRCW1 - Page 15
Plug the USB cable connectors into the corresponding USB port connectors for the computer and for the machine. → "Removable Disk" appears in "Computer" ("My Computer"). Note • When the message Connected to PC. Do not disconnect the USB cable." message appears on the embroidery machine LCD screen. 11 - Brother International PR655 | Installation Guide for KIT CW PRCW1 - Page 16
[Step 3] Certifying the Upgrade The following procedure describes how to certify the upgraded program. c Press in the Settings screen. a Turn the embroidery machine off, then on again. b Display the certification screen of the Settings screen. Note • The number of pages in the Settings screen - Brother International PR655 | Installation Guide for KIT CW PRCW1 - Page 17
l of "Obtaining the Certification Key" (page 7-9) to attain the Certification Key. f Certification has been completed when the following screen appears. Turn off the embroidery machine and then turn on again. g Confirm that there is a check mark beside "KIT CW" in the Settings screen. 13 - Brother International PR655 | Installation Guide for KIT CW PRCW1 - Page 18
needles, then turn the machine back on. For details on changing the needles, see "Replacing the Cutwork Needles" on page 16. Note • For details of the upgraded functions, refer to the Upgrade KIT CW Operation Manual and PE-DESIGN NEXT + CW Instruction Manual downloaded by using the Certification - Brother International PR655 | Installation Guide for KIT CW PRCW1 - Page 19
with the blade at the angle appropriate for the orientation of the cutting line. Note • The machine will automatically change needles when cutting around a desired shape. a Turn off the embroidery machine. b Remove the needle plate, and then open the hook cover. The following specific information - Brother International PR655 | Installation Guide for KIT CW PRCW1 - Page 20
• Be sure to turn off the embroidery machine before replacing the needles, otherwise injuries may result if the machine starts sewing. b Loosen the needle set screw and remove the needle. Hold the needle with your left hand, and then hold the Allen screw driver in your right hand and turn the - Brother International PR655 | Installation Guide for KIT CW PRCW1 - Page 21
needles are shorter than traditional embroidery needles, be sure to insert the needle in the needle bar chamber until it reaches the needle bar stopper and securely tighten the needle set screw with the Allen screw driver, otherwise the needle may break or the machine may be damaged. ■ Recommended - Brother International PR655 | Installation Guide for KIT CW PRCW1 - Page 22
contact your authorized dealer or Brother Customer Service. z If the software installation Instruction Manual, which provides descriptions for functions other than the cutwork functions. (For details on viewing the Instruction Manual USB A graphic printer that is supported by your system (if you wish - Brother International PR655 | Installation Guide for KIT CW PRCW1 - Page 23
ENGLISH CASE 1: When PE-DESIGN NEXT is not installed on the computer CASE 1: When PEDESIGN NEXT is not installed on the computer b Click "Run setup.exe". → The "User Account Control" dialog box appears. c Click "Yes". [Step 1] Installing the Software a Insert the enclosed CD-ROM2 (for PEDESIGN) - Brother International PR655 | Installation Guide for KIT CW PRCW1 - Page 24
the software is updated from PE-DESIGN version 5 through 8, the Upgrade Wizard starts up immediately after you launch Layout & Editing. Follow the wizard instructions to upgrade the USB card writer module. If PE-DESIGN NEXT is already being used with a different computer and the Upgrade Wizard does - Brother International PR655 | Installation Guide for KIT CW PRCW1 - Page 25
CD-ROM case for PE-DESIGN. The product ID on the label attached to the CDROM envelope for machines cannot be used. • If the product ID is incorrectly entered, the message "The product ID is writer module. Note • If a warning appears at any time, follow the instructions that are displayed. 21 - Brother International PR655 | Installation Guide for KIT CW PRCW1 - Page 26
PE-DESIGN NEXT version 9.2. Insert the CD-ROM into the computer's CD-ROM drive, run "setup.exe", and then follow the installer instructions. a Start Layout & Editing. Click 1, then 2 to check for most recent software version. 1 → The "User Account Control" dialog box appears. c Click "Yes". [Step - Brother International PR655 | Installation Guide for KIT CW PRCW1 - Page 27
". This completes the upgrade procedures. The cutwork functions are now available. Memo • Set "Machine Type" (on the "Design Page" tab of the "Design Settings" dialog box) to a multi-needle embroidery machine before using the cutwork functions. Note • The uninstalling of PE-DESIGN software is - Brother International PR655 | Installation Guide for KIT CW PRCW1 - Page 28
- Brother International PR655 | Installation Guide for KIT CW PRCW1 - Page 29
Unternehmen, dessen Software in dieser Anleitung erwähnt wird, hat eine seinen eigenen Programmen entsprechende Softwarelizenzvereinbarung. Alle anderen in Problemen an den Product Support. Die Adresse des Product Supports in Ihrer Umgebung erfahren Sie auf (http://www.brother.com/). Häufig gestellte - Brother International PR655 | Installation Guide for KIT CW PRCW1 - Page 30
Vorsichtsmaßnahmen z Verwenden Sie bei der Erstellung von Cutwork immer wasserlösliche Stickfolie. Bei Stoffen, die nicht gebügelt werden können, wie z. B. Organza, legen Sie wasserlösliche Stickfolie über und unter den Stoff und spannen Sie Stoff und Folie aufeinander in den Stickrahmen. z Je nach - Brother International PR655 | Installation Guide for KIT CW PRCW1 - Page 31
DEUTSCH INHALT ERSTE SCHRITTE ...4 Verwendung der Anleitungen ...4 Mitgeliefertes Zubehör ...5 Optionales Zubehör...6 INSTALLIEREN DES UPGRADE KIT CW ...6 Installation ...6 [Schritt 1]Bestätigungsschlüssel erhalten ...7 [Schritt 2]Maschine aktualisieren ...9 [Schritt 2-1]Verwenden von USB-Medien 9 - Brother International PR655 | Installation Guide for KIT CW PRCW1 - Page 32
ERSTE SCHRITTE ERSTE SCHRITTE Verwendung der Anleitungen Installationsanleitung (diese Anleitung) - Zuerst lesen - Die Installationsanleitung bietet Beschreibungen für die Vorbereitungen, die zur Erstellung von Cutwork erforderlich sind. Diese Anleitung beschreibt das Zubehör, die Verfahren zur - Brother International PR655 | Installation Guide for KIT CW PRCW1 - Page 33
DEUTSCH ERSTE SCHRITTE Mitgeliefertes Zubehör Teilebezeichnung Bestellnummer Beschreibung 1. CD-ROM1 (für Mehrfachnadel- Stickmaschinen) XF1985-001 • Assistent zur Erzeugung eines Bestätigungsschlüssels • Stickmuster (30 Cutwork-Stickmuster) 2. CD-ROM2 (für PE-DESIGN) XF2020-001 • - Brother International PR655 | Installation Guide for KIT CW PRCW1 - Page 34
bestätigen (Seite 12) [Schritt 4] In den Cutwork-Modus umschalten (Seite 14) Hinweis • Für Hilfe zum Produkt oder zur Installation wenden Sie sich an den autorisierten Brother-Händler in Ihrer Nähe. 6 - Brother International PR655 | Installation Guide for KIT CW PRCW1 - Page 35
DEUTSCH INSTALLIEREN DES UPGRADE KIT CW [Schritt 1] Bestätigungsschlüssel erhalten Die folgende Prozedur beschreibt, wie Sie den für das Upgrade erforderlichen Bestätigungsschlüssel erhalten. a Notieren Sie sich die 10-stellige Nummer (interne Maschinennummer), die neben „Nr. (No.)" und der - Brother International PR655 | Installation Guide for KIT CW PRCW1 - Page 36
INSTALLIEREN DES UPGRADE KIT CW e Lesen Sie aufmerksam die angezeigten Informationen und klicken Sie dann auf „Weiter". h Geben Sie den auf dem Etikett der CD-Hülle des Upgrade-Kits gedruckten 15-stelligen CD- Schlüssel ein und klicken Sie auf „Weiter". f Laden Sie die aktuelle Version des - Brother International PR655 | Installation Guide for KIT CW PRCW1 - Page 37
DEUTSCH INSTALLIEREN DES UPGRADE KIT CW j Prüfen Sie sorgfältig, dass die Informationen richtig eingegeben worden sind, und klicken Sie dann auf „Bestätigen". l Klicken Sie auf „Beenden". [Schritt 2] Maschine aktualisieren Anmerkung • Um die eingegebenen Informationen zu ändern, klicken Sie auf - Brother International PR655 | Installation Guide for KIT CW PRCW1 - Page 38
INSTALLIEREN DES UPGRADE KIT CW c Drücken Sie . e Drücken Sie . d Setzen Sie das USB-Medium in den PrimärUSB-Anschluss (oben) rechts am Maschinenbildschirm ein. Hinweis • Wenn die Meldung „Aktualisierung abgeschlossen" erscheint, ist die Installation des Aktualisierungsprogramms abgeschlossen. - Brother International PR655 | Installation Guide for KIT CW PRCW1 - Page 39
b Drücken Sie . INSTALLIEREN DES UPGRADE KIT CW e Drücken Sie . DEUTSCH c Stecken Sie das USB-Kabel in die entsprechenden USB-Anschlussbuchsen am Computer und an der Maschine ein. → „Wechseldatenträger" erscheint in „Computer" („Arbeitsplatz"). Hinweis • Wenn die Meldung „Aktualisierung - Brother International PR655 | Installation Guide for KIT CW PRCW1 - Page 40
INSTALLIEREN DES UPGRADE KIT CW [Schritt 3] Upgrade bestätigen Die folgende Prozedur beschreibt, wie Sie die Programmaktualisierung bestätigen. c Drücken Sie a Schalten Sie die Stickmaschine aus und wieder ein. im Einstellungsbildschirm. b Rufen Sie im Einstellungsbildschirm den Bestä - Brother International PR655 | Installation Guide for KIT CW PRCW1 - Page 41
e Geben Sie den 8-stelligen Bestätigungsschlüssel ein, den Sie in Schritt k unter „[Schritt 1] Bestätigungsschlüssel erhalten" (Seite 9) notiert haben und drücken Sie dann . INSTALLIEREN DES UPGRADE KIT CW Hinweis • Wenn der folgende Bildschirm erscheint, geben Sie die neben „Nr. (No.)" unten - Brother International PR655 | Installation Guide for KIT CW PRCW1 - Page 42
INSTALLIEREN DES UPGRADE KIT CW [Schritt 4] In den CutworkModus umschalten b Tippen Sie auf . a Tippen Sie auf neben „Cutwork" im Einstellungsbildschirm. → Eine Meldung wird angezeigt. 14 c Schalten Sie die Maschine aus, setzen Sie die Cutwork-Nadeln ein und schalten Sie die Maschine dann - Brother International PR655 | Installation Guide for KIT CW PRCW1 - Page 43
Nr. 1 bis Nr. 4 mit unterschiedlich ausgerichteten Schneidblättern) können zum automatischen Schneiden des Stoffes installiert werden. Jede Nadel hat einen anderen festen Schneidblattwinkel. Die Maschine verwendet die Nadel mit dem für die Ausrichtung der Schneidlinie am besten geeigneten Winkel - Brother International PR655 | Installation Guide for KIT CW PRCW1 - Page 44
EINSETZEN DER CUTWORK-NADELN c Installieren Sie das Distanzstück wie in der folgenden Abbildung dargestellt. 1 2 a Schalten Sie die Stickmaschine aus. 3 1 Setzen Sie das Distanzstück so ein, dass es an der elliptischen Kerbe einhakt. 2 Setzen Sie das Distanzstück so ein, dass es den - Brother International PR655 | Installation Guide for KIT CW PRCW1 - Page 45
EINSETZEN DER CUTWORK-NADELN c Setzen Sie die Cutwork-Nadel in das Cutwork-Nadelwechsel-Werkzeug ein. Halten Sie das Cutwork-Nadelwechsel-Werkzeug mit der Kerbe nach oben. Setzen Sie die Cutwork-Nadel mit der Nadelspitze nach unten in das Befestigungsloch ein. d Setzen Sie die Nadel mit der - Brother International PR655 | Installation Guide for KIT CW PRCW1 - Page 46
, benötigen Sie einen Internetzugang. Wenn Sie keine Internetverbindung haben, wenden Sie sich an Ihren autorisierten Händler oder den Brother Customer Service. z Wenn die Programminstallation vorzeitig abgebrochen oder nicht wie beschrieben durchgeführt wird, kann die Installation nicht ordnungsgem - Brother International PR655 | Installation Guide for KIT CW PRCW1 - Page 47
DEUTSCH FALL 1: PE-DESIGN NEXT ist nicht auf dem Computer installiert FALL 1: PE-DESIGN NEXT ist nicht auf dem Computer installiert b Klicken Sie auf „setup.exe ausführen". → Das Dialogfeld „Benutzerkontensteuerung" wird angezeigt. c Klicken Sie auf „Ja". [Schritt 1] Installieren der Software a - Brother International PR655 | Installation Guide for KIT CW PRCW1 - Page 48
FALL 1: PE-DESIGN NEXT ist nicht auf dem Computer installiert f Prüfen Sie den Speicherort für die Installation und klicken Sie dann auf „Weiter". h Klicken Sie auf „Fertigstellen", um die Installation der Software abzuschließen. Anmerkung • So installieren Sie die Software in einem anderen - Brother International PR655 | Installation Guide for KIT CW PRCW1 - Page 49
FALL 1: PE-DESIGN NEXT ist nicht auf dem Computer installiert b Um mit der Aktualisierung zu beginnen, klicken Sie auf „Jetzt aktualisieren". e Klicken Sie auf „Weiter", um über das Internet auf unseren Server zuzugreifen und den Aktualisierungsschlüssel abzurufen. DEUTSCH → Der Assistent für - Brother International PR655 | Installation Guide for KIT CW PRCW1 - Page 50
FALL 2: PE-DESIGN NEXT ist bereits auf dem Computer installiert FALL 2: PE-DESIGN NEXT ist bereits auf dem Computer installiert [Schritt 1] PE-DESIGN auf die neueste Version aktualisieren Anmerkung • Wenn das Kontrollkästchen „Beim Programmstart immer auf neueste Version prüfen" aktiviert ist, - Brother International PR655 | Installation Guide for KIT CW PRCW1 - Page 51
DEUTSCH FALL 2: PE-DESIGN NEXT ist bereits auf dem Computer installiert c Klicken Sie auf „Aktualisieren" unten links im Fenster und anschließend auf „Aktualisieren", um den Aktualisierungsassistenten zu starten. 12 Prüfen auf die neueste Programmversion Eine Funktion von Layout & Editing kann - Brother International PR655 | Installation Guide for KIT CW PRCW1 - Page 52
- Brother International PR655 | Installation Guide for KIT CW PRCW1 - Page 53
risque de vous blesser ou d'endommager la machine. Pour obtenir la toute dernière liste des modèles compatibles avec le cutwork (broderie blanche), contactez votre revendeur agréé le plus proche. Remarque • Ce guide d'installation ne contient pas d'instructions d'utilisation pour Windows® sur votre - Brother International PR655 | Installation Guide for KIT CW PRCW1 - Page 54
de la machine. Didacticiels vidéo Des didacticiels vidéo sont inclus sur le DVD fourni. Des vidéos d'instructions sont disponibles pour les rubriques indiquées par les icônes de DVD suivantes dans le présent Guide d'installation. Préparation 1 • Pour visualiser les vidéos relatives à la - Brother International PR655 | Installation Guide for KIT CW PRCW1 - Page 55
DE MISE À NIVEAU 6 Procédure d'installation ...6 [Étape 1]Obtention du code de certification 7 [Étape 2]Mise à niveau de la machine...9 [Étape 2-1]Utilisation du support USB 9 [Étape 2-2]Connexion à l'ordinateur 10 [Étape 3]Certification de la mise à niveau 12 [Étape 4]Réglage en mode Cutwork - Brother International PR655 | Installation Guide for KIT CW PRCW1 - Page 56
d'installation de PE-DESIGN NEXT + CW. Lisez ce guide en premier. Manuel d'instructions du kit cutwork (broderie blanche) de mise à niveau (pour les machines) (version PDF) Ce manuel fournit des instructions sur l'utilisation de la machine avec les fonctions de cutwork (broderie blanche) ajoutées - Brother International PR655 | Installation Guide for KIT CW PRCW1 - Page 57
pour visionner le didacticiel vidéo sur un ordinateur. 4. Guide d'installation XF1979-001 Ce manuel 5. Liste de motifs XF1981 pas coincer la découpe de tissu en dessous de la plaque à aiguille de la machine. 9. Stabilisateur soluble 75 × 30 cm (29-1/2 x 113/4 pouces) (type instructions. 5 - Brother International PR655 | Installation Guide for KIT CW PRCW1 - Page 58
mise à niveau de la machine avant la fin du processus ou si les procédures ne sont pas exécutées conformément aux instructions, l'installation de la de votre ordinateur et de votre machine. Dans ce guide d'installation, les opérations exécutées à partir de la machine sont indiquées par le symbole - Brother International PR655 | Installation Guide for KIT CW PRCW1 - Page 59
que le numéro de version, apparaissant à la page 5 ou 6 de l'écran des réglages en fonction du modèle de votre machine. a b a Numéro d'identification interne de la machine (No) b Numéro de la version Mémo • Sous Windows® 7 ou Windows Vista®, lorsque la boîte de dialogue « Exécution automatique - Brother International PR655 | Installation Guide for KIT CW PRCW1 - Page 60
fichier sur votre ordinateur, puis cliquez sur « Suivant ». Remarque • Tapez le code du CD figurant sur l'étiquette apposée sur l'enveloppe du CD-ROM pour les machines. L'ID de protection figurant sur l'étiquette apposée sur le boîtier du CD-ROM de PE-DESIGN ne peut pas être utilisé. Si un message - Brother International PR655 | Installation Guide for KIT CW PRCW1 - Page 61
USB ou un ordinateur pour transférer le fichier de mise à niveau vers votre machine à broder. Si vous utilisez le support USB, reportez-vous à la procédure décrite à l'[Étape 2-1]. Si la machine est connectée à l'ordinateur, reportez-vous à la procédure décrite à l'[Étape 2-2] (page 10). ■ [Étape - Brother International PR655 | Installation Guide for KIT CW PRCW1 - Page 62
DU KIT CW DE MISE À NIVEAU c Appuyez sur . e Appuyez sur . d Insérez le support USB dans le connecteur de port USB principal (supérieur) sur le côté droit de l'écran de la machine. Remarque • Lorsque le message « Mise à niveau terminée. » s'affiche, l'installation de l'application de mise - Brother International PR655 | Installation Guide for KIT CW PRCW1 - Page 63
ÇAIS c Branchez les prises du câble USB dans les connecteurs de port USB correspondants de l'ordinateur et de la machine. → « Disque amovible » s'affiche dans « Ordinateur » (« Poste de travail »). Remarque • Lorsque le message « Mise à niveau terminée. » s'affiche, l'installation de l'application - Brother International PR655 | Installation Guide for KIT CW PRCW1 - Page 64
la mise à niveau La procédure suivante décrit la certification du programme mis à niveau. c Appuyez sur à l'écran à réglages. a Mettez la machine à broder hors puis sous tension. b Affichez l'écran de certification de l'écran des réglages. Remarque • Le nombre de pages dans l'écran à réglages - Brother International PR655 | Installation Guide for KIT CW PRCW1 - Page 65
b à l de la section « Obtention du code de certification » (page 7 à 9) pour l'obtenir de nouveau. f La certification est terminée lorsque l'écran suivant s'affiche. Mettez la machine à broder hors puis sous tension. g Vérifiez que la case « KIT CW » est bien cochée à l'écran des réglages. 13 - Brother International PR655 | Installation Guide for KIT CW PRCW1 - Page 66
mettez la machine sous tension. Pour plus de détails sur le remplacement des aiguilles, reportez-vous à la section « Remplacement des aiguilles pour cutwork (broderie blanche) » à la page 16. Remarque • Pour plus de détails sur les fonctions mises à niveau, reportez-vous au manuel d'instructions du - Brother International PR655 | Installation Guide for KIT CW PRCW1 - Page 67
tige de chaque aiguille est positionnée à un angle différent. La machine utilise l'aiguille à un angle correspondant à l'orientation de la ligne de dans la même position que le numéro de la barre à aiguille de la machine. 2 L'aiguille est marquée d'une couleur spécifique, en fonction de l'angle de - Brother International PR655 | Installation Guide for KIT CW PRCW1 - Page 68
cutwork (broderie blanche) Lorsque vous installez ou remplacez les aiguilles pour cutwork (broderie blanche), utilisez le tournevis Allen fourni avec la machine et procédez comme suit. 16 Remarque • Veillez à utiliser le tournevis Allen fourni pour remplacer l'aiguille, sinon vous risquez de forcer - Brother International PR655 | Installation Guide for KIT CW PRCW1 - Page 69
vers le bas, insérez l'aiguille pour cutwork (broderie blanche) dans l'orifice de montage. d Le côté plat de l'aiguille orienté vers l'arrière de la machine, insérez l'aiguille dans le boîtier à aiguille, en la poussant vers le haut jusqu'à ce qu'elle touche la butée de la barre à aiguille - Brother International PR655 | Installation Guide for KIT CW PRCW1 - Page 70
Si vous ne le pouvez pas, contactez votre revendeur agréé ou le service client Brother. z En cas d'annulation de l'installation du logiciel avant la fin de versions 5, 6, 7 et 8 doivent également consulter le manuel d'instructions qui décrit les fonctions autres que celles destinées au cutwork ( - Brother International PR655 | Installation Guide for KIT CW PRCW1 - Page 71
FRANÇAIS CAS 1 : lorsque PE-DESIGN NEXT n'est pas installé sur l'ordinateur CAS 1 : lorsque PEDESIGN NEXT n'est pas installé sur l'ordinateur b Cliquez sur « Exécuter setup.exe ». → La boîte de dialogue « Contrôle de compte d'utilisateur » s'affiche. c Cliquez sur « Oui ». [Étape 1] Installation - Brother International PR655 | Installation Guide for KIT CW PRCW1 - Page 72
le logiciel est mis à jour de PEDESIGN versions 5 à 8, l'Assistant de mise à niveau démarre immédiatement après avoir lancé Layout & Editing. Suivez les instructions de l'Assistant pour mettre à niveau le module d'écriture de carte USB. Si PE-DESIGN NEXT est déjà utilisé avec un autre ordinateur et - Brother International PR655 | Installation Guide for KIT CW PRCW1 - Page 73
CD-ROM pour PEDESIGN. L'ID de protection figurant sur l'étiquette apposée sur l'enveloppe du CDROM pour les machines ne peut pas être utilisé. • Si l'ID de protection n'est pas entré correctement, le message • Si un message d'avertissement apparaît à n'importe quel moment, suivez ses instructions. 21 - Brother International PR655 | Installation Guide for KIT CW PRCW1 - Page 74
installer PE-DESIGN NEXT version 9.2. Insérez le CD-ROM dans le lecteur correspondant, exécutez « setup.exe », puis respectez les instructions du programme d'installation. a Démarrez Layout & Editing. Cliquez sur 1, puis sur 2 pour rechercher la dernière version du logiciel. 1 2 → Le logiciel - Brother International PR655 | Installation Guide for KIT CW PRCW1 - Page 75
» (sous l'onglet « Zone de création » de la boîte de dialogue « Réglages des motifs ») sur une machine à broder multi-aiguilles avant d'utiliser les fonctions pour cutwork (broderie blanche). Remarque • La désinstallation du logiciel PE-DESIGN est décrite pour Windows® 7 et Windows Vista®. • - Brother International PR655 | Installation Guide for KIT CW PRCW1 - Page 76
- Brother International PR655 | Installation Guide for KIT CW PRCW1 - Page 77
worden gewijzigd. VOORZICHTIG • De functies voor open borduurwerk kunt u gebruiken op Brother-borduurmachines met meerdere naalden, na de upgrade (met uitzondering van PR-600, PR-600II en PR-620). Wanneer u machines gebruikt die niet geschikt zijn voor open borduurwerk, kunt u letsel oplopen of - Brother International PR655 | Installation Guide for KIT CW PRCW1 - Page 78
. Meer bijzonderheden over het reinigen van de haak en rond de naaldplaat vindt u in "Onderhoud" in de Bedieningshandleiding bij de machine. Videolesgidsen Op de bijgeleverde dvd vindt u videolesgidsen. Instructiefilms zijn beschikbaar voor de onderwerpen die zijn aangegeven met onderstaande dvd - Brother International PR655 | Installation Guide for KIT CW PRCW1 - Page 79
accessoires...5 Optionele accessoires ...6 UPGRADE KIT CW INSTALLEREN...6 Installatieprocedure ...6 [Stap 1]De certificatiesleutel ophalen...7 [Stap 2]Upgrade van de machine uitvoeren 9 [Stap 2-1]Werken met een USB-medium 9 [Stap 2-2]Aansluiten op de computer 10 [Stap 3]De upgrade certificeren - Brother International PR655 | Installation Guide for KIT CW PRCW1 - Page 80
voorbereidingen u moet treffen om open borduurwerk te maken. Deze gids bevat beschrijvingen van de accessoires, procedures voor het upgraden van de machines en bijzonderheden over het installeren van de naalden voor open borduurwerk. Bovendien vindt u in deze gids de procedure om PE-DESIGN NEXT - Brother International PR655 | Installation Guide for KIT CW PRCW1 - Page 81
verwisselt. 8. Naaldafstandsplaat XF1978-001 Installeer de naaldafstandsplaat om te voorkomen dat afgesneden stof vastraakt onder de naaldplaat van de machine. 9. SA540 (Amerika met uitzondering van Wateroplosbare steunstof 75 cm × 30 cm (29- Canada)* 1/2 inch x 11-3/4 inch) (niet-geweven - Brother International PR655 | Installation Guide for KIT CW PRCW1 - Page 82
machine. z Eén upgradekit maakt de upgrade van slechts één machine machines) om de certificatiesleutel te verkrijgen. z Als u de machine machine. In deze Installatiegids worden bewerkingen die worden uitgevoerd op de machine pagina 7) [Stap 2] Upgrade van de machine uitvoeren (pagina 9) [Stap 3] De - Brother International PR655 | Installation Guide for KIT CW PRCW1 - Page 83
In onderstaande procedure wordt beschreven hoe u de certificatiesleutel verkrijgt die u nodig hebt voor de upgrade. a Noteer het 10-cijferige nummer (interne machine-identificatienummer) dat wordt weergegeven naast de "Nr. (No.)" samen met het versienummer, zoals aangegeven op pagina 5 of 6 van het - Brother International PR655 | Installation Guide for KIT CW PRCW1 - Page 84
van het etiket op het cd-hoesje van het upgradekit en klik op "Volgende". f Download het meest recente upgradeprogramma. Bevestig het model van uw machine, klik op "Laden" en sla het upgradeprogramma upf) op uw computer op. Klik op "Volgende". Opmerking • Als de weergegeven versie of later al is - Brother International PR655 | Installation Guide for KIT CW PRCW1 - Page 85
juist is ingevoerd en herhaal de procedure vanaf stap c. • Controleer de internetverbinding en klik opnieuw op "Certificatie". De upgrade van de machine wordt uitgevoerd op basis van de informatie die is verkregen in [Stap 1]. U kunt het upgradebestand met een USBmedium of een computer overzetten - Brother International PR655 | Installation Guide for KIT CW PRCW1 - Page 86
UPGRADE KIT CW INSTALLEREN c Druk op . e Druk op . d Plaats het USB-medium in de primaire (bovenste) USB-poort op de rechterkant van het machinescherm. Opmerking • Wanneer het bericht "Upgrade voltooid." verschijnt, is de installatie van de upgradeapplicatie voltooid. (Als zich een fout heeft - Brother International PR655 | Installation Guide for KIT CW PRCW1 - Page 87
INSTALLEREN e Druk op . NEDERLANDS c Sluit de USB-kabel aan op de betreffende USB-poortaansluiting op de computer en op de machine. → "Verwisselbare schijf" verschijnt in "Computer" ("Deze computer"). Opmerking • Wanneer het bericht "Upgrade voltooid." wordt weergegeven, is de installatie van - Brother International PR655 | Installation Guide for KIT CW PRCW1 - Page 88
UPGRADE KIT CW INSTALLEREN [Stap 3] De upgrade certificeren In onderstaande procedure wordt beschreven hoe u het programma certificeert nadat de upgrade is uitgevoerd. c Druk op a Zet de borduurmachine uit en weer aan. in het instellingenscherm. b Open het certificatiescherm van het - Brother International PR655 | Installation Guide for KIT CW PRCW1 - Page 89
e Typ de 8-cijferige certificatiesleutel die u hebt genoteerd in stap k van "[Stap 1] De certificatiesleutel ophalen" (pagina 9) en druk vervolgens op . UPGRADE KIT CW INSTALLEREN Opmerking • Als onderstaand scherm verschijnt, typt u het 10-cijferige nummer dat wordt weergegeven naast "Nr. (No - Brother International PR655 | Installation Guide for KIT CW PRCW1 - Page 90
b Druk op . a Druk op naast "Open borduurwerk" in het Instellingenscherm. → Een bericht verschijnt. 14 c Zet de machine uit, installeer de naalden voor open borduurwerk en zet de machine weer aan. Meer bijzonderheden over het verwisselen van de naalden vindt u in "De naalden voor open - Brother International PR655 | Installation Guide for KIT CW PRCW1 - Page 91
nummer naargelang de hoek van het mes. Installeer de naald zodat dit nummer op dezelfde positie staat als het nummer op de naaldstang van de machine. 2 De naald heeft een specifieke kleur naargelang de hoek van het mes. In combinatie met het nummer kunt u daaraan het type naald voor open borduurwerk - Brother International PR655 | Installation Guide for KIT CW PRCW1 - Page 92
en sluit het haakklepje. VOORZICHTIG • Let op dat u de borduurmachine uitzet voordat u de naalden verwisselt. Anders kunt u letsel oplopen als de machine begint te naaien. b Draai de naaldinstallatieschroef los en verwijder de naald. Houd de naald vast met uw linkerhand en houd de inbussleutel in - Brother International PR655 | Installation Guide for KIT CW PRCW1 - Page 93
de naald voor open borduurwerk, met de naaldpunt omlaag, in het bevestigingsgat. d Met de platte kant van de naald naar de achterkant van de machine gericht steekt u de naald in het naaldvak. Duw daarbij de naald omhoog totdat deze de naaldstangstopper raakt. Tip: Steek de naald eerst door het - Brother International PR655 | Installation Guide for KIT CW PRCW1 - Page 94
PE-DESIGN NEXT + CW INSTALLEREN OP DE COMPUTER PE-DESIGN NEXT + CW INSTALLEREN OP DE COMPUTER Als u originele open borduurwerkpatronen wilt creëren in PE-DESIGN NEXT, installeer dan deze upgrade-applicatie. Deze upgrade-applicatie is bedoeld voor eigenaars van PEDESIGN-versie 5 t/m 8 of PE-DESIGN - Brother International PR655 | Installation Guide for KIT CW PRCW1 - Page 95
SITUATIE 1: Wanneer PE-DESIGN NEXT niet is geïnstalleerd op de computer SITUATIE 1: Wanneer PEDESIGN NEXT niet is geïnstalleerd op de computer b Klik op "setup.exe uitvoeren". → Het dialoogvenster "Gebruikersaccountbeheer" verschijnt. c Klik op "Ja". [Stap 1] De software installeren a Plaats de - Brother International PR655 | Installation Guide for KIT CW PRCW1 - Page 96
SITUATIE 1: Wanneer PE-DESIGN NEXT niet is geïnstalleerd op de computer f Controleer de locatie van de installatie en klik vervolgens op "Volgende". h Klik op "Voltooien" om de installatie van de software te voltooien. Memo • Als u de applicatie in een andere map wilt installeren: 1. Klik op " - Brother International PR655 | Installation Guide for KIT CW PRCW1 - Page 97
de cd-sleutel over van het etiket op het cd-doosje voor PE-DESIGN. De product-ID op het etiket op het cd-hoesje voor machines kunt u niet gebruiken. • Als u de product ID onjuist typt, verschijnt het bericht "De beschermings-ID is onjuist. Controleer of u geen typefouten maakt.". • De hoofdletters - Brother International PR655 | Installation Guide for KIT CW PRCW1 - Page 98
SITUATIE 2: Wanneer PE-DESIGN NEXT al is geïnstalleerd op de computer SITUATIE 2: Wanneer PEDESIGN NEXT al is geïnstalleerd op de computer [Stap 1] PE-DESIGN upgraden naar de nieuwste versie Memo • Als het selectievakje "Bij opstarten altijd controleren op recentste versie" is ingeschakeld, wordt - Brother International PR655 | Installation Guide for KIT CW PRCW1 - Page 99
SITUATIE 2: Wanneer PE-DESIGN NEXT al is geïnstalleerd op de computer c Klik op "Upgrade" onder in het deelvenster aan de linkerkant en klik vervolgens op "Upgrade" om de Upgrade-wizard te starten. 12 Controleren op nieuwe versies van het programma Layout & Editing heeft een functie om te - Brother International PR655 | Installation Guide for KIT CW PRCW1 - Page 100
- Brother International PR655 | Installation Guide for KIT CW PRCW1 - Page 101
accessibili per la consultazione futura. Per ulteriori informazioni sui prodotti e sugli aggiornamenti, visitare il nostro sito Web all'indirizzo " www.brother.com ". Le informazioni contenute in questa guida sono aggiornate alla data di stampa. Il contenuto della presente Guida all'installazione - Brother International PR655 | Installation Guide for KIT CW PRCW1 - Page 102
prima. Per maggiori informazioni sulla pulizia dell'ago e dell'area circostante la piastra dell'ago, fare riferimento a "Manutenzione" nel Manuale d'istruzione. Esercitazioni video Il DVD fornito in dotazione comprende esercitazioni video. Per gli argomenti elencati con le seguenti icone DVD all - Brother International PR655 | Installation Guide for KIT CW PRCW1 - Page 103
ITALIANO SOMMARIO PRIMA DELL'USO ...4 Utilizzo dei manuali ...4 Accessori forniti in dotazione...5 Accessori opzionali...6 INSTALLAZIONE DELL'AGGIORNAMENTO KIT CW 6 Procedura d'installazione...6 [Passaggio 1]Ottenimento del codice di autenticazione 7 [Passaggio 2]Aggiornamento della macchina 9 [ - Brother International PR655 | Installation Guide for KIT CW PRCW1 - Page 104
PE-DESIGN NEXT + CW sono riuniti in un unico file dei manuali. Nota • Per visualizzare e stampare le versioni PDF del Manuale d'istruzione e del Manuale di istruzioni è necessario Adobe® Reader®. • Le procedure illustrate nei manuali sono stilate per l'uso in Windows® 7. Se le applicazioni - Brother International PR655 | Installation Guide for KIT CW PRCW1 - Page 105
esercitazioni sul computer sono necessari un'unità DVD-ROM e un software per la riproduzione. 4. Guida all'installazione XF1979-001 Il presente manuale 5. Elenco disegni XF1981-001 Presenta i disegni per il ricamo a intaglio sul CD-ROM1 (per le macchine) fornito in dotazione. 6. Set aghi - Brother International PR655 | Installation Guide for KIT CW PRCW1 - Page 106
Passaggio 2] Aggiornamento della macchina (pagina 9) [Passaggio 3] Autenticazione dell'aggiornamento (pagina 12) [Passaggio 4] Passaggio alla modalità Ricamo a intaglio (pagina 14) Nota • Contattare il più vicino rivenditore Brother autorizzato per assistenza sul prodotto o sull'installazione. 6 - Brother International PR655 | Installation Guide for KIT CW PRCW1 - Page 107
INSTALLAZIONE DELL'AGGIORNAMENTO KIT CW [Passaggio 1] Ottenimento del codice di autenticazione La seguente procedura descrive come ottenere il codice di autenticazione necessario per l'aggiornamento. a Annotare il numero di identificazione interno della macchina di 10 cifre visualizzato accanto a - Brother International PR655 | Installation Guide for KIT CW PRCW1 - Page 108
al "[Passaggio 2] Aggiornamento della macchina" a pagina 9, quindi iniziare la procedura dal "[Passaggio 3] Autenticazione dell'aggiornamento" a pagina 12. g Scaricare il manuale. Selezionare la lingua desiderata e fare clic su "Download" per salvare il file sul computer, quindi fare clic su "Avanti - Brother International PR655 | Installation Guide for KIT CW PRCW1 - Page 109
INSTALLAZIONE DELL'AGGIORNAMENTO KIT CW j Controllare attentamente le informazioni inserite e fare clic su "Autentica". l Fare clic su "Fine". [Passaggio 2] Aggiornamento della macchina Promemoria • Per modificare le informazioni inserite, fare clic su "Indietro". Se viene visualizzato un - Brother International PR655 | Installation Guide for KIT CW PRCW1 - Page 110
INSTALLAZIONE DELL'AGGIORNAMENTO KIT CW c Premere . e Premere . d Inserire il supporto USB nel connettore della porta USB primaria (superiore) sul lato destro dello schermo della macchina. Nota • Quando viene visualizzato il messaggio "Aggiornamento terminato.", l'installazione dell' - Brother International PR655 | Installation Guide for KIT CW PRCW1 - Page 111
b Premere . INSTALLAZIONE DELL'AGGIORNAMENTO KIT CW e Premere . ITALIANO c Inserire i connettori del cavo USB nei connettori delle porte USB corrispondenti sul computer e sulla macchina. → Viene visualizzato "Disco rimovibile" in "Computer" ("Risorse del computer"). Nota • Quando viene - Brother International PR655 | Installation Guide for KIT CW PRCW1 - Page 112
INSTALLAZIONE DELL'AGGIORNAMENTO KIT CW [Passaggio 3] Autenticazione dell'aggiornamento La seguente procedura descrive come autenticare il programma aggiornato. c Premere nella schermata Impostazioni. a Spegnere e riaccendere la macchina da ricamo. b Visualizzare la schermata di autenticazione - Brother International PR655 | Installation Guide for KIT CW PRCW1 - Page 113
INSTALLAZIONE DELL'AGGIORNAMENTO KIT CW e Digitare il codice di autenticazione di 8 cifre annotato al passaggio k di "[Passaggio 1] Ottenimento del codice di autenticazione" (pagina 9) e premere . Nota • Se viene visualizzata la seguente schermata, digitare il numero di 10 cifre visualizzato - Brother International PR655 | Installation Guide for KIT CW PRCW1 - Page 114
aghi per il ricamo a intaglio" a pagina 16. Nota • Per maggiori informazioni sulle funzioni aggiornate, fare riferimento al Manuale d'istruzione Aggiornamento KIT CW e al Manuale di istruzioni PE-DESIGN NEXT + CW scaricato utilizzando la Procedura guidata per il rilascio del codice di autenticazione - Brother International PR655 | Installation Guide for KIT CW PRCW1 - Page 115
INSTALLAZIONE DEGLI AGHI PER IL RICAMO A INTAGLIO INSTALLAZIONE DEGLI AGHI PER IL RICAMO A INTAGLIO Informazioni sugli aghi per il ricamo a intaglio Per tagliare il tessuto automaticamente è possibile installare i quattro aghi per il ricamo a intaglio (gli aghi per macchine multi-ago dal N. 1 al - Brother International PR655 | Installation Guide for KIT CW PRCW1 - Page 116
INSTALLAZIONE DEGLI AGHI PER IL RICAMO A INTAGLIO c Installare il distanziatore come mostrato nell'illustrazione di seguito. a Spegnere la macchina da ricamo. 1 2 3 1 Posizionare il distanziatore in modo che si agganci attorno all'intaglio ellittico. 2 Posizionare il distanziatore in modo che - Brother International PR655 | Installation Guide for KIT CW PRCW1 - Page 117
INSTALLAZIONE DEGLI AGHI PER IL RICAMO A INTAGLIO c Installare l'ago per il ricamo a intaglio nel dispositivo di sostituzione dell'ago per ricamo a intaglio. Tenere il dispositivo di sostituzione dell'ago per ricamo a intaglio con l'intaglio rivolto verso l'alto. Con l'ago rivolto verso il basso, - Brother International PR655 | Installation Guide for KIT CW PRCW1 - Page 118
, contattare il rivenditore autorizzato o il Servizio di assistenza clienti Brother. z Se si annulla l'installazione del software prima del completamento -DESIGN versioni 5, 6, 7 e 8 devono inoltre fare riferimento al Manuale di istruzioni per le descrizioni delle funzioni diverse da quelle per il - Brother International PR655 | Installation Guide for KIT CW PRCW1 - Page 119
CASO 1: Se PE-DESIGN NEXT non è installato sul computer CASO 1: Se PE-DESIGN NEXT non è installato sul computer [Passaggio 1] Installazione del software b Fare clic su "Esecuzione di setup.exe". → Viene visualizzata la finestra di dialogo "Controllo dell'account utente". c Fare clic su "Sì". a - Brother International PR655 | Installation Guide for KIT CW PRCW1 - Page 120
CASO 1: Se PE-DESIGN NEXT non è installato sul computer f Controllare il percorso di installazione e fare clic su "Avanti". h Fare clic su "Fine" per completare l'installazione del software. Promemoria • Per installare l'applicazione in un'altra cartella: 1. Fare clic su "Modifica". 2. Nella - Brother International PR655 | Installation Guide for KIT CW PRCW1 - Page 121
CASO 1: Se PE-DESIGN NEXT non è installato sul computer b Per iniziare l'aggiornamento, fare clic su "Aggiorna adesso". e Fare clic su "Avanti" per accedere al server tramite Internet e recuperare il codice di aggiornamento. ITALIANO → Si avvia l'aggiornamento guidato e viene visualizzata la - Brother International PR655 | Installation Guide for KIT CW PRCW1 - Page 122
CASO 2: Se PE-DESIGN NEXT è già installato sul computer CASO 2: Se PE-DESIGN NEXT è già installato sul computer [Passaggio 1] Aggiornamento di PE-DESIGN alla versione più recente Promemoria • Se la casella di controllo "Cerca sempre la versione più recente all'avvio" è selezionata, a ogni avvio il - Brother International PR655 | Installation Guide for KIT CW PRCW1 - Page 123
CASO 2: Se PE-DESIGN NEXT è già installato sul computer c Dopo aver fatto clic su "Aggiorna" in fondo al riquadro sul lato sinistro, fare clic su "Aggiorna" per avviare l'aggiornamento guidato. 12 Ricerca della versione più recente del programma Una funzione di Layout & Editing può ricercare la - Brother International PR655 | Installation Guide for KIT CW PRCW1 - Page 124
- Brother International PR655 | Installation Guide for KIT CW PRCW1 - Page 125
funcionamiento para Windows® ni para ningún otro equipo periférico. Consulte los manuales para Windows® y el resto del equipo para la información sobre su tenga algún problema. Consulte el sitio Web de la empresa (http://www.brother.com/) para encontrar el servicio de asistencia técnica en su zona. - Brother International PR655 | Installation Guide for KIT CW PRCW1 - Page 126
alrededores de la placa de la aguja, consulte "Mantenimiento" en el Manual de instrucciones de la máquina. Tutoriales en vídeo El DVD incluido contiene avanzado haciendo clic en "Bordado de calado avanzado" desde el índice de capítulos del DVD incluido. Creación de diseños de calado en el PC - Brother International PR655 | Installation Guide for KIT CW PRCW1 - Page 127
CONTENIDO PRIMEROS PASOS...4 Utilizar los manuales ...4 Accesorios incluidos ...5 Accesorios opcionales ...6 INSTALAR EL KIT DE ACTUALIZACIÓN CW 6 Procedimiento de instalación ...6 [Paso 1]Obtener la clave de certificaciones 7 [Paso 2]Actualizar la máquina ...9 [Paso 2-1]Utilizar - Brother International PR655 | Installation Guide for KIT CW PRCW1 - Page 128
en un sistema operativo distinto de Windows® 7, los procedimientos y el aspecto de las ventanas pueden variar ligeramente. • Los procedimientos indicados en los manuales se refieren a máquinas de 10 agujas. El aspecto de las pantallas puede variar ligeramente si se utiliza una máquina de 6 agujas - Brother International PR655 | Installation Guide for KIT CW PRCW1 - Page 129
de DVD-ROM y un software de reproducción para ver el DVD de los tutoriales en un ordenador. 4. Guía de instalación XF1979-001 Este manual 5. Lista de patrones XF1981-001 Facilita una introducción a los patrones de calado incluidos en el CD-ROM1 adjunto (para máquinas). 6. Juego de agujas - Brother International PR655 | Installation Guide for KIT CW PRCW1 - Page 130
máquina (página 9) [Paso 3] Certificar la actualización (página 12) [Paso 4] Cambiar al modo de calado (página 14) Nota • Póngase en contacto con el distribuidor autorizado de Brother más cercano para obtener ayuda sobre productos o sobre la instalación. 6 - Brother International PR655 | Installation Guide for KIT CW PRCW1 - Page 131
INSTALAR EL KIT DE ACTUALIZACIÓN CW [Paso 1] Obtener la clave de certificaciones En el siguiente procedimiento se describe cómo obtener la clave de certificaciones necesaria para realizar la actualización. a Anote el número de identificación interna de la máquina de 10 dígitos que se muestra al - Brother International PR655 | Installation Guide for KIT CW PRCW1 - Page 132
la máquina" en la página 9 y, a continuación, inicie el procedimiento a partir de "[Paso 3] Certificar la actualización" en la página 12. g Descargue el manual. Seleccione el idioma de su preferencia, haga clic en "Descargar" para guardar el archivo en el ordenador y después haga clic en - Brother International PR655 | Installation Guide for KIT CW PRCW1 - Page 133
INSTALAR EL KIT DE ACTUALIZACIÓN CW j Compruebe atentamente que haya introducido la información correcta y luego haga clic en "Certificar". l Haga clic en "Finalizar". [Paso 2] Actualizar la máquina Recuerde • Para cambiar la información introducida, haga clic en "Atrás". Si aparece un mensaje de - Brother International PR655 | Installation Guide for KIT CW PRCW1 - Page 134
INSTALAR EL KIT DE ACTUALIZACIÓN CW c Pulse . e Pulse . d Inserte el dispositivo USB en el conector del puerto USB principal (superior) del lado derecho de la pantalla de la máquina. Nota • Cuando aparece el mensaje "Actualización terminada.", la instalación de la aplicación de actualización - Brother International PR655 | Installation Guide for KIT CW PRCW1 - Page 135
b Pulse . INSTALAR EL KIT DE ACTUALIZACIÓN CW e Pulse . ESPAÑOL c Conecte el cable USB a los correspondientes conectores USB del ordenador y de la máquina. → Aparece "Disco extraíble" en "Equipo" ("Mi PC"). Nota • Cuando aparezca el mensaje "Actualización terminada.", la instalación de la - Brother International PR655 | Installation Guide for KIT CW PRCW1 - Page 136
INSTALAR EL KIT DE ACTUALIZACIÓN CW [Paso 3] Certificar la actualización El siguiente procedimiento describe cómo certificar el programa actualizado. c Pulse en la pantalla Ajustes. a Desactive la máquina de bordar y, a continuación, actívela de nuevo. b Visualice la pantalla de certificación - Brother International PR655 | Installation Guide for KIT CW PRCW1 - Page 137
e Escriba la clave de certificaciones de 8 dígitos anotada en el paso k de "[Paso 1] Obtener la clave de certificaciones" (página 9), y, a continuación, pulse . INSTALAR EL KIT DE ACTUALIZACIÓN CW Nota • Si aparece la siguiente pantalla, escriba el número de 10 dígitos que aparece junto a "N° ( - Brother International PR655 | Installation Guide for KIT CW PRCW1 - Page 138
NEXT + CW descargados mediante el Asistente para la emisión de claves de certificaciones. • Para obtener una copia del Manual de instrucciones de PE-DESIGN NEXT, consulte "Manual de instrucciones de PEDESIGN NEXT (versión en PDF) (para clientes que utilicen las versiones 5, 6, 7 y 8 de PE-DESIGN - Brother International PR655 | Installation Guide for KIT CW PRCW1 - Page 139
INSTALAR LAS AGUJAS DE CALADO INSTALAR LAS AGUJAS DE CALADO Acerca de las agujas de calado Pueden instalarse las cuatro agujas de calado (agujas para máquinas de varias agujas del Nº 1 al Nº 4 con hojas de diferentes orientaciones) para cortar la tela automáticamente. Cada aguja dispone de una - Brother International PR655 | Installation Guide for KIT CW PRCW1 - Page 140
INSTALAR LAS AGUJAS DE CALADO c Instale el separador tal y como se indica en la ilustración siguiente. 1 2 a Desactive la máquina de bordar. 3 1 Coloque el separador de forma que quede enganchado alrededor de la muesca elíptica. 2 Coloque el separador de forma que rodee la cabeza del tornillo. - Brother International PR655 | Installation Guide for KIT CW PRCW1 - Page 141
INSTALAR LAS AGUJAS DE CALADO c Instale la aguja de calado en la herramienta de cambio de la aguja de calado. Sujete la herramienta de cambio de la aguja de calado con la muesca hacia arriba. Con la punta de la aguja encarada hacia abajo, inserte la aguja de calado en el orificio de montaje. d Con - Brother International PR655 | Installation Guide for KIT CW PRCW1 - Page 142
contacto con un distribuidor autorizado o el Servicio de Atención al Cliente de Brother. z Si la instalación del software se cancela antes de que se 5, 6, 7 y 8 de PE-DESIGN también deben consultar el Manual de instrucciones, que proporciona descripciones de funciones distintas a las funciones de - Brother International PR655 | Installation Guide for KIT CW PRCW1 - Page 143
CASO 1: si PE-DESIGN NEXT no está instalado en el ordenador CASO 1: si PE-DESIGN NEXT no está instalado en el ordenador b Haga clic en "Ejecutar setup.exe". → Aparecerá el cuadro de diálogo "Control de cuentas de usuario". c Haga clic en "Sí". [Paso 1] Instalación del software a Inserte el CD- - Brother International PR655 | Installation Guide for KIT CW PRCW1 - Page 144
CASO 1: si PE-DESIGN NEXT no está instalado en el ordenador f Compruebe la ubicación de la instalación y, h Haga clic en "Finalizar" para completar la a continuación, haga clic en "Siguiente". instalación del software. Recuerde • Para instalar la aplicación en una carpeta diferente: 1. Haga clic - Brother International PR655 | Installation Guide for KIT CW PRCW1 - Page 145
CASO 1: si PE-DESIGN NEXT no está instalado en el ordenador b Para iniciar la actualización, haga clic en "Actualice ahora". e Haga clic en "Siguiente" para acceder a nuestro servidor a través de Internet y recuperar la clave de actualización. ESPAÑOL → Se inicia el asistente para - Brother International PR655 | Installation Guide for KIT CW PRCW1 - Page 146
CASO 2: cuando PE-DESIGN NEXT ya está instalado en el ordenador CASO 2: cuando PEDESIGN NEXT ya está instalado en el ordenador [Paso 1] Actualizar PE-DESIGN a su versión más reciente Recuerde • Si la casilla de verificación "Buscar siempre la versión más actualizada al iniciar" está marcada, se - Brother International PR655 | Installation Guide for KIT CW PRCW1 - Page 147
CASO 2: cuando PE-DESIGN NEXT ya está instalado en el ordenador c Después de hacer clic en "Actualizar", situado en la parte inferior izquierda del panel, haga clic en "Actualizar" para iniciar el Asistente para actualizaciones. 12 Comprobar la versión más reciente del programa Una de las - Brother International PR655 | Installation Guide for KIT CW PRCW1 - Page 148
- Brother International PR655 | Installation Guide for KIT CW PRCW1 - Page 149
facilmente para referência futura. Para atualizações e informações adicionais do produto, visite o nosso site: " www.brother.com ". As informações disponibilizadas neste manual são atuais no momento da impressão. Esteja ciente de que alguns conteúdos deste Guia de Instalação e as especificações - Brother International PR655 | Installation Guide for KIT CW PRCW1 - Page 150
e a área ao redor da chapa de agulhas, consulte "Manutenção" no Manual de Operação da máquina. Tutoriais em vídeo Os tutoriais em vídeo fazem avançado, clique em "Bordado com corte / Apliquê avançado" no índice de capítulos do DVD fornecido. Criação de desenhos de bordado com corte / apliquê no PC - Brother International PR655 | Installation Guide for KIT CW PRCW1 - Page 151
ÍNDICE INTRODUÇÃO...4 Usando os manuais...4 Acessórios incluídos ...5 Acessórios opcionais...6 INSTALANDO O KIT DE ATUALIZAÇÃO DE CW 6 Procedimentos de instalação...6 [Passo 1]Obtendo a chave de certificação 7 [Passo 2]Atualizando a máquina...9 [Passo 2-1]Usando a mídia USB ...9 [Passo 2-2] - Brother International PR655 | Installation Guide for KIT CW PRCW1 - Page 152
PE-DESIGN NEXT + CW estão combinados em um só arquivo. Nota • O Adobe® Reader® é necessário para exibir e imprimir versões em PDF do Manual de Operações e do Manual de Instruções. • Os procedimentos nos manuais são gravados para uso no Windows® 7. Se os aplicativos de atualização forem usados em um - Brother International PR655 | Installation Guide for KIT CW PRCW1 - Page 153
de DVD-ROM e um software de reprodução são necessários para exibir o DVD com o tutorial em um computador. 4. Guia de Instalação XF1979-001 Este manual 5. Lista de desenhos XF1981-001 Fornece uma introdução aos desenhos de bordados com corte / apliquê no CD-ROM1 fornecido (para máquinas - Brother International PR655 | Installation Guide for KIT CW PRCW1 - Page 154
7) [Passo 2] Atualizando a máquina (página 9) [Passo 3] Certificando a atualização (página 12) [Passo 4] Alternando para o modo Bordado com corte / Apliquê (página 14) Nota • Entre em contato com o revendedor Brother autorizado mais próximo para obter ajuda com o produto ou a instalação. 6 - Brother International PR655 | Installation Guide for KIT CW PRCW1 - Page 155
INSTALANDO O KIT DE ATUALIZAÇÃO DE CW [Passo 1] Obtendo a chave de certificação O procedimento a seguir descreve como obter a chave de certificação necessária para a atualização. a Anote o número de identificação interno da máquina de 10 dígitos exibido ao lado de "N° (No.)", nas páginas 5 ou 6 da - Brother International PR655 | Installation Guide for KIT CW PRCW1 - Page 156
l e pule o "[Passo 2] Atualizando a máquina" na página 9. Depois, inicie o procedimento do "[Passo 3] Certificando a atualização" na página 12. g Faça download do manual. Selecione seu idioma preferido e clique em "Download" para salvar o arquivo em seu computador. Depois, clique em "Next (Próximo - Brother International PR655 | Installation Guide for KIT CW PRCW1 - Page 157
INSTALANDO O KIT DE ATUALIZAÇÃO DE CW j Verifique com cuidado se a informação foi digitada corretamente e clique em "Certify (Certificar)". l Clique em "Finish (Finalizar)". [Passo 2] Atualizando a máquina Lembrete • Para alterar a informação digitada, clique em "Back (Retornar)". Se uma mensagem - Brother International PR655 | Installation Guide for KIT CW PRCW1 - Page 158
INSTALANDO O KIT DE ATUALIZAÇÃO DE CW c Pressione . e Pressione . d Insira a mídia USB no conector da porta USB principal (superior) no lado direito da tela da máquina. Nota • Quando a mensagem "Atualização completada." for exibida, a instalação do aplicativo de atualização terá sido concluída - Brother International PR655 | Installation Guide for KIT CW PRCW1 - Page 159
b Pressione . INSTALANDO O KIT DE ATUALIZAÇÃO DE CW e Pressione . PORTUGUÊS c Conecte os conectores do cabo USB aos conectores da porta USB correspondente do computador e da máquina. → "Disco Removível" aparecerá em "Computador" ("Meu Computador"). Nota • Quando a mensagem "Atualização - Brother International PR655 | Installation Guide for KIT CW PRCW1 - Page 160
INSTALANDO O KIT DE ATUALIZAÇÃO DE CW [Passo 3] Certificando a atualização O procedimento a seguir descreve como certificar o programa atualizado. c Pressione na tela Configurações. a Desligue a máquina de bordar e, em seguida, ligue-a novamente. b Exiba a tela de certificação da tela - Brother International PR655 | Installation Guide for KIT CW PRCW1 - Page 161
e Digite a chave de certificação de 8 dígitos escrita no passo k de "[Passo 1] Obtendo a chave de certificação" (página 9) e pressione . INSTALANDO O KIT DE ATUALIZAÇÃO DE CW Nota • Se a tela a seguir for exibida, digite o número de 10 dígitos que aparece ao lado de "N° (No.)" na parte inferior - Brother International PR655 | Installation Guide for KIT CW PRCW1 - Page 162
de Instruções do PE-DESIGN NEXT + CW usando o Assistente de Emissão de Chave de Certificação. • Para obter uma cópia do Manual de Instruções do PE-DESIGN NEXT, consulte "Manual de Instruções do PE-DESIGN NEXT (versão em PDF) (para clientes que usam as versões 5, 6, 7 e 8 do PEDESIGN)" na página - Brother International PR655 | Installation Guide for KIT CW PRCW1 - Page 163
INSTALANDO AS AGULHAS DE BORDADO COM CORTE / APLIQUÊ INSTALANDO AS AGULHAS DE BORDADO COM CORTE / APLIQUÊ Sobre as agulhas de bordado com corte / apliquê As quatro agulhas de bordado com corte / apliquê (máquina com várias agulhas, agulhas de N° 1 a N° 4 com lâminas em diferentes orientações) - Brother International PR655 | Installation Guide for KIT CW PRCW1 - Page 164
INSTALANDO AS AGULHAS DE BORDADO COM CORTE / APLIQUÊ c Instale o espaçador conforme mostrado na ilustração a seguir. a Desligue a máquina de bordar. 1 2 3 1 Posicione o espaçador de modo que ele fique preso ao redor da ranhura elíptica. 2 Posicione o espaçador de modo que ele fique ao redor do - Brother International PR655 | Installation Guide for KIT CW PRCW1 - Page 165
INSTALANDO AS AGULHAS DE BORDADO COM CORTE / APLIQUÊ c Instale a agulha de bordado com corte / apliquê na ferramenta de troca de agulhas. Segure a ferramenta de troca de agulhas de bordado com corte / apliquê com a ranhura voltada para cima. Com a ponta da agulha voltada para baixo, insira a - Brother International PR655 | Installation Guide for KIT CW PRCW1 - Page 166
entre em contato com o revendedor autorizado ou o atendimento ao cliente da Brother. z Se a instalação for cancelada antes de ser concluída ou ários do PE-DESIGN versões 5, 6, 7 e 8 também deverão consultar o Manual de Instruções, que fornece descrições de funções diferentes das funções de bordado - Brother International PR655 | Installation Guide for KIT CW PRCW1 - Page 167
CASO 1: Quando o PE-DESIGN NEXT não está instalado no computador CASO 1: Quando o PEDESIGN NEXT não está instalado no computador b Clique em "Executar setup.exe". → A caixa de diálogo "Controle de Conta de Usuário" é exibida. c Clique em "Sim". [Passo 1] Instalando o software a Insira o CD-ROM2 - Brother International PR655 | Installation Guide for KIT CW PRCW1 - Page 168
CASO 1: Quando o PE-DESIGN NEXT não está instalado no computador f Verifique o local de instalação e clique em "Avançar". h Clique em "Concluir" para concluir a instalação do software. Lembrete • Para instalar o aplicativo em uma pasta diferente: 1. Clique em "Alterar". 2. Na caixa de diálogo " - Brother International PR655 | Installation Guide for KIT CW PRCW1 - Page 169
CASO 1: Quando o PE-DESIGN NEXT não está instalado no computador b Para iniciar a atualização, clique em "Atualizar agora". e Clique em "Avançar" para acessar o nosso servidor através da Internet e recuperar a chave da atualização. → O Assistente de Atualização será iniciado e a primeira caixa de - Brother International PR655 | Installation Guide for KIT CW PRCW1 - Page 170
CASO 2: Quando o PE-DESIGN NEXT já está instalado no computador CASO 2: Quando o PEDESIGN NEXT já está instalado no computador [Passo 1] Atualizando o PEDESIGN para a versão mais recente Lembrete • Se a caixa de seleção "Sempre verificar versão mais recente na inicialização" estiver marcada, o - Brother International PR655 | Installation Guide for KIT CW PRCW1 - Page 171
CASO 2: Quando o PE-DESIGN NEXT já está instalado no computador c Depois de clicar em "Upgrade", na parte inferior do painel esquerdo, clique em "Upgrade" para iniciar o Assistente de Atualização. 12 Verificando a versão mais recente do programa Uma função de Layout & Editing pode verificar a vers - Brother International PR655 | Installation Guide for KIT CW PRCW1 - Page 172
- Brother International PR655 | Installation Guide for KIT CW PRCW1 - Page 173
PR-600, PR-600II и PR-620 PE-DESIGN NEXT + CW Certification Key Issuing Wizard www.brother.com Brother PR-600, PR-600II и PR-620 Windows Windows z "Windows" и "Windows Vista Microsoft Corporation z "Adobe" и "Adobe Reader Adobe Systems Incorporated z http:// - Brother International PR655 | Installation Guide for KIT CW PRCW1 - Page 174
z z z DVD DVD 1 DVD-диске. 2 DVDдиске. 3 DVDдиске. 4 DVD-диске. 2 - Brother International PR655 | Installation Guide for KIT CW PRCW1 - Page 175
4 4 5 6 CW 6 6 [Шаг 1 7 [Шаг 2 9 [Шаг 2-1 USB 9 [Шаг 2-2 10 [Шаг 3 12 [Шаг 4 14 15 15 15 1 16 1 PE-DESIGN NEXT + CW 18 18 1 PE-DESIGN NEXT 19 [Шаг 1 19 [Шаг 2 USB 20 2 PE-DESIGN NEXT 22 [Шаг 1 PE-DESIGN 22 [Шаг 2 USB 22 23 PE-DESIGN ...23 3 - Brother International PR655 | Installation Guide for KIT CW PRCW1 - Page 176
PE-DESIGN NEXT + CW CW PDF) PE-DESIGN NEXT + CW PDF) PEDESIGN NEXT + CW PDF g, с. 8 CW PE-DESIGN NEXT + CW PDF Adobe® Reader Windows® 7. Если Windows® 7 10 6 PE-DESIGN NEXT + CW PE-DESIGN NEXT + CW PDF Layout & Editing PE-DESIGN NEXT PDF - Brother International PR655 | Installation Guide for KIT CW PRCW1 - Page 177
1. 1 XF1985-001 Certification Key Issuing Wizard 30 2. 2 PE-DESIGN) XF2020-001 PE-DESIGN NEXT + CW PE-DESIGN NEXT PE-DESIGN 5 по 8 PE-DESIGN NEXT. PE-DESIGN NEXT + CW 18. PE-DESIGN 5 по 8 или PE-DESIGN NEXT PE-DESIGN NEXT. Для 3. - Brother International PR655 | Installation Guide for KIT CW PRCW1 - Page 178
1. Столик PRWT1 PRWT1: XE8417-001 CW z z z z (Certification Key Issuing Wizard CW 1 z z z Windows® XP, Windows Vista®, Windows® 7 (32 64 USB [Шаг 1 7) [Шаг 2 9) [Шаг 3 12) [Шаг 4 14) Brother. 6 - Brother International PR655 | Installation Guide for KIT CW PRCW1 - Page 179
CW [Шаг 1 a 10 No 5 или 6 a b b 1 Windows® 7 или Windows Vista c D Certification Key Issuing Wizard". Select Language a b No SER. NO Certification Key Issuing Wizard d OK". KIT CW Certification Key Issuing Wizard". 7 - Brother International PR655 | Installation Guide for KIT CW PRCW1 - Page 180
CW e Next h 15 Next f Download upf Next a, с. 7 Next l 2 9 3 12. g Download Next PE-DESIGN. OK". I 1 O цифры "0"? O" и "I i a Next OK". 8 - Brother International PR655 | Installation Guide for KIT CW PRCW1 - Page 181
CW j Certify l Finish [Шаг 2 Back OK c c Certify 1 USB USB 2-1 2-2] (с. 10). ■ [Шаг 2-1 USB a b USB f 8). k 8 USB CW 9 - Brother International PR655 | Installation Guide for KIT CW PRCW1 - Page 182
CW c . e . d USB USB f USB 3] (с. 12). ■ [Шаг 2-2 a 10 - Brother International PR655 | Installation Guide for KIT CW PRCW1 - Page 183
b . CW e . c USB USB d f 1 8 f USB. PC USB 11 - Brother International PR655 | Installation Guide for KIT CW PRCW1 - Page 184
CW [Шаг 3 c a b d 12 - Brother International PR655 | Installation Guide for KIT CW PRCW1 - Page 185
e 8 k 1] 9), и . CW 10 No c b по l 7-9 b- l 7-9 f g CW 13 - Brother International PR655 | Installation Guide for KIT CW PRCW1 - Page 186
CW [Шаг 4 b . a c 16. CW PE-DESIGN NEXT + CW PE-DESIGN NEXT PE-DESIGN NEXT PDF PE-DESIGN 5, 6, 7 и 8)" на с. 4. 14 - Brother International PR655 | Installation Guide for KIT CW PRCW1 - Page 187
1 до № 4 12 3 1 2 3 45 1 a b 4 3 2 1 4 3 2 1 Синий Угол a b 15 - Brother International PR655 | Installation Guide for KIT CW PRCW1 - Page 188
c 1 2 a 3 1 2 3 d b 1 16 - Brother International PR655 | Installation Guide for KIT CW PRCW1 - Page 189
c d a b c d a b Игла c d 15). e z z z 17 - Brother International PR655 | Installation Guide for KIT CW PRCW1 - Page 190
5, 6, 7 и 8 PE-DESIGN NEXT PE-DESIGN NEXT 2 PE-DESIGN NEXT + CW для PE-DESIGN 5/6/7/8/NEXT". z Windows® 7 z USB Brother. z z z USB z PE-DESIGN 5, 6, 7 и 8 z PE-DESIGN NEXT PE-DESIGN 5, 6, 7 и 8 4.) Windows® XP, Windows Vista®, Windows® 7 (32 64 1 Память - Brother International PR655 | Installation Guide for KIT CW PRCW1 - Page 191
1 PE-DESIGN NEXT 1 PEDESIGN NEXT b setup.exe". c [Шаг 1 a 2 PE-DESIGN Windows® XP d OK". Windows® XP InstallShield Wizard d. D:\setup.exe" (где "D InstallShield Wizard e ■ Для Windows® 7 или Windows Vista®: D:\setup.exe" (где - Brother International PR655 | Installation Guide for KIT CW PRCW1 - Page 192
1 PE-DESIGN NEXT f h 1 2 3 OK 4 g [Шаг 2 USB PEDESIGN NEXT + CW USB PE-DESIGN 5-8 Layout & Editing USB PEDESIGN NEXT 2 2". 20 USB USB USB USB USB a USB USB Layout & Editing. - Brother International PR655 | Installation Guide for KIT CW PRCW1 - Page 193
1 PE-DESIGN NEXT b e c f USB d 15 g USB PE-DESIGN I" и "O USB USB 21 - Brother International PR655 | Installation Guide for KIT CW PRCW1 - Page 194
2 PE-DESIGN NEXT 2 PE-DESIGN NEXT [Шаг 1 PE-DESIGN 2 PE-DESIGN PE-DESIGN NEXT 9.2 setup.exe a Layout & Editing 1 2. 1 2 b c [Шаг 2 USB a USB USB Layout & Editing. b 1 2 1 2 22 - Brother International PR655 | Installation Guide for KIT CW PRCW1 - Page 195
2 PE-DESIGN NEXT c 12 Layout & Editing PE-DESIGN 22. PE-DESIGN d d до g 2 1". CW a b c PE-DESIGN для Windows® 7 и Windows Vista®. Windows® XP 23 - Brother International PR655 | Installation Guide for KIT CW PRCW1 - Page 196
English German French Dutch Italian Spanish Portuguese-BR Russian 111-001 Printed in Taiwan XF1979-001
-
 1
1 -
 2
2 -
 3
3 -
 4
4 -
 5
5 -
 6
6 -
 7
7 -
8
-
9
-
10
-
11
-
12
-
13
-
14
-
15
-
16
-
17
-
18
-
19
-
20
-
21
-
22
-
23
-
24
-
25
-
26
-
27
-
28
-
29
-
30
-
31
-
32
-
33
-
34
-
35
-
36
-
37
-
38
-
39
-
40
-
41
-
42
-
43
-
44
-
45
-
46
-
47
-
48
-
49
-
50
-
51
-
52
-
53
-
54
-
55
-
56
-
57
-
58
-
59
-
60
-
61
-
62
-
63
-
64
-
65
-
66
-
67
-
68
-
69
-
70
-
71
-
72
-
73
-
74
-
75
-
76
-
77
-
78
-
79
-
80
-
81
-
82
-
83
-
84
-
85
-
86
-
87
-
88
-
89
-
90
-
91
-
92
-
93
-
94
-
95
-
96
-
97
-
98
-
99
-
100
-
101
-
102
-
103
-
104
-
105
-
106
-
107
-
108
-
109
-
110
-
111
-
112
-
113
-
114
-
115
-
116
-
117
-
118
-
119
-
120
-
121
-
122
-
123
-
124
-
125
-
126
-
127
-
128
-
129
-
130
-
131
-
132
-
133
-
134
-
135
-
136
-
137
-
138
-
139
-
140
-
141
-
142
-
143
-
144
-
145
-
146
-
147
-
148
-
149
-
150
-
151
-
152
-
153
-
154
-
155
-
156
-
157
-
158
-
159
-
160
-
161
-
162
-
163
-
164
-
165
-
166
-
167
-
168
-
169
-
170
-
171
-
172
-
173
-
174
-
175
-
176
-
177
-
178
-
179
-
180
-
181
-
182
-
183
-
184
-
185
-
186
-
187
-
188
-
189
-
190
-
191
-
192
-
193
-
194
-
195
-
196
 |
 |

Leia este guia antes da instalação.
•
•
Read this guide before installing.
•
Lesen Sie diese Anleitung vor der Installation durch.
•
Lisez ce guide avant de procéder à l’installation.
•
Lees deze gids alvorens te installeren.
•
Leggere il presente guida prima dell’installazione.
Antes de instalar, lea este guía.
•
Перед началом установки прочитайте данное руководство.
•
KIT CW
Installation Guide
Guia de Instalação
do KIT CW
Guía de instalación
del KIT CW
KIT CW
Installatiegids
Guide d’installation
du KIT CW
Installationsanleitung
für KIT CW
Guida all’installazione
di KIT CW
КОМПЛЕКТ
CW
Руководство
по
установке
ENGLISH
DEUTSCH
FRANÇAIS
NEDERLANDS
ITALIANO
ESPAÑOL
PORTUGUÊS
РУССКИЙ
DVD
DVD
DVD