Brother International PT 1650 Users Manual - Spanish
Brother International PT 1650 - P-Touch 1650 B/W Thermal Transfer Printer Manual
 |
UPC - 012502607366
View all Brother International PT 1650 manuals
Add to My Manuals
Save this manual to your list of manuals |
Brother International PT 1650 manual content summary:
- Brother International PT 1650 | Users Manual - Spanish - Page 1
1600/1650 USER'S GUIDE GUÍA DE USUARIO • Read this User's Guide before you start using your P-touch. • Keep this User's Guide in a handy place for future reference. • Antes de usar su equipo por primera vez, lea cuidadosamente esta guía de usuario. • Guarde esta guía de usuario - Brother International PT 1650 | Users Manual - Spanish - Page 2
Corporate Boulevard Bridgewater, NJ 08807-0911 USA TEL : (908) 704-1700 declares that the product Product Name Model Number : Brother Label Printer P-touch : PT-1600/1650 complies with Part 15 of the FCC Rules. Operation is subject to the following two conditions: (1) this device may not cause - Brother International PT 1650 | Users Manual - Spanish - Page 3
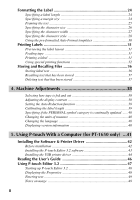
2 General Precautions 4 Batteries & Tape Cassettes 5 Installing batteries and a tape cassette 5 Cleaning 8 Cleaning the print head, rollers and tape cutter 8 Optional AC Adapter 9 Connecting the AC adapter 9 Turning the P-touch On/Off 9 2. Label Type Modes 10 Selecting a Label Type Mode 10 - Brother International PT 1650 | Users Manual - Spanish - Page 4
With a Computer (for PT-1650 only) ...41 Installing the Software & Printer Driver 42 Before installation 42 Installing the P-touch Editor 3.2 software 43 Installing the USB printer driver 44 Reading the User's Guide 46 Using P-touch Editor 3.2 47 Starting up P-touch Editor 3.2 48 Displaying - Brother International PT 1650 | Users Manual - Spanish - Page 5
data to the P-touch 51 Adding a user-defined character image to the text 52 Using template data 52 Using downloaded database data 54 Backing up/restoring P-touch data 57 6. Appendix 58 Troubleshooting 58 Error Message List 59 Machine Specifications 63 Hardware ...63 Software ...63 Index 64 - Brother International PT 1650 | Users Manual - Spanish - Page 6
Consumable and Accessory Item(s) is covered by this warranty and if you first reported the problem to Brother or an Authorized Service Center within 90 days from the date of original purchase, Brother or its Authorized Service Center will repair or replace the Machine and/ or accompanying Consumable - Brother International PT 1650 | Users Manual - Spanish - Page 7
is covered by this warranty and if you first reported the problem after 90 days, but before 1 year from the date of original purchase, Brother will furnish, free of charge (excluding labor charges), replacement part(s) for those part(s) of the Machine determined by Brother or its Authorized Service - Brother International PT 1650 | Users Manual - Spanish - Page 8
about your Brother Product, we have a variety of support options for you to choose from: USA-Customer Service: Customer Service 877-478-6824 (voice) Customer Service 901-379-1210 (fax) Automated Faxback 800-521-2846 World Wide Web www.brother.com Supplies / Accessories www.brothermall.com or 888 - Brother International PT 1650 | Users Manual - Spanish - Page 9
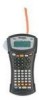
Started 1 Getting Started General Description Top view & bottom view Top view Display Tape cutter button Keyboard Back cover USB port (for PT-1650 only) AC adapter connector Battery compartment Tape cassette compartment Cassette release lever Print head Tape exit slot Bottom view 1 - Brother International PT 1650 | Users Manual - Spanish - Page 10
Keyboard & LCD display PT-1600 1 234 56 7 E GF H Q P O N D CB A 0 8 9 Italic text style (page 28) 8 Frame (page 25) 9 Low battery (page 6) 0 Block number (page 17) A Label Type setting (page 10) B Width setting (page 27) C Size key (page 31) P Print key (page 31) Q Label Type (page 10) 2 - Brother International PT 1650 | Users Manual - Spanish - Page 11
Getting Started PT-1650 E GF H Q P O N 1 234 56 7 D CB A 0 8 9 I J Italic text style (page 28) 8 Frame (page 25) 9 Low battery (page 6) 0 Block number (page 17) A Label Type setting (page 10) B Width setting (page 27) C Size setting key (page 31) P Print key (page 31) Q Label Type (page 10) 3 - Brother International PT 1650 | Users Manual - Spanish - Page 12
high quality construction (for PT-1650 only). ● IBM® and PC-DOS® are trademarks of International Business Machines, Inc (for PT-1650 only). ● Microsoft® and Windows® are registered trademarks of Microsoft Corp. in the US and other countries (for PT-1650 only). ● All other software and product names - Brother International PT 1650 | Users Manual - Spanish - Page 13
available for this machine in a wide variety of types, colors and sizes, enabling you to make distinctive color-coded and stylized labels. Installing batteries and a tape cassette 1 2 Notes on batteries ☞ This P-touch requires six AA-size batteries. Rechargeable (Ni-Cd or Ni-MH) batteries can be - Brother International PT 1650 | Users Manual - Spanish - Page 14
in the correct direction. With batteries installed, the P-touch determines the remaining battery charge during printing and feeding. If a low battery charge is detected, the low battery indicator ()) comes on. When this occurs, be sure to replace the batteries. The low battery indicator may not come - Brother International PT 1650 | Users Manual - Spanish - Page 15
the instruction sheet included with the Extra Strength Adhesive Tape cassette recommends cutting the tape with scissors, the tape cutter that this P-touch is equipped with is able to cut Extra Strength Adhesive Tape. Flexible ID Tape ☞ For applications that require more flexible labels, such - Brother International PT 1650 | Users Manual - Spanish - Page 16
environment. With use, the tape cutter may become covered with adhesive, making it difficult to cut the tape. Cleaning the print head, rollers and tape cutter ☞ Before cleaning the print head and rollers, press o to turn off the P-touch, and then remove the batteries and disconnect the optional AC - Brother International PT 1650 | Users Manual - Spanish - Page 17
Started Notes on cleaning the tape cutter ☞ If the tape cannot be cut correctly, clean the tape cutter blades. Optional AC Adapter When printing a large number of labels or labels that contain a large amount of text, it may be useful to connect the P-touch to a standard electrical outlet using - Brother International PT 1650 | Users Manual - Spanish - Page 18
number keys to type in the desired setting). 6 Press n to apply the selected settings. 7 Type the text for each label in a separate text block. 8 Print the labels. • To print a single copy of each label, press p. • To print multiple copies or several copies while increasing certain characters, or to - Brother International PT 1650 | Users Manual - Spanish - Page 19
maximum of 7 text lines, and with the ROT-REP Label Type mode, only the text lines that fit within the label are printed. ☞ For labels to be attached to cables and wires, we recommend using Flexible ID Tape. When wrapping Flexible ID Tape around cylindrical objects, the diameter of the object should - Brother International PT 1650 | Users Manual - Spanish - Page 20
FLAG Label Type mode, each block of text is printed at both ends of separate labels. The length of the unprinted part of this label is For labels to be attached to cables and wires, we recommend using Flexible ID Tape. To wrap Flexible ID Tape around cylindrical objects, use the FLAG Label Type - Brother International PT 1650 | Users Manual - Spanish - Page 21
Type Modes Port & Panel Modes Labels printed using these Label Type modes can be used to identify various components or panels. With the Port Label Type mode, each block of the text is printed on a separate label, making these labels useful for identifying different components or ports that are - Brother International PT 1650 | Users Manual - Spanish - Page 22
FRONT ☞ For these types of labels, we recommend using Extra Strength Adhesive Tape. ☞ The PRINT parameter is only available with the PANEL Label Type mode. ☞ Using the Numbering function with the PANEL Label Type mode makes it easy to create a single label of multiple blocks containing incremental - Brother International PT 1650 | Users Manual - Spanish - Page 23
3 Basic Functions Performing Basic Operations Choosing functions, parameters, settings and groups ● If "WX" appears, press l to select the previous item or r to select the next item. ● If " S T " appears, press u to select the previous item or d to select the next item. - Brother International PT 1650 | Users Manual - Spanish - Page 24
Inputting Label Data Entering and editing text Entering characters ● To type a lowercase spaces ● To add a blank space to the text, press e. Moving the cursor Move the cursor in order to review and edit the text, or you can select the various functions and settings. ● To move the cursor left, right, - Brother International PT 1650 | Users Manual - Spanish - Page 25
line. ☞ The number of text lines that can be printed depends on the width of the tape. Tape Width 1/4" (6 mm) 3/8" (9 mm) 1/2" (12 mm) 3/4" ( as shown below, will be printed as follows. R R2:456 R1:ABC_ ---- -- 1 NORMAL 2 Basic Functions ☞ A single label can only contain a maximum of - Brother International PT 1650 | Users Manual - Spanish - Page 26
Deleting text ● To remove characters to the left of the cursor's current position, press b until all of the characters that you wish to delete are removed. ● To delete all of the text: 1 Press g, then b. 2 Press u or d to select either TEXT ONLY (to erase just the text) or TEXT&FORMAT (to erase all - Brother International PT 1650 | Users Manual - Spanish - Page 27
codes to be printed as part of labels. ☞ Since this machine is not specifically designed for special bar code label-making, some bar code readers may not be able to read the labels. ☞ Bar code readers may not be able to read bar codes printed with certain ink colors on certain label tape colors. For - Brother International PT 1650 | Users Manual - Spanish - Page 28
Entering bar code data 1 Press c. 2 Type in the new bar code data or edit the old data. 3 Press n to add the bar code to the text. ☞ To add special characters to the bar code data (only with protocols CODE39, CODABAR, EAN128 or CODE128), position the cursor below the character immediately to the - Brother International PT 1650 | Users Manual - Spanish - Page 29
The following special characters can only be added to bar codes created using protocols EAN128 and CODE128. Symbol 0 1 2 3 4 5 6 7 8 9 10 11 12 13 14 15 16 17 Character (SPACE) Symbol 18 19 20 21 22 23 24 25 26 27 28 29 30 31 32 33 34 35 Character NUL SOH STX ETX EOT ENQ ACK Symbol 36 37 - Brother International PT 1650 | Users Manual - Spanish - Page 30
be selected by typing in the corresponding code from the table below. For example, typing "A02", then pressing n adds "?" to the text. ☞ Some symbols are printed in color on the keypad. To use a symbol on a key, press g to enter Code mode, and then press the key for the symbol. The following - Brother International PT 1650 | Users Manual - Spanish - Page 31
Basic Functions Category Symbols H NUMBER 12 13 14 0 1 2 1 2 00 01 02 03 04 05 06 07 I PICTOGRAPH 00 01 02 03 04 05 J 00 01 02 03 04 05 06 07 08 09 ELECTRICAL / ELECTRONIC 10 11 12 13 14 15 16 17 18 19 20 21 22 23 24 25 26 27 28 29 30 31 32 33 - Brother International PT 1650 | Users Manual - Spanish - Page 32
is set to OFF. (Refer to Specifying if the PERSONAL symbol category is continually updated on page 40.) Formatting the Label Specifying a label length The length of the label can be specified as follows. 1 Press g, then A. 2 Press l or r until LENGTH is displayed. 3 Press u or d until the desired - Brother International PT 1650 | Users Manual - Spanish - Page 33
Framing the text 1 Press g, then B. 2 Press u or d until the desired frame setting is displayed. 3 Press n. The selected setting is applied to the entire text. The following frame styles are available. Frame Setting Sample Frame Setting Sample 1 8 2 9 3 10 4 11 5 12 6 13 7 14 - Brother International PT 1650 | Users Manual - Spanish - Page 34
line that the cursor is positioned in. ☞ Since the text sizes that can be printed depends on the width of the tape, the following table shows the maximum text size that can be used with each tape width. Tape Width 1/4" (6 mm) 3/8" (9 mm) 1/2" (12 mm) 3/4" (18 mm) 1" (24 mm) Maximum Text Size 12 - Brother International PT 1650 | Users Manual - Spanish - Page 35
Specifying the character width Basic Functions Formatting the width of all text 1 Press t. 2 Press l or r until GLB WIDE is displayed. 3 Press u or d until the desired character width setting is displayed. 4 Press n. The selected setting is applied to the entire text. Formatting the width of a - Brother International PT 1650 | Users Manual - Spanish - Page 36
Specifying the character style Formatting the character style of all text 1 Press t. 2 Press l or r until GLB STYL is displayed. 3 Press u or d until the desired character style setting is displayed. 4 Press n. The selected setting is applied to the entire text. Formatting the character style of a - Brother International PT 1650 | Users Manual - Spanish - Page 37
Specifying the alignment for all lines in the text 1 Press t. 2 Press l or r until ALIGN is displayed. 3 Press u or d until the desired setting is displayed. 4 Press n. The selected setting is applied to the entire text. The following alignment settings are available. LEFT CENTER RIGHT JUSTIFY - Brother International PT 1650 | Users Manual - Spanish - Page 38
and ID tags. After simply selecting one of the ten label templates, type text into each of its fields, and then the label is ready to be printed. The following label templates are available. Key Template Name Tape Width Label Length 1 BIN BOX 3/4" × 2.80" (18 mm × 70 mm) Template Fields - Brother International PT 1650 | Users Manual - Spanish - Page 39
displayed. ☞ Press f to feed out any leftover printed tape after pressing o to quit printing. Printing a label ● To print out a label, press p. The message "WORKING", then "COPIES" followed by the number of the label being printed is displayed. ☞ To quit printing, press o to turn off the P-touch. 31 - Brother International PT 1650 | Users Manual - Spanish - Page 40
. ☞ If the Cut function is set to 1 or 3, the message "CUT TAPE TO CONTINUE" appears after each label is printed. Press the tape cutter button to cut off the label and continue printing. ☞ Be sure to cut the tape within 5 minutes from the time that the message appears. ☞ For the different options - Brother International PT 1650 | Users Manual - Spanish - Page 41
. ☞ If the Cut function is set to 1 or 3, the message "CUT TAPE TO CONTINUE" appears after each label is printed. Press the tape cutter button to cut off the label and continue printing. ☞ Be sure to cut the tape within 5 minutes from the time that the message appears. ☞ For the different options - Brother International PT 1650 | Users Manual - Spanish - Page 42
step 7, press u or d until CONTINUE is displayed in the Print Option menu, and then press n. Printing mirrored labels This function prints your label so that the text can be read from the adhesive side of the tape. If mirror-printed labels are attached to glass or some other transparent material - Brother International PT 1650 | Users Manual - Spanish - Page 43
(or p). START appears in the Print Option menu. 5 Press n (or p) to begin printing the specified number of labels. The number of each copy is displayed while it is being printed. ☞ When using the Mirror Printing function, the text should be printed on clear tape. ☞ To specify settings for additional - Brother International PT 1650 | Users Manual - Spanish - Page 44
used label text along with its formatting can be stored in the memory and easily recalled so that it can be edited and quickly printed. When Press n. ☞ If the maximum number of characters has already been stored, the error message "MEMORY FULL!" appears in the display. If this occurs, an existing - Brother International PT 1650 | Users Manual - Spanish - Page 45
under the selected file number is recalled into the display. ☞ To view other parts of the selected text file, press l or r. Deleting text that has been selected text file(s), press b instead of n in step 7. ☞ To view other parts of the selected text file, press l or r. ☞ To remove a text file - Brother International PT 1650 | Users Manual - Spanish - Page 46
a setting using chain printing is selected, the last label in the previous session remains in the machine (is not fed out), so that the next label can be printed without wasting tape. When the last label is printed, press f to feed the chain of labels, and then press the tape cutter button to cut it - Brother International PT 1650 | Users Manual - Spanish - Page 47
the printed label length can be recalibrated with the Length Adjust function by selecting a setting between -1 and +3. (The default setting is 0.) 1 Press g, then Z. 2 Press l or r until LENGTH ADJUST is displayed. 3 Press u or d until the desired setting is displayed, and then press n. 39 Machine - Brother International PT 1650 | Users Manual - Spanish - Page 48
desired setting is displayed, and then press n. Displaying version information This function can be used to display the version information for the P-touch software and built-in symbol set. 1 Press g, then Z. 2 Press l or r until VERSION INFO is displayed. 3 Press u or d until the desired version - Brother International PT 1650 | Users Manual - Spanish - Page 49
for PT-1650 only) This P-touch is equipped with a USB port, allowing you to connect it to a computer running Microsoft® Windows®. The enclosed CD-ROM contains P-touch Editor 3.2, which is installed together with the printer driver, Transfer Manager and Backup Manager. ● P-touch Editor 3.2 is a label - Brother International PT 1650 | Users Manual - Spanish - Page 50
Installing the Software & Printer Driver The P-touch Editor 3.2 software, provided on the enclosed CD-ROM, includes a variety of more complex functions for printing bar codes and images, enabling you to design just about any label that you can imagine. With this application, the printer driver must - Brother International PT 1650 | Users Manual - Spanish - Page 51
then remove the CD-ROM from the CD-ROM drive. ☞ To uninstall the P-touch Editor 3.2 software, double-click "Add/Remove Programs" ("Add or Remove Programs" in Windows® XP) in the Control Panel window, and then follow the instructions that appear. 43 Using P-touch With a Computer (for PT-1650 only) - Brother International PT 1650 | Users Manual - Spanish - Page 52
CD-ROM drive. With Windows® XP: ☞ A message appears, informing you that the printer driver has passed Brother's own compatibility tests and that touch printer driver will be installed, click "Next". A dialog box appears, instructing you to connect the P-touch to the computer. 2 Connect the P-touch - Brother International PT 1650 | Users Manual - Spanish - Page 53
then remove the CD-ROM from the computer. ☞ To uninstall the printer driver, start up the installer on the CD-ROM, click the Driver button in the dialog box that appeared, and then select the desired option and follow the instructions that appear. 45 Using P-touch With a Computer (for PT-1650 only) - Brother International PT 1650 | Users Manual - Spanish - Page 54
up Windows® Explorer. 2 Select the CD-ROM drive. 3 Double-click the Ptouch folder 4 Double-click the Manual folder 5 Double-click "Main.htm". To view the User's Guide installed on the hard disk: 1 Click "Start" in the taskbar to display the Start menu. 2 Point to "Programs". 3 Point to "P-touch - Brother International PT 1650 | Users Manual - Spanish - Page 55
the label and printing it on 2 or more labels) cannot be transferred. ☞ The length of the label set with P-touch Editor and the label length setting on the P-touch may be slightly different as a result of the P-touch's computational margin of error. 47 Using P-touch With a Computer (for PT-1650 - Brother International PT 1650 | Users Manual - Spanish - Page 56
touch Editor 3.2". 4 Click "P-touch Editor 3.2". When P-touch Editor is started, the following window is displayed. Menu bar Standard toolbar Title bar Property dock Layout area Print Page Properties ( ) When the P-touch is selected as the printer: Click this button to hide the Properties. 48 - Brother International PT 1650 | Users Manual - Spanish - Page 57
details, refer to Reading the User's Guide on page 46. Notes on usage Bar codes Keep the following points in mind when using P-touch Editor 3.2 to print bar codes. • Bar code readers may not be able to read bar codes printed with certain ink colors on certain label tape colors. • Be sure to test - Brother International PT 1650 | Users Manual - Spanish - Page 58
be used with P-touch Editor. Refer to the User's Guide supplied on the P-touch Editor 3.2 CD touch. ☞ Be sure not to turn off the P-touch while data is being set to it, otherwise the data will be lost. ☞ Regardless of whether the P-touch is being operated from batteries or the AC adapter, the machine - Brother International PT 1650 | Users Manual - Spanish - Page 59
to the computer through a USB connection, label layouts created in P-touch Editor cannot be printed directly from the application. 1 Make sure that the P-touch is in Transfer mode. (For more details, refer to Entering Transfer mode on page 50.) 2 • For downloading a template or database to the - Brother International PT 1650 | Users Manual - Spanish - Page 60
is automatically resized to the width of the tape being used. Using template data A label layout created with P-touch Editor (*.lbl file) can be downloaded to the P-touch, where it can be used as a template for printing labels. The templates can be printed using text either from a database or text - Brother International PT 1650 | Users Manual - Spanish - Page 61
type in the new text. RM NO.:[Part Nam] NO 1: AC adapter 5 Press p. To select a range of database records to be printed in the template: 3 Press u Print Option menu. 8 Press n (or p) to begin printing the labels using the specified range of records. Using P-touch With a Computer (for PT-1650 - Brother International PT 1650 | Users Manual - Spanish - Page 62
☞ If the Cut function is set to 1 or 3, the message "CUT TAPE TO CONTINUE" appears after each label is printed. Press the tape cutter button to cut off the label and continue printing. ☞ Be sure to cut the tape within 5 minutes from the time that the message appears. ☞ For the different options - Brother International PT 1650 | Users Manual - Spanish - Page 63
labels on page 34.) ☞ While trying to print a large amount of data at one time, some outputted labels may be blank. For example, when printing 50 records, the maximum number of characters that can be printed at one time is limited to approximately 200. 55 Using P-touch With a Computer (for PT-1650 - Brother International PT 1650 | Users Manual - Spanish - Page 64
database While selecting a database record to be used in a template or while selecting a database record whose data is to be added to a label, the database can be searched for records containing specific characters or records with a specific number. To search the database for a record containing - Brother International PT 1650 | Users Manual - Spanish - Page 65
touch. • Label templates • Database • User-defined character images • Label files stored in the P-touch memory 1 Make sure that the P-touch touch data onto the computer, click the Printer → PC tab, and then click "Update List". To restore P-touch data backed up on the computer, click the PC → Printer - Brother International PT 1650 | Users Manual - Spanish - Page 66
or replace the batteries with new ones. • Clean the print head as explained on Cleaning the print head, rollers and tape cutter on page 8. • You have reached the end of the tape. Replace the tape cassette with a new one. • Turn off the P-touch, and then while holding down g and R, turn the machine - Brother International PT 1650 | Users Manual - Spanish - Page 67
was changed while the P-touch paused for the tape to be cut. • This message appears if a combination of new and used batteries, a combination of batteries of different types (alkaline, Ni-Cd and NiMH), manufacturers or models, or a combination of recharged and uncharged batteries have been installed - Brother International PT 1650 | Users Manual - Spanish - Page 68
SETTING IN LABEL TYPE MODE! On 3/4" (18 mm) tape: CHECK THE NUMBER OF LINES! 5 MAX On 1/2" (12 mm) tape: CHECK THE NUMBER OF LINES! 3 MAX On 3/3" (9 mm) and 1/4" (6 mm) tape: CHECK THE NUMBER OF LINES! 2 MAX CHOOSE COPIES LESS THAN 1000! CUTTER ERROR! IMAGE CHARACTER SIZE ERROR! (for PT-1650 only - Brother International PT 1650 | Users Manual - Spanish - Page 69
Appendix Error Message INPUT ABCD AT BEGIN & END! INSERT 1" TAPE INSERT 24mm TAPE INSERT 3/4" TAPE INSERT 18mm TAPE INSERT 1/2" TAPE INSERT 12mm TAPE INSERT 3/8" TAPE INSERT 9mm TAPE INSERT 1/4" TAPE INSERT 6mm TAPE LENGTH LIMIT! MEMORY FULL! Cause • This message appears if a letter between A and - Brother International PT 1650 | Users Manual - Spanish - Page 70
Error Message MIN 4 DIGITS! NO FILES! NO DATABASE OR INCORRECT FORMAT (for PT-1650 only) NO TAPE! RECORD NOT FOUND! (for PT-1650 only) TEXT has been downloaded to the P-touch when you press g, then i. • This message appears if no tape cassette is installed when you try to feed the tape, print or use - Brother International PT 1650 | Users Manual - Spanish - Page 71
Machine Specifications Appendix Hardware Power supply: Input device: LCD: Print tape: Print head: Tape cutter: Dimensions: Weight: Six AA alkaline batteries or Six AA rechargeable batteries or AC adapter (model AD-60/AD-24) Keyboard (56 keys) 48 × 132 dots + Caps and other indicators TZ tape is - Brother International PT 1650 | Users Manual - Spanish - Page 72
special characters 20 Bar Code function 19 batteries 5 block number 2, 3 block cleaning print head 8 rollers 8 tape cutter 8 64 Label Type mode 55 searching 56 default setting 15 deleting memory files 37 text 18 display 2 contrast 38 E error messages 59 Extra Strength Adhesive Tape - Brother International PT 1650 | Users Manual - Spanish - Page 73
3 justified text alignment 2, 3 Label Type setting 2, 3 left text alignment 2, 3 length 2, 3 low battery 2, 3 outline text style 2, 3 right text alignment 2, 3 Shift 2, 3 size 2, 3 width 2, 3 Insert indicator 2, 3 Insert key 17 installing printer driver 44 P-touch Editor 42 italic text - Brother International PT 1650 | Users Manual - Spanish - Page 74
13 power key 2, 3, 9 preview 31 print head 8 Print key 2, 3, 31 printer driver installing 44 printing database record range 53 text block range 34 problems 58 P-touch Editor installing 42 starting 47 template 52 User's Guide 46 R recalling 37 Repeat Printing function 32 restoring 57 - Brother International PT 1650 | Users Manual - Spanish - Page 75
you may call Brother Customer Service at: Voice 1-877-4-PTouch, or Fax 1-901-379-1210 Assistance on the Internet For product information and downloading the latest drivers: http://www.brother.com For purchasing accessories and certain Brother products: http://www.brothermall.com Accessories and - Brother International PT 1650 | Users Manual - Spanish - Page 76
- Brother International PT 1650 | Users Manual - Spanish - Page 77
GUÍA DE USUARIO - Brother International PT 1650 | Users Manual - Spanish - Page 78
Nombre del producto Número de modelo : Impresora de etiquetas P-touch de Brother : PT-1600/1650 cumple la Parte 15 de las Normas FCC. El funcionamiento está sujeto a las no cuente con la aprobación expresa de Brother Industries, Ltd. podría anular la autorización del usuario para manejar el equipo - Brother International PT 1650 | Users Manual - Spanish - Page 79
del cabezal de impresión, rodillos y cortador de la cinta 8 Adaptador de CA opcional 9 Conexión del adaptador de CA 9 Conexión/desconexión de la P-touch 9 2. Modos de tipo de etiqueta 10 Selección de un modo de tipo de etiqueta 10 Modos Normal y Vertical 10 Modos Girar (ROTATE) y Girar - Brother International PT 1650 | Users Manual - Spanish - Page 80
40 Cambio de las unidades de medida 40 Cambio del idioma 40 Visualización de información sobre la versión 40 5. Uso de la P-touch con un PC(sólo para PT-1650) ........41 Instalación de los programas y del controlador de impresión ...... 42 Antes de la instalación 42 Instalación del programa - Brother International PT 1650 | Users Manual - Spanish - Page 81
de datos a/desde un PC 50 Para entrar en el modo Transfer 50 Descarga de datos a la P-touch 51 Para agregar al de la P-touch y restaurarlos 57 6. Apéndice 58 Solución de problemas 58 Lista de mensajes de error 59 Características técnicas de la máquina 63 Hardware ...63 Software ...63 Índice - Brother International PT 1650 | Users Manual - Spanish - Page 82
iv - Brother International PT 1650 | Users Manual - Spanish - Page 83
ón general Vista superior y vista inferior Vista Visualizador Botón del cortador de la cinta Teclado Cubierta posterior Puerto USB (sólo para PT-1650) Conector del adaptador de CA Compartimento de las pilas Compartimento del casete de cinta Palanca de liberación del casete Cabezal de - Brother International PT 1650 | Users Manual - Spanish - Page 84
Teclado y visualizador de LCD PT-1600 1 234 56 7 E GF H Q P O N D CB A 0 8 9 I J K L M 1 Alineación del texto a la izquierda (página 29) 2 Alineación del texto centrada (página 29) 3 Alineación del texto a la derecha (página 29) 4 - Brother International PT 1650 | Users Manual - Spanish - Page 85
Para empezar PT-1650 E GF H Q P O N 1 234 56 7 D CB A 0 8 9 I J K L M 1 Alineación del texto a la izquierda (página 29) 2 Alineación del texto centrada (página 29) 3 Alineación del texto a la derecha (página 29) 4 Alineación - Brother International PT 1650 | Users Manual - Spanish - Page 86
(sólo para PT-1650). ● IBM® y PC-DOS® son marcas comerciales de International Business Machines, Inc(sólo para PT-1650). ● Microsoft® y Windows® son marcas registradas de Microsoft Corp. en EE.UU. y en otros países (sólo para PT-1650). ● Todos los demás nombres de software y productos mencionados - Brother International PT 1650 | Users Manual - Spanish - Page 87
. Pueden usarse pilas recargables (Ni-Cd o Ni-MH) en lugar de 6 pilas alcalinas. ☞ Las pilas recargables no se pueden cargar dejándolas en la P-touch con el adaptador de CA conectado. Cárguelas con un cargador diseñado específicamente para el tipo de pilas utilizado. Para más detalles acerca de las - Brother International PT 1650 | Users Manual - Spanish - Page 88
la memoria se perderán. ☞ Si prevé que no va a utilizar la P-touch durante un período prolongado, extraiga las pilas. Cuando se desconecta la máquina se incluyen empiezan a descargarse desde el mismo momento en que la unidad sale de fábrica, es posible que su duración no cumpla las especificaciones, - Brother International PT 1650 | Users Manual - Spanish - Page 89
la hoja de instrucciones que acompaña al casete de cinta con fuerza adhesiva extra se recomienda cortarla con tijeras, el cortador de esta P-touch es capaz de cortar este tipo de cinta. Cinta de identificación flexible ☞ Para aquellas aplicaciones que requieran etiquetas más flexibles (por ejemplo - Brother International PT 1650 | Users Manual - Spanish - Page 90
que limpiar ciertas partes de la P-touch. Puede que se adhiera polvo o suciedad al cabezal de impresión y a los rodillos de la P-touch, especialmente si se cabezal de impresión y los rodillos, pulse o para desconectar la P-touch y, a continuación, extraiga las pilas y desenchufe el adaptador de CA - Brother International PT 1650 | Users Manual - Spanish - Page 91
acerca del adaptador de CA ☞ Emplee sólo el adaptador de CA diseñado exclusivamente para esta máquina. ☞ Si prevé que no va a utilizar la P-touch durante un período prolongado, desconecte el adaptador de CA. Cuando se desconecta la máquina, se pierden el texto que se muestra en la pantalla y - Brother International PT 1650 | Users Manual - Spanish - Page 92
2 Modos de tipo de etiqueta Selección de un modo de tipo de etiqueta Presionando a, podrá seleccionar uno de los dos modos normales de diseño e impresión de etiquetas personalizadas, o cualquiera de los cinco modos especiales disponibles para imprimir etiquetas preformateadas para la identificación - Brother International PT 1650 | Users Manual - Spanish - Page 93
Modos de tipo de etiqueta Después de seleccionar el modo de tipo de etiqueta NORMAL o VERTICAL, el texto de la etiqueta puede escribirse, formatearse, imprimirse y cortarse de la manera habitual. Con el modo de tipo de etiqueta Normal, el texto introducido se imprime horizontalmente a lo largo de - Brother International PT 1650 | Users Manual - Spanish - Page 94
entre sí para formar una bandera. Con el modo FLAG, cada bloque de texto se imprime en ambos extremos de etiquetas diferentes. La longitud de la parte no impresa de esta etiqueta es igual a la circunferencia del hilo o cable. Además, el texto se puede imprimir horizontalmente o con un giro de 90 - Brother International PT 1650 | Users Manual - Spanish - Page 95
que se han escrito o en el orden inverso. Port FRONT REVERSE Longitud de bloque Longitud de bloque Longitud de bloque Panel (PRINT ajustado a FRONT) Panel (PRINT ajustado a REVERSE) Longitud de bloque Longitud de bloque Longitud de bloque Longitud de bloque Después de seleccionar el modo de tipo - Brother International PT 1650 | Users Manual - Spanish - Page 96
(orden de impresión): FRONT, REVERSE Valor predeterminado: FRONT ☞ Para estos tipos de etiquetas, se recomienda usar cinta con fuerza adhesiva extra. ☞ El parámetro PRINT sólo está disponible con el modo de tipo de etiqueta PANEL. ☞ Si se emplea la función de Numeración con el Tipo de Etiqueta en - Brother International PT 1650 | Users Manual - Spanish - Page 97
3 Funciones básicas Cómo realizar las operaciones básicas Elección de funciones, parámetros, ajustes y grupos ● Si aparece "WX", pulse l para seleccionar el elemento anterior o r para seleccionar el elemento siguiente. ● Si aparece " S T ", pulse u para seleccionar el elemento anterior o d - Brother International PT 1650 | Users Manual - Spanish - Page 98
Introducción de los datos de la etiqueta Introducción y modificación de texto Introducción de caracteres ● Para escribir una letra minúscula, un número, una coma o un punto, sólo tiene que pulsar la tecla correspondiente. ● Para escribir una letra mayúscula, pulse h para entrar en el modo de mayú - Brother International PT 1650 | Users Manual - Spanish - Page 99
puede contener cincuenta bloques de texto como máximo. ☞ El número del bloque en el que se encuentra el cursor aparece indicado en la parte inferior del visualizador. ☞ Todos los bloques de texto tienen las mismas características de formato. ☞ Cuando intente imprimir una gran cantidad de datos - Brother International PT 1650 | Users Manual - Spanish - Page 100
Borrado de texto ● Para eliminar caracteres situados a la izquierda de la posición actual del cursor, pulse b hasta que haya borrado todos los caracteres deseados. ● Para borrar todo el texto: 1 Pulse g y luego b. 2 Pulse u o d para seleccionar TEXT ONLY (para borrar sólo el texto) o TEXT&FORMAT ( - Brother International PT 1650 | Users Manual - Spanish - Page 101
añadir "Ä" al texto, escriba "A2" y luego pulse n. Funciones básicas Introducción de un código de barras Esta función permite imprimir códigos de barras como parte de las etiquetas. ☞ Como esta máquina no ha sido específicamente diseñada para hacer etiquetas de códigos de barras, es posible que - Brother International PT 1650 | Users Manual - Spanish - Page 102
Introducción de los datos del código de barras 1 Pulse c. 2 Escriba los datos del nuevo código de barras o modifique los datos existentes. 3 Pulse n para añadir el código de barras al texto. ☞ Para añadir caracteres especiales a los datos del código de barras (sólo con los protocolos CODE39, CODABAR - Brother International PT 1650 | Users Manual - Spanish - Page 103
Los siguientes caracteres especiales solamente podrán añadirse a códigos de barras creados con los protocolos EAN128 y CODE128. Símbolo 0 1 2 3 4 5 6 7 8 9 10 11 12 13 14 15 16 17 Carácter (SPACE) Símbolo 18 19 20 21 22 23 24 25 26 27 28 29 30 31 32 33 34 35 Carácter NUL SOH STX ETX EOT ENQ - Brother International PT 1650 | Users Manual - Spanish - Page 104
6 Pulse n. ☞ También se puede seleccionar un símbolo escribiendo el código correspondiente, que puede ver en la tabla siguiente. Por ejemplo, para añadir "?" al texto, escriba "A02" y luego pulse n. ☞ Algunos símbolos aparecen impresos en color sobre el teclado. Para usar un símbolo impreso sobre - Brother International PT 1650 | Users Manual - Spanish - Page 105
Categoría Símbolos H NUMÉRICOS 12 13 14 0 1 2 1 2 00 01 02 03 04 05 06 07 I PICTOGRÁFICOS 00 01 02 03 04 05 J 00 01 02 03 04 05 06 07 08 09 ELECTRICIDAD / 10 11 12 13 14 15 16 17 18 19 ELECTRÓNICA 20 21 22 23 24 25 26 27 28 29 Funciones bá - Brother International PT 1650 | Users Manual - Spanish - Page 106
☞ Una vez que se llene la categoría de símbolos PERSONAL, los nuevos símbolos que se seleccionen se sobrescribirán sobre los antiguos a menos que la función de guardar símbolos esté ajustada a OFF (desactivada). (Consulte Definición de la actualización continua de la categoría de símbolos PERSONAL - Brother International PT 1650 | Users Manual - Spanish - Page 107
Cómo enmarcar el texto 1 Pulse g y luego B. 2 Pulse u o d hasta que se visualice el ajuste de marco deseado. 3 Pulse n. El ajuste seleccionado se aplicará a todo el texto. Están disponibles los siguientes estilos de marco: Ajuste de marco Muestra Ajuste de marco Muestra 1 8 2 9 3 10 4 - Brother International PT 1650 | Users Manual - Spanish - Page 108
Definición del tamaño de los caracteres El tamaño de los caracteres se puede definir para todo el texto de la etiqueta o sólo para el texto de la línea en la que está el cursor. Cómo formatear el tamaño de los caracteres de todo el texto 1 Pulse t. 2 Presione l o r hasta que se visualice GLB SIZE - Brother International PT 1650 | Users Manual - Spanish - Page 109
Definición de la anchura de los caracteres Funciones básicas Cómo formatear la anchura de todo el texto 1 Pulse t. 2 Presione l o r hasta que se visualice GLB WIDE. 3 Pulse u o d hasta que se visualice el ajuste de anchura de caracteres deseado. 4 Pulse n. El ajuste seleccionado se aplicará a - Brother International PT 1650 | Users Manual - Spanish - Page 110
Definición del estilo de los caracteres Cómo formatear el estilo de los caracteres de todo el texto 1 Pulse t. 2 Presione l o r hasta que se visualice GLB STYL. 3 Pulse u o d hasta que se visualice el ajuste de estilo de caracteres deseado. 4 Pulse n. El ajuste seleccionado se aplicará a todo el - Brother International PT 1650 | Users Manual - Spanish - Page 111
Definición de la alineación de todas las líneas de texto 1 Pulse t. 2 Pulse l o r hasta que se visualice ALIGN. 3 Pulse u o d hasta que se visualice el ajuste deseado. 4 Pulse n. El ajuste seleccionado se aplicará a todo el texto. Están disponibles los siguientes ajustes de alineación: LEFT ( - Brother International PT 1650 | Users Manual - Spanish - Page 112
× 1.65" (24 mm × 41 mm) 1 TEXT? 2 BAR CODE? 5 ASSET4 1" × 2.25" (24 mm × 56 mm) 1 TEXT1? 3 TEXT3? 5 TEXT5? 2 TEXT2? 4 TEXT4? 6 ID LABEL 1" × 2.80" (24 mm × 70 mm) 1 TEXT1? 3 TEXT3? 2 TEXT2? 7 SIGN 1" × 4.05" 1 SYMBOL? 2 TEXT1? (24 mm × 102 mm) 3 TEXT2? 8 BADGE 3/4" × 4.05" 1 NAME - Brother International PT 1650 | Users Manual - Spanish - Page 113
Funciones básicas 3 Pulse u o d para visualizar cada uno de los campos y seguidamente escriba el texto. 4 • Para imprimir una sola copia, pulse p. • Para imprimir múltiples copias, varias copias con ciertos caracteres que se incrementan o una imagen especular del texto, pulse g y luego a. (Para - Brother International PT 1650 | Users Manual - Spanish - Page 114
. El número de cada copia se visualizará mientras esta se esté imprimiendo. ☞ Si la función de corte está ajustada a 1 o 3, aparecerá el mensaje "CUT TAPE TO CONTINUE" (corte la cinta para continuar) después de que se imprima cada etiqueta. Pulse el botón del cortador de la cinta para cortar la - Brother International PT 1650 | Users Manual - Spanish - Page 115
definido. El número de cada copia se visualizará mientras esta se esté imprimiendo. ☞ Si la función de corte está ajustada a 1 o 3, aparecerá el mensaje "CUT TAPE TO CONTINUE" (corte la cinta para continuar) después de que se imprima cada etiqueta. Pulse el botón del cortador de la cinta para cortar - Brother International PT 1650 | Users Manual - Spanish - Page 116
☞ Para definir ajustes para otras funciones de opción de impresión en lugar de continuar con el paso 9, presione u o d hasta que se visualice CONTINUE en el menú de opciones de impresión y seguidamente presione n. ☞ Se pueden hacer incrementos a un bloque de texto. Si se selecciona un código de - Brother International PT 1650 | Users Manual - Spanish - Page 117
3 Pulse u o d hasta que se visualice ON. 4 Pulse n (o p). Aparecerá START en el menú de opciones de impresión. 5 Presione n (o p) para empezar a imprimir el número de etiquetas definido. El número de cada copia se visualizará mientras esta se esté imprimiendo. ☞ Cuando emplee la función de impresión - Brother International PT 1650 | Users Manual - Spanish - Page 118
Almacenamiento e invocación de archivos Si hay textos de etiquetas que usa con frecuencia, puede guardarlos en memoria, junto con su formato, y después invocarlos fácilmente para poder modificarlos e imprimirlos con rapidez. Cuando se almacena un archivo de texto, se le asigna un número para poder - Brother International PT 1650 | Users Manual - Spanish - Page 119
(o "CLEAR ALL?" si se han seleccionado todos los archivos). 7 Pulse n. Se borrará el texto almacenado en los archivos seleccionados. ☞ Para ver otras partes del archivo de texto seleccionado, pulse l o r. ☞ Para quitar un archivo de texto de la lista de archivos a borrar, visualícelo y pulse e para - Brother International PT 1650 | Users Manual - Spanish - Page 120
4 Ajustes de la máquina Existen diversas funciones que permiten cambiar y ajustar el funcionamiento de la P-touch. Selección de la forma de avance y corte de la cinta La función Cut permite definir la forma de avance de la cinta una vez impresa. - Brother International PT 1650 | Users Manual - Spanish - Page 121
1 Pulse g y luego Z. 2 Pulse l o r hasta que se visualice CONTRAST. 3 Pulse u o d hasta que se visualice el ajuste deseado y seguidamente pulse n. Ajuste de la función de reducción automática Con la función de reducción automática, puede seleccionar si la anchura del texto (TEXT WIDTH) o el tamaño - Brother International PT 1650 | Users Manual - Spanish - Page 122
seguidamente pulse n. Visualización de información sobre la versión Esta función puede usarse para ver información sobre la versión del software P-touch y del juego de símbolos incorporados. 1 Pulse g y luego Z. 2 Pulse l o r hasta que se visualice VERSION INFO. 3 Pulse u o d hasta que se visualice - Brother International PT 1650 | Users Manual - Spanish - Page 123
5 Uso de la P-touch con un PC (sólo para PT-1650) Esta P-touch está provista de un puerto USB que permite conectarla a un PC que opere en Microsoft® Windows®. El CD-ROM adjunto incluye P-touch Editor 3.2, que se instala junto con el controlador de impresión, Transfer Manager y Backup Manager. ● P- - Brother International PT 1650 | Users Manual - Spanish - Page 124
Memoria Espacio libre en el disco duro Monitor Puerto USB Unidad de CD-ROM IBM PC/AT o compatible Microsoft® Windows® 98, 98 SE, Me, 2000 Professional, XP Professional o XP Home Edition Pentium 166 MHz o superior (XP Professional y XP Home Edition: Pentium 300 MHz o superior) Al menos 64 MB - Brother International PT 1650 | Users Manual - Spanish - Page 125
, se abrirá un cuadro de diálogo que le permitirá actualizar P-touch Editor 3.2 de forma que sea compatible con Access 2000.Para actualizar P-touch Editor 3.2 para Access 2000, haga clic en "Yes" (Sí) y siga las instrucciones de la pantalla. 43 Uso de la P-touch con un PC (sólo para PT-1650) - Brother International PT 1650 | Users Manual - Spanish - Page 126
Windows® XP) y siga las instrucciones de la pantalla. Instalación del controlador de impresión USB ☞ No conecte la P-touch al PC PC y extraiga el CD de su unidad. En Windows® XP: ☞ Aparece un mensaje que informa de que el controlador de impresión ha pasado las pruebas de compatibilidad de Brother - Brother International PT 1650 | Users Manual - Spanish - Page 127
de diálogo que advierte de que el software no ha superado la prueba Windows® Logo. 4 Haga clic en "Continue Driver Setup" (Instalación del controlador) que indica que el controlador de impresión ya se ha instalado, haga clic en "Finish" (Finalizar). Uso de la P-touch con un PC (sólo para PT-1650 - Brother International PT 1650 | Users Manual - Spanish - Page 128
Guía del usuario La Guía del usuario de P-touch Editor puede consultarse insertando el CD-ROM cada vez que el CD-ROM: 1 Inicie el Explorador de Windows®. 2 Seleccione la unidad de CD-ROM. 3 Haga doble clic en la carpeta Ptouch. 4 Haga doble clic en la carpeta Manual. 5 Haga doble clic en "Main.htm". - Brother International PT 1650 | Users Manual - Spanish - Page 129
ía la etiqueta y la imprime en 2 o más etiquetas). ☞ La longitud de la etiqueta ajustada con P-touch Editor y el ajuste de longitud de etiqueta de la P-touch pueden diferir ligeramente a consecuencia del margen de error de cálculo de la P-touch. 47 Uso de la P-touch con un PC (sólo para PT-1650) - Brother International PT 1650 | Users Manual - Spanish - Page 130
para Windows® 2000 y XP son iguales, salvo indicación expresa en contrario. Puede ver las propiedades que desee haciendo clic en el icono correspondiente de la zona de propiedades. Página Texto Fuente Base de datos Maquetación Propiedades de la página ( ) Cuando se seleccione la P-touch como - Brother International PT 1650 | Users Manual - Spanish - Page 131
en las explicaciones siguientes corresponden a Windows® 98, 98 SE y Me, las operaciones para Windows® 2000 y XP son iguales, salvo indicación expresa la P-touch. Consulte en la página 19 una lista de los protocolos de códigos de barras disponibles. 49 Uso de la P-touch con un PC (sólo para PT-1650) - Brother International PT 1650 | Users Manual - Spanish - Page 132
se pueden vincular con archivos .mdb. Con esta función, los datos modificados en Excel se actualizan automáticamente con P-touch Editor. Transferencia de datos a/desde un PC Se puede transferir desde el PC una plantilla, una base de datos o una imagen de carácter definida por el usuario (un carácter - Brother International PT 1650 | Users Manual - Spanish - Page 133
se están transfiriendo. 7 Cuando aparezca el mensaje "The transfer was completed successfully." (La transferencia ha terminado con éxito.), haga clic en "OK" (Aceptar). 8 En la P-touch, presione o para salir del modo Transfer y apagar la P-touch. 51 Uso de la P-touch con un PC (sólo para PT-1650) - Brother International PT 1650 | Users Manual - Spanish - Page 134
. Para restaurar las plantillas iniciales, use Transfer Manager para descargar los archivos *.pd3 de la carpeta situada en \etc\Transfer, dentro de la carpeta P-touch Editor. ☞ Sólo se puede asignar una imagen de carácter o una plantilla a cada tecla PF. Si ya se ha asignado una imagen de carácter - Brother International PT 1650 | Users Manual - Spanish - Page 135
cualquier texto del registro, pulse u o d para RM NO.:[Part Nam] NO 1: AC adapter visualizar el texto y, a n. 4 Pulse g y luego a. Aparecerá el mensaje "CLEAR TEXT & PRINT DATABASE?" (¿Desea borrar el texto e imprimir la base de datos?). 5 Pulse Uso de la P-touch con un PC (sólo para PT-1650) 53 - Brother International PT 1650 | Users Manual - Spanish - Page 136
está ajustada a 1 o 3, aparecerá el mensaje "CUT TAPE TO CONTINUE" (corte la cinta para continuar) después de que se pueden usar con una plantilla o se pueden añadir directamente a una etiqueta creada en la P-touch, sin usar plantilla. Cómo añadir datos de la base de datos a una etiqueta 1 Mueva el - Brother International PT 1650 | Users Manual - Spanish - Page 137
tal como se describe en el capítulo 2. 2 Pulse g y luego a. Aparecerá el mensaje "CLEAR TEXT & PRINT DATABASE?" (¿Desea borrar el texto e imprimir la base de datos?). 3 Pulse n. 4 Pulse l o r hasta que vez está limitado aproximadamente a 200. 55 Uso de la P-touch con un PC (sólo para PT-1650) - Brother International PT 1650 | Users Manual - Spanish - Page 138
Búsqueda en la base de datos Al seleccionar un registro de base de datos para usarlo en una plantilla o para añadir sus datos a una etiqueta, es posible buscar en la base de datos un registro que contenga caracteres concretos o que tenga un número determinado. Para buscar en la base de datos un - Brother International PT 1650 | Users Manual - Spanish - Page 139
tecla PF, haga clic en "Change PF Key Mapping" (Cambiar la asignación de teclas PF), en la ficha PC → Printer, y seleccione la tecla PF a la que desea asignar los datos. ☞ Sólo se puede restaurar una imagen de otra imagen de carácter o plantilla. 57 Uso de la P-touch con un PC (sólo para PT-1650) - Brother International PT 1650 | Users Manual - Spanish - Page 140
4 Los caracteres impresos no se forman correctamente. 5 Aparece una línea horizontal en blanco a lo largo de la etiqueta impresa. 6 Aparecen franjas. 7 La P-touch se ha "bloqueado" (es decir, no responde cuando se presiona una tecla). 58 Solución • Compruebe que el adaptador de CA (modelo AD-60/AD - Brother International PT 1650 | Users Manual - Spanish - Page 141
error Apéndice Mensaje de error 1 BLOCK LIMIT! 7 LINE LIMIT! 50 LINE LIMIT REACHED! BUFFER EMPTY! BUFFER FULL! CASSETTE CHANGED! CHECK BATTERIES cinta durante la pausa de la P-touch para cortar la cinta. • Este cualquiera de estas operaciones. • Borre parte del texto existente antes de intentar añ - Brother International PT 1650 | Users Manual - Spanish - Page 142
LABEL TYPE MODE! En cinta de 3/4" (18 mm): CHECK THE NUMBER OF LINES! 5 MAX En cinta de 1/2" (12 mm): CHECK THE NUMBER OF LINES! 3 MAX En cinta de 3/3" (9 mm) y de 1/4" (6 mm): CHECK THE NUMBER OF LINES! 2 MAX CHOOSE COPIES LESS THAN 1000! CUTTER ERROR! IMAGE CHARACTER SIZE ERROR! (sólo para PT-1650 - Brother International PT 1650 | Users Manual - Spanish - Page 143
error INSERT 1" TAPE INSERT 24mm TAPE INSERT 3/4" TAPE INSERT 18mm TAPE INSERT 1/2" TAPE INSERT 12mm TAPE INSERT 3/8" TAPE INSERT 9mm TAPE INSERT 1/4" TAPE INSERT 6mm TAPE Instale un casete de cinta de 1/4" (6 mm) de anchura. • Borre parte del texto. • Borre un archivo que no necesite a fin de dejar - Brother International PT 1650 | Users Manual - Spanish - Page 144
Mensaje de error NO FILES! NO DATABASE OR INCORRECT FORMAT (sólo para PT-1650) NO TAPE! RECORD NOT FOUND! (sólo para PT-1650) TEXT TOO HIGH! XX • Este mensaje aparecerá si no se ha descargado ninguna base de datos a la P-touch al presionar g y luego i. • Este mensaje aparecerá si no hay un casete de - Brother International PT 1650 | Users Manual - Spanish - Page 145
impresión: 18,1 mm (altura)/180 ppp (resolución) Cortador de la cinta: Manual Dimensiones: Con el botón del cortador de la cinta: 5 1/4" (An) 239 mm (Prf) × 87 mm (Al)) Peso: 1,36 1b. (615 g) Software Tipos de caracteres: 1 tipo de caracteres integrado (Helsinki) Tamaños de caracteres: AUTO - Brother International PT 1650 | Users Manual - Spanish - Page 146
cinta casetes 5 cortador 8 Cinta con fuerza adhesiva extra ......... 7 Cinta de identificación flexible .......... 7 código de barras caracteres especiales 20 conexión al PC 41 conexión USB 41, 44, 45 confirmación 15 controlador de impresión instalación 44 copias 32 cursor 16 E elección 15 - Brother International PT 1650 | Users Manual - Spanish - Page 147
pilas gastadas 2, 3 tamaño 2, 3 instalación controlador de impresión 44 P-touch Editor 42 invocación 37 L letras mayúsculas 16 letras minúsculas 16 rodillos 8 M márgenes de la etiqueta 24 medidas 40 mensajes de error 59 modo Bandera 12 modo Bloque de puertos 13 modo de mayúscula - Brother International PT 1650 | Users Manual - Spanish - Page 148
números 16 P pausa para corte 38 pilas 5 plantillas formato automático 30 P-touch Editor 52 problemas 58 P-touch Editor Guía del usuario 46 inicio 47 instalación 42 plantilla 52 R restauración 57 rodillos 8 S selección 15, 16 ajuste predeterminado 15 serie de bloques 34 serie - Brother International PT 1650 | Users Manual - Spanish - Page 149
un centro de servicio local, llame al teléfono 1-800-284-HELP (4357) para averiguar cuál es el centro de servicio autorizado que www.brother.com Para adquirir accesorios y determinados productos Brother: http://www.brothermall.com Accesorios y suministros Para pedir accesorios y suministros Brother - Brother International PT 1650 | Users Manual - Spanish - Page 150
- Brother International PT 1650 | Users Manual - Spanish - Page 151
- Brother International PT 1650 | Users Manual - Spanish - Page 152
Printed in China LN9968001
-
 1
1 -
 2
2 -
 3
3 -
 4
4 -
 5
5 -
 6
6 -
 7
7 -
8
-
9
-
10
-
11
-
12
-
13
-
14
-
15
-
16
-
17
-
18
-
19
-
20
-
21
-
22
-
23
-
24
-
25
-
26
-
27
-
28
-
29
-
30
-
31
-
32
-
33
-
34
-
35
-
36
-
37
-
38
-
39
-
40
-
41
-
42
-
43
-
44
-
45
-
46
-
47
-
48
-
49
-
50
-
51
-
52
-
53
-
54
-
55
-
56
-
57
-
58
-
59
-
60
-
61
-
62
-
63
-
64
-
65
-
66
-
67
-
68
-
69
-
70
-
71
-
72
-
73
-
74
-
75
-
76
-
77
-
78
-
79
-
80
-
81
-
82
-
83
-
84
-
85
-
86
-
87
-
88
-
89
-
90
-
91
-
92
-
93
-
94
-
95
-
96
-
97
-
98
-
99
-
100
-
101
-
102
-
103
-
104
-
105
-
106
-
107
-
108
-
109
-
110
-
111
-
112
-
113
-
114
-
115
-
116
-
117
-
118
-
119
-
120
-
121
-
122
-
123
-
124
-
125
-
126
-
127
-
128
-
129
-
130
-
131
-
132
-
133
-
134
-
135
-
136
-
137
-
138
-
139
-
140
-
141
-
142
-
143
-
144
-
145
-
146
-
147
-
148
-
149
-
150
-
151
-
152
 |
 |
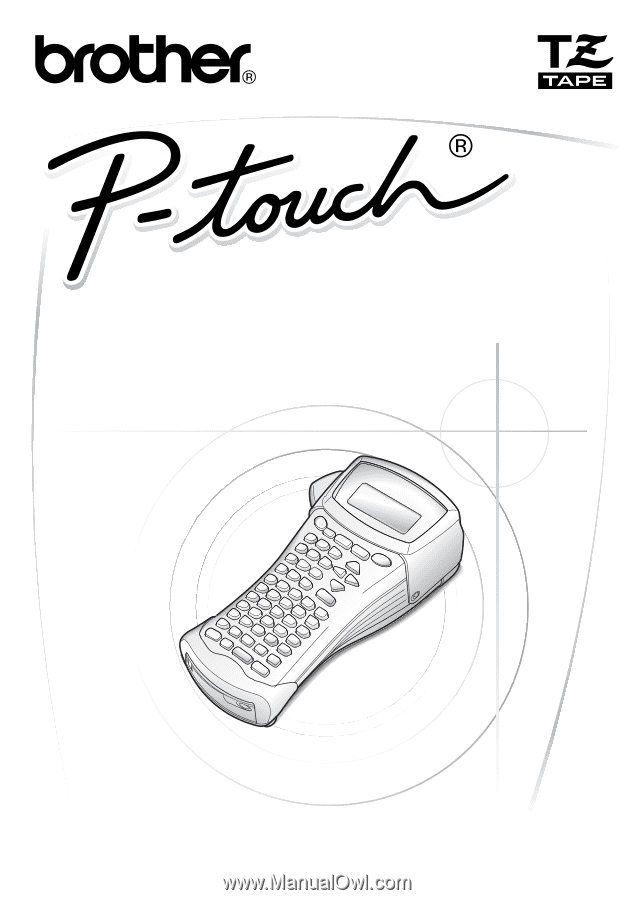
USER’S GUIDE
GUÍA DE USUARIO
1600/1650
• Read this User’s Guide before you start using your P-touch.
• Keep this User’s Guide in a handy place for future reference.
• Antes de usar su equipo por primera vez, lea cuidadosamente esta guía de usuario.
• Guarde esta guía de usuario para futuras referencias.
USER’S GUIDE
GUÍA DE USUARIO