Brother International SE725 Operation Manual
Brother International SE725 Manual
 |
View all Brother International SE725 manuals
Add to My Manuals
Save this manual to your list of manuals |
Brother International SE725 manual content summary:
- Brother International SE725 | Operation Manual - Page 1
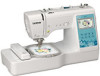
Operation Manual Sewing and Embroidery Machine Product Code: 888-P10 Instruction Videos https://s.brother/cvjap/ Be sure to read this document before using the machine. We recommend that you keep this document nearby for future reference. - Brother International SE725 | Operation Manual - Page 2
- Brother International SE725 | Operation Manual - Page 3
instructions before attempting to use the machine. DANGER - To reduce the risk of electrical shock 1 Always unplug the machine from the electrical outlet immediately after using, when cleaning, making any user servicing adjustments mentioned in this manual the nearest authorized Brother dealer for - Brother International SE725 | Operation Manual - Page 4
not use outdoors. 8 For a longer service life: • When using and storing this machine troubleshooting table in the back of the Operation Manual to inspect and adjust the machine yourself. If the problem persists, please consult your local authorized Brother supervision or instruction concerning use - Brother International SE725 | Operation Manual - Page 5
704-1700 declares that the product Product Name: Brother Sewing Machine Model Number: SE700, SE725, LB5500 this equipment does cause harmful interference to radio , if not installed and used in accordance with the instructions, may cause harmful interference to radio communications. However, there - Brother International SE725 | Operation Manual - Page 6
are in conformity with the provisions of the Radio Equipment Regulation 2017. The Declaration of Conformity (DoC) can be downloaded from Brother support website. Visit support.brother.com For Users in Norway This subsection does not apply for the geographical area within a radius of 20 km from the - Brother International SE725 | Operation Manual - Page 7
: This Terms of Use ("Agreement") is a legal agreement between Brother Industries, Ltd. ("Company") and you that governs your use of POSSIBILITY OF SUCH DAMAGES, ARISING OUT OF OR RELATING TO THE SOFTWARE, SUPPORT SERVICE OR THIS AGREEMENT. THESE LIMITATIONS SHALL APPLY TO THE MAXIMUM EXTENT ALLOWED - Brother International SE725 | Operation Manual - Page 8
5 Termination 5.1 Company shall have the right to terminate this Agreement at any time by providing a written notice to you if you commit a material breach of any terms of this Agreement and fail to immediately rectify such breach upon Company's request. 5.2 Upon termination for any reason all - Brother International SE725 | Operation Manual - Page 9
This product includes open-source software. To see the open source licensing remarks, please go to the manual download section on your model's home page of Brother support website at https://s.brother/cpjap/. TRADEMARKS WPA™ and WPA2™ are trademarks of Wi-Fi Alliance®. Any trade names and product - Brother International SE725 | Operation Manual - Page 10
Cleaning the machine surface 83 Restrictions on oiling 83 Precautions on storing the machine 83 Cleaning the race 83 Touch panel is malfunctioning 84 Troubleshooting 85 Upper thread tightened up 85 Tangled thread on wrong side of fabric 85 Incorrect thread tension 86 Fabric is caught in the - Brother International SE725 | Operation Manual - Page 11
dial (page 36, page 72) D Handwheel Turn the handwheel toward you (counterclockwise) to raise and lower the needle to sew one stitch. E Thread guide cover (page 20) F Handle Carry the machine by its handle when transporting. G Presser foot lever Raise and lower the presser foot lever to raise and - Brother International SE725 | Operation Manual - Page 12
Names of Machine Parts ■ Embroidery unit a b d c 1 Embroidery carriage frame holder (page 66) 2 Embroidery unit connection (page 62) 3 Carriage (page 62) 4 Release button (page 63) ■ Operation buttons b a cd e 1 "Start/Stop" button Press the "Start/Stop" button to start or stop sewing. The - Brother International SE725 | Operation Manual - Page 13
. These things may damage the cord, or cause fire or electric shock. If the cord or plug is damaged, take the machine to your authorized Brother dealer for repairs before continuing use. • Do not insert the plug on the power cord into an electrical outlet that is in poor condition. 11 - Brother International SE725 | Operation Manual - Page 14
Turning the Machine On/Off CAUTION • (For U.S.A. only) This appliance has a polarized plug (one blade wider than the other). To reduce the risk of electrical shock, this plug is intended to fit in a polarized electrical outlet only one way. If the plug does not fit fully in the electrical outlet, - Brother International SE725 | Operation Manual - Page 15
LCD Operation LCD Operation Viewing the LCD An opening movie may be displayed when the power is turned on. When the opening movie is displayed, the screen will be displayed if you touch the LCD with your finger. Touch a key with your finger to select the stitch pattern, to select a machine - Brother International SE725 | Operation Manual - Page 16
stitch length of the currently selected stitch pattern. 35 8 L/R Shift Shows the distance of left/right shift from the original position. 35 9 Manual adjustment key Touch this key to display the adjustment screen of the stitch width, stitch length and 35 "L/R Shift". 0 Page display Shows - Brother International SE725 | Operation Manual - Page 17
off. 6 Select the level of the input sensitivity for operation keys. (page 16) 7 Display the service count which is a reminder to take your machine in for regular servicing. (Contact your authorized Brother dealer for details.) 8 Display the total number of stitches sewn on this machine. 9 The [No - Brother International SE725 | Operation Manual - Page 18
LCD Operation ■ Wireless LAN settings 1 2 3 4 5 6 7 Adjusting input sensitivity for operation keys You can adjust the sensitivity of the operation keys to 5 levels. Display the settings screen to set desired level. Touch a to display the settings screen. Display page 7 by touching / . b Touch - Brother International SE725 | Operation Manual - Page 19
available with a wireless network connection This machine supports a wireless network connection. The following useful operations following URL. https://s.brother/cajkb/ * Settings must be specified in Design Database Transfer. For more information, refer to the manual for Design Database Transfer - Brother International SE725 | Operation Manual - Page 20
Wireless Network Connection Functions Touch beside [Wireless LAN Setup Wizard]. b When the following message appears, touch . e A list of available SSIDs appears. Select the SSID that was noted in step a. c When a connection is established, the following message appears. The screen for - Brother International SE725 | Operation Manual - Page 21
type bobbin. GETTING READY Winding the bobbin This section describes how to wind thread onto a bobbin. 1 2 3 4 1 TCP/IP settings can be manually entered. 2 Shows the MAC address. 3 Use when proxy settings are required. 4 Resets the wireless LAN connection settings. Note • When winding the bobbin - Brother International SE725 | Operation Manual - Page 22
in it, pass the thread under the hook of the thread guide, then under the thread guide cover and to the front. a b 1 Thread guide 2 Thread guide cover Pass the thread under the hook on the bobbin winding e thread guide, and then wind it counterclockwise under the pretension disk. 1 2 3 1 Bobbin - Brother International SE725 | Operation Manual - Page 23
controller is plugged in, press down on the foot controller. 1 GETTING READY 1 Guide slit in bobbin winder seat (with built-in cutter) Note • Be sure bobbin is wound without cutting the thread using the cutter built into the guide slit in the bobbin winder seat, the thread may become tangled in - Brother International SE725 | Operation Manual - Page 24
the bobbin thread by simply inserting the bobbin in the bobbin case and guiding the thread through the slit in the needle plate cover. Memo • a reference. Lightly hold down the bobbin with your right hand g (1), and then guide the end of the thread around the tab of the needle plate cover with your - Brother International SE725 | Operation Manual - Page 25
While lightly holding down the bobbin with your right i hand (1), continue guiding the thread through the slit with your left hand (2). Then, cut Threading CAUTION 1 • When threading the upper thread, carefully follow the instructions. If the upper threading is not correct, the thread may become - Brother International SE725 | Operation Manual - Page 26
is no g slack in it, pass the thread under the hook of the thread guide, then under the thread guide cover and to the front. 1 1 The thread unwinds to the front from the bottom. a b 1 Thread guide 2 Thread guide cover Pass the thread through the thread channel in the order h shown below. 24 - Brother International SE725 | Operation Manual - Page 27
the thread is cut. Therefore, instead of using the thread cutter, pull out about 8 cm (approx. 3 inches) of thread after passing it through the thread guide disk (marked "7"). Lower the needle threader lever on the left side of the o machine as much as possible to make the hook turn. 1 2 Pull the - Brother International SE725 | Operation Manual - Page 28
Upper Threading Carefully pull the end of thread that was passed q through the eye of the needle. If the needle was not completely threaded, but a loop in the thread was formed in the eye of the needle, carefully pull the loop through the eye of the needle to pull out the end of the thread. Raise - Brother International SE725 | Operation Manual - Page 29
Fabric/Thread/Needle Combinations Fabric/Thread/Needle Combinations • Needles that can be used with this machine: Home sewing machine needles (size 65/9 - 100/16) * The larger the number, the larger the needle. As the numbers decrease, the needles get finer. • Thread that can be used with this - Brother International SE725 | Operation Manual - Page 30
it clockwise. 1 Needle stopper 1 Replacing the needle Use the screwdriver and a new needle that has been determined to be straight according to the instructions in "Checking the needle" on page 28. Press (Needle position button) once or twice to a raise the needle. Place fabric or paper under - Brother International SE725 | Operation Manual - Page 31
Replacing the Presser Foot CAUTION • Use the appropriate presser foot for the type of stitch that you wish to sew, otherwise the needle may hit the presser foot. The needle may break, possibly resulting in injury. For details on the presser foot that should be used with the selected stitch, refer to - Brother International SE725 | Operation Manual - Page 32
Replacing the Presser Foot Removing and attaching the presser foot holder Remove the presser foot holder when installing a presser foot that does not use the presser foot holder. ■ Removing the presser foot holder Touch . a The screen changes, and all keys and operation buttons are locked (except - Brother International SE725 | Operation Manual - Page 33
Sewing 2 Chapter SEWING BASICS Sewing CAUTION • While the machine is in operation, pay special attention to the needle location. In addition, keep your hands away from all moving parts such as the needle and handwheel, otherwise injuries may occur. • Do not pull or push the fabric too hard while - Brother International SE725 | Operation Manual - Page 34
of the machine. Press the "Start/Stop" button to start sewing. (When j the foot controller is plugged in, slowly press down on the foot controller.) Guide the fabric lightly by hand. Memo • When the foot controller is connected, the "Start/ Stop" button cannot be used to start sewing. Press the - Brother International SE725 | Operation Manual - Page 35
Slowly depress the foot controller to start sewing. d Touch . d Select the following stitch pattern. e Sewing SEWING BASICS Memo • The speed set with the sewing speed controller is the foot controller's maximum sewing speed. Release the foot controller to stop sewing. e Combining stitch patterns - Brother International SE725 | Operation Manual - Page 36
Sewing Sewing reverse/reinforcement stitches Reverse/reinforcement stitches are generally necessary at the beginning and end of sewing. Depending on the selected stitch, reverse or reinforcement stitches are sewn while (Reverse/Reinforcement stitch button) is kept pressed. With reinforcement - Brother International SE725 | Operation Manual - Page 37
Sewing Once you have reached the end of the stitching, press e (Reverse/Reinforcement stitch button) once. If stitching, such as buttonholes and bar tacking, that includes reinforcement stitching has been selected, this operation is unnecessary. After the reverse stitching (or reinforcement - Brother International SE725 | Operation Manual - Page 38
Adjusting the Thread Tension Adjusting the Thread Tension You may need to change the thread tension, depending on the fabric and thread being used. ■ Correct thread tension The upper thread and the bobbin thread should cross near the center of the fabric. Only the upper thread should be visible - Brother International SE725 | Operation Manual - Page 39
Useful Sewing Tips Useful Sewing Tips Sewing tips ■ Trial sewing Before starting your sewing project, we recommend sewing trial stitches using thread and scrap fabric that are the same as those used for your project. While checking the sewing results, adjust the thread tension as well as the - Brother International SE725 | Operation Manual - Page 40
Useful Sewing Tips Sewing an even seam allowance To sew an even seam, start sewing so that the seam allowance is to the right of the presser foot, and the edge of the fabric is aligned with either the right edge of the presser foot or a marking on the needle plate. ■ Changing the needle position - Brother International SE725 | Operation Manual - Page 41
Useful Sewing Tips Sewing various fabrics ■ Sewing thick fabrics If the fabric does not fit under the presser foot The presser foot lever can be raised to two different positions. If the fabric does not fit under the presser foot, for example, when sewing together thick fabrics, raise the presser - Brother International SE725 | Operation Manual - Page 42
Useful Sewing Tips ■ Sewing leathers or vinyl fabrics If the leather or vinyl fabric sticks to the flat bed attachment, sew with copy paper or tracing paper placed on top of the flat bed attachment so the fabric moves smoothly. If the paper is positioned so that it does not cover the needle plate, - Brother International SE725 | Operation Manual - Page 43
(1/16) 2.5 (3/32) 0.0 - 7.0 0.4 - 5.0 (0 - 1/4) (1/64 - 3/16) Stitch (Presser No. Stitch name/Applications foot) Stitch width (mm (inch)) Auto. Manual Stitch length (mm (inch)) Auto. Manual Basting stitch For basting. If the basting threads fall out of the fabric, pull up the bobbin thread - Brother International SE725 | Operation Manual - Page 44
(1/16) 0.0 - 7.0 0.4 - 5.0 (J) (0 - 1/4) (1/64 - 3/16) Stitch (Presser No. Stitch name/Applications foot) Stitch width (mm (inch)) Auto. Manual Stitch length (mm (inch)) Auto. Manual Blind hem stitch Hemming woven fabrics 2-01 * The stitch width setting (R) is in neither millimeters nor - Brother International SE725 | Operation Manual - Page 45
Stitch Chart Stitch (Presser No. Stitch name/Applications foot) Stitch width (mm (inch)) Auto. Manual Stitch length (mm (inch)) Auto. Manual Hemstitching zigzag 3-01* Decorative hems, top (N) stitching Hemstitching 3-02 Decorative hems, lace (N) attaching pin stitch 6.0 (15/64) 3.0 (1/8) - Brother International SE725 | Operation Manual - Page 46
needle may hit the presser foot. The needle may break, possibly resulting in injury. Position the fabric with the edge of the fabric against c the guide of the presser foot, and then lower the presser foot lever - Brother International SE725 | Operation Manual - Page 47
does not touch the presser foot. 1 The needle should not touch the center pin Sew with the edge of the fabric against the presser foot e guide. 1 Needle drop point 1 IMPORTANT • Be sure to pull the fabric backward after finished sewing. If you pull the fabric toward side or forward, the presser - Brother International SE725 | Operation Manual - Page 48
the right side of the fabric will be very large, leaving an unattractive finish. Sew with the fold of the hem against the presser foot l guide. Press the "Start/Stop" button to stop sewing when you m are finished, and raise the presser foot and needle to pull the fabric under the - Brother International SE725 | Operation Manual - Page 49
+ thickness of button) 3 5 mm (3/16 inch) 2 3 Example: For a button with a diameter of 15 mm (9/16 inch) and a thickness of 10 mm (3/8 inch), the button guide plate should be set to 25 mm (1 inch) on the scale. 1 10 mm (3/8 inch) 1 2 15 mm (9/16 inch) 2 The size of the buttonhole is set - Brother International SE725 | Operation Manual - Page 50
Utility Stitches Position the fabric with the front end of the buttonhole e mark aligned with the red marks on the sides of the buttonhole foot, and then lower the presser foot lever. 1 Mark on fabric a (front) 2 Red marks on buttonhole foot 3 Upper thread A cb • When lowering the presser - Brother International SE725 | Operation Manual - Page 51
■ Sewing buttonholes on stretch fabrics When sewing buttonholes on stretch fabrics, use a gimp thread. Hook the gimp thread onto the part of buttonhole foot a "A" shown in the illustration. Utility Stitches Raise the presser foot lever, and then slide the feed dog b position switch, located at the - Brother International SE725 | Operation Manual - Page 52
Utility Stitches IMPORTANT • When sewing, be sure that the needle does not touch the button. Set the sewing speed controller to the left (so that the h speed will be slow), then start sewing. Sew straight stitches up to the zipper opening. b With the right sides of the fabric facing each other, sew - Brother International SE725 | Operation Manual - Page 53
Utility Stitches Select stitch. h No. 1-03 Stitch • For details, refer to "Stitch Chart" on page 41. Note • When using zipper foot "I", be sure to select the straight stitch (middle (center) needle position), and slowly turn the handwheel toward you (counterclockwise) to check that the needle - Brother International SE725 | Operation Manual - Page 54
Utility Stitches ■ Piecing Sewing together two pieces of fabric is called "piecing". The fabric pieces should be cut with a 6.5 mm (1/4 inch) seam allowance. Sew a piecing straight stitch 6.5 mm (1/4 inch) from either the right side or the left side of the presser foot. Baste or pin along the seam - Brother International SE725 | Operation Manual - Page 55
at the pin nearest the front of the presser foot with your right hand. Determine the desired length of the bar tack. a Set the button guide plate on buttonhole foot "A" to the desired length. (The distance between the markings on the presser foot scale is 5 mm (3/16 inch).) 1 Presser foot scale - Brother International SE725 | Operation Manual - Page 56
end of the upper thread in your left f hand, and then start sewing. 1 Reinforcement stitching Determine the desired length of the darning. a Set the button guide plate on buttonhole foot "A" to the desired length. (The distance between the markings on the presser foot scale is 5 mm (3/16 inch - Brother International SE725 | Operation Manual - Page 57
Utility Stitches After removing the fabric, use the eyelet punch to cut a f hole in the center of the eyelet. • When using the eyelet punch, place thick paper or some other protective sheet under the fabric before punching the hole in the fabric. ■ Fagoting Stitching across an open seam is called - Brother International SE725 | Operation Manual - Page 58
to "Replacing the Needle" on page 28. Pass the first upper thread behind the needle bar b thread guide. • For details, refer to steps a through j of "Threading the upper thread" on page 23. Manually thread the left needle with the first upper c thread. Pass the thread through the eye of the needle - Brother International SE725 | Operation Manual - Page 59
may break and cause injury. Start sewing. j Thread the machine with the second upper thread. e Without passing the thread behind the needle bar thread guide, manually thread the right needle with the second upper thread. Insert the thread through the eye of the needle from the front to the back - Brother International SE725 | Operation Manual - Page 60
Making Adjustments Making Adjustments Your stitch pattern may sometimes turn out poorly, depending on the type or thickness of fabric, the stabilizer material used, sewing speed, etc. If your sewing does not turn out well, sew trial stitches using the same conditions as the real sewing, and adjust - Brother International SE725 | Operation Manual - Page 61
Using the Memory Function Using the Memory Function Saving stitch patterns You can save stitch patterns that you have customized in the machine's memory or USB flash drive. Note • Do not turn the main power to OFF while the [Saving...] screen is displayed. You will lose the stitch pattern you are - Brother International SE725 | Operation Manual - Page 62
Using the Memory Function 60 - Brother International SE725 | Operation Manual - Page 63
4 Chapter EMBROIDERY Embroidering Preparation Embroidering Preparation Follow the steps below to prepare the machine for embroidery. Step 9 Step 3 Step 1, 2 Step 5 Step 4 Step 6 Step 7, 8 Step Aim # Action Page 1 Presser foot Attach embroidery foot "Q". 61 attachment 2 Checking the - Brother International SE725 | Operation Manual - Page 64
Embroidering Preparation While pressing in the lever on embroidery foot "Q" e with your finger, place the embroidery foot bar above the needle clamp screw. a b c 1 Embroidery foot bar 2 Needle clamp screw 3 Presser bar Secure embroidery foot "Q" with the presser foot f holder screw, making sure that - Brother International SE725 | Operation Manual - Page 65
be selected when the embroidery unit is attached. ■ Removing the embroidery unit Make sure that the machine is completely stopped and follow the instructions below. Remove the embroidery frame. a • For details on removing the embroidery frame, refer to "Removing the embroidery frame" on page 66 - Brother International SE725 | Operation Manual - Page 66
the stabilizer material under the fabric without fusing it, then position the fabric and stabilizer in the embroidery frame, or check with your authorized Brother dealer for the correct stabilizer to use. ■ Inserting the fabric CAUTION • If you use a frame that is too small, the presser foot may - Brother International SE725 | Operation Manual - Page 67
Embroidering Preparation Loosen the embroidery frame adjustment screw and a remove the inner and outer frames, placing the outer frame on a flat surface. Separate the inner and outer frame by removing inner frame upward. 1 Inner frame 2 Outer frame a 3 Adjustment screw b c Tighten the - Brother International SE725 | Operation Manual - Page 68
CAUTION • Do not hit the needle with your finger or the embroidery frame. It may cause injury or needle breakage. 1 Embroidery frame guide tabs 2 Embroidery carriage frame holder slots The embroidery unit is attached. CAUTION • Correctly set the embroidery frame into the embroidery carriage frame - Brother International SE725 | Operation Manual - Page 69
the screen. ab a b c e f dg 1 Embroidery patterns 2 Brother "Exclusives" 3 Floral alphabet patterns 4 Character patterns 5 Frame patterns 6 Touch wireless network (page 80) • Refer to the "Embroidery Design Guide" for more information on each category's embroidery pattern. Selecting an - Brother International SE725 | Operation Manual - Page 70
Embroidering Memo • If [Embroidery Frame Identification View] in the settings screen is set to [ON], the pattern can be edited in the screen as if that embroidery frame is attached. a ■ Selecting character patterns Touch . a Touch the key of the font you want to embroider. b Touch a tab to - Brother International SE725 | Operation Manual - Page 71
■ Selecting frame patterns Touch . a Touch the key of the frame shape you want to b embroidery. Embroidering ■ Checking the pattern position The embroidery frame moves and shows the pattern position. Watch the frame closely to make sure the pattern will be embroidered in the right place. Touch a - Brother International SE725 | Operation Manual - Page 72
Embroidering Embroidering a pattern Embroidery patterns are embroidered with a change of thread after each color. Prepare embroidery thread colors as shown on the a screen. Lower the presser foot, then press the "Start/Stop" d button to start embroidering. After 5-6 stitches, press the "Start/Stop - Brother International SE725 | Operation Manual - Page 73
Cut the excess thread jumps within the color. i ■ Changing the thread color display You can display the name of the thread colors or embroidery thread number. Memo • Colors on the screen may vary slightly from actual spool colors. • The default thread brand is set to [Original]. Imported embroidery - Brother International SE725 | Operation Manual - Page 74
colors depending on those in the appliqué pattern. • Some appliqué patterns differ from the procedure described in this manual. For the procedure, refer to the "Embroidery Design Guide". ■ Upper thread is too loose The upper thread has slack. In this instance, increase the upper thread tension - Brother International SE725 | Operation Manual - Page 75
■ 2. Sewing the appliqué position on the base fabric Sew the appliqué position. a Embroidering After the appliqué piece is attached, attach the b embroidery frame to the machine. Thread the machine with the embroidery thread, lower the presser foot lever, and then press the "Start/Stop" button to - Brother International SE725 | Operation Manual - Page 76
Embroidering Select the satin stitch frame pattern of the same shape c as the appliqué. Embroider over the appliqué and base fabric from step b to create the appliqué. Select the satin stitch frame pattern of the same shape e as the appliqué and embroider the satin stitch pattern to create an - Brother International SE725 | Operation Manual - Page 77
single pattern after each section is embroidered. For details on creating split embroidery patterns and for more detailed embroidery instructions, refer to the Instruction manual included with PE-DESIGN Ver.7 or later. Insert the USB flash drive containing the created split a embroidery pattern, and - Brother International SE725 | Operation Manual - Page 78
Editing Patterns (Pattern Editing Screen) Display No. Key Name Explanation 3 Touch this key to magnify the pattern in the screen. Magnify key When the pattern is magnified, appears. Touch these keys to move the display area in the screen in the corresponding directions, making this convenient - Brother International SE725 | Operation Manual - Page 79
Editing Patterns (Pattern Editing Screen) Display No. Key Name Explanation 2 Touch this key to change the Array key configuration of a character pattern. When selecting an arc ( ), use and degree of the arc. to change the : Make the arc flatter. : Make the arc rounder. When selecting , - Brother International SE725 | Operation Manual - Page 80
Editing Patterns (Embroidery Settings Screen) Editing Patterns (Embroidery Settings Screen) When is touched in the editing screen, the embroidery settings screen appears. After editing the pattern, touch to continue to the embroidering screen. ■ Embroidery settings screen 1 2 3 65 4 Display No. - Brother International SE725 | Operation Manual - Page 81
Editing Patterns (Embroidery Settings Screen) Embroidering linked characters Follow the procedure described below to embroider linked characters in a single row when the entire pattern extends beyond the embroidery frame. Example: Linking "DEF" to the characters "ABC" Select the character - Brother International SE725 | Operation Manual - Page 82
(version 11 or later) or Design Database Transfer to transfer the patterns in advance. For details on transferring embroidery patterns, refer to the manual for PE-DESIGN or Design Database Transfer. Touch . b When saving the embroidery pattern in a USB flash b drive, insert the USB flash drive into - Brother International SE725 | Operation Manual - Page 83
Touch . d Memo • When saving a retrieved pattern, touch the following keys. 1.Touch . 2.Touch the key for the desired destination. : Saves to the machine. : Saves to the USB flash drive. : Temporarily saves to the wireless function pocket. When saving patterns retrieved via USB or wireless network - Brother International SE725 | Operation Manual - Page 84
Using the Memory Function 82 - Brother International SE725 | Operation Manual - Page 85
operation, making periodic oiling unnecessary. If problems occur, such as difficulty turning the handwheel or an unusual noise, immediately stop using the machine, and contact your authorized Brother dealer or the nearest Brother authorized service center. Cleaning the race Stitching performance - Brother International SE725 | Operation Manual - Page 86
it. Otherwise the upper thread may become tangled, the needle may break and cause injury. For a new bobbin case, contact your nearest Brother authorized service center. • Be sure that the bobbin case is correctly installed, otherwise the needle may break and cause injury. c 1 Cleaning brush 2 Race - Brother International SE725 | Operation Manual - Page 87
Brother support website offers the latest FAQs and troubleshooting tips. Visit us at https://s.brother/ cpjap/. If the problem persists, contact your authorized Brother dealer or the nearest Brother authorized service center. ■ Frequent troubleshooting following the c instructions in "Threading the - Brother International SE725 | Operation Manual - Page 88
Troubleshooting Incorrect thread tension ■ Symptoms • Symptom 1: The bobbin thread is visible from the right side of the fabric. (Refer to illustration below) • Symptom 2: The upper thread - Brother International SE725 | Operation Manual - Page 89
Troubleshooting Fabric is caught in the machine and cannot be removed If plate. 5 APPENDIX If the fabric cannot be removed, even after completing these steps, contact your nearest Brother authorized service center. Remove any threads in the race and around the feed l dogs. Turn the handwheel to - Brother International SE725 | Operation Manual - Page 90
Troubleshooting Turn the handwheel to check that the feed dogs move smoothly Note • If an error occurs, the machine may be malfunctioning; so contact your authorized Brother dealer or the nearest Brother authorized service center. Select Straight stitch (Middle). b * Refer to "Stitch Chart" on page - Brother International SE725 | Operation Manual - Page 91
hand as shown below. List of symptoms Check the following possible problems before requesting service. If the reference page is "*", contact your authorized Brother dealer or the nearest Brother authorized service center. ■ Getting ready Symptom, Cause/solution Reference Cannot thread the - Brother International SE725 | Operation Manual - Page 92
Troubleshooting Symptom, Cause/solution Reference The LCD screen is fogged up. Condensation has the wrong 23 spool cap, spool cap is loose, the thread did not catch the needle bar thread guide, etc.). Knotted or tangled thread is being used. - The selected needle is not appropriate for the - Brother International SE725 | Operation Manual - Page 93
Troubleshooting Symptom, Cause/solution Reference The upper thread is too tight the needle that fell into the machine cannot be removed, consult your authorized Brother dealer or the nearest Brother authorized service center. The handwheel does not turn smoothly. Thread is tangled in the bobbin - Brother International SE725 | Operation Manual - Page 94
Troubleshooting it was being sewn. • Sew while guiding the fabric with your hands so that See your authorized Brother dealer for the embroidery frame does not cause problems, rotate the pattern and embroider embroidery unit movement will be impaired. Support the fabric while embroidering. Fabric is - Brother International SE725 | Operation Manual - Page 95
Troubleshooting , please contact your authorized Brother dealer or the nearest Brother authorized service center. 2 Cannot change point/router. Your machine supports the following authentication methods: (without encryption) Shared key WEP If your problem is not solved, the SSID or network - Brother International SE725 | Operation Manual - Page 96
Troubleshooting USB media cannot be used. 19 2. If you manually entered the SSID and security information (SSID/ authentication method selected wireless LAN access point/router are not supported by your machine.] error message, and brother/cpjap/ for details on the USB media that can be used. 94 - Brother International SE725 | Operation Manual - Page 97
Troubleshooting Error messages When the the machine may be malfunctioning. Contact your authorized Brother dealer or the nearest Brother authorized service center. How can I find the wireless security You will have to manually enter the SSID. 1 SSID 2 Network key (password) a b 5 APPENDIX 95 - Brother International SE725 | Operation Manual - Page 98
version 11 or later to transfer data from your computer to the machine. For the operating systems compatible with the software, visit our website https://s.brother/cnjkb/. *2 .pmx and .pmu stitch data files can be retrieved; however, when this machine is used to save the file, it is saved as a .pmv - Brother International SE725 | Operation Manual - Page 99
The machine's software can be updated using USB flash drive. When an update program is available on Brother support website at https://s.brother/cpjap/, please download the file(s) following the instructions on the website and steps listed below. When using the wireless function, the update mark is - Brother International SE725 | Operation Manual - Page 100
case 84 , Bobbin installation 22 Bobbin thread 19 63 Bobbin winding 19 Bobbin winding thread guide 19 Button sewing 49 Buttonhole 47 C Character spacing 77 Cleaning 83 Cylindrical pieces 37 D 36 72 86 , , , , Transparent nylon thread 20 21 25 27 42 Troubleshooting 85 Twin needle 56 98 - Brother International SE725 | Operation Manual - Page 101
U , , Updating 97 Upper thread 23 27 63 V Vinyl fabrics 40 W Wireless LAN 17 Z , Zigzag stitch 35 52 Zipper 50 Index 5 APPENDIX 99 - Brother International SE725 | Operation Manual - Page 102
- Brother International SE725 | Operation Manual - Page 103
- Brother International SE725 | Operation Manual - Page 104
accessories are available to be purchased separately. Visit our website https://s.brother/cojkb/. Please visit us at https://s.brother/cpjap/ where you can get the support information (Instruction Videos, FAQs, etc.) for your Brother product. Be sure to install the latest software. A variety of
-
 1
1 -
 2
2 -
 3
3 -
 4
4 -
 5
5 -
 6
6 -
 7
7 -
8
-
9
-
10
-
11
-
12
-
13
-
14
-
15
-
16
-
17
-
18
-
19
-
20
-
21
-
22
-
23
-
24
-
25
-
26
-
27
-
28
-
29
-
30
-
31
-
32
-
33
-
34
-
35
-
36
-
37
-
38
-
39
-
40
-
41
-
42
-
43
-
44
-
45
-
46
-
47
-
48
-
49
-
50
-
51
-
52
-
53
-
54
-
55
-
56
-
57
-
58
-
59
-
60
-
61
-
62
-
63
-
64
-
65
-
66
-
67
-
68
-
69
-
70
-
71
-
72
-
73
-
74
-
75
-
76
-
77
-
78
-
79
-
80
-
81
-
82
-
83
-
84
-
85
-
86
-
87
-
88
-
89
-
90
-
91
-
92
-
93
-
94
-
95
-
96
-
97
-
98
-
99
-
100
-
101
-
102
-
103
-
104
 |
 |

Operation Manual
Sewing and Embroidery Machine
Product Code: 888-P10
Be sure to read this document before using the machine.
We recommend that you keep this document nearby for future reference.
Instruction Videos
https://s.brother/cvjap/