Brother International BES-100E BE-100 Workbook - English - Page 11
Purpose, Action - tutorial
 |
View all Brother International BES-100E manuals
Add to My Manuals
Save this manual to your list of manuals |
Page 11 highlights
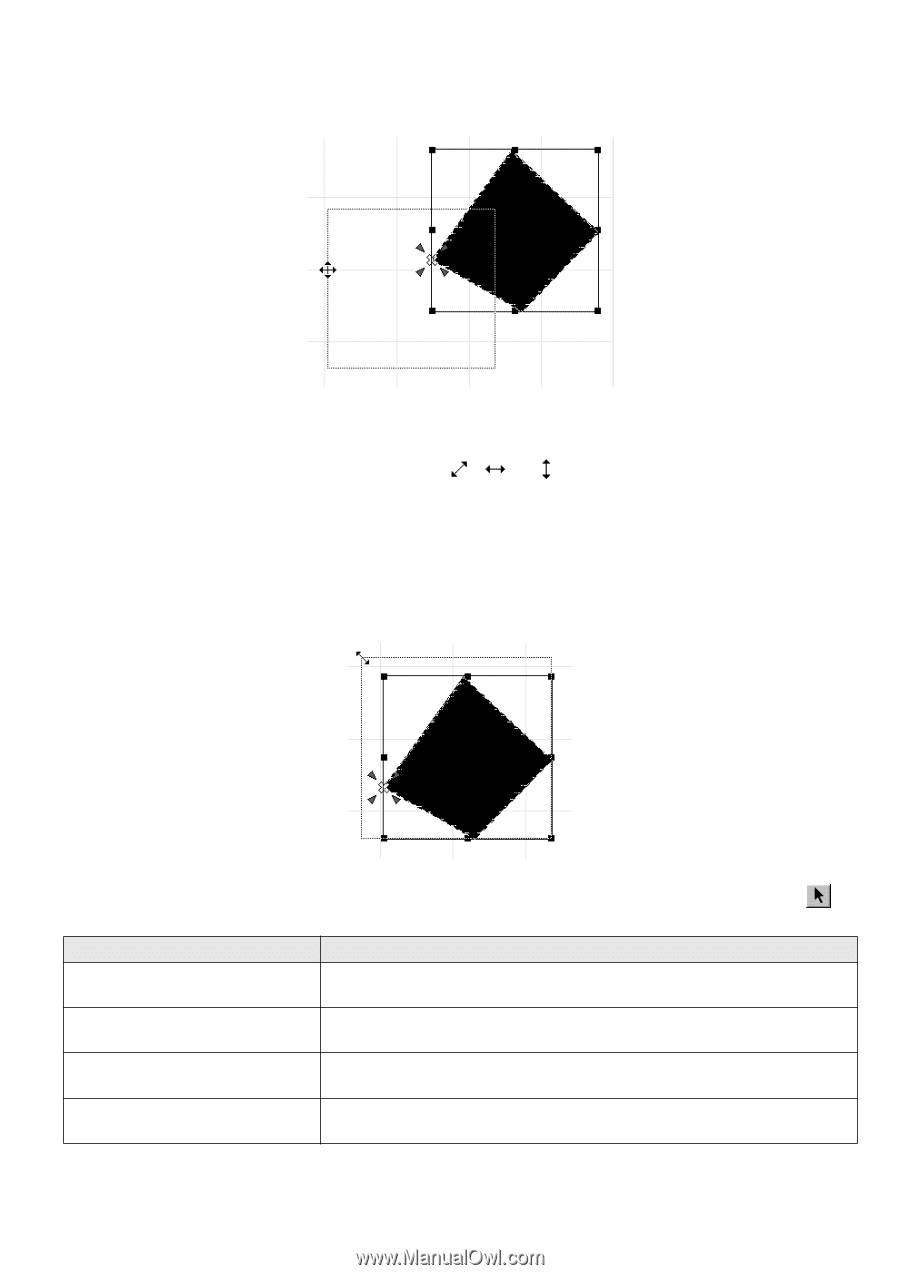
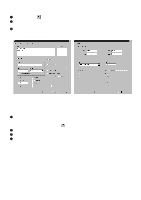
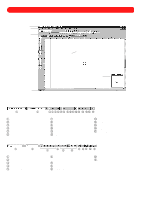
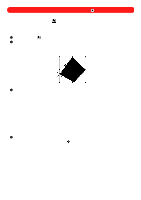
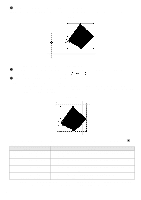
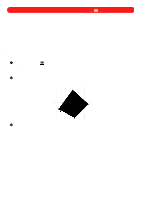
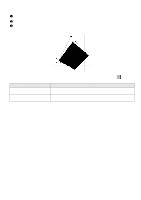
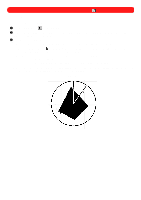
2 Drag the selected shapes to the desired location in the design area. NOTE: If you do not know how to drag an object, run the Windows 95 tutorial for instructions and practice. Figure 13 To resize (shrink, enlarge or reproportion) selected design shapes: 1 Move the pointer over a handle (small square) on the selection frame around the selected design shapes. The pointer changes to a double-headed arrow ( , or ). 2 Drag the handle to adjust the size of the design shape. NOTE: Text shapes are always resized proportionately. If a handle at the top or bottom edge of the selection frame is dragged, the design shape is resized vertically. If a handle at the left or right edge of the selection frame is dragged, the design shape is resized horizontally. Figure 14 To move and resize design shapes with greater precision, select the design shape(s) using the Move tool ( ), and then follow the instructions in the table below. Purpose To move selected design shapes horizontally or vertically To move selected design shapes in grid increments To resize selected design shapes proportionally To resize selected design shapes in grid increments Action Click the design shape(s), and then, while holding down the Shift key, drag the shape(s). Click the design shape(s), and then, while holding down the Ctrl key, drag the shape(s). Click the design shape(s), and then, while holding down the Shift key, drag a corner handle of the selection frame. Click the design shape, and then, while holding down the Ctrl key, drag a corner handle of the selection frame. NOTE: If Num Lock is turned on, the number keys 2, 4, 6 and 8 of the numeric keypad allow you to "nudge" (move in small amounts) design shapes down, left, right and up, respectively. 8
-
 1
1 -
2
-
3
-
4
-
5
-
 6
6 -
 7
7 -
 8
8 -
 9
9 -
 10
10 -
 11
11 -
 12
12 -
 13
13 -
 14
14 -
 15
15 -
 16
16 -
17
-
18
-
19
-
20
-
21
-
22
-
23
-
24
-
25
-
26
-
27
-
28
-
29
-
30
-
31
-
32
-
33
-
34
-
35
-
36
-
37
-
38
-
39
-
40
-
41
-
42
-
43
-
44
-
45
-
46
-
47
-
48
-
49
-
50
-
51
-
52
-
53
-
54
-
55
-
56
-
57
-
58
-
59
-
60
-
61
-
62
-
63
-
64
-
65
-
66
-
67
-
68
-
69
-
70
-
71
-
72
-
73
-
74
-
75
-
76
-
77
-
78
-
79
-
80
-
81
-
82
-
83
-
84
-
85
-
86
-
87
-
88
-
89
-
90
-
91
-
92
-
93
-
94
-
95
-
96
-
97
-
98
-
99
-
100
-
101
-
102
-
103
-
104
-
105
-
106
-
107
-
108
-
109
-
110
-
111
-
112
-
113
-
114
-
115
-
116
-
117
-
118
-
119
 |
 |