Brother International BES-100E BE-100 Workbook - English - Page 21
Changing the font
 |
View all Brother International BES-100E manuals
Add to My Manuals
Save this manual to your list of manuals |
Page 21 highlights
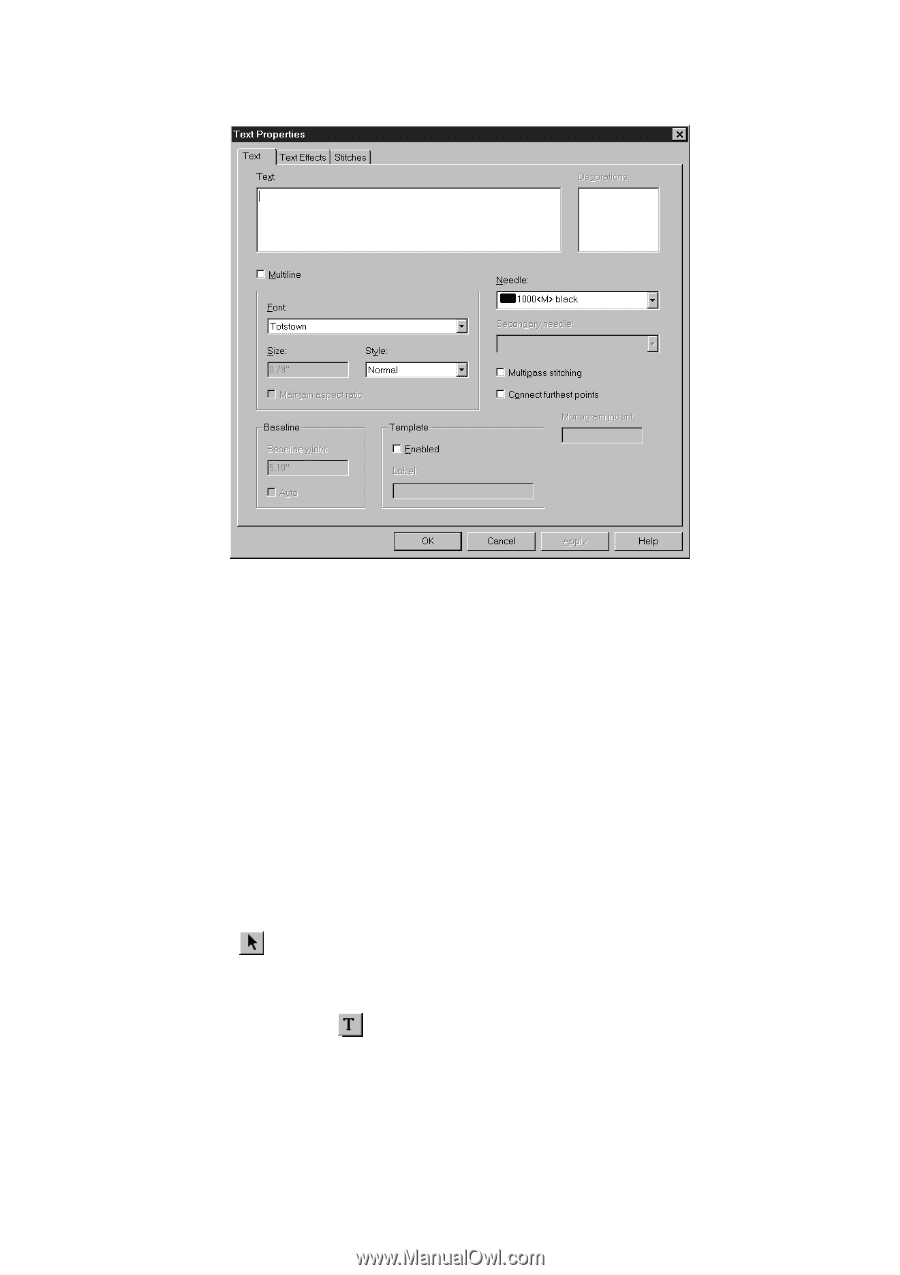
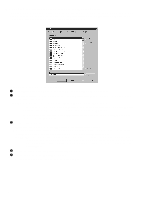
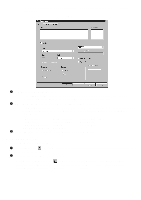
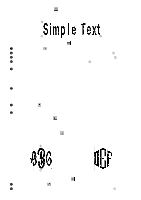
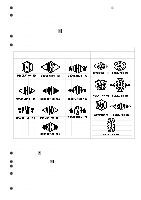
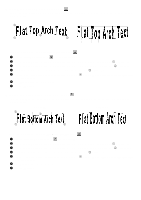
NOTE: To identify a text shape, move the pointer over it so that its name appears in the left corner of the status bar. Figure 23 3 In the Text box, type the desired text. NOTE: If the Simple rectangle or Double circle text shape was selected, multiple lines of text can be entered. For more information, see Entering multiple lines of text in chapter 1. 4 Select the desired settings, such as the font or needle (thread) color. NOTE: The Baseline settings are available only with the following text shapes. With text shapes where the Baseline settings are not available, the baseline is calculated automatically according to the entered text. Simple rectangle Vertical orientation Convex single arch Double arch Concave single arch Flat top arch Simple flat top arch Step up Flat bottom arch Simple flat bottom arch Step down 5 Click the OK button. The text shape is added at the center of the design. s Changing the font To change the font of a text shape: 1 Using the Move tool ( ), select the text shape that you wish to change. "Dancing ants" (moving dashes) appear around the shape. 2 Do either of the following: x Click the Text Properties button ( ) in the Text bar. The Text tab of the Text Properties dialog box appears. In the Font drop-down list, select the desired font name, and then click the OK button. x In the Fonts drop-down list in the Text bar, select the desired font name. 18
-
 1
1 -
2
-
3
-
4
-
5
-
6
-
7
-
8
-
9
-
10
-
11
-
12
-
13
-
14
-
15
-
 16
16 -
 17
17 -
 18
18 -
 19
19 -
 20
20 -
 21
21 -
 22
22 -
 23
23 -
 24
24 -
 25
25 -
 26
26 -
27
-
28
-
29
-
30
-
31
-
32
-
33
-
34
-
35
-
36
-
37
-
38
-
39
-
40
-
41
-
42
-
43
-
44
-
45
-
46
-
47
-
48
-
49
-
50
-
51
-
52
-
53
-
54
-
55
-
56
-
57
-
58
-
59
-
60
-
61
-
62
-
63
-
64
-
65
-
66
-
67
-
68
-
69
-
70
-
71
-
72
-
73
-
74
-
75
-
76
-
77
-
78
-
79
-
80
-
81
-
82
-
83
-
84
-
85
-
86
-
87
-
88
-
89
-
90
-
91
-
92
-
93
-
94
-
95
-
96
-
97
-
98
-
99
-
100
-
101
-
102
-
103
-
104
-
105
-
106
-
107
-
108
-
109
-
110
-
111
-
112
-
113
-
114
-
115
-
116
-
117
-
118
-
119
 |
 |