Brother International BES-100E BE-100 Workbook - English - Page 24
Using the Simple Text tool, Changing the font, Using the Monogram Text tool
 |
View all Brother International BES-100E manuals
Add to My Manuals
Save this manual to your list of manuals |
Page 24 highlights
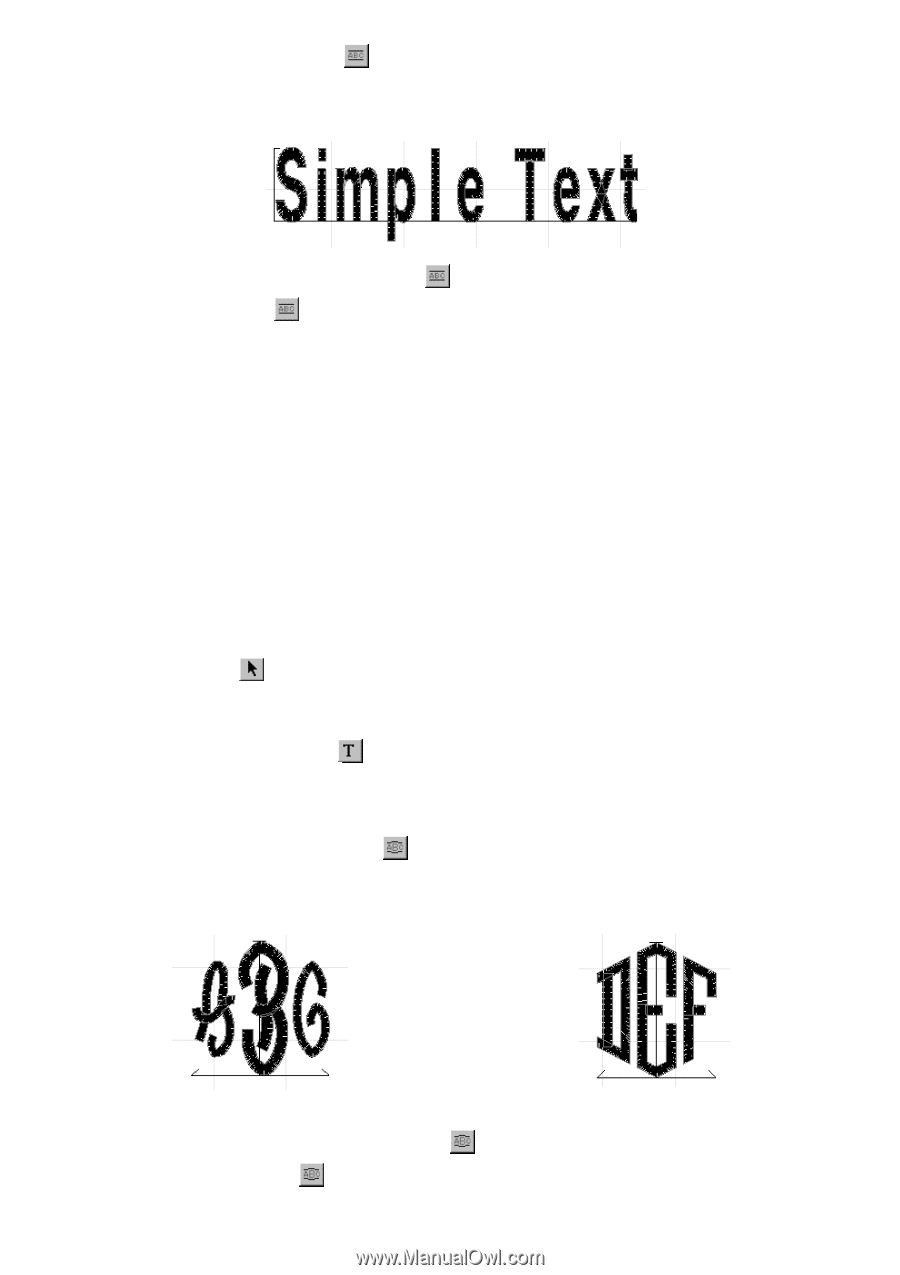
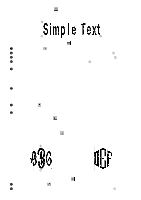
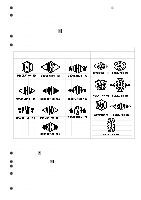
s Using the Simple Text tool ( ) This tool creates a block containing one or more horizontal lines of text. Figure 24 3 1 2 To create a text shape using the Simple Text tool ( ): 1 Click the Simple Text tool ( ) in the Lettering palette. 2 Click in the design area to specify the desired location for the left end of the baseline (1 in figure 24). 3 Click in the design area to specify the desired location for the right end of the baseline (2 in figure 24). 4 Click above the baseline to specify the desired height of the text (3 in figure 24). The Text tab of the Text Properties dialog box appears. 5 In the Text box, type the desired text. NOTE: To enter multiple lines of text, select the Multiline check box. A check mark will appear. For more information, see Entering multiple lines of text in chapter 1. If multiple lines of text are entered, the specified baseline is the baseline position for the first line of text. 6 Click the OK button. s Changing the font To change the font of a text shape: 1 Using the Move tool ( ), select the text shape that you wish to change. "Dancing ants" (moving dashes) appear around the shape. 2 Do either of the following: x Click the Text Properties button ( ) in the Text bar. The Text tab of the Text Properties dialog box appears. In the Font drop-down list, select the desired font name, and then click the OK button. x In the Fonts drop-down list in the Text bar, select the desired font name. s Using the Monogram Text tool ( ) This tool creates a one-, two-, or three-letter monogram with optional decoration. Figure 25 Figure 26 2 1 To create a text shape using the Monogram Text tool ( ): 1 Click the Monogram Text tool ( ) in the Lettering palette. 2 Click in the design area to specify the desired location for the base of the center letter (1 in figure 25). 21
-
 1
1 -
2
-
3
-
4
-
5
-
6
-
7
-
8
-
9
-
10
-
11
-
12
-
13
-
14
-
15
-
16
-
17
-
18
-
 19
19 -
 20
20 -
 21
21 -
 22
22 -
 23
23 -
 24
24 -
 25
25 -
 26
26 -
 27
27 -
 28
28 -
 29
29 -
30
-
31
-
32
-
33
-
34
-
35
-
36
-
37
-
38
-
39
-
40
-
41
-
42
-
43
-
44
-
45
-
46
-
47
-
48
-
49
-
50
-
51
-
52
-
53
-
54
-
55
-
56
-
57
-
58
-
59
-
60
-
61
-
62
-
63
-
64
-
65
-
66
-
67
-
68
-
69
-
70
-
71
-
72
-
73
-
74
-
75
-
76
-
77
-
78
-
79
-
80
-
81
-
82
-
83
-
84
-
85
-
86
-
87
-
88
-
89
-
90
-
91
-
92
-
93
-
94
-
95
-
96
-
97
-
98
-
99
-
100
-
101
-
102
-
103
-
104
-
105
-
106
-
107
-
108
-
109
-
110
-
111
-
112
-
113
-
114
-
115
-
116
-
117
-
118
-
119
 |
 |