Brother International BES-100E BE-100 Workbook - English - Page 28
Using the Circular Text tool, Changing the text position relative to the baseline
 |
View all Brother International BES-100E manuals
Add to My Manuals
Save this manual to your list of manuals |
Page 28 highlights
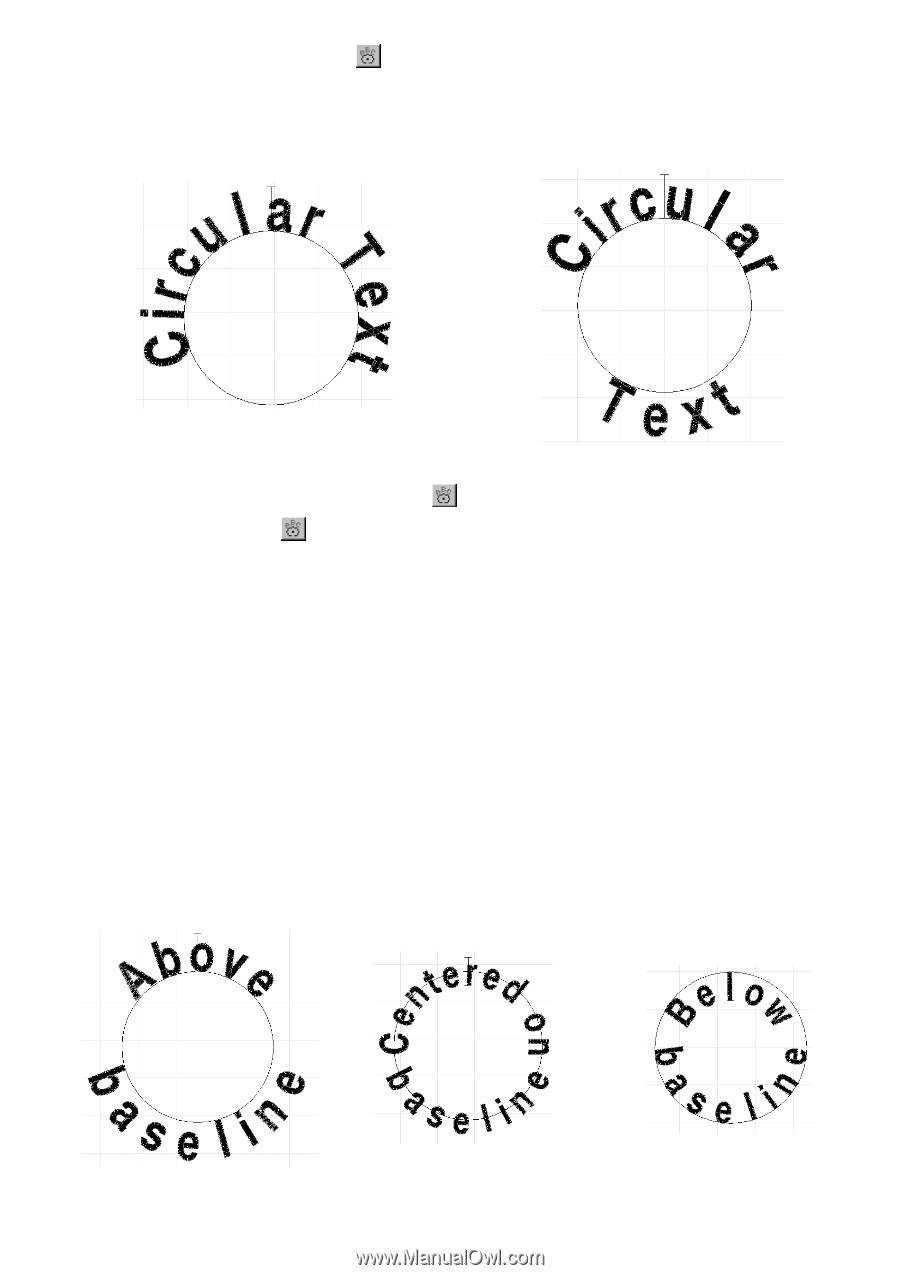
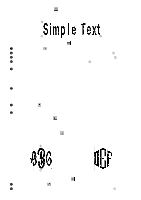
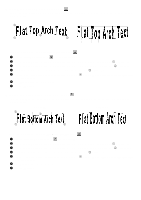
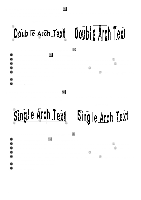
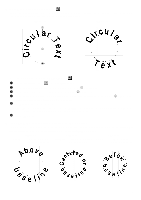
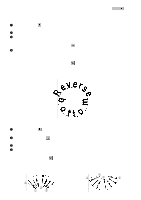
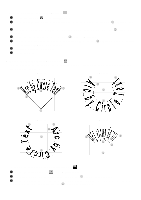
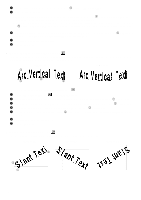
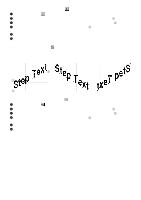
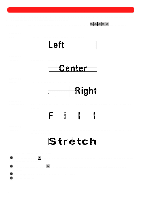
s Using the Circular Text tool ( ) This tool arranges text along a circle whose radius you can specify. If two lines of text are entered, the first line is added at the top and second line is added at the bottom. Figure 36 Figure 37 3 1 2 To create a text shape using the Circular Text tool ( ): 1 Click the Circular Text tool ( ) in the Lettering palette. 2 Click in the design area to specify the center of the circle (1 in figure 36). 3 Drag the pointer until the circle has the desired radius (2 in figure 36). 4 Drag the T-shaped extension, which indicates the text height, until it is the desired size (3 in figure 36). The Text tab of the Text Properties dialog box appears. 5 In the Text box, type the desired text. NOTE: To enter multiple lines of text, select the Multiline check box. (A check mark will appear.) For more information, see Entering multiple lines of text in chapter 1. 6 Click the OK button. s Changing the text position relative to the baseline The placement of text in relation to the baseline can be specified by choosing one the following Position relative to baseline settings (on the Text Effects tab of the Text Properties dialog box). Figure 38 Figure 39 Figure 40 Above . . . . The text is placed Centered . . The text is centered Below. . . . . The text hangs above the baseline. on the baseline. below the baseline. 25
-
 1
1 -
2
-
3
-
4
-
5
-
6
-
7
-
8
-
9
-
10
-
11
-
12
-
13
-
14
-
15
-
16
-
17
-
18
-
19
-
20
-
21
-
22
-
 23
23 -
 24
24 -
 25
25 -
 26
26 -
 27
27 -
 28
28 -
 29
29 -
 30
30 -
 31
31 -
 32
32 -
 33
33 -
34
-
35
-
36
-
37
-
38
-
39
-
40
-
41
-
42
-
43
-
44
-
45
-
46
-
47
-
48
-
49
-
50
-
51
-
52
-
53
-
54
-
55
-
56
-
57
-
58
-
59
-
60
-
61
-
62
-
63
-
64
-
65
-
66
-
67
-
68
-
69
-
70
-
71
-
72
-
73
-
74
-
75
-
76
-
77
-
78
-
79
-
80
-
81
-
82
-
83
-
84
-
85
-
86
-
87
-
88
-
89
-
90
-
91
-
92
-
93
-
94
-
95
-
96
-
97
-
98
-
99
-
100
-
101
-
102
-
103
-
104
-
105
-
106
-
107
-
108
-
109
-
110
-
111
-
112
-
113
-
114
-
115
-
116
-
117
-
118
-
119
 |
 |