Brother International BES-100E BE-100 Workbook - English - Page 50
Shapes Toolbar - bes 100 software
 |
View all Brother International BES-100E manuals
Add to My Manuals
Save this manual to your list of manuals |
Page 50 highlights
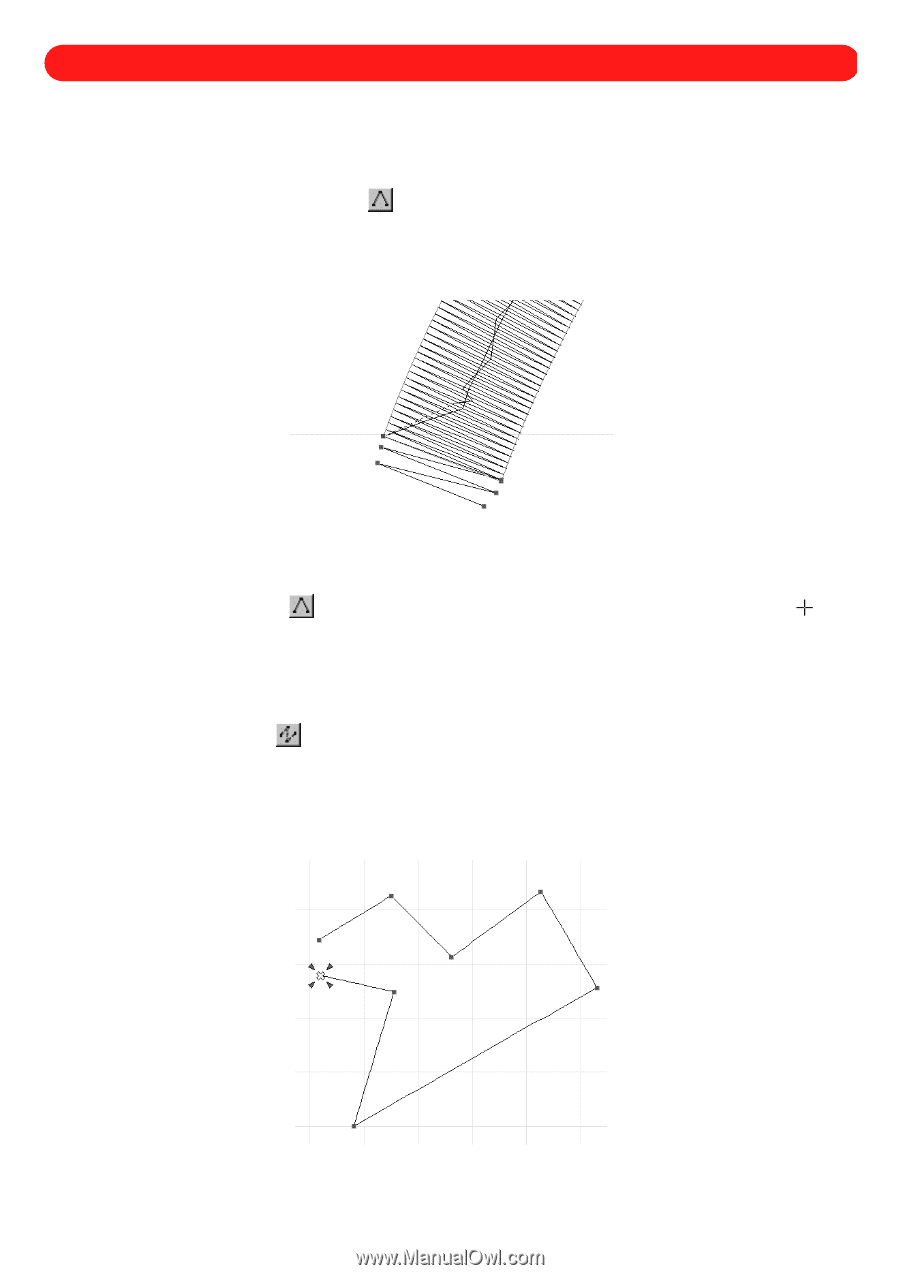
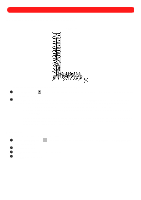
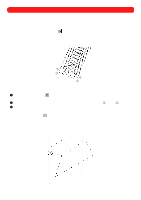
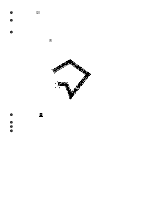
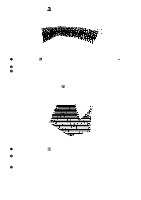
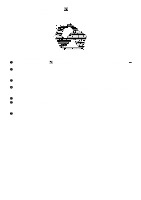
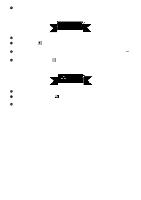
Chapter 20: Shapes Toolbar The tools in the Shapes toolbar allow you to create a variety of graphic shapes, such as paths (i.e., lines that stitching follows) and different types of filled areas. NOTE: To delete the last punchpoint added, press the Backspace key. s Using the Manual Stitch tool ( ) This tool allows individual needle punchpoints to be placed in order to control the stitch length or add intricate details to a shape (for example, a small copyright or trademark symbol or extra lock stitches). Figure 82 1 3 2 4 To add manual stitches to the design: 1 Click the Manual Stitch tool ( ) in the Shapes toolbar. The pointer changes to large crosshairs ( ) when it is moved into the design area. 2 Click in the design area to specify the placement of the stitches, as shown by 1 through 4 in figure 82. 3 Right-click in the design area to finish adding stitches. s Using the Path tool ( ) This tool adds paths (running stitches), which are used for outlining and adding fine detail to a design. NOTE: This tool is available in the digitizing level of the software, and in the editing level with .bdf files cre- ated using BE-100. Figure 83 47
-
 1
1 -
2
-
3
-
4
-
5
-
6
-
7
-
8
-
9
-
10
-
11
-
12
-
13
-
14
-
15
-
16
-
17
-
18
-
19
-
20
-
21
-
22
-
23
-
24
-
25
-
26
-
27
-
28
-
29
-
30
-
31
-
32
-
33
-
34
-
35
-
36
-
37
-
38
-
39
-
40
-
41
-
42
-
43
-
44
-
 45
45 -
 46
46 -
 47
47 -
 48
48 -
 49
49 -
 50
50 -
 51
51 -
 52
52 -
 53
53 -
 54
54 -
 55
55 -
56
-
57
-
58
-
59
-
60
-
61
-
62
-
63
-
64
-
65
-
66
-
67
-
68
-
69
-
70
-
71
-
72
-
73
-
74
-
75
-
76
-
77
-
78
-
79
-
80
-
81
-
82
-
83
-
84
-
85
-
86
-
87
-
88
-
89
-
90
-
91
-
92
-
93
-
94
-
95
-
96
-
97
-
98
-
99
-
100
-
101
-
102
-
103
-
104
-
105
-
106
-
107
-
108
-
109
-
110
-
111
-
112
-
113
-
114
-
115
-
116
-
117
-
118
-
119
 |
 |