Brother International BES-100E BE-100 Workbook - English - Page 70
Cutting, Copying and Pasting
 |
View all Brother International BES-100E manuals
Add to My Manuals
Save this manual to your list of manuals |
Page 70 highlights
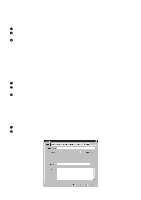
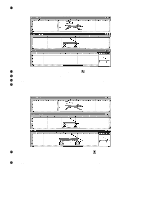
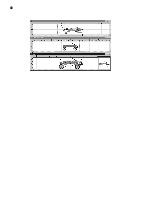
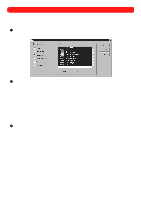
Chapter 29: Cutting, Copying and Pasting By cutting, copying and pasting, shapes from existing designs or from the many designs available in the "Sample" folder can be reused. s Copying or cutting design shapes To copy a design shape or cut a shape out of the design: 1 Using the Move tool ( ), select the design shape that you wish to copy or cut. "Dancing ants" (moving dashes) appear around the shape. 2 Do one of the following: x To copy the design shape, click Copy on the Edit drop-down menu. A copy of the design shape is put on the Windows clipboard. NOTE: The design shape can also be copied by clicking the Copy button ( ) in the Ribbon bar. x To cut the shape out of the design, click Cut on the Edit drop-down menu. The shape is removed from the design and put on the Windows clipboard. NOTE: The design shape can also be cut out by clicking the Cut button ( ) in the Ribbon bar. s Pasting design shapes To paste a design shape into a design: 1 Open the design into which you wish to paste the design shape. 2 On the Edit drop-down menu, click Paste. The shape is placed in the center of the design area and added to the end of the sewing sequence. NOTE: To paste the shape into a specific place in the sewing order, click Paste Before or Paste After in the Edit drop-down menu. For more information, see chapter 30. The design shape can also be pasted by clicking the Paste button ( ) in the Ribbon bar. To copy a design shape and paste it into the same design, select the design shape using the Move tool ( ), and then click Duplicate on the Edit drop-down menu. s Example To create a new design from two sample designs (from the "Sample" folder): 1 On the File drop-down menu, click New. The Design Info dialog box appears. 2 Specify the desired settings for the new file. 3 Click the OK button. A new blank design area appears. 4 On the File drop-down menu, click Open. The Open dialog box appears. 5 Click the Thumbnails button. The Thumbnails dialog box appears. 6 Click the Browse button. The Browse for Folder dialog box appears. 7 Select the "Sample" folder in the "BES" folder, and then click the OK button. Thumbnails of all files in the "Sample" folder appear in the Designs box of the Thumbnails dialog box. 8 Click the "Redwagon" file, and then hold down the Ctrl key and click the "Rundog" file. 9 Click the Open button. Both files are opened; however, they cannot both be seen at the same time. 0 On the Window drop-down menu, click Tile. The two opened sample files and the new file can all be seen at the same time. A Click the title bar of the "Rundog" file, and then click Fit to Window on the Zoom drop-down menu to display the entire design. 67
-
 1
1 -
2
-
3
-
4
-
5
-
6
-
7
-
8
-
9
-
10
-
11
-
12
-
13
-
14
-
15
-
16
-
17
-
18
-
19
-
20
-
21
-
22
-
23
-
24
-
25
-
26
-
27
-
28
-
29
-
30
-
31
-
32
-
33
-
34
-
35
-
36
-
37
-
38
-
39
-
40
-
41
-
42
-
43
-
44
-
45
-
46
-
47
-
48
-
49
-
50
-
51
-
52
-
53
-
54
-
55
-
56
-
57
-
58
-
59
-
60
-
61
-
62
-
63
-
64
-
 65
65 -
 66
66 -
 67
67 -
 68
68 -
 69
69 -
 70
70 -
 71
71 -
 72
72 -
 73
73 -
 74
74 -
 75
75 -
76
-
77
-
78
-
79
-
80
-
81
-
82
-
83
-
84
-
85
-
86
-
87
-
88
-
89
-
90
-
91
-
92
-
93
-
94
-
95
-
96
-
97
-
98
-
99
-
100
-
101
-
102
-
103
-
104
-
105
-
106
-
107
-
108
-
109
-
110
-
111
-
112
-
113
-
114
-
115
-
116
-
117
-
118
-
119
 |
 |