Brother International BES-100E BE-100 Workbook - English - Page 76
Grouping and Ungrouping Design Shapes
 |
View all Brother International BES-100E manuals
Add to My Manuals
Save this manual to your list of manuals |
Page 76 highlights
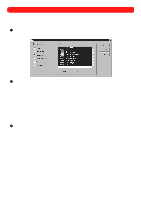
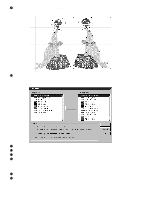
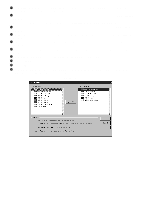
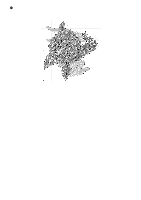
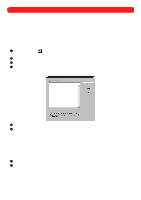
Chapter 32: Grouping and Ungrouping Design Shapes By grouping design shapes, they can all be moved or formatted at the same time. One of the most powerful uses of this command consists of grouping design shapes of the same color in order to eliminate unnecessary needle (thread color) changes. For example, in a design that only has the six colors and fourteen color changes, design shapes of the same color can be grouped in order to reduce the number of needle (thread color) changes from fourteen to six. NOTE: To see the number of needle (thread color) changes a design contains, click Color Sequence on the File drop-down menu. The Color Sequence dialog box appears, and the number of needle (thread color) changes is shown in the Color Sequence list. s Grouping design shapes To group a number of individual design shapes: 1 Using the Move tool ( ), select all of the design shapes that you wish to group. "Dancing ants" (moving dashes) appear around the shape. NOTE: For more information about selecting multiple design shapes, see Selecting design shapes in chapter 3. 2 On the Shape drop-down menu, click Group. Now, when any part of the grouped shapes are clicked, the entire grouped shape is selected. s Ungrouping design shapes To ungroup design shapes that have been grouped: 1 Using the Move tool ( ), select the grouped design shape that you wish to ungroup. "Dancing ants" appear around the shape. 2 On the Shape drop-down menu, click Ungroup. s Example To create a multicolored design from a sample design (in the "Sample" folder), then reduce the number of needle (thread color) changes needed for sewing it: 1 On the File drop-down menu, click Open. The Open dialog box appears. 2 In the Files of type drop-down list, select "BES Files (*.bdf)". 3 In the Look in drop-down list, select the "BES" folder, and then in the list below it, double-click the "Sample" folder. 4 In the Look in list, select the "SEAL" file. 5 Click the Open button. 6 On the Edit drop-down menu, click Select All. "Dancing ants" appear around the entire design. 7 On the Edit drop-down menu, click Duplicate. A copy of the seal is added to the design. 8 With the new seal still selected, move it to the right and align it with the top of the original one. NOTE: Before trying to move the design shape, be sure to move the pointer over either the selection frame or the "dancing ants" around the selected design shape so that the pointer changes to a four-headed arrow ( ). 73
-
 1
1 -
2
-
3
-
4
-
5
-
6
-
7
-
8
-
9
-
10
-
11
-
12
-
13
-
14
-
15
-
16
-
17
-
18
-
19
-
20
-
21
-
22
-
23
-
24
-
25
-
26
-
27
-
28
-
29
-
30
-
31
-
32
-
33
-
34
-
35
-
36
-
37
-
38
-
39
-
40
-
41
-
42
-
43
-
44
-
45
-
46
-
47
-
48
-
49
-
50
-
51
-
52
-
53
-
54
-
55
-
56
-
57
-
58
-
59
-
60
-
61
-
62
-
63
-
64
-
65
-
66
-
67
-
68
-
69
-
70
-
 71
71 -
 72
72 -
 73
73 -
 74
74 -
 75
75 -
 76
76 -
 77
77 -
 78
78 -
 79
79 -
 80
80 -
 81
81 -
82
-
83
-
84
-
85
-
86
-
87
-
88
-
89
-
90
-
91
-
92
-
93
-
94
-
95
-
96
-
97
-
98
-
99
-
100
-
101
-
102
-
103
-
104
-
105
-
106
-
107
-
108
-
109
-
110
-
111
-
112
-
113
-
114
-
115
-
116
-
117
-
118
-
119
 |
 |