Brother International CS6000i User Guide - Page 22
Checking the needle, Replacing the needle - sewing machine model
 |
UPC - 012502615309
View all Brother International CS6000i manuals
Add to My Manuals
Save this manual to your list of manuals |
Page 22 highlights
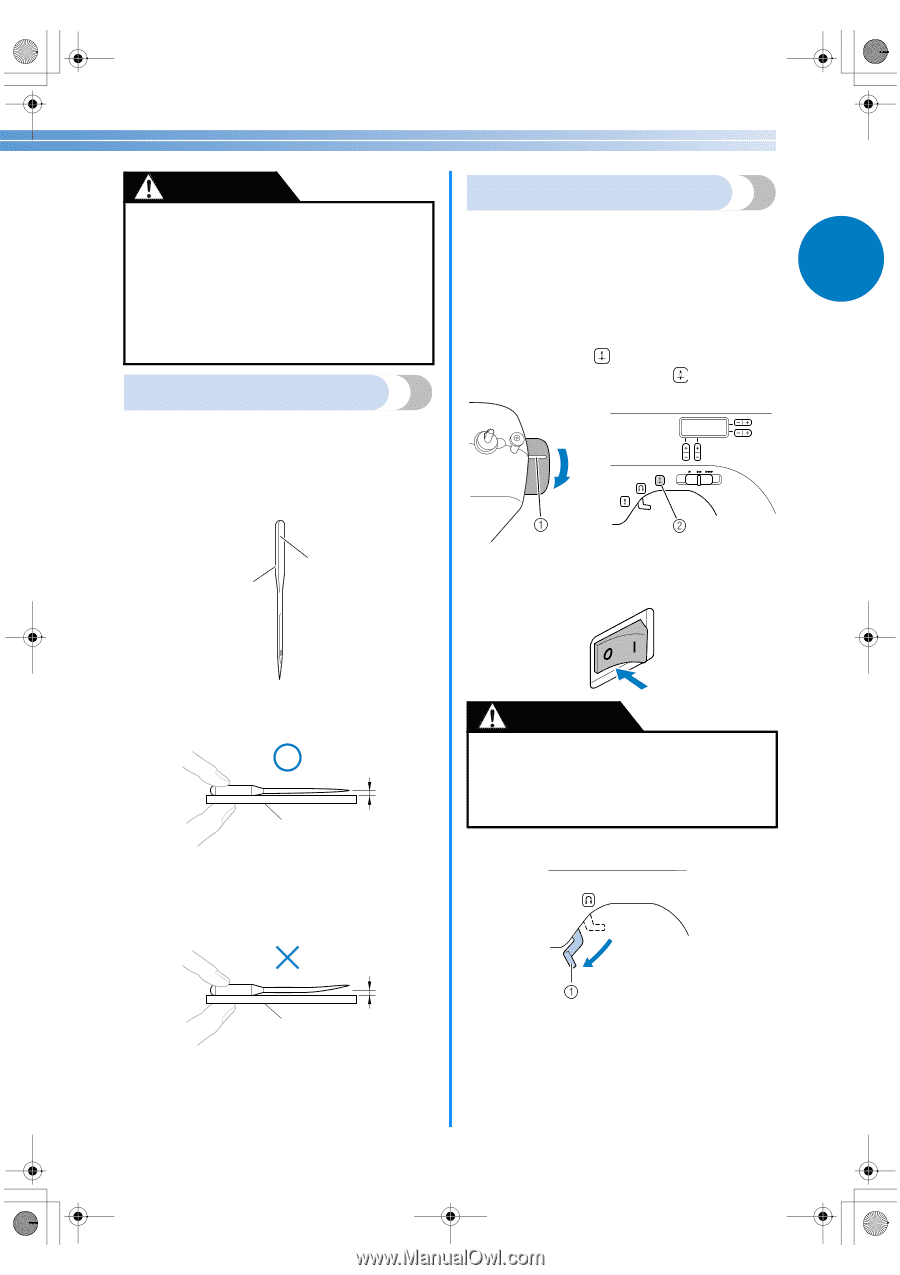
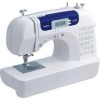
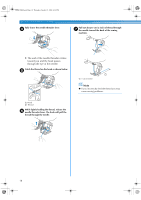
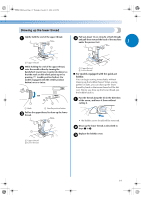
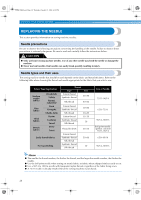
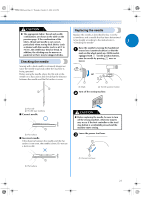
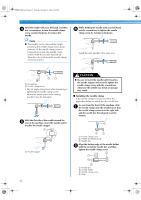
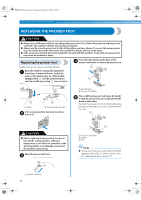
NCBC2000.book Page 21 Thursday, October 21, 2004 4:32 PM CAUTION ● The appropriate fabric, thread and needle combinations are shown in the table on the previous page. If the combination of the fabric, thread and needle is not correct, particularly when sewing thick fabrics (such as denim) with thin needles (such as 65/9 to 75/11), the needle may bend or break. In addition, the stitching may be uneven or puckered or there may be skipped stitches. Checking the needle Replacing the needle Replace the needle as described below. Use the screwdriver and a needle that has been determined to be straight according to the instructions in "Checking the needle" . 1 Raise the needle by turning the handwheel a toward you (counterclockwise) so that the mark on the wheel points up. (With models equipped with (needle position button), raise the needle by pressing once or twice.) Sewing with a bent needle is extremely dangerous since the needle may break while the machine is being operated. Before using the needle, place the flat side of the or needle on a flat surface and check that the distance between the needle and the flat surface is even. 1 2 a Mark b Needle position button Turn off the sewing machine. b a Flat side b Needle type marking ■ Correct needle 1 a Flat surface ■ Incorrect needle If the distance between the needle and the flat surface is not even, the needle is bent. Do not use a bent needle. CAUTION ● Before replacing the needle, be sure to turn off the sewing machine, otherwise injuries may occur if the foot controller or the start/ stop button is accidentally pressed and the machine starts sewing. Lower the presser foot lever. c 1 a Flat surface a Presser foot lever 21
-
 1
1 -
2
-
3
-
4
-
5
-
6
-
7
-
8
-
9
-
10
-
11
-
12
-
13
-
14
-
15
-
16
-
 17
17 -
 18
18 -
 19
19 -
 20
20 -
 21
21 -
 22
22 -
 23
23 -
 24
24 -
 25
25 -
 26
26 -
 27
27 -
28
-
29
-
30
-
31
-
32
-
33
-
34
-
35
-
36
-
37
-
38
-
39
-
40
-
41
-
42
-
43
-
44
-
45
-
46
-
47
-
48
-
49
-
50
-
51
-
52
-
53
-
54
-
55
-
56
-
57
-
58
-
59
-
60
-
61
-
62
-
63
-
64
-
65
-
66
 |
 |